1>各个部件的下载
目前在windows下开发
PHP官网下载地址:https://windows.php.net/download
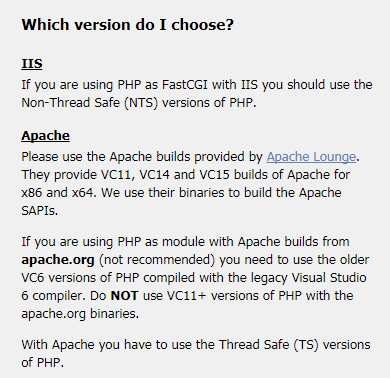
PHP有TS(ThreadSafe)和NTS两个版本,所以按照PHP的提示,如果你使用IIS作为FastCGS开发就用NTS,因为FastCGI是单线程。如果想用apache2.x serviceAPI,就使用TS版本。
Apache2.x下载直接点击"Apache Lounge"。
phpMyAdmin的官网地址:https://www.phpmyadmin.net/
2>安装和配置
2.1》配置PHP
在安装目录下找到php.ini,主要是编辑extension_dir和extension两个字段:
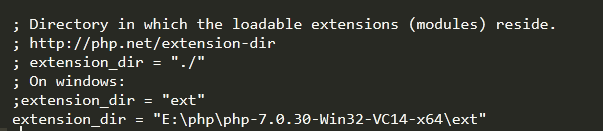
在Windows下要用绝对路径。同时将extension=php_mysqli.dll打开。

然后将php.ini拷贝一份到"C:\windows"目录下。
2.2>配置phpMyAdmin
将phpMyAdmin解压缩到Apache2.x的htdocs目录下。找到并编辑phpMyAdmin\libraries\config.default.php文件。编辑以下几个字段
$cfg['Servers'][$i]['host'] ->mysql安装服务器IP,如果本地测试就是"localhost"
$cfg['Servers'][$i]['port'] ->mysql默认是3306,如果为空就是这个值。
$cfg['Servers'][$i]['user'] -->mysql登陆用户名,其实也是登陆phpMyAdmin的用户名。
$cfg['Servers'][$i]['password'] ->mysql的登陆密码
$cfg['Servers'][$i]['auth_type'] ->phpMyAdmin登陆类型,一般都选"cookie"
$cfg['blowfish_secret'] ->phpMyAdmin登陆密码,跟$cfg['Servers'][$i]['password'] 要一样。因为登陆phpMyAdmin其实就是登陆mysql。
2.3>配置Apache2
在Apache2目录\conf\httpd.conf编辑此配置文件。
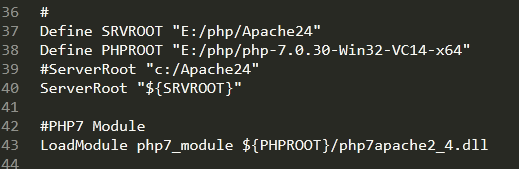
先配置ServerRoot和php7_module路径.然后将此配置文件中,所有"c:/Apache24"都替换成实际安装路径,我这里都替换成"${SRVROOT}"。


在DirectoryIndex添加index.php,AddType添加application/x-httpd-phh .php.
在cmd命令行窗口,用httpd.exe -t 检查配置文件是否OK。

以上配置全部完毕后,启动apache输入http://localhost/phpMyAdmin查看结果。
--------------------------------------------------------------------------------------------结束--------------------------------------------------------------------------------------------