SpringBoot+Netty整合websocket(一)——客户端和服务端通讯
背景
现在的一般的项目当中一般都有长连接时事通讯的需求,客户端和服务器之间,客户端和客户端之间进行通讯。
WebSocket协议是基于TCP的一种新的网络协议。它实现了浏览器与服务器全双工(full-duplex)通信——允许服务器主动发送信息给客户端 ,它是先进行一次Http的连接,连接成功后转为TCP连接。
我们一般会采用websocket技术,但是原生的websocket往往容易发生同步阻塞,导致效率低,所以会采用Netty整合websocket。
这篇博客主要总结SpringBoot+Netty如何整合websocket(和整合原生的websocket其实差不多)。
步骤
准备,引入Maven依赖
<!--netty-->
<dependency>
    <groupId>io.netty</groupId>
    <artifactId>netty-all</artifactId>
    <version>4.1.42.Final</version>
</dependency>
1.建立服务端WebSocketServer
/**
 * 功能描述:netty整合websocket的服务端
 **/
@Slf4j
@Configuration
public class WebSocketServer {

    @Value("${netty.port}")
    private int port;

    public void run() throws InterruptedException {
        EventLoopGroup boss = new NioEventLoopGroup();
        EventLoopGroup worker = new NioEventLoopGroup();

        try {
            ServerBootstrap bootstrap = new ServerBootstrap();
            bootstrap.group(boss,worker)
                    .channel(NioServerSocketChannel.class)
                    .option(ChannelOption.SO_BACKLOG,1024)
                    .childOption(ChannelOption.TCP_NODELAY,true)
                    .childHandler(new ChannelInitializer<SocketChannel>() {
                        @Override
                        protected void initChannel(SocketChannel ch) throws Exception {
                            //web基于http协议的解码器
                            ch.pipeline().addLast(new HttpServerCodec());
                            //对大数据流的支持
                            ch.pipeline().addLast(new ChunkedWriteHandler());
                            //对http message进行聚合,聚合成FullHttpRequest或FullHttpResponse
                            ch.pipeline().addLast(new HttpObjectAggregator(1024 * 64));
                            //websocket服务器处理对协议,用于指定给客户端连接访问的路径
                            //该handler会帮你处理一些繁重的复杂的事
                            //会帮你处理握手动作:handshaking(close,ping,pong) ping + pong = 心跳
                            //对于websocket来讲,都是以frames进行传输的,不同的数据类型对应的frames也不同
                            ch.pipeline().addLast(new WebSocketServerProtocolHandler("/ws"));
                            //添加我们的自定义channel处理器
                            ch.pipeline().addLast(new WebSocketHandler());
                        }
                    });
            log.info("服务器启动中,websocket的端口为:"+port);
            ChannelFuture future = bootstrap.bind(port).sync();
            future.channel().closeFuture().sync();
        } finally {
            //关闭主从线程池
            worker.shutdownGracefully();
            boss.shutdownGracefully();
        }

    }
}
2.建立channel处理器
@Slf4j
public class WebSocketHandler extends SimpleChannelInboundHandler<Object> {
    //用于记录和管理所有客户端的channel
     //客户端组
    public  static ChannelGroup channelGroup;

    static {
        channelGroup=new DefaultChannelGroup(GlobalEventExecutor.INSTANCE);
    }

    /**
     * 接收客户端传来的消息
     */
    @Override
	protected void channelRead0(ChannelHandlerContext ctx, Object msg) throws Exception {
    //文本消息
        if (msg instanceof TextWebSocketFrame) {
            //第一次连接成功后,给客户端发送消息
            Channel channel = ctx.channel();
            channel.writeAndFlush(new TextWebSocketFrame("连接客户端成功"));

            //获取当前channel绑定的IP地址
            InetSocketAddress ipSocket = (InetSocketAddress)ctx.channel().remoteAddress();
            String address = ipSocket.getAddress().getHostAddress();
            System.out.println("address为:"+address);
            //将IP和channel的关系保存
            if (!channelMap.containsKey(address)){
                channelMap.put(address,ctx.channel());
            }
        }
        //二进制消息
        if (msg instanceof BinaryWebSocketFrame) {
            System.out.println("收到二进制消息:" + ((BinaryWebSocketFrame) msg).content().readableBytes());
            BinaryWebSocketFrame binaryWebSocketFrame = new BinaryWebSocketFrame(Unpooled.buffer().writeBytes("hello".getBytes()));
            //给客户端发送的消息
            ctx.channel().writeAndFlush(binaryWebSocketFrame);
        }
        //ping消息
        if (msg instanceof PongWebSocketFrame) {
            System.out.println("客户端ping成功");
        }
        //关闭消息
        if (msg instanceof CloseWebSocketFrame) {
            System.out.println("客户端关闭,通道关闭");
            Channel channel = ctx.channel();
            channel.close();
        }
	}

    /**
     * 当客户端连接服务端之后(打开连接)
     * 获取客户端的channel,并且放到ChannelGroup中去进行管理
     * @param ctx
     * @throws Exception
     */
    @Override
    public void handlerAdded(ChannelHandlerContext ctx) throws Exception {
        channelGroup.add(ctx.channel());
    }

    @Override
    public void handlerRemoved(ChannelHandlerContext ctx) throws Exception {
        //当触发handlerRemoved,ChannelGroup会自动移除对应的客户端的channel
        //所以下面这条语句可不写
//        channelGroup.remove(ctx.channel());
        log.info("客户端断开,channel对应的长id为:" + ctx.channel().id().asLongText());
        log.info("客户端断开,channel对应的短id为:" + ctx.channel().id().asShortText());
    }

  /**
     * 异常处理
     *
     * @param ctx
     * @param cause
     * @throws Exception
     */
    @Override
    public void exceptionCaught ( ChannelHandlerContext ctx, Throwable cause ) throws Exception {
        System.out.println("连接异常:" + cause.getMessage());
        cause.printStackTrace();
        ctx.channel().close();
        channelGroup.remove(ctx.channel());
    }
}
3.在SpringBoot启动时,启动Netty整合的websocket服务
方式一
可以在application.yml配置netty的启动端口
PS:和原生websocket不同,不能共用项目的端口,所以需要新设定端口
netty:
  port: 10101
这里采用的是,启动类实现CommandLineRunner 接口,重写run方法,用来在项目启动时预加载资源
/**
 * 声明CommandLineRunner接口,实现run方法,就能给启动项目同时启动netty服务
 */
@SpringBootApplication
public class WebsocketApplication implements CommandLineRunner {

   @Autowired
   private WebSocketServer webSocketServer;

   public static void main(String[] args) throws InterruptedException {
      SpringApplication.run(WebsocketApplication.class, args);
   }


   @Override
   public void run ( String... args ) throws Exception {
      webSocketServer.run();
   }
}
问题
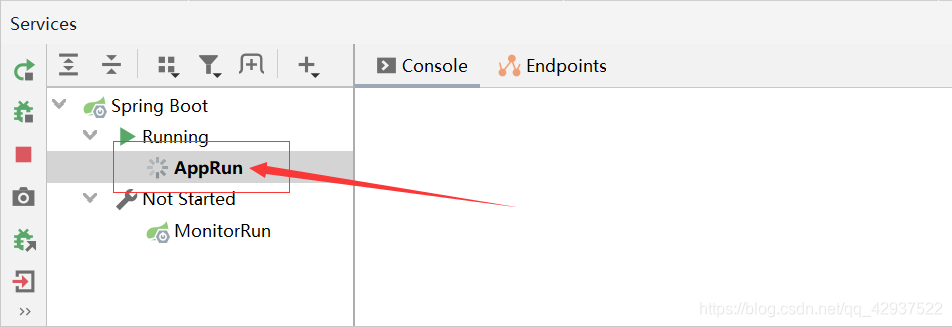
在IDEA中启动类实现CommandLineRunner接口,会造成Running一直在加载,但是不影响正常的使用
方式二
直接在启动类里,传入启动端口
@SpringBootApplication
public class WebsocketApplication  {

   public static void main(String[] args) throws InterruptedException {
      SpringApplication.run(WebsocketApplication.class, args);
      //服务启动时,启动netty整合websocket服务
      try {
            new WebSocketNettyServer(10101).run();
        } catch (InterruptedException e) {
            e.printStackTrace();
        }
   }

}
修改WebSocketServer,添加带port属性的构造方法
@Slf4j
//全参构造方法
@AllArgsConstructor
public class WebSocketServer {

    @Value("${netty.port}")
    private int port;

	//其余代码不变
}
4.前端代码
<!DOCTYPE html>
<html>
    <head>
        <meta charset="utf-8" />
        <title></title>
    </head>
    <body>
        <div>发送消息:</div>
        <input type="text" id="msgContent" />
        <input type="button" value="发送" onclick="CHAT.chat()" />

        <div>接受消息:</div>
        <div id="receiveMsg" style="background-color: gainsboro;"></div>

        <script type="application/javascript">
            window.CHAT = {
                socket: null,
                init: function() {
                    if (window.WebSocket) {
                        CHAT.socket = new WebSocket("ws://127.0.0.1:10101/ws");
                        CHAT.socket.onopen = function() {
                            console.log("连接建立成功");
                        },
                        CHAT.socket.onclose = function() {
                            console.log("连接关闭");
                        },
                        CHAT.socket.onerror = function() {
                            console.log("发生错误");
                        },
                        CHAT.socket.onmessage = function(e) {
                            console.log("接收到消息" + e.data);
                            var receiveMsg = document.getElementById("receiveMsg");
                            var html = receiveMsg.innerHTML;
                            receiveMsg.innerHTML = html + "<br/>" + e.data;
                        }
                    }else {
                        alert("浏览器不支持WebSocket协议...");
                    }
                },
                chat: function() {
                    var msg = document.getElementById("msgContent");
                    CHAT.socket.send(msg.value);
                }
            }
            CHAT.init();
        </script>
    </body>
</html>
也可以使用在线websocket,模拟客户端测试客户端发送数据至服务端
小结
至此SpringBoot+Netty整合websocket就已经实现了。至于具体的业务逻辑就要写到WebSocketHandler的channelRead0方法里面了。
但是websocket用的最多还是服务器给客户端推送消息和客户端之间进行实时通讯。但是难免会遇到客户端离线的消息接收问题。
本篇博客的功能只是客户端发送消息至服务器端,服务器端可以接收到消息。下篇博客就总结下websocket如何实现客户端实时通讯(一对一聊天),并存储消息到redis或者数据库中。
