一,tensorflow-gpu环境搭配
GPU的速度是CPU的20倍,你看着选择吧,CPU版直接安装,GPU版本入口:
https://blog.csdn.net/qq_42192693/article/details/104736719二,下载bert+bert预训练面模型
下载bert:https://github.com/google-research/bert
下载bert预训练模型:https://storage.googleapis.com/bert_models/2018_11_03/chinese_L-12_H-768_A-12.zip
三,数据准备
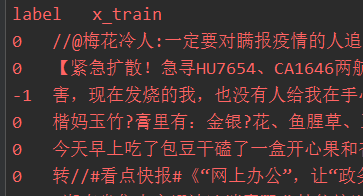
Bert训练需要训练集,开发集;预测需要测试集;
由于训练,只需要label,content(lable是预测结果,content是新闻/微博文本内容)
一般数据挖掘比赛提供训练集和测试集,我们将训练集分为训练集和开发集,一般8:2;
项目目录: data目录:
其中:
| init.py | 数据预处理,异常值,缺失值 |
| cut.py | 训练集分解 |
| get_result.py | 后期将预测概率转变成数据挖掘需求 |
| out,csv | 数据挖掘比赛给的训练集 |
| out2.csv | 经过init.py处理过的训练集 |
| dev.csv,train,csv | 经过cut.py分割过的数据 |
| test.csv | 数据挖掘比赛的测试集 |
cut.py
#!/usr/bin/env python
import os
import pandas as pd
from sklearn.model_selection import train_test_split
from sklearn.utils import shuffle


def train_valid_test_split(x_data, y_data,
                           validation_size=0.1, test_size=0.1, shuffle=True):
    x_, x_test, y_, y_test = train_test_split(x_data, y_data, test_size=test_size, shuffle=shuffle)
    valid_size = validation_size / (1.0 - test_size)
    x_train, x_valid, y_train, y_valid = train_test_split(x_, y_, test_size=valid_size, shuffle=shuffle)
    return x_train, x_valid, x_test, y_train, y_valid, y_test


if __name__ == '__main__':
    path = ""
    pd_all = pd.read_csv(os.path.join(path, "out2.csv"))
    pd_all = shuffle(pd_all)
    x_data, y_data = pd_all.content, pd_all.label

    x_train, x_valid, y_train, y_valid = \
        train_valid_test_split(x_data, y_data, 0.2)

    train = pd.DataFrame({'label': y_train, 'x_train': x_train})
    train.to_csv("train.csv", index=False, encoding='utf-8', sep='\t')
    valid = pd.DataFrame({'label': y_valid, 'x_valid': x_valid})
    valid.to_csv("dev.csv", index=False, encoding='utf-8', sep='\t')
四,修改Bert的run_classifier.py
找到:XnliProcessor,MnliProcessor,MrpcProcessor,ColaProcessor四个并列类
然后后面添加一个自己模仿的类:EmloProcessor
class EmloProcessor(DataProcessor):
    """Processor for the Emotion data set ."""

    def get_train_examples(self, data_dir):
        """定义开发集的数据是什么,data_dir会作为参数传进去, 这里就是加上你的文件名即可 """
        return self._create_examples(
            self._read_tsv(os.path.join(data_dir, "train.csv"), ), "train")

    def get_dev_examples(self, data_dir):
        """定义开发集的数据是什么,data_dir会作为参数传进去,模型训练的时候会用到,这里就是加上你的文件名即可 """
        return self._create_examples(
            self._read_tsv(os.path.join(data_dir, "dev.csv")), "dev")

    def get_test_examples(self, data_dir):
        """定义测试集的数据是什么, 用于预测数据 ,在训练时没有用到这个函数, 这里写预测的数据集"""
        return self._create_examples(
            self._read_tsv(os.path.join(data_dir, "test.csv")), "test")

    def get_labels(self):
        """ 这里是显示你一共有几个分类标签, 在此任务中我有3个标签,如实写上  标签值和 csv里面存的值相同 """
        return ["0", "1", "-1"]

    def _create_examples(self, lines, set_type):
        """这个函数是用来把数据处理, 把每一个例子分成3个部分,填入到InputExample的3个参数
        text_a 是 第一个句子的文本
        text_b 是 第二个句子的文本 但是由于此任务是单句分类, 所以 这里传入为None
        guid 是一个二元组  第一个表示此数据是什么数据集类型(train dev test) 第二个表示数据标号
        label 表示句子类别
        """
        examples = []
        for (i, line) in enumerate(lines):
            # All sets have a header
            print(line,i)
            if i == 0: continue
            guid = "%s-%s" % (set_type, i)
            text_a = tokenization.convert_to_unicode(line[1])
            label = tokenization.convert_to_unicode(line[0])
            examples.append(
                InputExample(guid=guid, text_a=text_a, text_b=None, label=label))
        return examples
再找到: 最后是自己添加的
到这里就完成了。
扫描二维码关注公众号,回复:
10271609 查看本文章

五,训练Bert模型


参数:emlo是之前设定的。max_seq_length:发布的模型经过训练,序列长度最大为512,但是您可以使用更短的最大序列长度进行微调,以节省大量内存。train_batch_size:内存使用也与批处理大小成正比。
--task_name=emlo
--do_train=true
--do_eval=true
--data_dir=data
--vocab_file=chinese_L-12_H-768_A-12/vocab.txt
--bert_config_file=chinese_L-12_H-768_A-12/bert_config.json
--init_checkpoint=chinese_L-12_H-768_A-12/bert_model.ckpt
--max_seq_length=255
--train_batch_size=8
--learning_rate=2e-5
--num_train_epochs=3.0
--output_dir=output
注意:训练根据硬件决定,时间长的话改用GPU或者减少训练数据量。
六,预测
同上,将do_predict改为true,do_train和do_eval改为false。
预测结果是:


我们需要的是1,0,-1或者其他情感;运行ger_result.py
import os
import pandas as pd


if __name__ == '__main__':
    path = "../output/"
    pd_all = pd.read_csv(os.path.join(path, "test_results.tsv") ,sep='\t',header=None)

    data = pd.DataFrame(columns=['polarity'])
    print(pd_all.shape)

    for index in pd_all.index:
        neutral_score = pd_all.loc[index].values[0]
        positive_score = pd_all.loc[index].values[1]
        negative_score = pd_all.loc[index].values[2]

        if max(neutral_score, positive_score, negative_score) == neutral_score:
            # data.append(pd.DataFrame([index, "neutral"],columns=['id','polarity']),ignore_index=True)
            data.loc[index+1] = ["0"]
        elif max(neutral_score, positive_score, negative_score) == positive_score:
            #data.append(pd.DataFrame([index, "positive"],columns=['id','polarity']),ignore_index=True)
            data.loc[index+1] = [ "1"]
        else:
            #data.append(pd.DataFrame([index, "negative"],columns=['id','polarity']),ignore_index=True)
            data.loc[index+1] = [ "-1"]
        #print(negative_score, positive_score, negative_score)

    data.to_csv(os.path.join(path, "pre_sample.tsv"),sep = '\t')
    #print(data)
