1、新建一个web项目
2、导入jar包:四个核心(bean、core、context、expression),一个依赖
spring-framework-3.0.2.RELEASE-dependencies:集成了很多jar包,是最新版本。
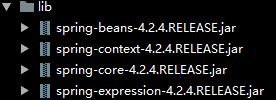
spring-framework-4.2.4.RELEASE:与spring相关,目录结构如下:

(1)导入Spring的核心包:它们是Spring其它功能的基础(四个核心包)
(2)导入日志文件相关的jar包:(依赖包)
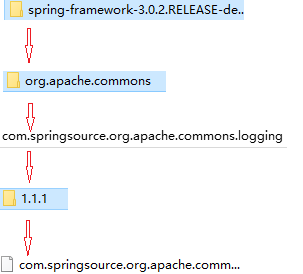
spring-framework-3.0.2.RELEASE-dependencies\org.apache.commons\com.springsource.org.apache.commons.logging\1.1.1
另外一个日志文件相关的包(支持老版本):
spring-framework-3.0.2.RELEASE-dependencies\org.apache.log4j\com.springsource.org.apache.log4j\1.2.15
3、IoC入门案例
(1)IoC(Inverse of Control)
IoC被称为控制反转,它是一种设计模式,实质上是将对象的创建方式进行反转。传统的资源获取方式是组件向容器发起请求,容器返回资源。在IoC模式下是容器主动地将资源推送给它所管理的组件,组件以合理的方式来接收资源即可。(将对象的创建交给了Spring)
(2)创建一个对象(Student):
package pers.zhb.domain;
public class Student {
    private String snum;
    private String sname;
    private String sex;
    public String getSnum() { return snum; } public void setSnum(String snum) { this.snum = snum; } public String getSname() { return sname; } public void setSname(String sname) { this.sname = sname; } public String getSex() { return sex; } public void setSex(String sex) { this.sex = sex; } @Override public String toString() { return "Student{" + "snum='" + snum + '\'' + ", sname='" + sname + '\'' + ", sex='" + sex + '\'' + '}'; } }
(3)创建配置文件:
位置:任意(这里放在src目录下)
名字:任意(这里用applicationContext)
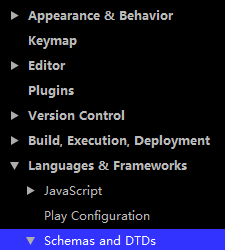
导入外部约束(IDEA):
File下选择Settings:

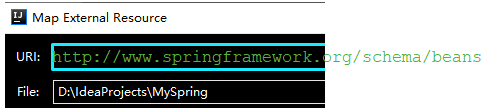
URI填入网络地址,File填入约束文件在本地的路径,然后点击确定配置完成。
<?xml version="1.0" encoding="UTF-8"?>
<beans xmlns:xsi="http://www.w3.org/2001/XMLSchema-instance" xmlns="http://www.springframework.org/schema/beans" xsi:schemaLocation="http://www.springframework.org/schema/beans http://www.springframework.org/schema/beans/spring-beans-4.2.xsd ">

</beans>

有提示即表明约束导入成功。
<?xml version="1.0" encoding="UTF-8"?>
<beans xmlns:xsi="http://www.w3.org/2001/XMLSchema-instance" xmlns="http://www.springframework.org/schema/beans" xsi:schemaLocation="http://www.springframework.org/schema/beans http://www.springframework.org/schema/beans/spring-beans-4.2.xsd ">
 <bean name="student" class="pers.zhb.domain.Student">

 </bean>
</beans>
以上的配置文件的作用是将Student对象交给Spring容器管理:
bean:配置需要创建的对象
name:用于以后从后spring容器中获得实例时使用
class:需要创建实例类的全限定名
(5)测试:
创建测试类:
public class Test {
    public void test1(){
        ApplicationContext applicationContext=new
                ClassPathXmlApplicationContext("applicationContext.xml");//创建容器对象
        Student student=(Student)applicationContext.getBean("student");
        student.setSname("zhai");
        student.setSnum("202012"); student.setSex("nv"); System.out.println(student); } public static void main(String[] args){ Test test=new Test(); test.test1(); } }
创建Spring的容器对象后将Student对象从容器中取出,通过set方法对对象进行赋值,打印结果如下:

4、spring与传统方式创建对象的对比
(1)spring方式:
   ApplicationContext applicationContext=new
                ClassPathXmlApplicationContext("applicationContext.xml");//创建容器对象
        Student student=(Student)applicationContext.getBean("student");
直接从容器中获取即可。
(2)传统方式:
Student student=new Student();
        student.setSname("zhang");
        student.setSnum("202019");
        student.setSex("nan");
        System.out.println(student);