1 前言
早就想总结一下,但是没时间,这次有时间了,就详细的把步骤写出来。
2 步骤
2.1 添加区域
右键项目->添加->区域,如图1:

区域名称:Ceshi
添加完之后解决方案管理器会增加如图所示目录

并且弹出一个附有代码的窗体
Scaffolding has generated all the files and added the required dependencies.

However the Application's Startup code may required additional changes for things to work end to end.
Add the following code to the Configure method in your Application's Startup class if not already done:


大概意思:
框架已生成所有文件并添加了所需的依赖关系。
应用程序的启动代码可能需要进行额外的更改才能使事情顺利进行。
如果尚未完成,请将以下代码添加到应用程序Startup类中的Configure方法中:
        app.UseMvc(routes =>
        {
          route.MapRoute(
            name : "areas",
            template : "{area:exists}/{controller=Home}/{action=Index}/{id?}"
          );
        });
2.2 在 Startup 添加配置
上面已经明确指出,我们按照指示做即可,打开Startup,找到
app.UseMvc(routes =>
{


});
我们只需要在里面添加步骤 2.1 里面的
 routes.MapRoute(
            name : "areas",
            template : "{area:exists}/{controller=Home}/{action=Index}/{id?}"
          );
这部分代码即可。(注意:route改成routes)
添加完毕,看下Startup类
 app.UseMvc(routes =>

{


});
的整体代码:
            app.UseMvc(routes =>
            {
                routes.MapRoute(
                   name: "areas",
                   template: "{area:exists}/{controller=Home}/{action=Index}/{id?}"
                 );


                routes.MapRoute(
                    name: "default",
                    template: "{controller=Home}/{action=Index}/{id?}");
            });
2.3 添加控制器
右键Controllers添加控制器
名称:Home
如图

2.4 添加视图
右键上图中的Return View()添加视图
名称:index
如图

创建完之后,如图
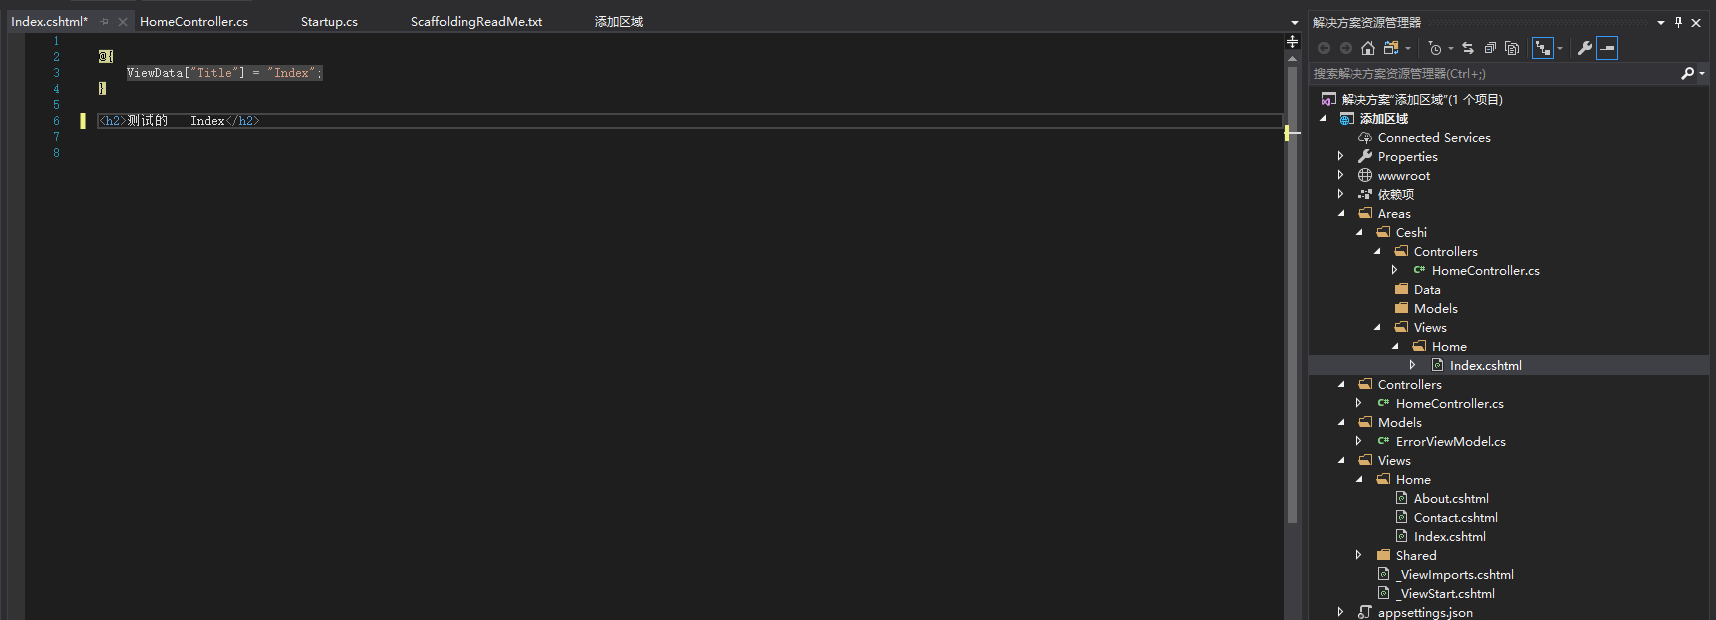
2.6(核心)添加AreaAttribute属性
注意在添加控制器的时候,要添加AreaAttribute属性,[Area("Ceshi")]
AreaName名称要和文件夹名称相同,如图:

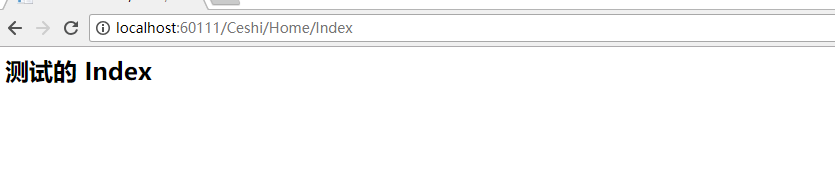
2.7 测试
至此,添加区域完成
运行后,在后面加上/Ceshi/Home/Index即可显示出页面如图:
3 总结
事情虽简单,但是还是记录一下吧。