SpringBoot启动流程分析
SpringBoot启动流程主要分两部分,一部分是在创建SpringApplication的时候,一部分是在Run方法里

1.首先来看SpringApplication构造函数
public SpringApplication(ResourceLoader resourceLoader, Class<?>... primarySources) {
// 资源加载器
		this.resourceLoader = resourceLoader;
		Assert.notNull(primarySources, "PrimarySources must not be null");
		this.primarySources = new LinkedHashSet<>(Arrays.asList(primarySources));

 // 1. 可能的web应用程序类型的类型。
		this.webApplicationType = WebApplicationType.deduceFromClasspath();

// 2. 设置初始化应用context
		setInitializers((Collection) getSpringFactoriesInstances(ApplicationContextInitializer.class));

// 3.设置初始化监听
		setListeners((Collection) getSpringFactoriesInstances(ApplicationListener.class));

// 4. 推演主程序类
		this.mainApplicationClass = deduceMainApplicationClass();
	}

1.可能的web应用程序类型的类型。
这段代码是来推断我们的应用是哪种web应用程序

2.设置初始化应用context
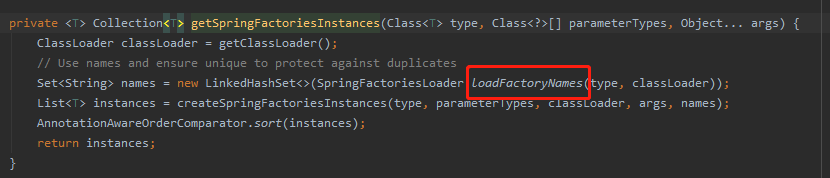
在设置初始化应用context的时候 ,是先执行了`getSpringFactoriesInstances(ApplicationContextInitializer.class)方法,参数是ApplicationContextInitializer.class字节码对象
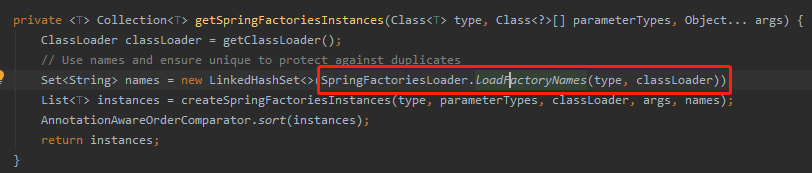
我们先来看看他是如何加载这些类的
先从缓存中拿,如果没有从资源文件里取


双击Shift搜索spring.factories可以看到它存在于以下工程中

从Map中根据org.springframework.context.ApplicationContextInitializer的类型拿到需要的类初始化类,断点进入getOrDefault(factoryClassName, Collections.emptyList());方法,之后就是把加载到的类放到集合中备用
3.初始化监听器类
和初始化应用context没有什么区别,
唯一不同的是getSpringFactoriesInstances(ApplicationListener.class))传进去的是·ApplicationListener.class所以这里就不再赘述。
4.推演主程序类

到这里就完成了SpringBoot启动过程中初始化SpringApplication的过程。
小结
SpringApplication的流程,大致可以分为四个步骤:
推演web应用的类型(如果没有加web依赖类型NONE)
初始化ApplicationContextInitializer
初始化ApplicationListener
推演出主程序类
通过这样四个步骤就完成了第一步SpringApplication的初始化过程。
2.在来看Run方法都干什么了
public ConfigurableApplicationContext run(String... args) {
		StopWatch stopWatch = new StopWatch();
        //计时器开始
		stopWatch.start();
		ConfigurableApplicationContext context = null;
		Collection<SpringBootExceptionReporter> exceptionReporters = new ArrayList<>();
		// 配置Headless模式,是在缺少显示屏、键盘或者鼠标时的系统配置
		// 默认为true
		configureHeadlessProperty();
        //获取所有的监听器
		SpringApplicationRunListeners listeners = getRunListeners(args);
        //启动监听器
		listeners.starting();
		try {
			ApplicationArguments applicationArguments = new DefaultApplicationArguments(args);
            //准备环境
			ConfigurableEnvironment environment = prepareEnvironment(listeners, applicationArguments);
            //配置忽略的bean
			configureIgnoreBeanInfo(environment);
            //打印banner
			Banner printedBanner = printBanner(environment);
            //创建容器
			context = createApplicationContext();
            //异常相关处理
			exceptionReporters = getSpringFactoriesInstances(SpringBootExceptionReporter.class,
					new Class[] { ConfigurableApplicationContext.class }, context);
            //准本应用上下文
			prepareContext(context, environment, listeners, applicationArguments, printedBanner);
            //刷新容器
			refreshContext(context);
            //刷新容器后的扩展接口
			afterRefresh(context, applicationArguments);
			stopWatch.stop();
			if (this.logStartupInfo) {
				new StartupInfoLogger(this.mainApplicationClass).logStarted(getApplicationLog(), stopWatch);
			}
            //发布监听应用上下文启动完成
			listeners.started(context);
            //执行runner
			callRunners(context, applicationArguments);
		}
		catch (Throwable ex) {
			handleRunFailure(context, ex, exceptionReporters, listeners);
			throw new IllegalStateException(ex);
		}

		try {
        	//监听应用上下文运行中
			listeners.running(context);
		}
		catch (Throwable ex) {
			handleRunFailure(context, ex, exceptionReporters, null);
			throw new IllegalStateException(ex);
		}
		return context;
	}
下面就对关键步骤进行解释
1.获取所有的监听器


这块代码就很熟悉了,它的主要作用就是去META-INFO/spring.properties中加载配置SpringApplicationRunListener的监听器如下:
# Run Listeners
org.springframework.boot.SpringApplicationRunListener=\norg.springframework.boot.context.event.EventPublishingRunListener
显然只有一个事件发布监听器类,拿到了EventPublishingRunListener启动事件发布监听器,下一步就是开始启动了listeners.starting();我们往下跟源码看

启动的时候实际上是又创建了一个ApplicationStartingEvent对象,其实就是监听应用启动事件。
其中initialMulticaster是一个SimpleApplicationEventMulticaster
@Override
	public void multicastEvent(final ApplicationEvent event, @Nullable ResolvableType eventType) {
		ResolvableType type = (eventType != null ? eventType : resolveDefaultEventType(event));
        //获取线程池
		Executor executor = getTaskExecutor();
        //为每一个监听器创建一个线程
		for (ApplicationListener<?> listener : getApplicationListeners(event, type)) {
			if (executor != null) {
				executor.execute(() -> invokeListener(listener, event));
			}
			else {
				invokeListener(listener, event);
			}
		}
	}
2.准备环境
private ConfigurableEnvironment prepareEnvironment(SpringApplicationRunListeners listeners,
			ApplicationArguments applicationArguments) {
		// Create and configure the environment
		ConfigurableEnvironment environment = getOrCreateEnvironment();
        //配置环境
		configureEnvironment(environment, applicationArguments.getSourceArgs());

		ConfigurationPropertySources.attach(environment);
        //环境准备完成
		listeners.environmentPrepared(environment);

		bindToSpringApplication(environment);
		if (!this.isCustomEnvironment) {
			environment = new EnvironmentConverter(getClassLoader()).convertEnvironmentIfNecessary(environment,
					deduceEnvironmentClass());
		}
		ConfigurationPropertySources.attach(environment);
		return environment;
	}
3.配置忽略的Bean
4.打印Banner


这个是可以自定义的,也可以是图篇或是文本文件中的图形。
5.创建容器


我们的环境是servlet,DEFAULT_SERVLET_WEB_CONTEXT_CLASS其实servlet通过反射的方式创建对象
6.异常错误处理

其实还是去META-INFO/spring.factories配置文件中加载SpringBootExceptionReporter类
7.准备应用上下文
这里就会根据之前创建的上下文、准备的环境、以及监听等准备应用上下文
private void prepareContext(ConfigurableApplicationContext context, ConfigurableEnvironment environment,
			SpringApplicationRunListeners listeners, ApplicationArguments applicationArguments, Banner printedBanner) {
         //设置环境参数
		context.setEnvironment(environment);
        //设置后处理应用上下文
		postProcessApplicationContext(context);
        //把从spring.properties中加载的org.springframework.boot.context.ConfigurationWarningsApplicationContextInitializer,进行初始化操作
		applyInitializers(context);
        //发布应用上下文事件
		listeners.contextPrepared(context);
        //打印启动日志
		if (this.logStartupInfo) {
			logStartupInfo(context.getParent() == null);
			logStartupProfileInfo(context);
		}
		// Add boot specific singleton beans
        //注册一个名字是springApplicationArguments单例的bane
		ConfigurableListableBeanFactory beanFactory = context.getBeanFactory();
		beanFactory.registerSingleton("springApplicationArguments", applicationArguments);
		if (printedBanner != null) {
        //注册一个名字是springBootBanner单例的bean
			beanFactory.registerSingleton("springBootBanner", printedBanner);
		}
        //是否允许类重名
		if (beanFactory instanceof DefaultListableBeanFactory) {
			((DefaultListableBeanFactory) beanFactory)
					.setAllowBeanDefinitionOverriding(this.allowBeanDefinitionOverriding);
		}
        //是否可以懒加载
		if (this.lazyInitialization) {
			context.addBeanFactoryPostProcessor(new LazyInitializationBeanFactoryPostProcessor());
		}
		// Load the sources
        //获取所有的资源
		Set<Object> sources = getAllSources();
		Assert.notEmpty(sources, "Sources must not be empty");
        //创建BeanDefinitionLoader加载器加载所有的资源
		load(context, sources.toArray(new Object[0]));
        //发布上下文事件
		listeners.contextLoaded(context);
	}
8.刷新应用上下文
public void refresh() throws BeansException, IllegalStateException {
		synchronized (this.startupShutdownMonitor) {
			// Prepare this context for refreshing.
            //准备刷新上下文
			prepareRefresh();

			// Tell the subclass to refresh the internal bean factory.
            //通知子类刷新内部工厂
			ConfigurableListableBeanFactory beanFactory = obtainFreshBeanFactory();

			// Prepare the bean factory for use in this context.
            //准备Bean工厂
			prepareBeanFactory(beanFactory);

			try {
				// Allows post-processing of the bean factory in context subclasses.
             // 允许在上下文子类中对bean工厂进行后处理。
				postProcessBeanFactory(beanFactory);

				// Invoke factory processors registered as beans in the context.
                //调用上下文中注册为bean的工厂处理器
				invokeBeanFactoryPostProcessors(beanFactory);

				// Register bean processors that intercept bean creation.
                //注册后置处理器
				registerBeanPostProcessors(beanFactory);

				// Initialize message source for this context.
                //初始化信息源
				initMessageSource();

				// Initialize event multicaster for this context.
                //初始化上下文事件发布器
				initApplicationEventMulticaster();

				// Initialize other special beans in specific context subclasses.
                //初始化其他自定义bean
				onRefresh();

				// Check for listener beans and register them.
                //注册监听器
				registerListeners();

				// Instantiate all remaining (non-lazy-init) singletons.
                //完成bean工厂初始化
				finishBeanFactoryInitialization(beanFactory);

				// Last step: publish corresponding event.
                //完成刷新,清缓存,初始化生命周期,事件发布等
				finishRefresh();
			}

			catch (BeansException ex) {
				if (logger.isWarnEnabled()) {
					logger.warn("Exception encountered during context initialization - " +
							"cancelling refresh attempt: " + ex);
				}

				// Destroy already created singletons to avoid dangling resources.
                //销毁Bean
				destroyBeans();

				// Reset 'active' flag.
				cancelRefresh(ex);

				// Propagate exception to caller.
				throw ex;
			}

			finally {
				// Reset common introspection caches in Spring's core, since we
				// might not ever need metadata for singleton beans anymore...
				resetCommonCaches();
			}
		}
	}
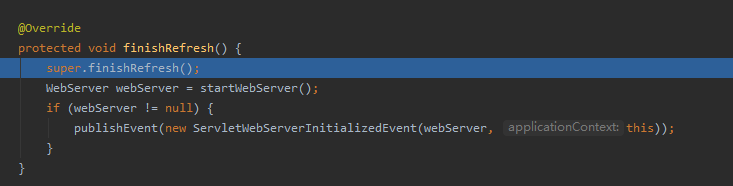
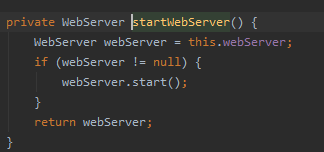
在onRefresh()这个方法中去创建的Tomcat服务


创建了Tomcat对象,并设置参数


在finishRefresh方法中启动tomcat服务
9.刷新后处理
afterRefresh()是个一空实现,留着后期扩展
10.发布监听应用启动事件
调用context.publishEvent方法,发布应用启动事件ApplicationStartedEvent

11.执行Runner
获取所有的ApplicationRunner和CommandLineRunner来初始化一些参数callRunner()是一个回调函数

12.发布上下文准备完成的事件
这段代码看上去似成相识,前面有很多类似的代码,不同的是这里上下文准备完成之后发布了一个ApplicationReadyEvent事件,声明一下应用上下文准备完成

