文章目录
一、实验环境
- Centos 7 64位
- Oracle 12c 对系统内存的最低要求为1G,推荐4G或更大的内存
二、官方的下载地址
http://www.oracle.com/technetwork/database/enterprise-edition/downloads/index.html
三、安装步骤
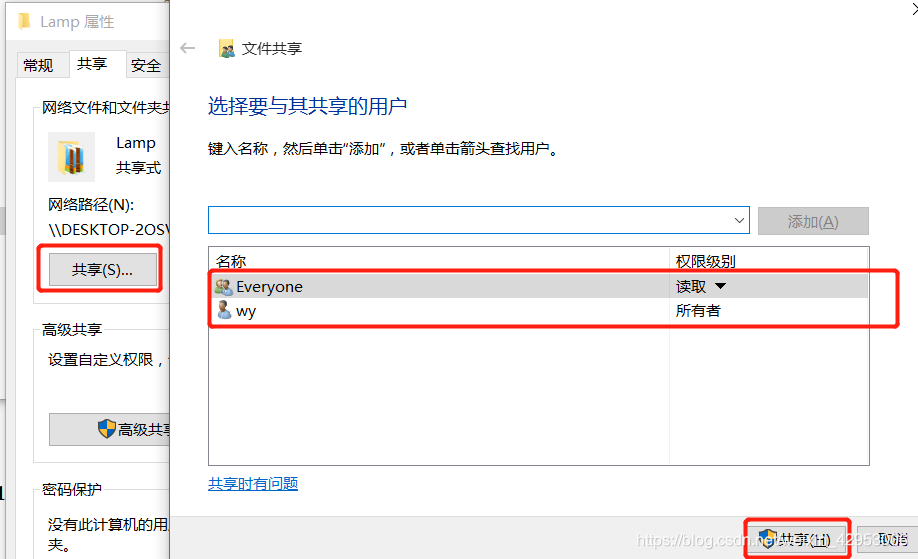
3.1、通过真机在官网下载安装包用于共享给Linux服务器
- 打开该文件夹的共享权限
3.2、打开Linux服务器添加一块磁盘sdb
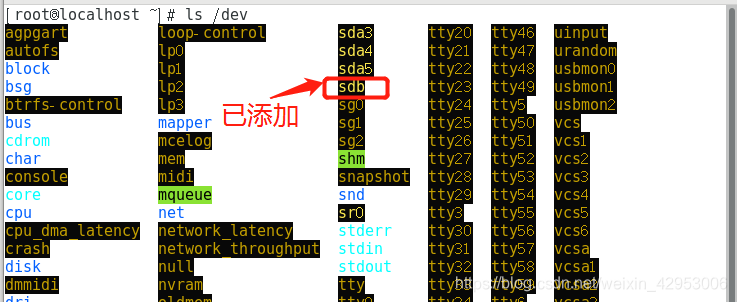
- 输入fdisk磁盘管理命令将磁盘创建为83默认格式即可
[root@localhost ~]# fdisk /dev/sdb
欢迎使用 fdisk (util-linux 2.23.2)。

更改将停留在内存中,直到您决定将更改写入磁盘。
使用写入命令前请三思。

Device does not contain a recognized partition table
使用磁盘标识符 0x0125b79f 创建新的 DOS 磁盘标签。

命令(输入 m 获取帮助):n
Partition type:
   p   primary (0 primary, 0 extended, 4 free)
   e   extended
Select (default p):
Using default response p
分区号 (1-4,默认 1):
起始 扇区 (2048-125829119,默认为 2048):
将使用默认值 2048
Last 扇区, +扇区 or +size{K,M,G} (2048-125829119,默认为 125829119):
将使用默认值 125829119
分区 1 已设置为 Linux 类型,大小设为 60 GiB

命令(输入 m 获取帮助):w
The partition table has been altered!

Calling ioctl() to re-read partition table.
正在同步磁盘。
3.3、执行以下shell脚本即可安装
[root@localhost ~]# vim oracle.sh
#!/bin/bash
yum install expect -y
read -p "请输入本机IP地址"  b
read -p "请输入真机IP地址"  c
read -p "请输入真机里共享的oracle文件夹名称" d
read -p "请确认是否已添加磁盘sdb(yes/no)" a
case "$a" in
yes)
  echo "开始安装oracle"
;;
*)
  exit 1
  echo "请先添加一块新的磁盘"
esac
hostnamectl set-hostname oracle
cat >> /etc/hosts <<-EOF
$b	oracle
EOF
yum install expect -y
mkfs.xfs /dev/sdb1
mkdir /orc
mount /dev/sdb1 /orc
yum -y install binutils compat-libcapl compat-libstdc++-33 gcc gcc-c++ glibc glibc-devel ksh libaio libaio-devel libgcc libstdc++ libstdc++-devel libXi libXtst make sysstat unixODBC unixODBC-devel
cat >> /etc/sysctl.conf <<-EOF
fs.aio-max-nr = 1048576
fs.file-max = 6815744
kernel.shmall = 2097152
kernel.shmmax = 4294967295
kernel.shmmni = 4096
kernel.sem = 250 32000 100 128
net.core.rmem_default = 262144
net.core.rmem_max = 4194304
net.core.wmem_default = 262144
net.core.wmem_max = 1048576
EOF
sysctl -p
groupadd oinstall
groupadd dba
useradd -g oinstall -G dba oracle
/usr/bin/expect<<-EOF
spawn passwd oracle
expect {
    "密码:"
{send "123123\r";exp_continue}
"输入新的 密码:"
{send "123123\r"}
}
expect eof
EOF
mkdir -p /orc/app/oracle
chown -R oracle:oinstall /orc/app
chmod -R 755 /orc/app/oracle/
cat >> /home/oracle/.bash_profile <<-EOF
umask 022
ORACLE_BASE=/orc/app/oracle
ORACLE_HOME=/orc/app/oracle/product/ 12.2.0/dbhome_1/
ORACLE_SID=orcl
NLS_LANG="SIMPLIFIED CHINESE_CHINA".UTF8
PATH=$PATH:$HOME/.local/bin:$HOME/bin:$ORACLE_HOME/bin
LANG=zh_CN.UTF-8
export PATH LANG NLS_LANG ORACLE_BASE ORACLE_HOME ORACLE_SID
EOF
sed -i '8asession    required     /lib/security/pam_lilits.so\nsession    required     pam_limits.so' /etc/pam.d/login
cat >> /etc/security/limits.conf <<-EOF
#设定单用户可使用的进程数量
oracle           soft   nproc            2047
#设定用户可打开的文件数量
oracle           hard   nproc            16384
oracle           soft   nofile           1024
#设置堆栈
oracle           hard   nofile           65536
oracle           soft   stack            10240
EOF
cat >> /etc/profile <<-EOF
if [$USER="oracle"]
	then
	 if [ $SHELL = "/bin/ksh"]
		then
		  ulimit -p 16384				#缓冲区大小
		  ulimit -n 65536				#文件数
	else
		ulimit -u 16384 -n 65536		#进程数和文件数
	fi
fi
EOF
mkdir /abc
/usr/bin/expect<<-EOF
spawn mount.cifs //$c/$d   /abc
expect {
       "/$c/$d: "
        {send "\r"}
}
expect eof
EOF
export DISPLAY=:0.0
xhost +
/usr/bin/expect<<-EOF
spawn su oracle
set timeout 300
expect {
"]"
 {send "bash /abc/database/runInstaller\r"}
}
expect eof
EOF
[root@localhost ~]# bash oracle.sh     ##执行该脚本
###省略过程信息......
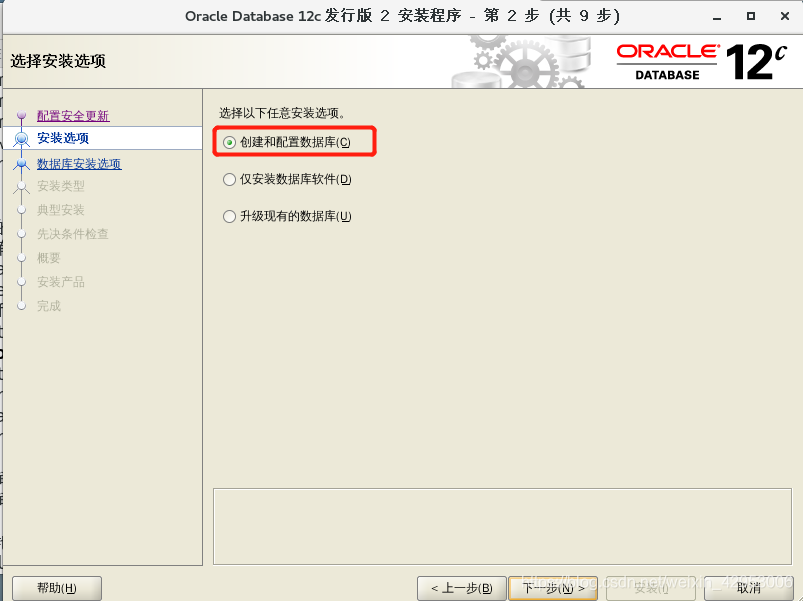
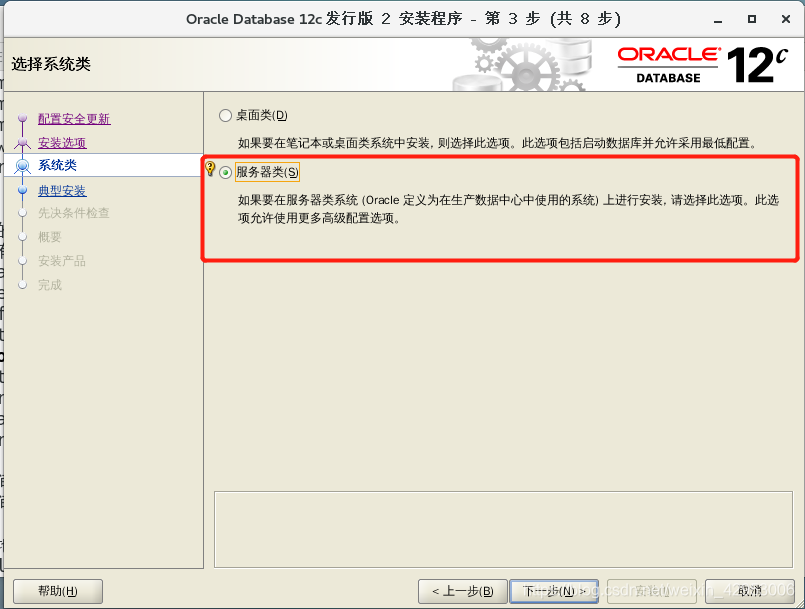
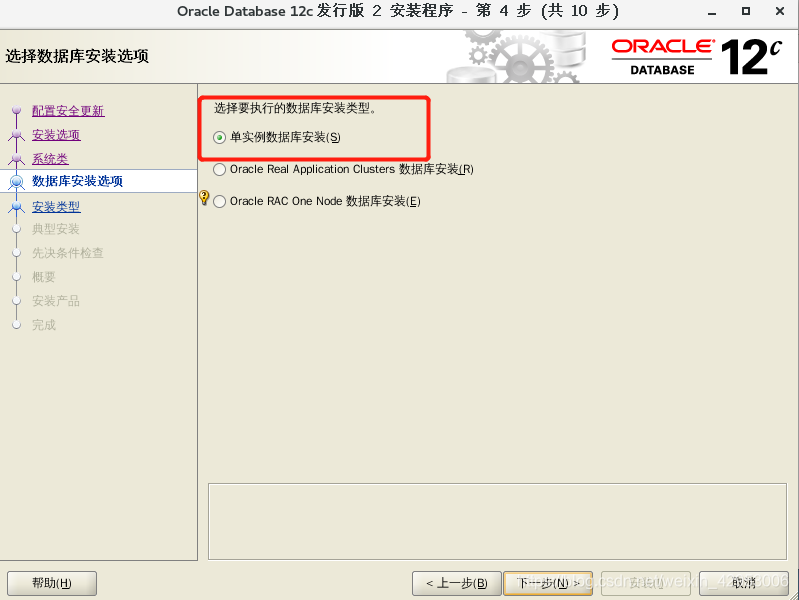
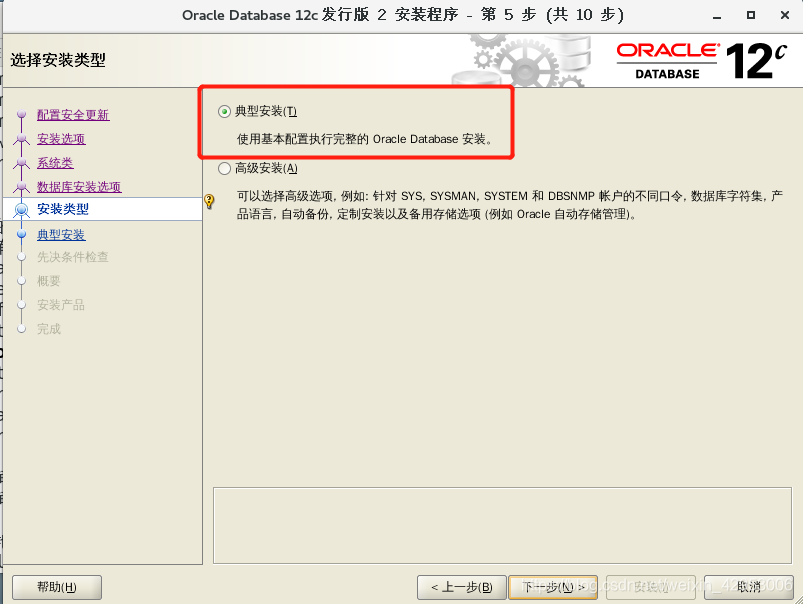
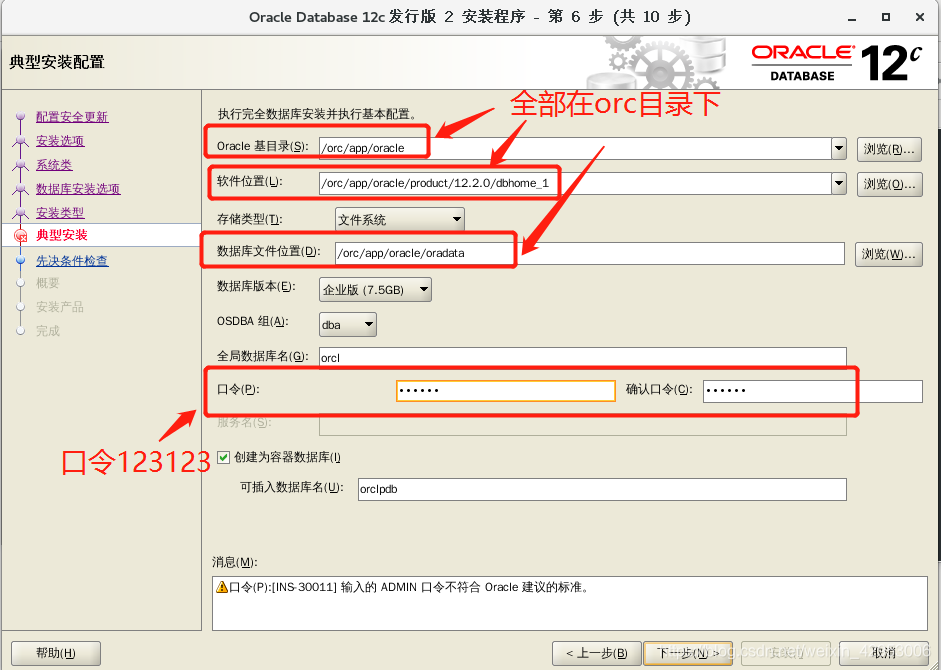
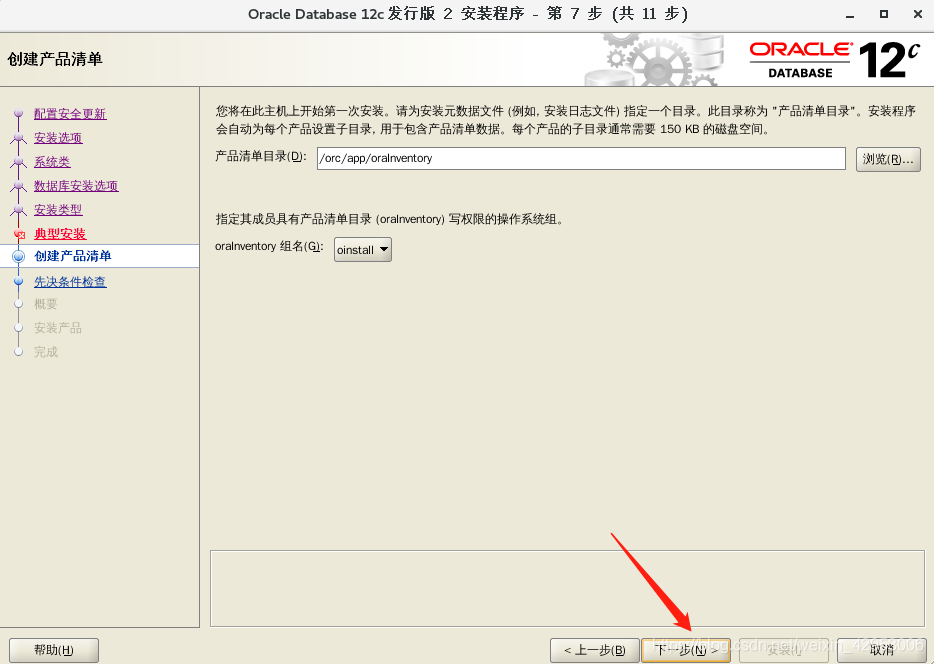
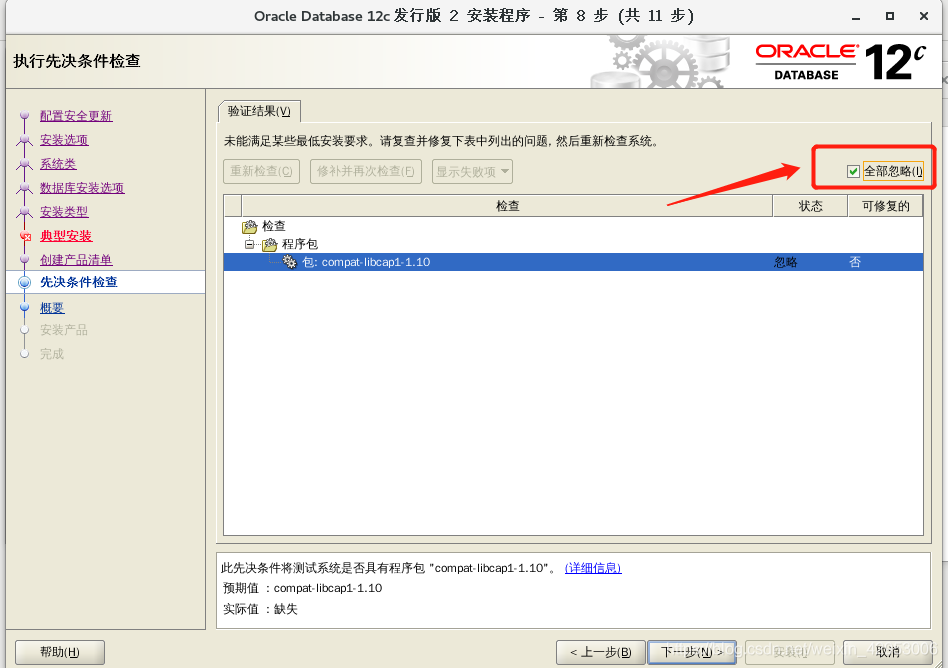
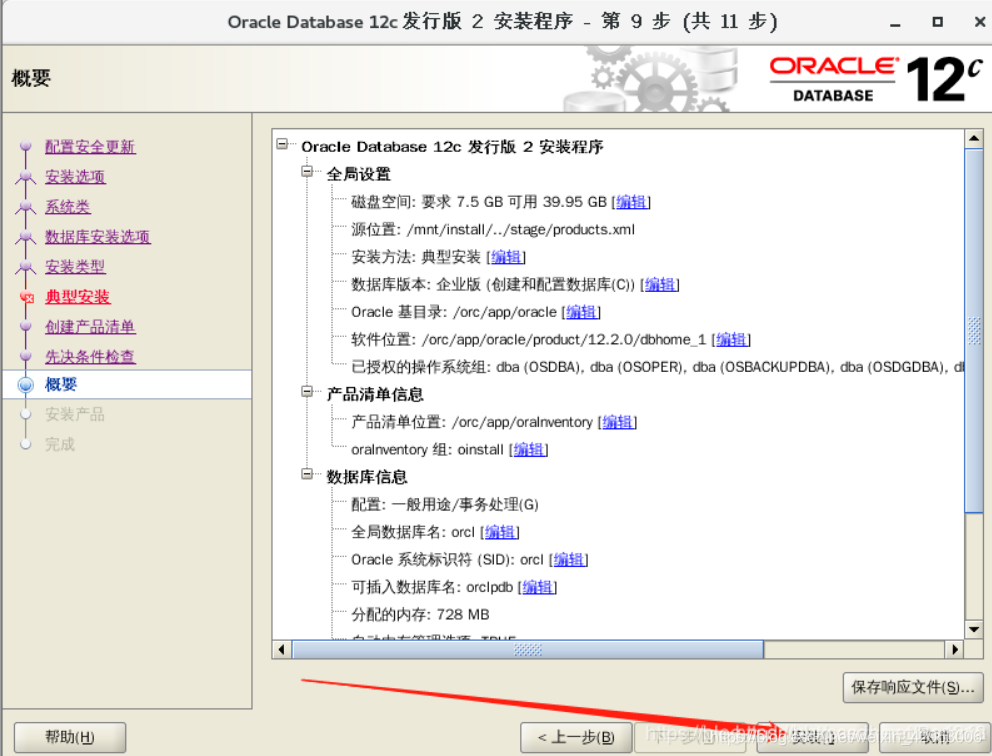
3.4、执行完安装脚本后会直接进入图形化界面
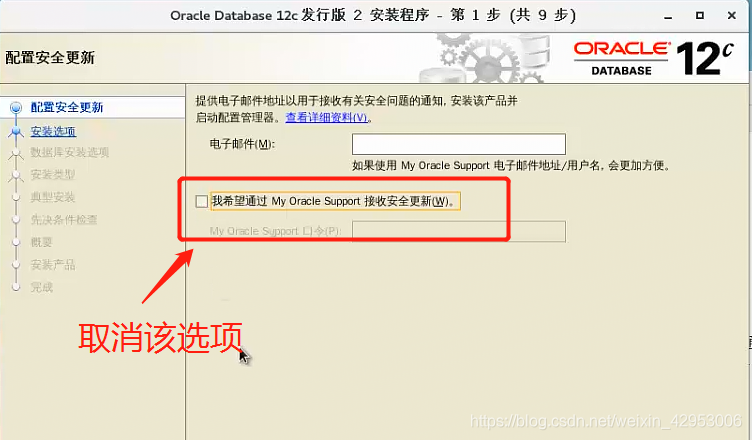
- 在安装时会跳出以下窗口,此时只需要打开一个新的终端界面,以root用户执行这两条命令,执行完成后再点击图形化界面中的确定。(注意:一定要执行完这2条语句再点确定)
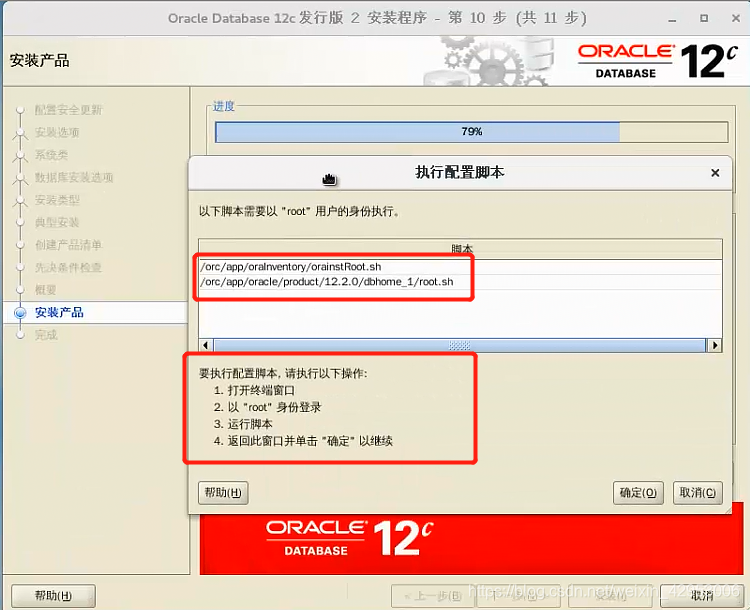
- 打开新的终端,执行下面脚本,执行完成后再点击图形化界面的确定
[root@oracle ~]# /orc/app/oraInventory/orainstRoot.sh
[root@oracle ~]# /orc/app/oracle/product/12.2.0/dbhome_1/root.sh

四、进入oracle
- 使用oracle用户登录
- sqlplus / as sysdba (sys用户是oracle的最高管理员所以要加上as)
[oracle@oracle root]$ sqlplus / as sysdba
bash: sqlplus: 未找到命令...
- 如果出现以上报错,只需要在/home/oracle/.bash_profile 中配置下环境变量即可
[oracle@oracle root]$ su root
密码:
[root@oracle ~]# vim /home/oracle/.bash_profile
##在末尾加入
export ORACLE_HOME=/orc/app/oracle/product/12.2.0/dbhome_1/
export PATH=$ORACLE_HOME/bin:$PATH

[root@oracle ~]# source /home/oracle/.bash_profile    ###重新加载
[root@oracle ~]# su oracle
[oracle@oracle root]$ sqlplus / as sysdba

SQL*Plus: Release 12.2.0.1.0 Production on 星期三 1月 29 18:58:55 2020

Copyright (c) 1982, 2016, Oracle.  All rights reserved.


连接到:
Oracle Database 12c Enterprise Edition Release 12.2.0.1.0 - 64bit Production

SQL>                     ###已经进入数据库
- SQL> help index (查看命令列表,sql中不区分大写小写)
- SQL> show user (查看当前用户)
