参考路径:https://www.jianshu.com/p/c4f0e4072fcc
参考路径:https://blog.csdn.net/cai_caiyi/article/details/53405433
参考路径:https://www.linuxidc.com/Linux/2011-03/33485.htm
1.下载解压源码
我们获取的源码为:boa-0.94.13.tar包,解压
$ tar -xf boa-0.94.13.tar
2.环境搭建
$ sudo apt-get install bison
$ sudo apt-get install flex
3修改文件src/compat.h
cd boa-0.94.13/src
#define TIMEZONE_OFFSET(foo) foo##->tm_gmtoff
改为
#define TIMEZONE_OFFSET(foo) (foo)->tm_gmtoff
4.修改boa.c源文件
将boa.c文件中以下几行判断注释掉。
if (setuid(0) != -1) {
    DIE("icky Linux kernel bug!");
}
改为
/*if (setuid(0) != -1) {
    DIE("icky Linux kernel bug!");
}*/
5 ./configure
$ cd boa-0.94.13/src
$ ./configure
会在src下生成Makefile
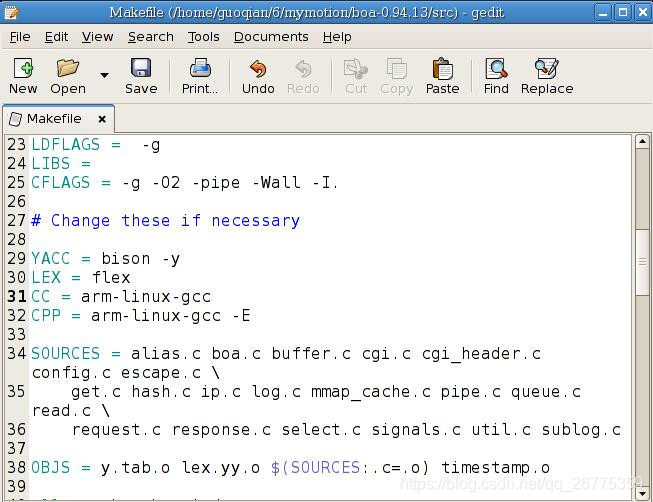
修改Makefile文件(此步骤可不做,用于生成编译文件,供系统直接使用)
CC = arm-linux-gcc
CPP = arm-linux-gcc–E
$ make
7.创建文件夹
$ sudo mkdir /etc/boa
$ cd boa-0.94.13/src
$ sudo cp ../boa.conf /etc/boa
8.修改boa.conf
$ cd /etc/boa/
8.更改内容
#Group nogroup
Group 0   #0表示root用户组
#ScriptAlias /cgi-bin/ /usr/lib/cgi-bin/
ScriptAlias /cgi-bin/ /var/www/cgi-bin/
#AccessLog /var/log/boa/access_log
9.我们还需要修改源码src/log.c中的内容,如下图所示

10.创建index.html
$ cd /var/www
index.html内容
<html>
<head>
<meta charset="utf-8"/>
<title>Upload</title>
</head>
<body>
    <h2>wit_yuan say hello world</h2>
</body>
</html>
11.运行boa
$ cd src/
$ sudo ./boa

由于在boa.conf中我们的端口为80,浏览器访问80端口就好了
