前言
MPC5748G开发环境搭建
MPC5748G S32_SDK_PA_RTM_3.0.0 GPIO 调试仿真设置
MPC5748G SDK 定时器 timing_pal
MPC5748G UART uart_pal
MPC5748G笔记 CAN can_pal
MPC5748G笔记 以太网 LwIP
前几篇讲了开发环境的搭建, GPIO的读写操作, 调试仿真的设置, 定时器的使用, 串口的使用, CAN的收发, 以太网等, 本篇轻松一下, 看看PWM的用法.
eMIOS简介
eMIOS全称 Configurable Enhanced Modular IO Subsystem, 不同于其他MCU用定时器搞PWM, MPC5748G用eMIOS, 似乎显得有些专业, 搞不懂没关系, 知道这玩意能搞PWM就可以.
MPC5748G有3个eMIOS模块, 每个模块有32个通道, 均可以搞PWM:

又分了4种通道类型(X, Y, G, H):
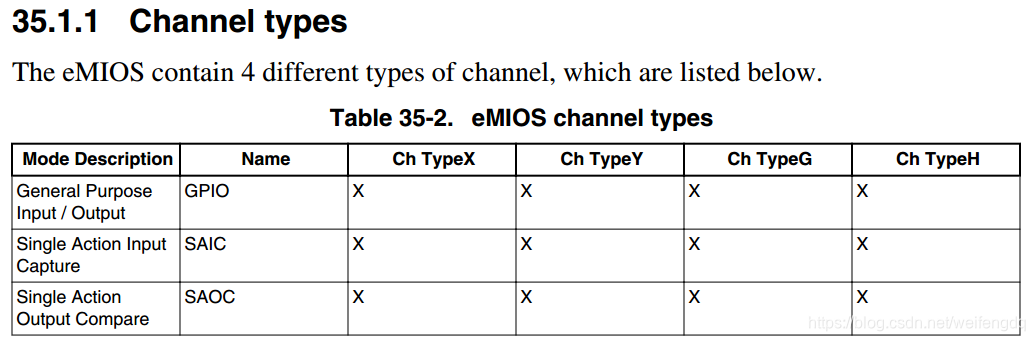
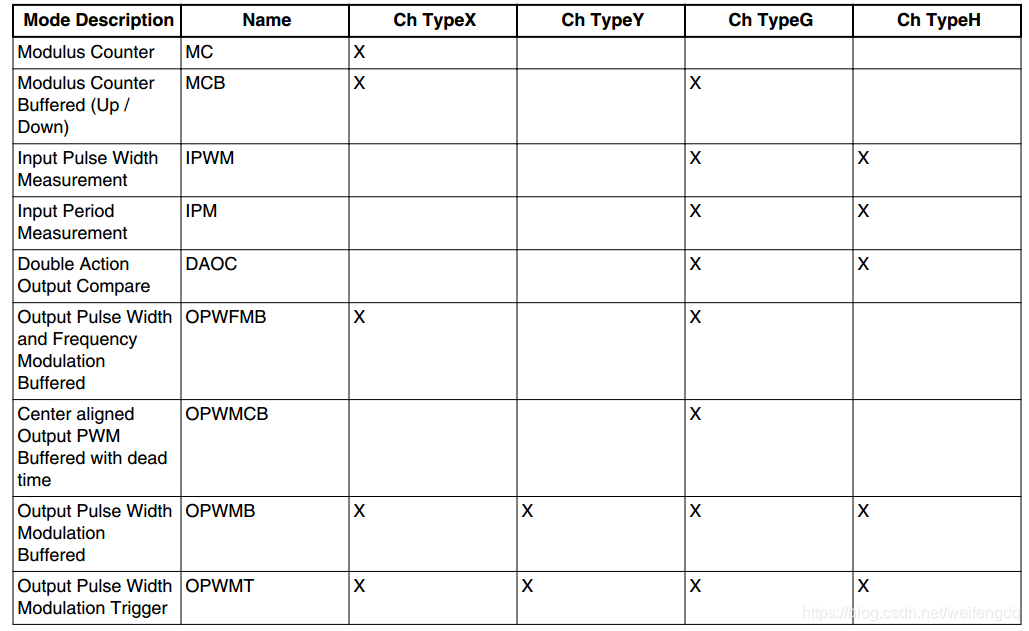
通道和类型的对应图:

这样每个通道能实现哪些, 看一下类型可用的Mode Description就可以了, 几种类型都可以输出PWM, X和G有内部计数器.
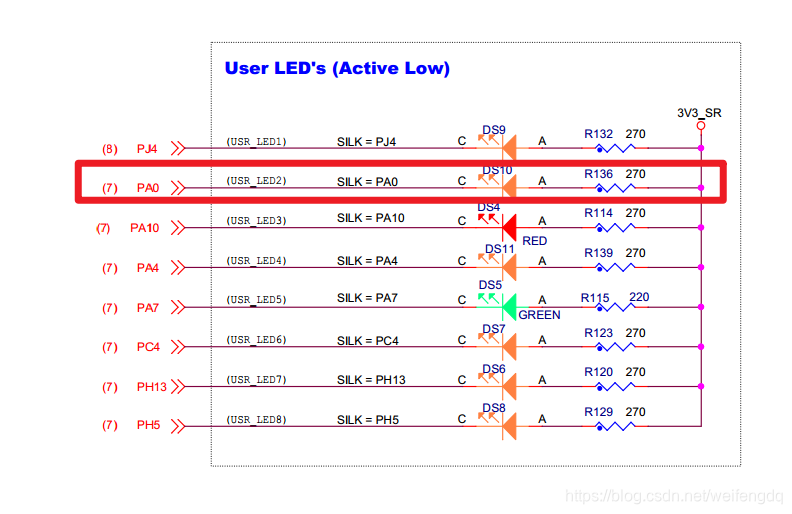
pwm_pal例程用板子的PA0的LED演示了PWM, 本篇也以此为例:
新建工程
步骤如下:
- 打开S32, File -> New -> S32DS Application Project
- 选择MCU: MPC5748G, 填入工程名
- 默认3个核都勾上了, 这里去掉Z4_1和Z2_2的勾选, 只保留Z4_0, 选择SDK: MPC5748G_SDK_Z4_0 3.0.0, 点击Finish结束.
PE配置
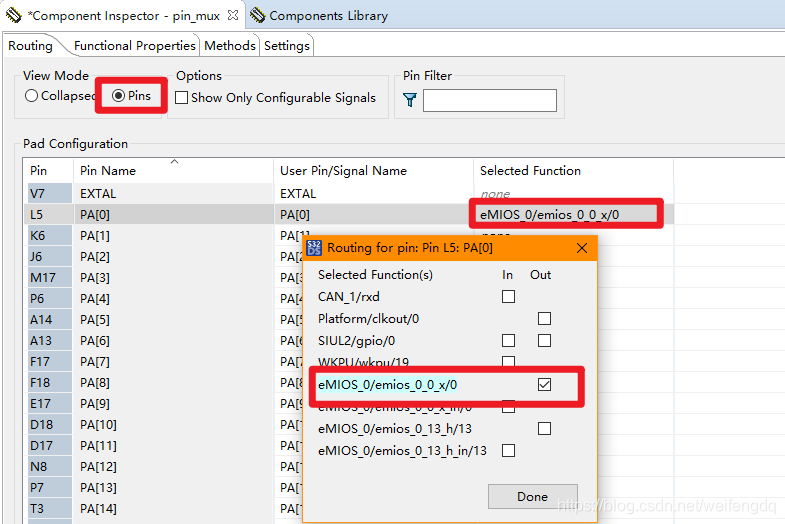
eMIOS配置:
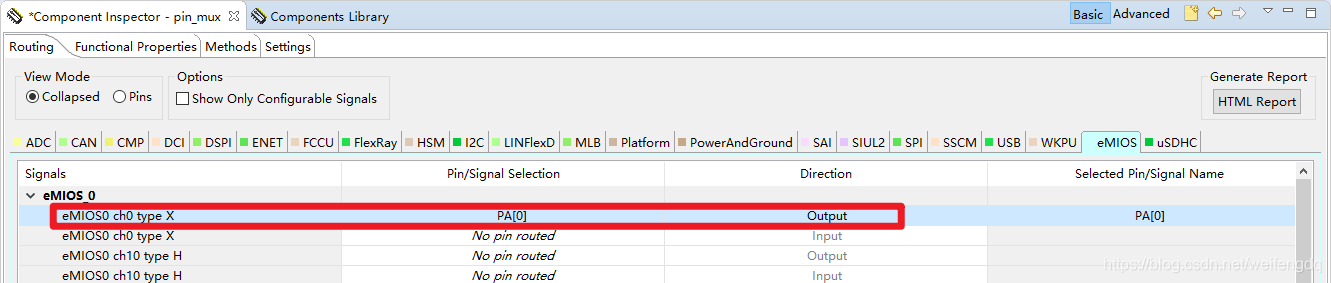
或者直接在pins里面选:
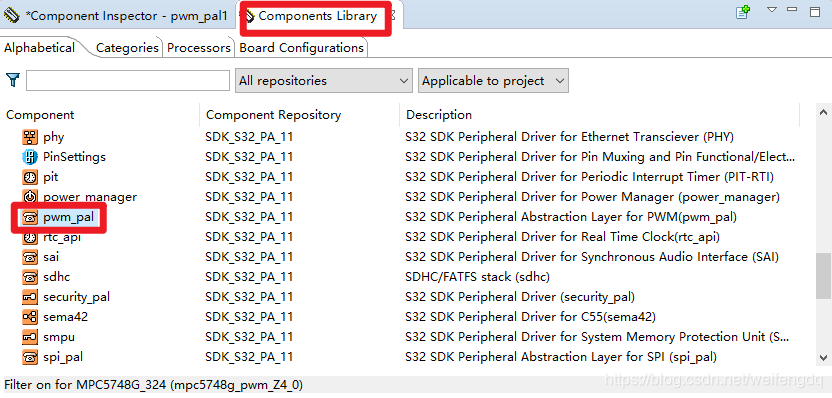
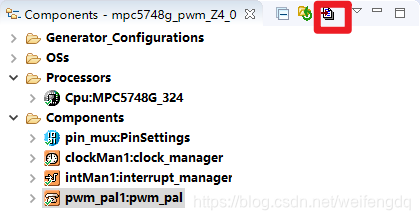
Components Library 添加 pwm_pal 组件:
pwm_pal配置如下图, 保持默认:

时基应该是80MHz, 1分频, Period设置5000, 即PWM频率为16kHz, Duty/Perios=2500/5000=50%就是占空比.
点击生成代码:
补全代码
main.c:
/* Including necessary module. Cpu.h contains other modules needed for compiling.*/
#include "Cpu.h"

  volatile int exit_code = 0;
/* User includes (#include below this line is not maintained by Processor Expert) */
  void delay(volatile int cycles) {
	  while(cycles--);
 }
/*!
  \brief The main function for the project.
  \details The startup initialization sequence is the following:
 * - startup asm routine
 * - main()
*/
int main(void)
{
  /* Write your local variable definition here */
	uint32_t duty = 0;
  /*** Processor Expert internal initialization. DON'T REMOVE THIS CODE!!! ***/
  #ifdef PEX_RTOS_INIT
    PEX_RTOS_INIT();                   /* Initialization of the selected RTOS. Macro is defined by the RTOS component. */
  #endif
  /*** End of Processor Expert internal initialization.                    ***/

  /* Write your code here */
  /* For example: for(;;) { } */
    CLOCK_SYS_Init(g_clockManConfigsArr, CLOCK_MANAGER_CONFIG_CNT,
                	g_clockManCallbacksArr, CLOCK_MANAGER_CALLBACK_CNT);
    CLOCK_SYS_UpdateConfiguration(0U, CLOCK_MANAGER_POLICY_AGREEMENT);
    PINS_DRV_Init(NUM_OF_CONFIGURED_PINS, g_pin_mux_InitConfigArr);

    PWM_Init(&pwm_pal1Instance,&pwm_pal1Configs);

    while(1) {
    	PWM_UpdateDuty(&pwm_pal1Instance, 0, duty);	//channel 0
    	if (duty == 5000U) {
    		duty = 0;
    	}
    	delay(1000);
    	duty++;
    }


  /*** Don't write any code pass this line, or it will be deleted during code generation. ***/
  /*** RTOS startup code. Macro PEX_RTOS_START is defined by the RTOS component. DON'T MODIFY THIS CODE!!! ***/
  #ifdef PEX_RTOS_START
    PEX_RTOS_START();                  /* Startup of the selected RTOS. Macro is defined by the RTOS component. */
  #endif
  /*** End of RTOS startup code.  ***/
  /*** Processor Expert end of main routine. DON'T MODIFY THIS CODE!!! ***/
  for(;;) {
    if(exit_code != 0) {
      break;
    }
  }
  return exit_code;
  /*** Processor Expert end of main routine. DON'T WRITE CODE BELOW!!! ***/
} /*** End of main routine. DO NOT MODIFY THIS TEXT!!! ***/

/* END main */
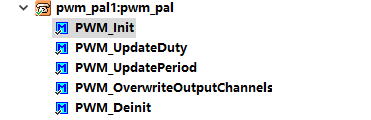
PWM的函数只有下面几个, 可以改变占空比(PWM), 频率(PFM?)等:
调试运行, 可以明显看到LED的明暗, 符合预期, 至于频率/占空比之类的, 有示波器的可以测一下.
微信公众号
欢迎扫描关注我的微信公众号, 及时获取最新文章: