0 Descripción
Este artículo compila el código fuente basado en la versión Ambari-2.7.7. Los materiales de compilación requeridos se proporcionan uniformemente de la siguiente manera:
链接:https://pan.baidu.com/s/1F2D7zBGfKihxTBArnOilTw
提取码:8m17
1 requisitos previos
1.1 Descargue el paquete fuente de ambari
wget https://github.com/apache/ambari/releases/tag/release-2.7.7-rc0/ambari-release-2.7.7-rc0.tar.gz
wget https://www-eu.apache.org/dist/ambari/ambari-2.7.7/apache-ambari-2.7.7-src.tar.gz
wget https://mirrors.tuna.tsinghua.edu.cn/apache/ambari/ambari-2.7.7/apache-ambari-2.7.7-src.tar.gz
Simplemente elija uno de ellos para descargarlo y descomprímalo una vez que se complete la descarga.
tar -zxvf apache-ambari-2.7.7-src.tar.gz
chown -R root:root apache-ambari-2.7.7-src
1.2 Necesidad de instalar software
| Java | 1.8.0_201 |
|---|---|
| experto | Apache experto 3.8.6 |
| rpm-construir | rpm-build-4.11.3-48.el7_9.x86_64 |
| gcc-c++ | 4.8.5 |
| pitón | 2.7.5 |
| python-devel | python-devel-2.7.5-92.el7_9.x86_64 |
| git | 1.8.3.1 |
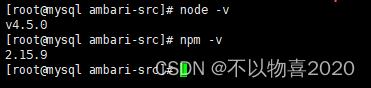
| nodos | v4.5.0 |
Nota: instalación de ①rpm-build
yum install rpm-build -y
Ver versión rpm-build

② instalación de python-devel
yum install python-devel -y
Compruebe la versión instalada

③ Nodo de instalación
wget https://nodejs.org/dist/v4.5.0/node-v4.5.0-linux-x64.tar.gz
tar -zxvf node-v4.5.0-linux-x64.tar.gz -C /usr/lib/node
Una vez completada la instalación, asegúrese de que los comandos npm y node sean normales.
Nota: Si se produce el siguiente error al ejecutar npm -v:
Cannot find module ‘npmlog’
Solución:
# cd 命令进入nodejs安装目录然后执行如下命令,建立软连接:
ln -s ../lib/node_modules/npm/bin/npm-cli.js
④ Configure las variables de entorno para jdk/maven/node instalado arriba
#java environment
export JAVA_HOME=/usr/local/java
export CLASSPATH=.:${JAVA_HOME}/jre:${JAVA_HOME}/lib
export PATH=$PATH:${JAVA_HOME}/bin

#maven environment
export MAVEN_HOME=/usr/local/maven/apache-maven-3.8.6
export M2_HOME=/usr/local/maven/apache-maven-3.8.6
export PATH=$PATH:$MAVEN_HOME/bin

#node
export NODE_HOME=/usr/lib/node-v4.5.0-linux-x64
export PATH=$PATH:$NODE_HOME/bin
1.3 configuración de fuente de espejo maven
Edite el archivo de configuración conf/settings.xml y agregue las siguientes fuentes espejo, lo que mejorará la velocidad de compilación de ambari.
<?xml version="1.0" encoding="UTF-8"?>
<!--
Licensed to the Apache Software Foundation (ASF) under one
or more contributor license agreements.  See the NOTICE file
distributed with this work for additional information
regarding copyright ownership.  The ASF licenses this file
to you under the Apache License, Version 2.0 (the
"License"); you may not use this file except in compliance
with the License.  You may obtain a copy of the License at

    http://www.apache.org/licenses/LICENSE-2.0

Unless required by applicable law or agreed to in writing,
software distributed under the License is distributed on an
"AS IS" BASIS, WITHOUT WARRANTIES OR CONDITIONS OF ANY
KIND, either express or implied.  See the License for the
specific language governing permissions and limitations
under the License.
-->
<!--
 | This is the configuration file for Maven. It can be specified at two levels:
 |
 |  1. User Level. This settings.xml file provides configuration for a single user,
 |                 and is normally provided in ${user.home}/.m2/settings.xml.
 |
 |                 NOTE: This location can be overridden with the CLI option:
 |
 |                 -s /path/to/user/settings.xml
 |
 |  2. Global Level. This settings.xml file provides configuration for all Maven
 |                 users on a machine (assuming they're all using the same Maven
 |                 installation). It's normally provided in
 |                 ${maven.conf}/settings.xml.
 |
 |                 NOTE: This location can be overridden with the CLI option:
 |
 |                 -gs /path/to/global/settings.xml
 |
 | The sections in this sample file are intended to give you a running start at
 | getting the most out of your Maven installation. Where appropriate, the default
 | values (values used when the setting is not specified) are provided.
 |
 |-->
<settings
	xmlns="http://maven.apache.org/SETTINGS/1.2.0"
	xmlns:xsi="http://www.w3.org/2001/XMLSchema-instance"
          xsi:schemaLocation="http://maven.apache.org/SETTINGS/1.2.0 https://maven.apache.org/xsd/settings-1.2.0.xsd">
	<!-- localRepository
   | The path to the local repository maven will use to store artifacts.
   |
   | Default: ${user.home}/.m2/repository
  <localRepository>/path/to/local/repo</localRepository>
  -->
	<localRepository>/usr/local/maven/apache-maven-3.8.6/repository</localRepository>
	<!-- interactiveMode
   | This will determine whether maven prompts you when it needs input. If set to false,
   | maven will use a sensible default value, perhaps based on some other setting, for
   | the parameter in question.
   |
   | Default: true
  <interactiveMode>true</interactiveMode>
  -->
	<!-- offline
   | Determines whether maven should attempt to connect to the network when executing a build.
   | This will have an effect on artifact downloads, artifact deployment, and others.
   |
   | Default: false
  <offline>false</offline>
  -->
	<!-- pluginGroups
   | This is a list of additional group identifiers that will be searched when resolving plugins by their prefix, i.e.
   | when invoking a command line like "mvn prefix:goal". Maven will automatically add the group identifiers
   | "org.apache.maven.plugins" and "org.codehaus.mojo" if these are not already contained in the list.
   |-->
	<pluginGroups>
		<!-- pluginGroup
     | Specifies a further group identifier to use for plugin lookup.
    <pluginGroup>com.your.plugins</pluginGroup>
    -->
	</pluginGroups>
	<!-- proxies
   | This is a list of proxies which can be used on this machine to connect to the network.
   | Unless otherwise specified (by system property or command-line switch), the first proxy
   | specification in this list marked as active will be used.
   |-->
	<proxies>
		<!-- proxy
     | Specification for one proxy, to be used in connecting to the network.
     |
    <proxy><id>optional</id><active>true</active><protocol>http</protocol><username>proxyuser</username><password>proxypass</password><host>proxy.host.net</host><port>80</port><nonProxyHosts>local.net|some.host.com</nonProxyHosts></proxy>
    -->
	</proxies>
	<!-- servers
   | This is a list of authentication profiles, keyed by the server-id used within the system.
   | Authentication profiles can be used whenever maven must make a connection to a remote server.
   |-->
	<servers>
		<!-- server
     | Specifies the authentication information to use when connecting to a particular server, identified by
     | a unique name within the system (referred to by the 'id' attribute below).
     |
     | NOTE: You should either specify username/password OR privateKey/passphrase, since these pairings are
     |       used together.
     |
    <server><id>deploymentRepo</id><username>repouser</username><password>repopwd</password></server>
    -->
		<!-- Another sample, using keys to authenticate.
    <server><id>siteServer</id><privateKey>/path/to/private/key</privateKey><passphrase>optional; leave empty if not used.</passphrase></server>
    -->
	</servers>
	<!-- mirrors
   | This is a list of mirrors to be used in downloading artifacts from remote repositories.
   |
   | It works like this: a POM may declare a repository to use in resolving certain artifacts.
   | However, this repository may have problems with heavy traffic at times, so people have mirrored
   | it to several places.
   |
   | That repository definition will have a unique id, so we can create a mirror reference for that
   | repository, to be used as an alternate download site. The mirror site will be the preferred
   | server for that repository.
   |-->
	<mirrors>
		<!-- mirror
     | Specifies a repository mirror site to use instead of a given repository. The repository that
     | this mirror serves has an ID that matches the mirrorOf element of this mirror. IDs are used
     | for inheritance and direct lookup purposes, and must be unique across the set of mirrors.
     |
    <mirror><id>mirrorId</id><mirrorOf>repositoryId</mirrorOf><name>Human Readable Name for this Mirror.</name><url>http://my.repository.com/repo/path</url></mirror>
     -->
		<!-- Amabri build mirror source -->
		<mirror>
			<id>huaweicloud</id>
			<name>huaweicloud maven</name>
			<mirrorOf>central</mirrorOf>
			<url>https://repo.huaweicloud.com/repository/maven/</url>
		</mirror>
		<mirror>
			<id>nexus-aliyun</id>
			<mirrorOf>central</mirrorOf>
			<name>Nexus aliyun</name>
			<url>https://maven.aliyun.com/nexus/content/groups/public/</url>
		</mirror>
		<mirror>
			<id>alimaven</id>
			<!-- <mirrorOf>central</mirrorOf> -->
			<mirrorOf>central,apache.snapshots.https,maven2-repository.dev.java.net,maven2-glassfish-repository.dev.java.net,maven2-repository.atlassian,apache.staging.https,oss.sonatype.org,spring-milestones</mirrorOf>
			<name>aliyun maven</name>
			<url>http://maven.aliyun.com/nexus/content/repositories/central/</url>
		</mirror>
		<mirror>
			<id>nexus-hortonworks</id>
			<mirrorOf>central</mirrorOf>
			<name>Nexus hortonworks</name>
			<url>https://repo.hortonworks.com/content/groups/public/</url>
		</mirror>
		<mirror>
			<id>HDPReleases</id>
			<name>HDP Releases</name>
			<url>https://repo.hortonworks.com/content/repositories/releases/</url>
			<mirrorOf>central</mirrorOf>
		</mirror>
		<mirror>
			<id>WSO2Releases</id>
			<name>WSO2 Dist Repository</name>
			<url>http://dist.wso2.org/maven2/</url>
			<mirrorOf>central</mirrorOf>
		</mirror>
		<mirror>
			<id>MavenCentralReleases</id>
			<name>Maven Central Repository</name>
			<url>https://repo1.maven.org/maven2/</url>
			<mirrorOf>central</mirrorOf>
		</mirror>
	</mirrors>
	<!-- profiles
   | This is a list of profiles which can be activated in a variety of ways, and which can modify
   | the build process. Profiles provided in the settings.xml are intended to provide local machine-
   | specific paths and repository locations which allow the build to work in the local environment.
   |
   | For example, if you have an integration testing plugin - like cactus - that needs to know where
   | your Tomcat instance is installed, you can provide a variable here such that the variable is
   | dereferenced during the build process to configure the cactus plugin.
   |
   | As noted above, profiles can be activated in a variety of ways. One way - the activeProfiles
   | section of this document (settings.xml) - will be discussed later. Another way essentially
   | relies on the detection of a system property, either matching a particular value for the property,
   | or merely testing its existence. Profiles can also be activated by JDK version prefix, where a
   | value of '1.4' might activate a profile when the build is executed on a JDK version of '1.4.2_07'.
   | Finally, the list of active profiles can be specified directly from the command line.
   |
   | NOTE: For profiles defined in the settings.xml, you are restricted to specifying only artifact
   |       repositories, plugin repositories, and free-form properties to be used as configuration
   |       variables for plugins in the POM.
   |
   |-->
	<profiles>
		<!-- profile
     | Specifies a set of introductions to the build process, to be activated using one or more of the
     | mechanisms described above. For inheritance purposes, and to activate profiles via <activatedProfiles/>
     | or the command line, profiles have to have an ID that is unique.
     |
     | An encouraged best practice for profile identification is to use a consistent naming convention
     | for profiles, such as 'env-dev', 'env-test', 'env-production', 'user-jdcasey', 'user-brett', etc.
     | This will make it more intuitive to understand what the set of introduced profiles is attempting
     | to accomplish, particularly when you only have a list of profile id's for debug.
     |
     | This profile example uses the JDK version to trigger activation, and provides a JDK-specific repo.
    <profile><id>jdk-1.4</id><activation><jdk>1.4</jdk></activation><repositories><repository><id>jdk14</id><name>Repository for JDK 1.4 builds</name><url>http://www.myhost.com/maven/jdk14</url><layout>default</layout><snapshotPolicy>always</snapshotPolicy></repository></repositories></profile>
    -->
		<!--
     | Here is another profile, activated by the system property 'target-env' with a value of 'dev',
     | which provides a specific path to the Tomcat instance. To use this, your plugin configuration
     | might hypothetically look like:
     |
     | ...
     | <plugin>
     |   <groupId>org.myco.myplugins</groupId>
     |   <artifactId>myplugin</artifactId>
     |
     |   <configuration>
     |     <tomcatLocation>${tomcatPath}</tomcatLocation>
     |   </configuration>
     | </plugin>
     | ...
     |
     | NOTE: If you just wanted to inject this configuration whenever someone set 'target-env' to
     |       anything, you could just leave off the <value/> inside the activation-property.
     |
    <profile><id>env-dev</id><activation><property><name>target-env</name><value>dev</value></property></activation><properties><tomcatPath>/path/to/tomcat/instance</tomcatPath></properties></profile>
    -->
		<profile>
			<id>huaweicloud</id>
			<repositories>
				<repository>
					<id>huawei</id>
					<url>https://repo.huaweicloud.com/repository/maven/</url>
					<releases>
						<enabled>true</enabled>
					</releases>
					<snapshots>
						<enabled>true</enabled>
						<updatePolicy>always</updatePolicy>
					</snapshots>
				</repository>
			</repositories>
		</profile>
		<profile>
			<id>nexus-aliyun</id>
			<repositories>
				<repository>
					<id>aliyun</id>
					<url>https://maven.aliyun.com/nexus/content/groups/public/</url>
					<releases>
						<enabled>true</enabled>
					</releases>
					<snapshots>
						<enabled>true</enabled>
						<updatePolicy>always</updatePolicy>
					</snapshots>
				</repository>
			</repositories>
		</profile>
		<profile>
			<id>alimaven</id>
			<repositories>
				<repository>
					<id>ali</id>
					<url>http://maven.aliyun.com/nexus/content/repositories/central/</url>
					<releases>
						<enabled>true</enabled>
					</releases>
					<snapshots>
						<enabled>true</enabled>
						<updatePolicy>always</updatePolicy>
					</snapshots>
				</repository>
			</repositories>
		</profile>
		<profile>
			<id>nexus-hortonworks</id>
			<repositories>
				<repository>
					<id>hortonworks</id>
					<url>https://repo.hortonworks.com/content/groups/public/</url>
					<releases>
						<enabled>true</enabled>
					</releases>
					<snapshots>
						<enabled>true</enabled>
						<updatePolicy>always</updatePolicy>
					</snapshots>
				</repository>
			</repositories>
		</profile>
		<profile>
			<id>HDPReleases</id>
			<repositories>
				<repository>
					<id>HDP</id>
					<url>https://repo.hortonworks.com/content/repositories/releases/</url>
					<releases>
						<enabled>true</enabled>
					</releases>
					<snapshots>
						<enabled>true</enabled>
						<updatePolicy>always</updatePolicy>
					</snapshots>
				</repository>
			</repositories>
		</profile>
		<profile>
			<id>WSO2Releases</id>
			<repositories>
				<repository>
					<id>WSO2</id>
					<url>http://dist.wso2.org/maven2/</url>
					<releases>
						<enabled>true</enabled>
					</releases>
					<snapshots>
						<enabled>true</enabled>
						<updatePolicy>always</updatePolicy>
					</snapshots>
				</repository>
			</repositories>
		</profile>
		<profile>
			<id>MavenCentralReleases</id>
			<repositories>
				<repository>
					<id>MavenCentral</id>
					<url>https://repo1.maven.org/maven2/</url>
					<releases>
						<enabled>true</enabled>
					</releases>
					<snapshots>
						<enabled>true</enabled>
						<updatePolicy>always</updatePolicy>
					</snapshots>
				</repository>
			</repositories>
		</profile>
	</profiles>
	<activeProfiles>
		<activeProfile>huaweicloud</activeProfile>
		<activeProfile>nexus-aliyun</activeProfile>
		<activeProfile>alimaven</activeProfile>
		<activeProfile>nexus-hortonworks</activeProfile>
		<activeProfile>HDPReleases</activeProfile>
		<activeProfile>WSO2Releases</activeProfile>
		<activeProfile>MavenCentralReleases</activeProfile>
	</activeProfiles>
	<!-- activeProfiles
   | List of profiles that are active for all builds.
   |
  <activeProfiles><activeProfile>alwaysActiveProfile</activeProfile><activeProfile>anotherAlwaysActiveProfile</activeProfile></activeProfiles>
  -->
</settings>
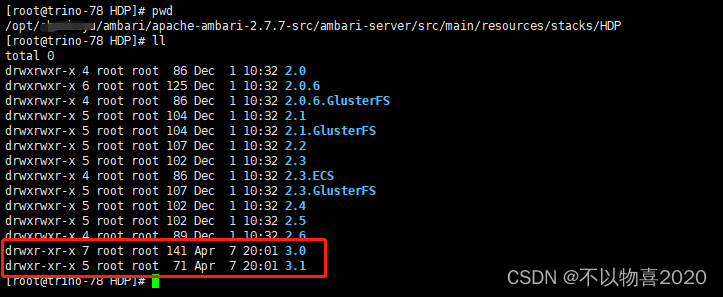
1.4 Copie los archivos HDP 3.0 y 3.1 en el código fuente
HDP3.0/HDP3.1 obtiene la conexión de la siguiente manera:
Copie HDP3.0/HDP3.1 en el directorio apache-ambari-2.7.7-src/ambari-server/src/main/resources/stacks/HDP:
1.5 Aceleración de compilación
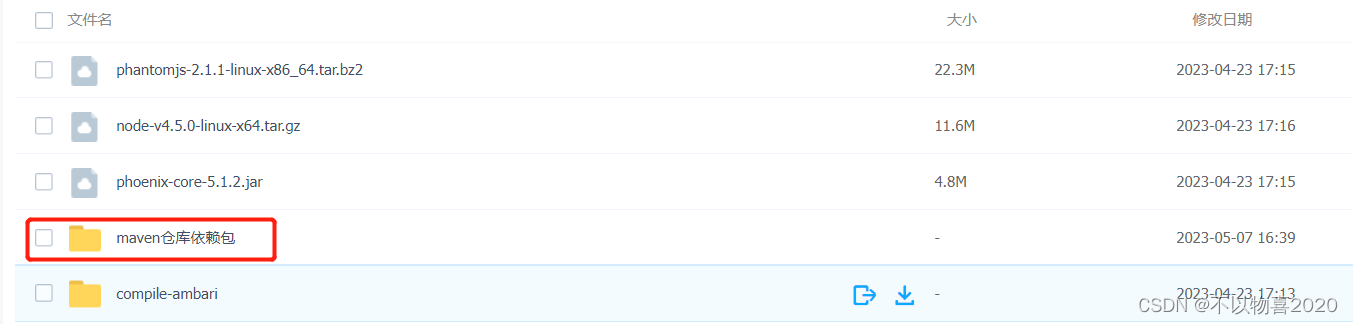
1.5.1 Descargar bower_components
Al compilar ambari, debe ir al directorio apache-ambari-2.7.7-src/ambari-admin/src/main/resources/ui/admin-web/app/ para descargar el contenido de bower_components. Debido a razones de red, puede descargarlo y ponerlo en el directorio, y luego volver a compilarlo.
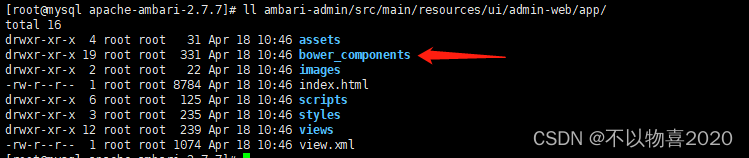
Nota: Si no se realiza esta operación, se puede reportar un error en 4.1
1.5.2 Descarga de dependencias requeridas para compilar métricas
Modifique el archivo ambari-metrics/pom.xml para reemplazar las rutas de descarga de habse, hadoop, phoenix y grafana
<hbase.tar>http://192.168.5.78/compile-ambari/hbase-2.4.2-bin.tar.gz</hbase.tar><hadoop.tar>http://192.168.5.78/compile-ambari/hadoop-3.1.1.tar.gz</hadoop.tar>
<grafana.tar>http://192.168.5.78/compile-ambari/grafana-6.7.4.linux-amd64.tar.gz</grafana.tar>
<phoenix.tar>http://192.168.5.78/compile-ambari/phoenix-hbase-2.4-5.1.2-bin.tar.gz</phoenix.tar>
Nota: ① El 192.168.5.78 aquí se configuró con la función httpd, y puede descargar los paquetes dependientes requeridos a través de este método de descarga. ②
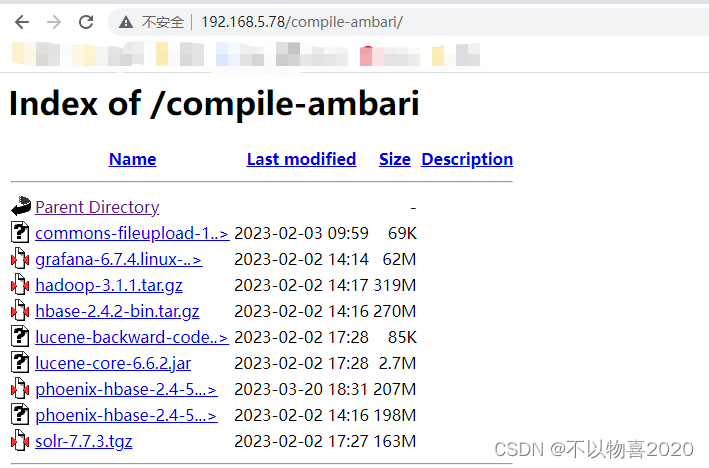
Si no realiza ninguna modificación, el error que se muestra en 4.2 se informará durante la compilación
. ③ Si httpd no está configurado, también puede configurarlo como ruta local. Por ejemplo:
    <hbase.tar>file:///opt/compile-ambari/hbase-2.4.2-bin.tar.gz</hbase.tar>
    <hbase.folder>hbase-2.4.2</hbase.folder>
    <hadoop.tar>file:///opt/compile-ambari/hadoop-3.1.1.tar.gz</hadoop.tar>
    <hadoop.folder>hadoop-3.1.1</hadoop.folder>
    <grafana.folder>grafana-6.7.4</grafana.folder>
    <grafana.tar>file:///opt/compile-ambari/grafana-6.7.4.linux-amd64.tar.gz</grafana.tar>
    <phoenix.tar>file:///opt/compile-ambari/phoenix-hbase-2.4-5.1.2-bin.tar.gz</phoenix.tar>
    <phoenix.folder>phoenix-hbase-2.4-5.1.2</phoenix.folder>
1.5.3 Modificar el archivo ambari-infra/ambari-infra-assembly/pom
<solr.tar>http://archive.apache.org/dist/lucene/solr/${solr.version}/solr-${solr.version}.tgz</solr.tar>
改为:
<solr.tar>http://192.168.5.78/compile-ambari/solr-${solr.version}.tgz</solr.tar>
Nota: si no hay un nodo con el servicio httpd instalado, también se puede establecer en una ruta local, como se indicó anteriormente.
1.5.4 Modificar el archivo ambari-infra/ambari-infra-solr-client/pom
<lucene6-core.url>https://repo1.maven.org/maven2/org/apache/lucene/lucene-core/${lucene6.version}/${lucene6-core-jar.name}</lucene6-core.url>
<lucene6-backward-codecs.url>https://repo1.maven.org/maven2/org/apache/lucene/lucene-backward-codecs/${lucene6.version}/${lucene6-backward-codecs-jar.name}</lucene6-backward-codecs.url>
改为:
<lucene6-core.url>http://192.168.5.78/compile-ambari/${lucene6-core-jar.name}</lucene6-core.url>
<lucene6-backward-codecs.url>http://192.168.5.78/compile-ambari/${lucene6-backward-codecs-jar.name}</lucene6-backward-codecs.url>
Nota: si no hay un nodo con el servicio httpd instalado, también se puede establecer en una ruta local, como se indicó anteriormente.
1.5.6 Reemplazar las dependencias del repositorio maven
Si tiene una red defectuosa, puede usar directamente el almacén de maven proporcionado por mí, descomprimir la biblioteca dependiente directamente en el almacén de maven de su entorno local y luego compilar.
1.5.7 Otorgar todos los permisos de ejecución
Para garantizar que no haya errores causados por permisos ejecutables durante el proceso de compilación, todos los archivos del directorio de compilación de Ambari pueden recibir permisos ejecutables antes de la compilación.
chmod -R 777 apache-ambari-2.7.7/
Nota: Si no se realizan las operaciones anteriores, es posible que se informen los siguientes errores durante la compilación:
[ERROR] Failed to execute goal org.codehaus.mojo:exec-maven-plugin:1.2.1:exec (Bower install) on project ambari-admin: Command execution failed. Process exited with an error: 1 (Exit value: 1)
2 compilar
① Al compilar ambari, si existe un requisito para un número de versión personalizado, primero puede marcar el código fuente de ambari con su propio número de versión definido. Presionar el número de versión es en realidad modificar automáticamente el valor de la versión en el archivo pom.xml a través del comando mvn, incluidos los submódulos.
②Compile el código fuente de cada módulo de ambari a través del comando mvn y, finalmente, obtenga sus respectivos paquetes rpm, similares a los paquetes rpm relacionados con ambari proporcionados oficialmente por hortonworks.
2.1 Escriba el número de versión
Asigne al código fuente de ambari un número de versión, el número de versión se puede personalizar
mvn versions:set -DnewVersion=2.7.7.0.1
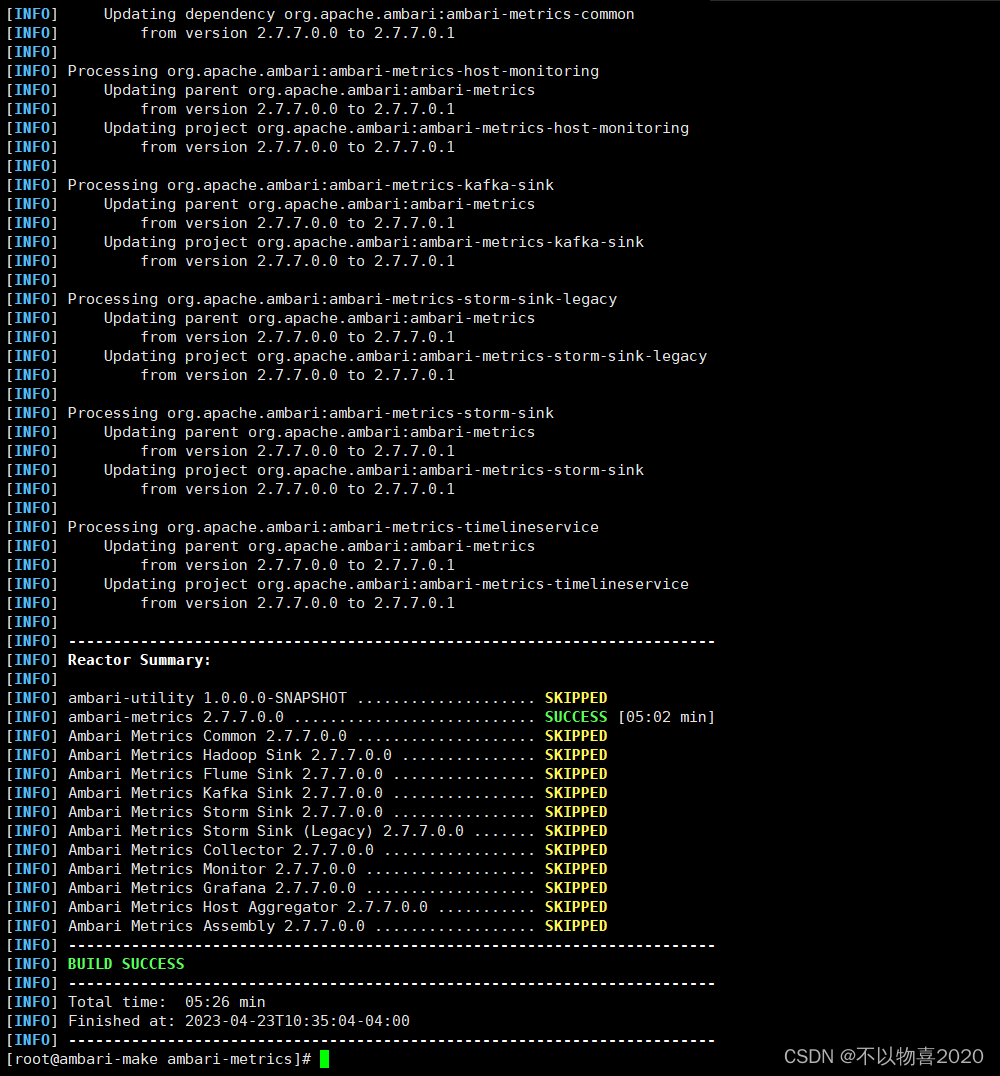
2.2 módulo de métricas ambari
pushd ambari-metrics

# 打版本号
mvn versions:set -DnewVersion=2.7.7.0.1
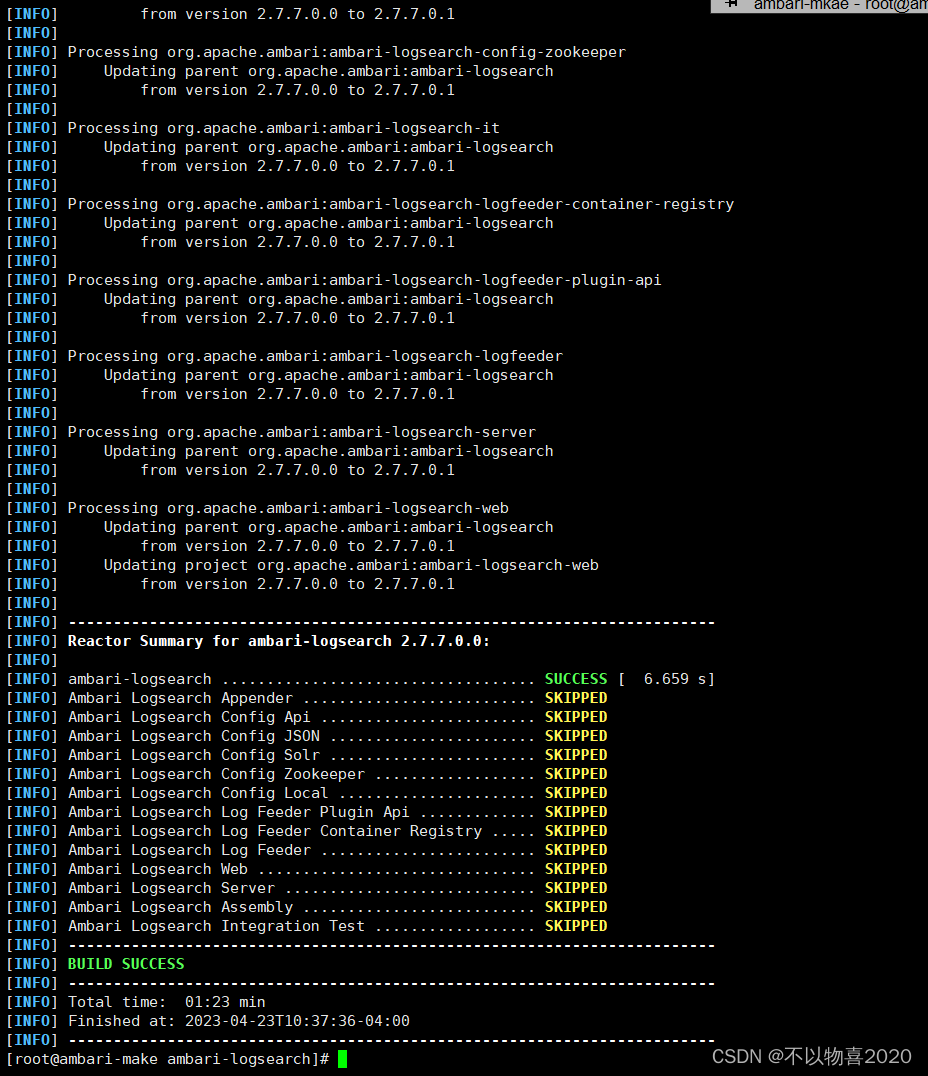
2.3 módulo ambari-logsearch
# 返回到ambari根目录
popd
pushd ambari-logsearch
# 打版本号
mvn versions:set -DnewVersion=2.7.7.0.1
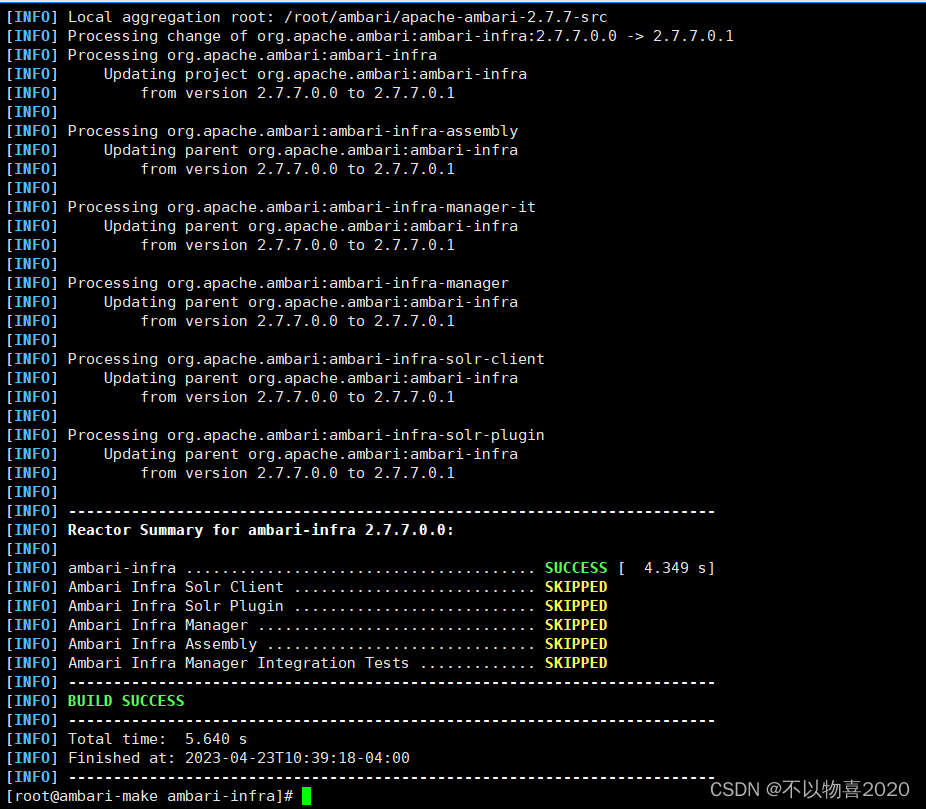
2.4 módulo ambari-infra
# 返回到ambari根目录
popd
pushd ambari-infra
# 打版本号
mvn versions:set -DnewVersion=2.7.7.0.1
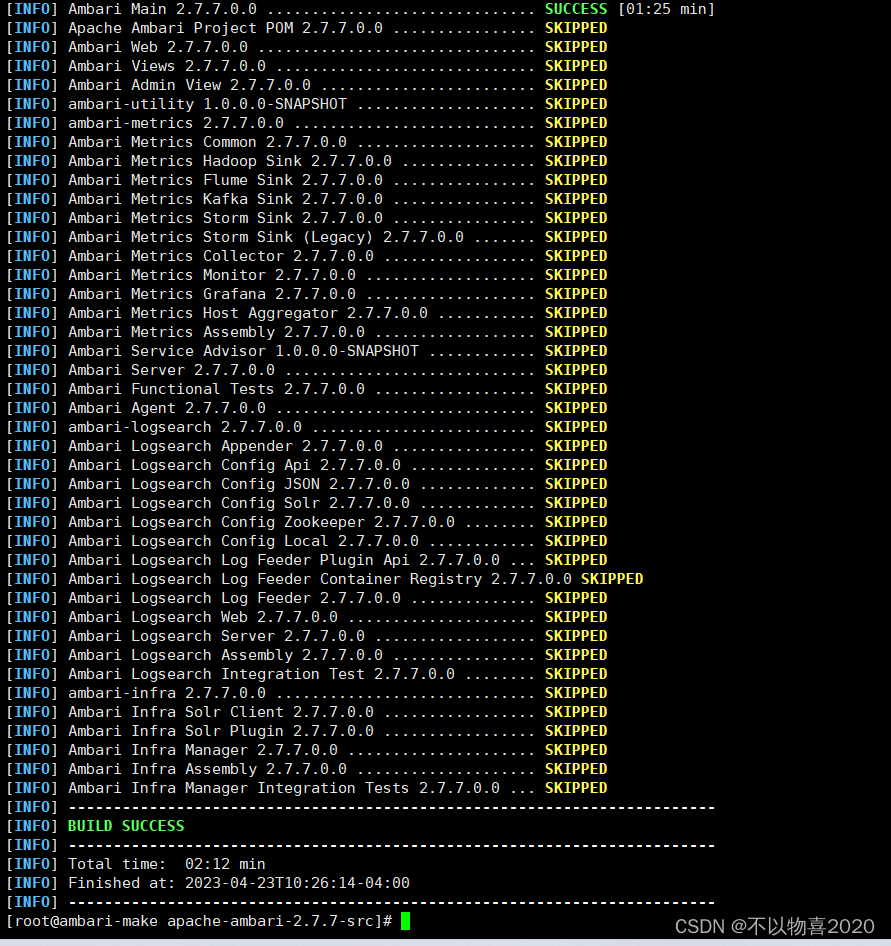
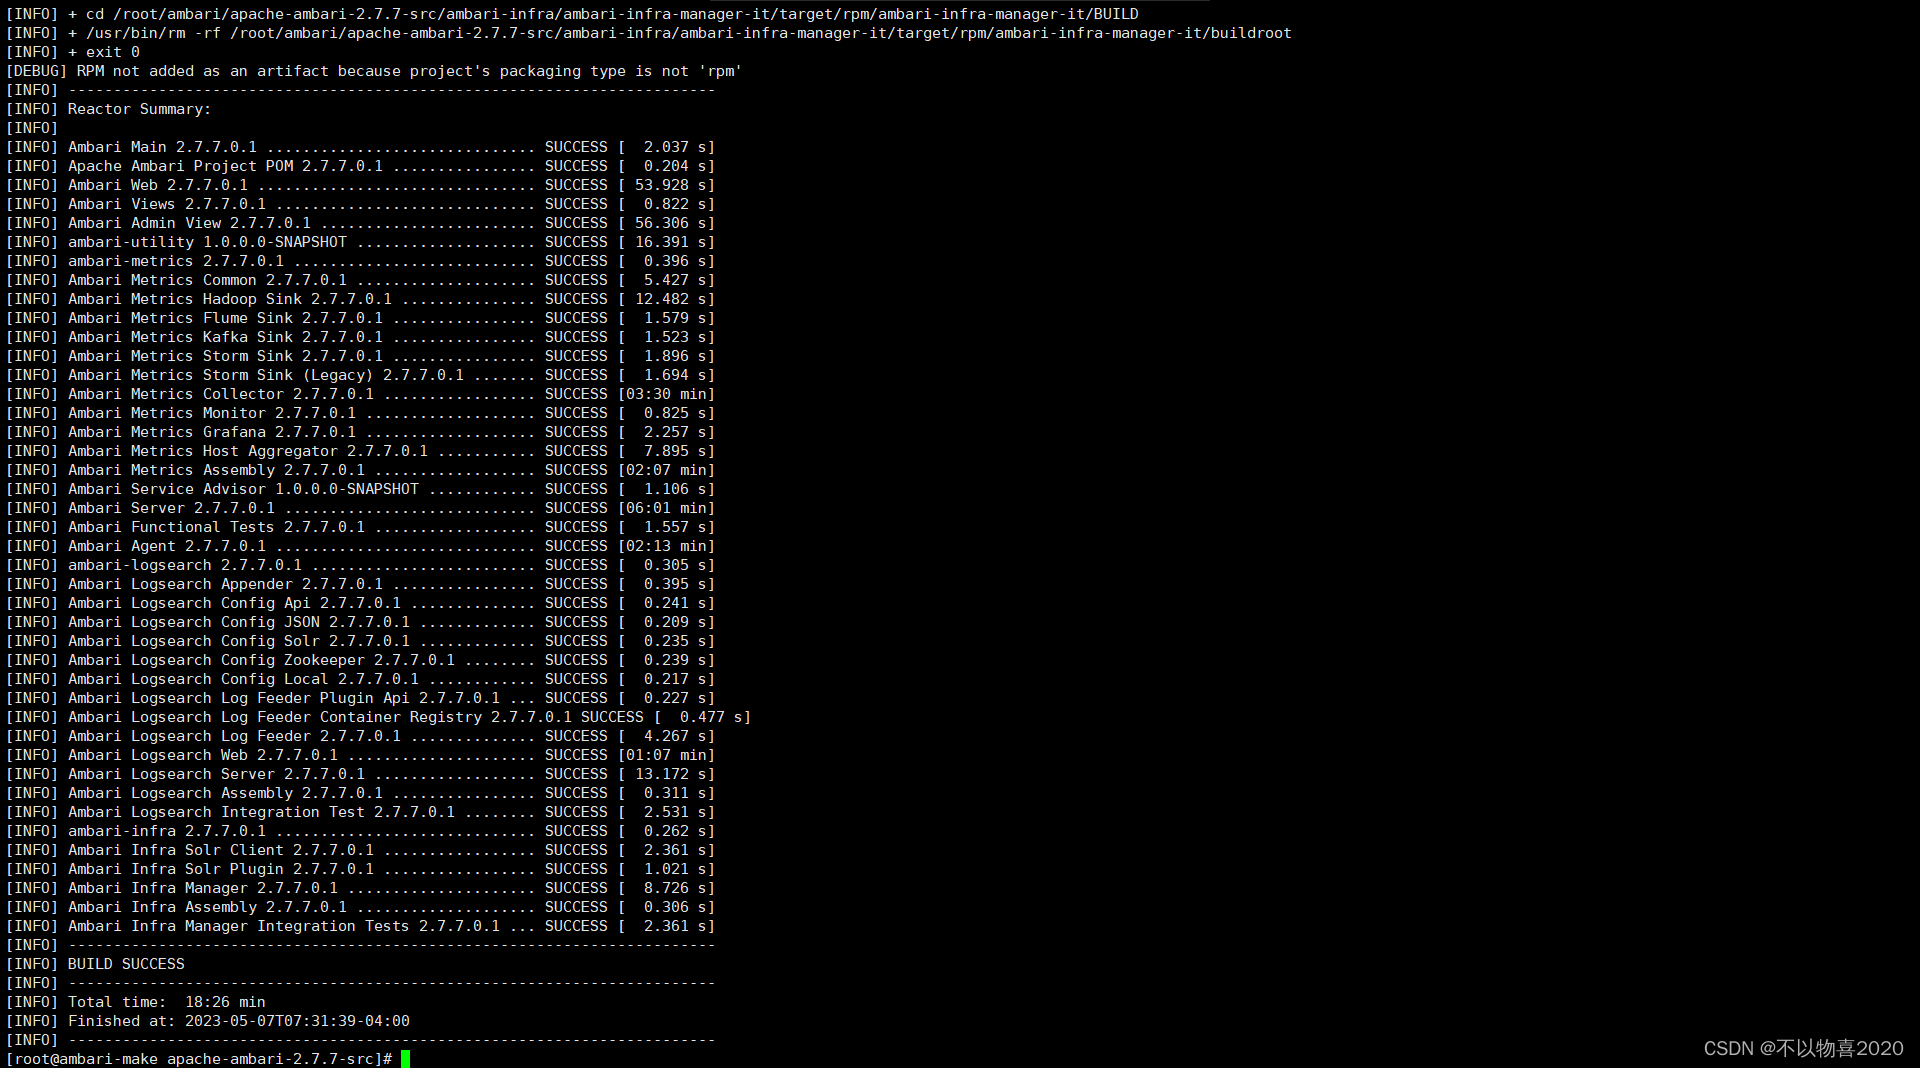
2.5 Comience a compilar todos los módulos
# 返回到ambari根目录
popd
mvn -B -X install rpm:rpm -DnewVersion=2.7.7.0.1 -DbuildNumber=5895e4ed6b30a2da8a90fee2403b6cab91d19972 -DskipTests -Dpython.ver="python >= 2.6" -Drat.skip=true
Se recomienda copiar todos los comandos anteriores, se requiere buildNumber, de lo contrario, cuando se instale el paquete rpm, se informará un error de buildNumber; -Drat.skip=true omitirá la verificación de la licencia.
compilar con éxito
3 instrucciones de compilación
El código fuente de ambari se divide en varios módulos. Cuando un módulo falla al compilar, queremos continuar compilando desde este módulo. ¿Cómo hacerlo?
Por ejemplo, si el módulo ambari-web se compila con un error, simplemente agregue: -rf :ambari-web al final del comando de compilación. El nombre del módulo que se muestra cuando se informa un error se mostrará en la última línea de salida de mvn.
4 Se informa un error durante el proceso de compilación
4.1 Informe de errores de vista de administrador
Contenido de error específico
[ERROR] Failed to execute goal com.github.eirslett:frontend-maven-plugin:1.4:yarn (yarn install) on project ambari-admin: Failed to run task: 'yarn install --ignore-engines --pure-lockfile' failed. org.apache.commons.exec.ExecuteException: Process exited with an error: 1 (Exit value: 1) -> [Help 1]
org.apache.maven.lifecycle.LifecycleExecutionException: Failed to execute goal com.github.eirslett:frontend-maven-plugin:1.4:yarn (yarn install) on project ambari-admin: Failed to run task
bower angular-bootstrap#0.11.0 ECMDERR Failed to execute "git ls-remote --tags --heads https://github.com/angular-ui/bootstrap-bower.git", exit code of #128 fatal: unable to access 'https://github.com/angular-ui/bootstrap-bower.git/': Empty reply from server
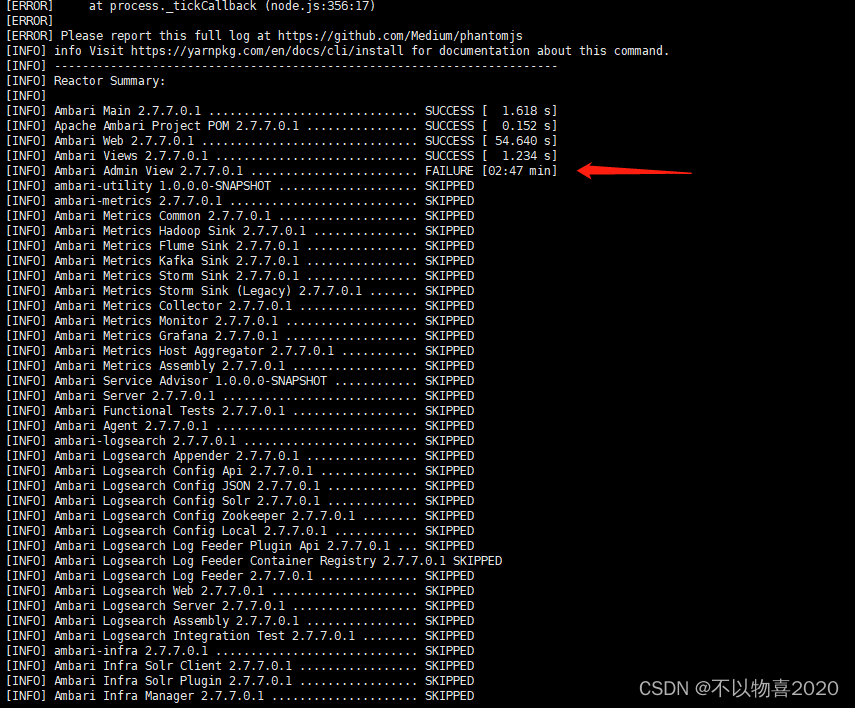
Esto se debe a que ambari necesita ir al directorio apache-ambari-2.7.7-src/ambari-admin/src/main/resources/ui/admin-web para descargar el contenido de bower_components al compilar ambari. No se puede descargar debido a la red. razones Puede descargarlo usted mismo y ponerlo en el directorio, y luego volver a compilar.
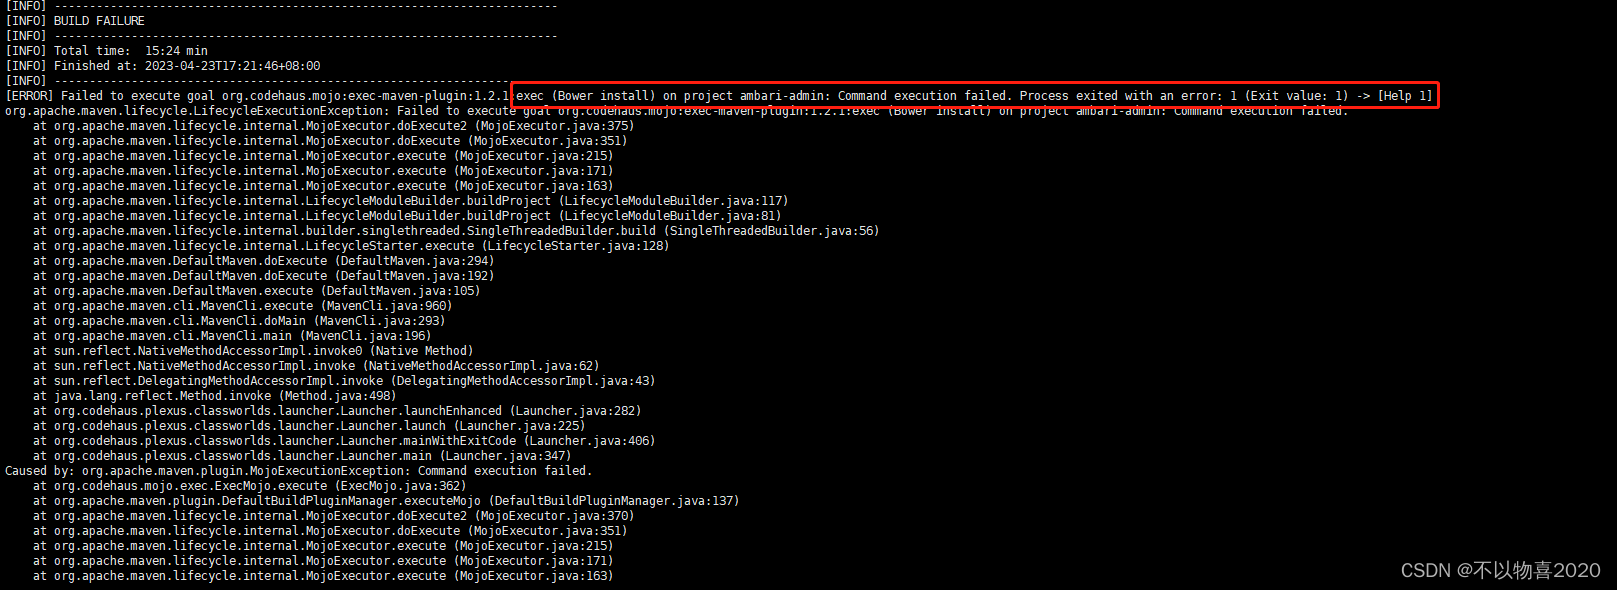
4.2 Ambari Metrics Collector informa de un error

Solución:
el método ①
necesita eliminar el módulo de métricas en el archivo pom.xml en el proyecto ambari, eliminarlo y volver a compilarlo.Método ②Descargue
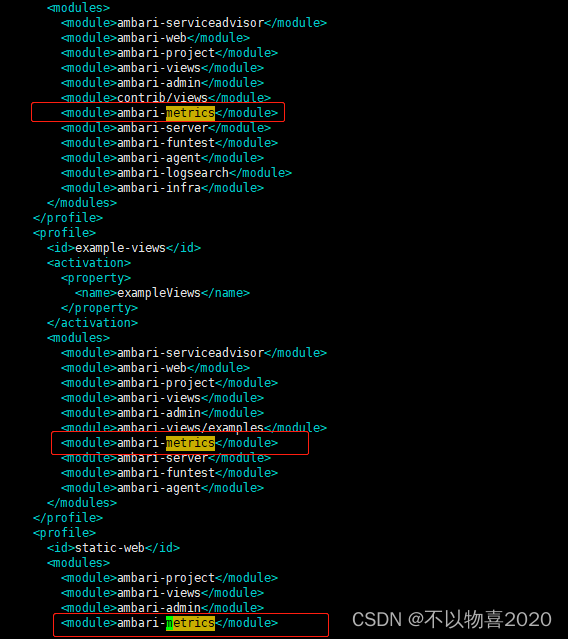
manualmente
los paquetes de dependencia necesarios para compilar las métricas y modifique el archivo de métricas pom.xml. Para métodos de modificación específicos, consulte 1.5.2
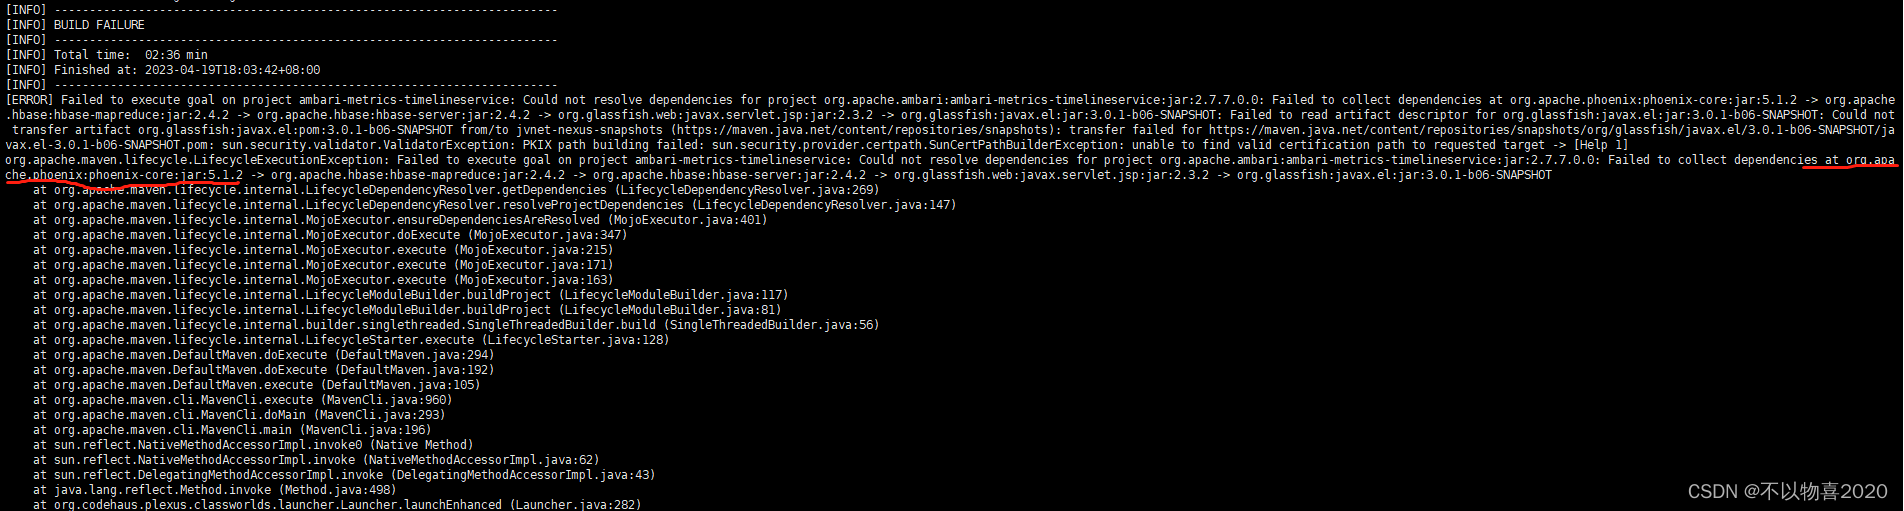
4.3 Falta el paquete phoenix-core
Ingrese al almacén de maven para descargar el paquete jar y coloque el paquete jar descargado en maven
4.4 rpm-build no está instalado
[ERROR] Failed to execute goal org.codehaus.mojo:rpm-maven-plugin:2.1.4:rpm (default-cli) on project ambari: Unable to build the RPM: Error while executing process. Cannot run program "rpmbuild" (in directory "/root/ambari/apache-ambari-2.7.7-src/target/rpm/ambari/SPECS"): error=2, No such file or directory -> [Help 1]
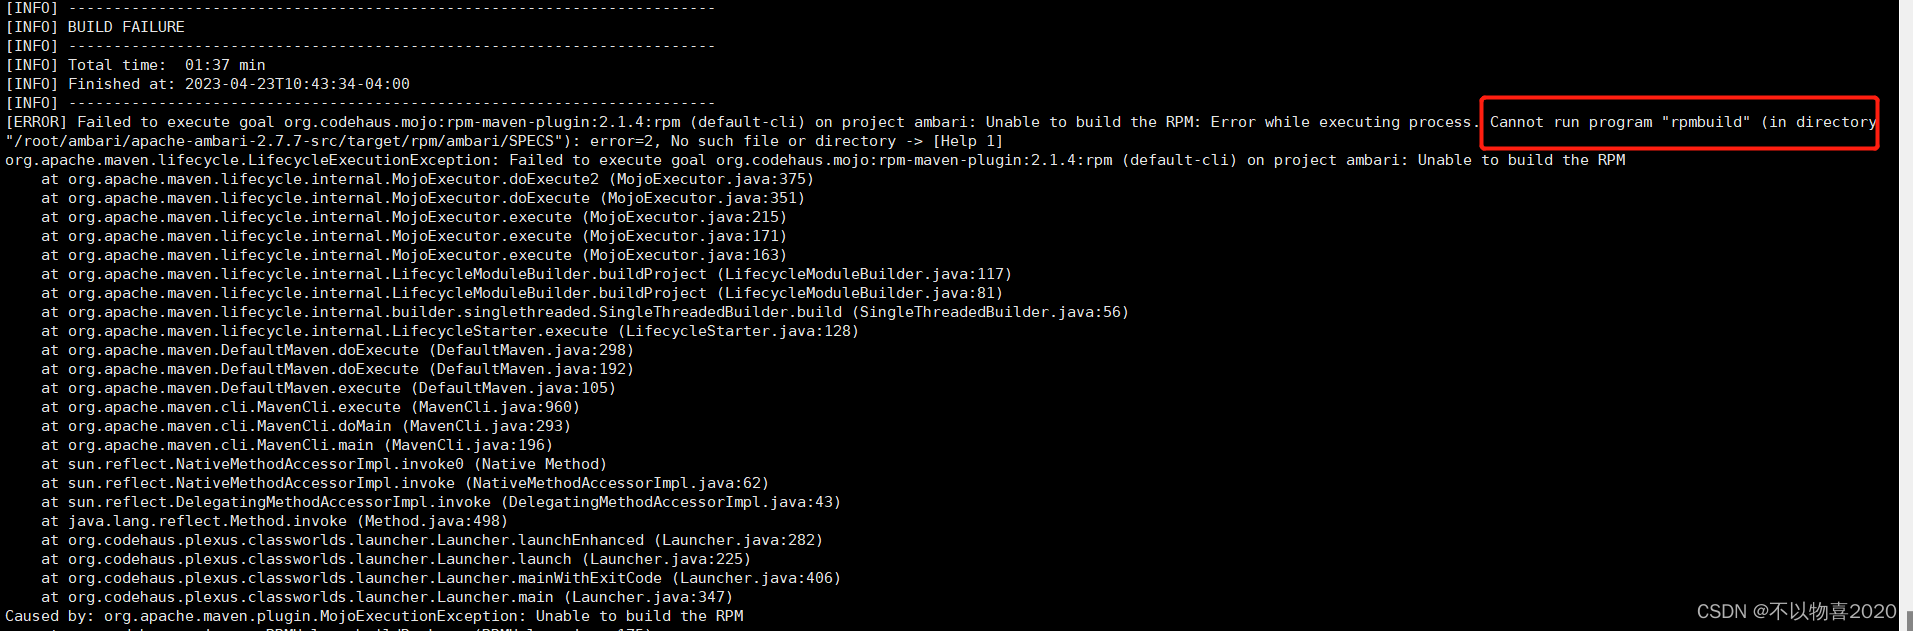
Solución: instalar rpm-build
yum install -y rpm-build
4.5 error de hilo
Could not extract the Yarn archive: Could not extract archive
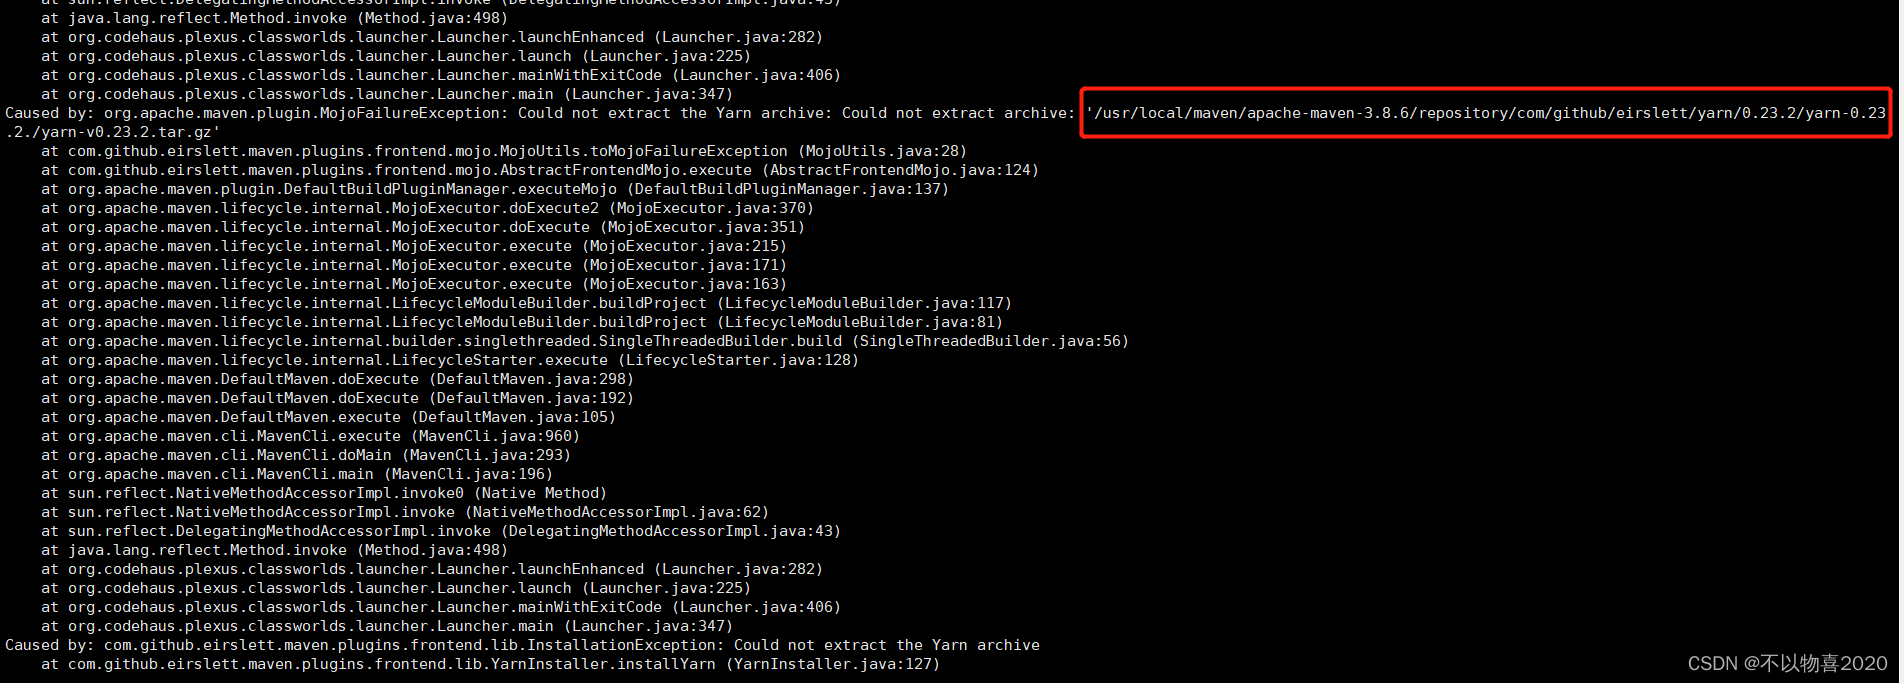
Solución:
① Descargue manualmente https://github.com/yarnpkg/yarn/releases/download/v0.23.2/yarn-v0.23.2.tar.gz
② Una vez completada la descarga, colóquela manualmente en com/github/eirslett en el directorio maven warehouse /yarn/0.23.2/yarn-0.23.2./
4.6 error de instalación de hilo
[ERROR] Failed to execute goal com.github.eirslett:frontend-maven-plugin:1.4:yarn (yarn install) on project ambari-web: Failed to run task: 'yarn install --ignore-engines --pure-lockfile' failed. org.apache.commons.exec.ExecuteException: Process exited with an error: 1 (Exit value: 1) -> [Help 1]
org.apache.maven.lifecycle.LifecycleExecutionException: Failed to execute goal com.github.eirslett:frontend-maven-plugin:1.4:yarn (yarn install) on project ambari-web: Failed to run task
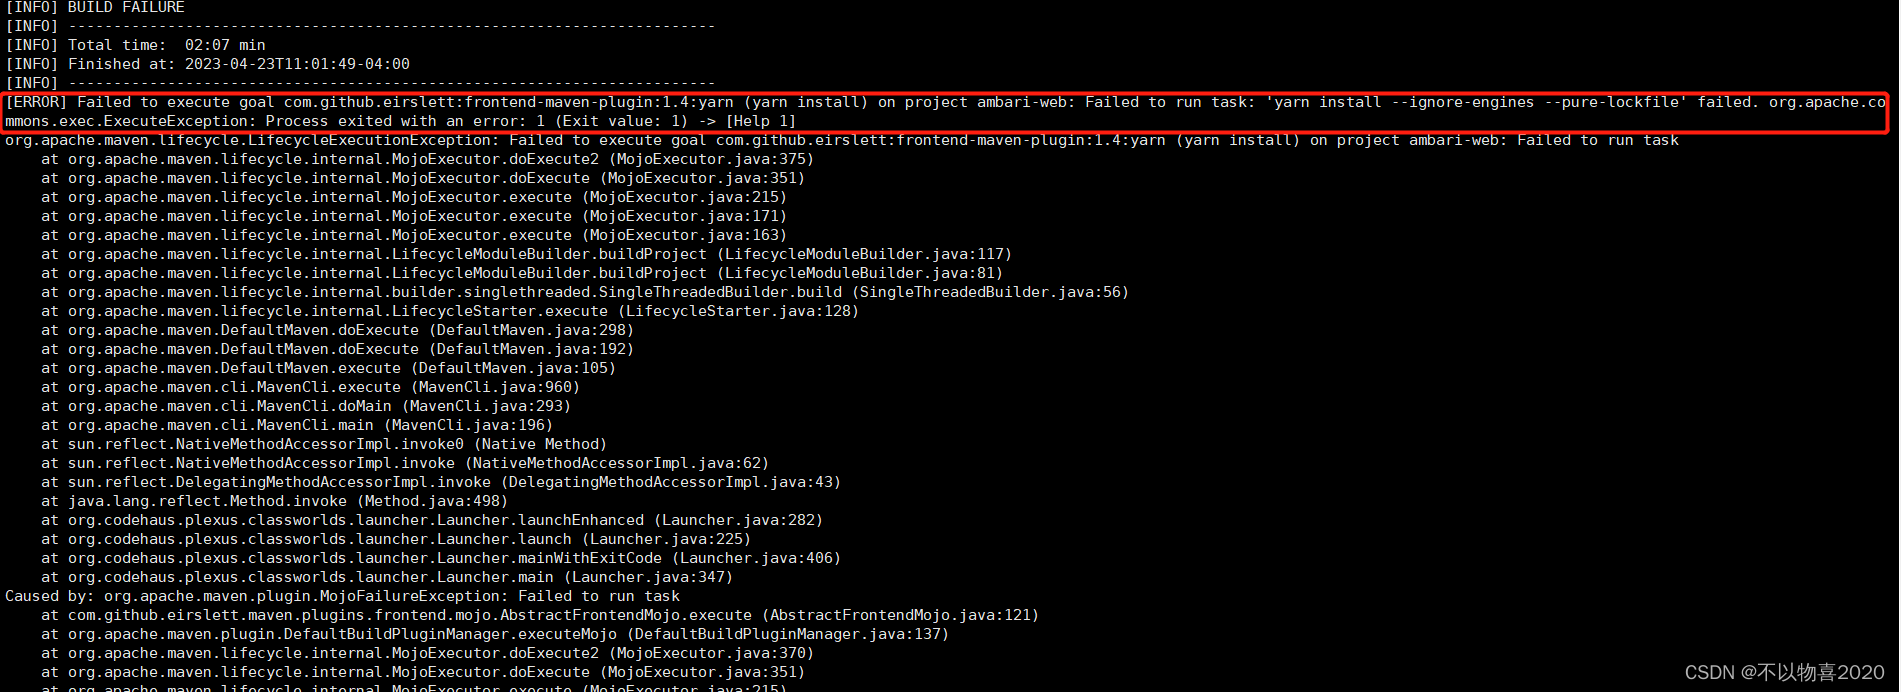
Solución: es más probable que ocurra este problema, principalmente porque nodejs cargará los paquetes de dependencia a través de yarn, y la solución es garantizar un buen entorno de red. Después de asegurarse de que el entorno de red está bien, elimine el archivo *.lock en el directorio de errores de compilación (elimine personalmente el directorio de destino) y vuelva a compilar
# find ~/.m2/repository/ -name "*.lastUpdated" -exec rm -rf {} \;
4.7 ambari-admin informa de error
[ERROR] Failed to execute goal org.codehaus.mojo:exec-maven-plugin:1.2.1:exec (Bower install) on project ambari-admin: Command execution failed. Process exited with an error: 1 (Exit value: 1) -> [Help 1]
org.apache.maven.lifecycle.LifecycleExecutionException: Failed to execute goal org.codehaus.mojo:exec-maven-plugin:1.2.1:exec (Bower install) on project ambari-admin: Command execution failed.
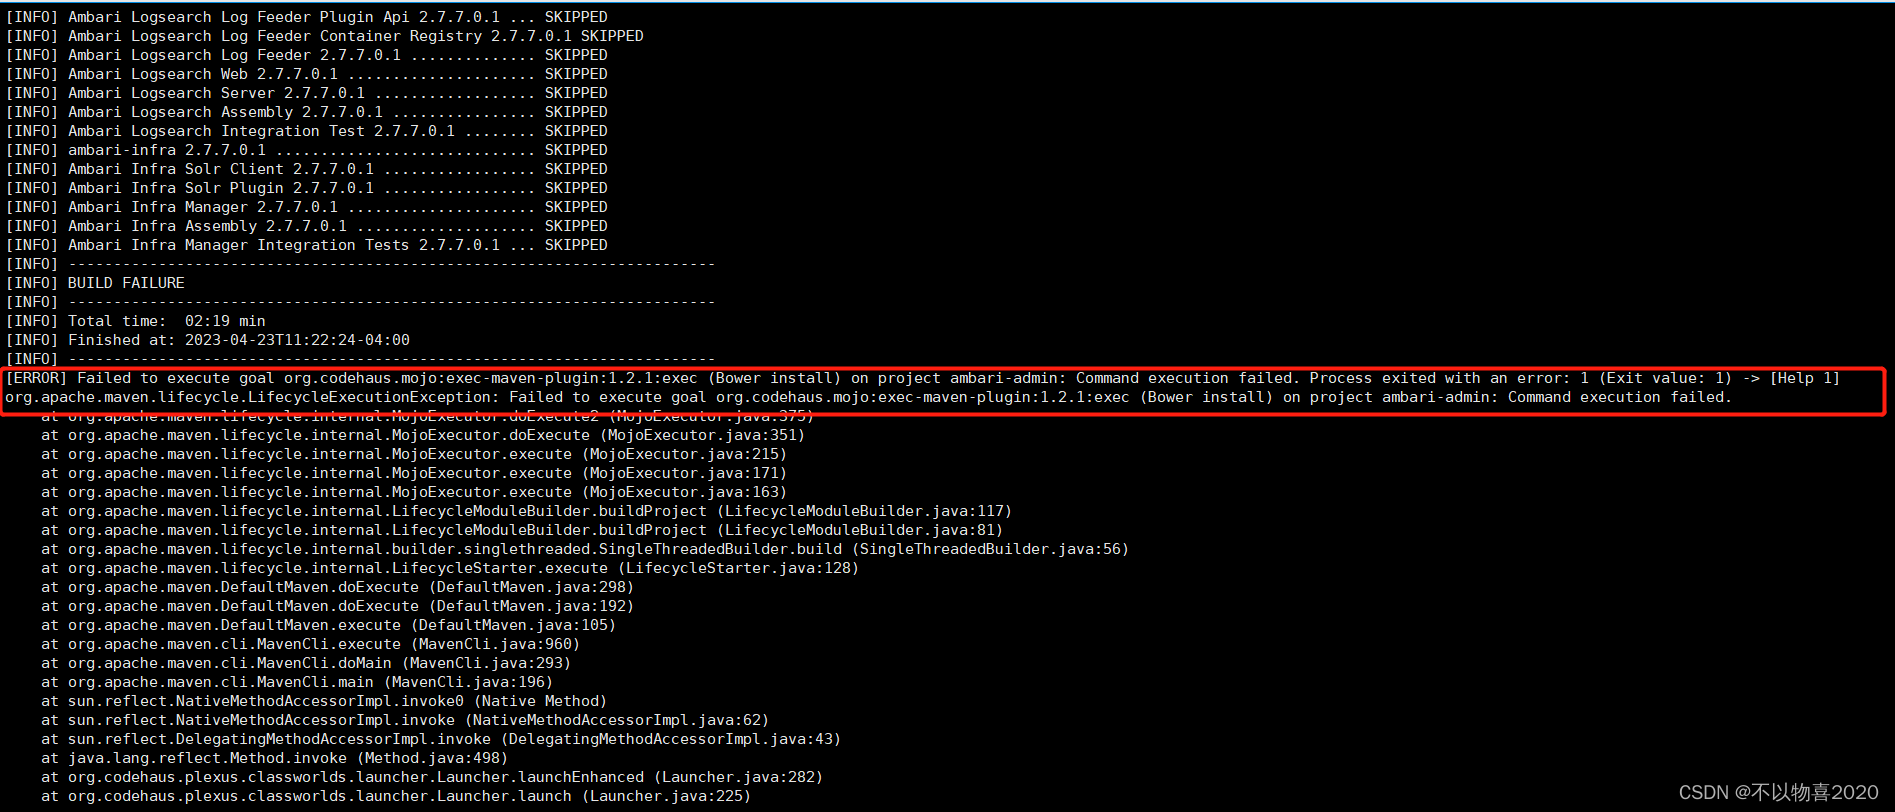
Solución: cd ambari-admin/src/main/resources/ui/admin-web directory, edite .bowerrc, el contenido modificado es el siguiente:
{


    "directory": "app/bower_components",
    "allow_root": true
}
4.8 hilo informa de un error
Could not download Yarn: Could not download https://github.com/yarnpkg/yarn/releases/download/v1.1.0/yarn-v1.1.0.tar.gz: Connect to objects.githubusercontent.com:443 [objects.githubusercontent.com/127.0.0.1, objects.githubusercontent.com/0:0:0:0:0:0:0:1] failed: Connection refused (Connection refused) -> [Help 1]
No se puede acceder al puerto 443 de github
# 下载
https://github.com/yarnpkg/yarn/releases/download/v1.1.0/yarn-v1.1.0.tar.gz
# 放入maven仓库
repository/com/github/eirslett/yarn/1.1.0/yarn-1.1.0.tar.gz
5 Acuerdo de paquete de compilación
Ambari view, ambari-metrics, ambari-logsearch, ambari-solr se compilan correctamente. Después de compilar todos los códigos fuente de Ambari, debemos compilar los paquetes compilados de cada módulo de Ambari. Tomando centos7 como ejemplo, necesitamos resumir los paquetes rpm compilados
5.1 Fusionar paquetes rpm
nuevo directorio
mkdir ambari-2.7.7
Resumir todos los paquetes rpm y generar fuente yum
cp -r ./ambari-server/target/rpm/ambari-server/RPMS/x86_64/ambari-server-2.7.7.0-1.x86_64.rpm ../ambari-2.7.7/
cp -r ./ambari-agent/target/rpm/ambari-agent/RPMS/x86_64/ambari-agent-2.7.7.0-1.x86_64.rpm  ../ambari-2.7.7/

cp -r ./ambari-infra/ambari-infra-assembly/target/rpm/ambari-infra-solr/RPMS/noarch/ambari-infra-solr-2.7.7.0-1.noarch.rpm  ../ambari-2.7.7/
cp -r ./ambari-infra/ambari-infra-assembly/target/rpm/ambari-infra-solr-client/RPMS/noarch/ambari-infra-solr-client-2.7.7.0-1.noarch.rpm ../ambari-2.7.7/
cp -r ./ambari-infra/ambari-infra-assembly/target/rpm/ambari-infra-manager/RPMS/noarch/ambari-infra-manager-2.7.7.0-1.noarch.rpm ../ambari-2.7.7/
cp -r ./ambari-logsearch/ambari-logsearch-assembly/target/rpm/ambari-logsearch-portal/RPMS/noarch/ambari-logsearch-portal-2.7.7.0-1.noarch.rpm ../ambari-2.7.7/
cp -r ./ambari-logsearch/ambari-logsearch-assembly/target/rpm/ambari-logsearch-logfeeder/RPMS/noarch/ambari-logsearch-logfeeder-2.7.7.0-1.noarch.rpm ../ambari-2.7.7/

cp -r ./ambari-metrics/ambari-metrics-assembly/target/rpm/ambari-metrics-collector/RPMS/x86_64/
cp -r ./ambari-metrics/ambari-metrics-assembly/target/rpm/ambari-metrics-hadoop-sink/RPMS/x86_64/
cp -r ./ambari-metrics/ambari-metrics-assembly/target/rpm/ambari-metrics-grafana/RPMS/x86_64/
cp -r ./ambari-metrics/ambari-metrics-assembly/target/rpm/ambari-metrics-monitor/RPMS/x86_64/
cp -r ./ambari-metrics/ambari-metrics-common/target/rpm/ambari-metrics-common/RPMS/noarch/
crear yum fuente
createrepo ./
Una vez completada la ejecución, se generará la carpeta repodata.

Nota: si no hay tal comando en el informe, simplemente instale createrepo
5.2 Comprimir el archivo de instalación de ambari
tar -zcvf ambari-2.7.7.tar.gz ambari-2.7.7/
Una vez completada la compresión,

el paquete ambari-2.7.7.tar.gz generado de acuerdo con la compilación se puede usar para instalar e implementar el clúster amabri