table of Contents
Hadoop installation
Upload Package.
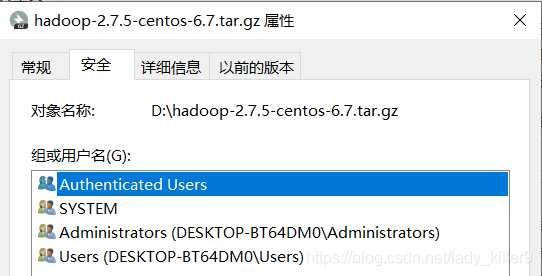
In hadoop user, a new apps directory, enter the directory. Can be found via the properties file in the full path to the Security tab, and copy, and the installation jdk, the use of SecureCRT sftp upload.
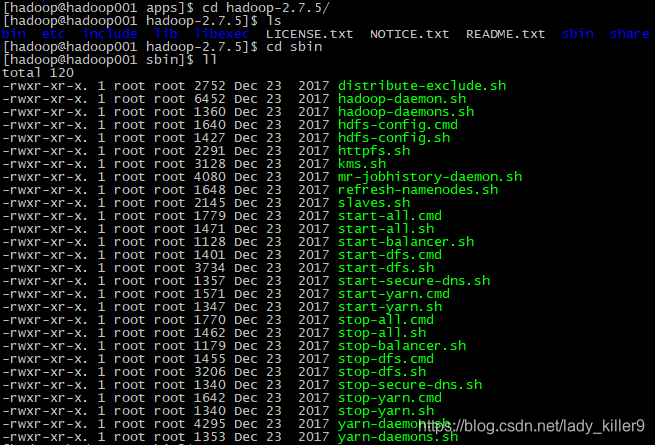
Unzip in the directory can be.

Hadoop can see the contents inside, there are some scripts in sbin directory, it will be used later.
- vim ~/.bashrc
- In the last plane to join the following statement:
export HADOOP_HOME=/home/hadoop/apps/hadoop-2.7.5
export PATH=$PATH:$HADOOP_HOME/bin:$HADOOP_HOME/sbin - source ~ / .bashrc (environment variables to the new configuration to take effect)

At this point, the master virtual machine has been set up, the next will be cloned and overall layout.
Cluster layout
| Virtual machine name | h1 | h2 | h3 |
|---|---|---|---|
| HostName | hadoop1 | hadoop2 | hadoop3 |
| ip | 192.168.74.121 | 192.168.74.122 | 192.168.74.123 |
| NameNode | √ | × | × |
| SecondryNameNode | × | √ | × |
| ResourceManager | × | × | √ |
| DataNode | √ | √ | √ |
| NodeManager | √ | √ | √ |
clone
Run the memory is limited, it sets 3-4, three clones here. Close Master virtual machine to the first example, the master virtual machine on the right, select Manage, and select Clone.
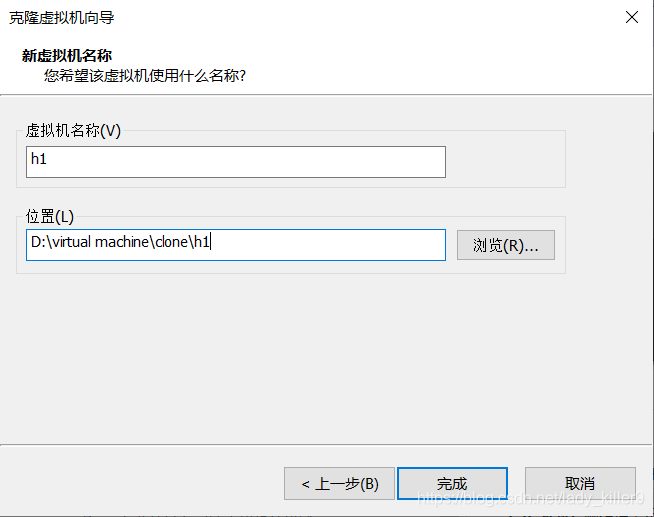
Two cloned sequentially Further, named h2, h3.
Internet connection
vi /etc/udev/rules.d/70-persistent-net.rules, to h1, for example, where the eth0 line comment or deleted, eth0 eth1 changed, the other two the same.


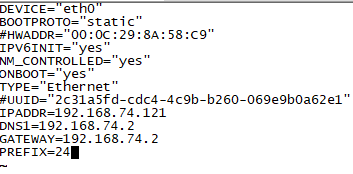
sudo vi /etc/sysconfig/network-scripts/ifcfg-eth0,将HWADDR和UUID所在行删除或注释掉,修改IPADDR。
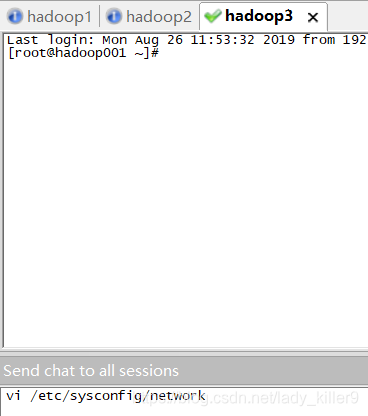
sudo vi /etc/sysconfig/network,修改hostname,SecureCRT下方右键,可以对多个会话一起发命令,比较方便,三台虚拟机一起修改。
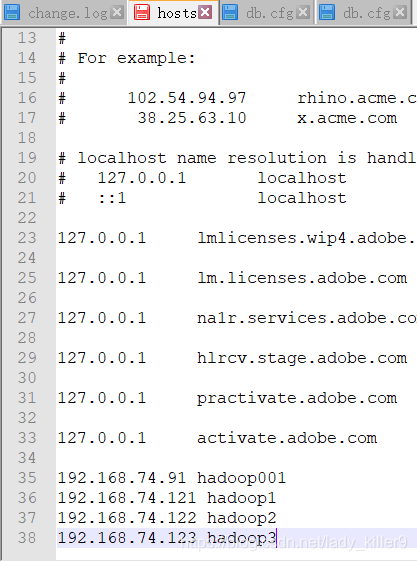
sudo vi /etc/hosts,修改主机映射,保存后,使用init 6命令重启网卡。
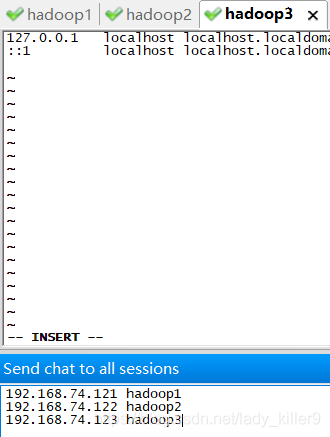
也可以添加本机的主机映射,在SecureCRT和浏览器地址用主机名代替,更加方便。
配置免密登录
为什么要配置免密登录?

未配置免密登录前,在hadoop1登录hadoop2需要输入密码,这对以后的工作会产生很多麻烦。
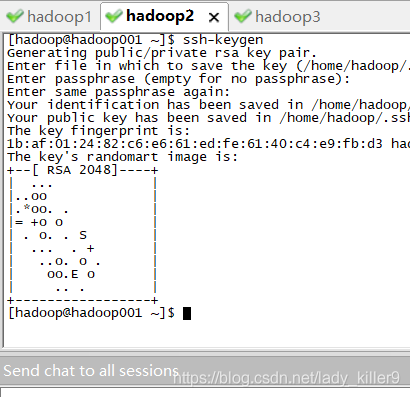
在 hadoop 用户下,输入命令 ssh-keygen ,连按 3 次回车,之后你会发现,在/home/hadoop/.ssh 目录下生成了一对密钥。每台虚拟就都需要,使用发送所有对话框,输入一次就好,比较方便。
再分别输入ssh-copy-id hadoop1、ssh-copy-id hadoop2、ssh-copy-id hadoop3。每次需要输入yes及密码。这样就会在每台虚拟机的.ssh/authorized_keys中存在三台虚拟机的密钥。

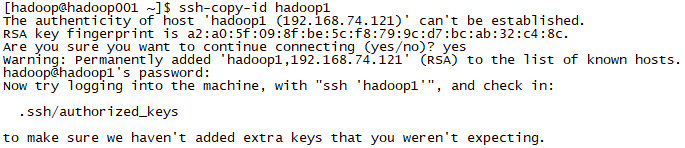
可以在任一台虚拟机,使用ssh 主机名的方式登录其他虚拟机,使用exit退出。
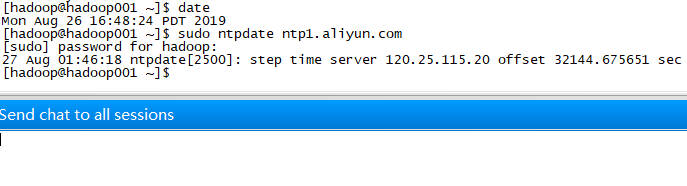
集群配置前先同步时间
- date(查看时间)
- sudo ntpdate ntp1.aliyun.com(与阿里云的同步)
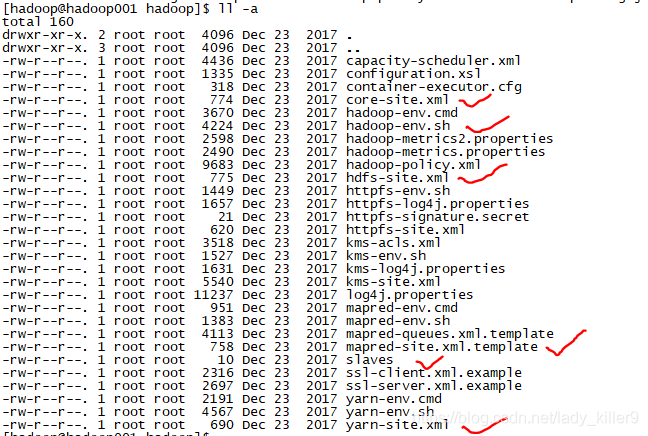
集群配置
需要配置的文件,如图中的画红勾的那些。你可以照着Hadoop官网所给提示来敲,也可以从我的百度网盘下载,直接上传覆盖(上传前记得修改文件为自己的路径、用户名等)。
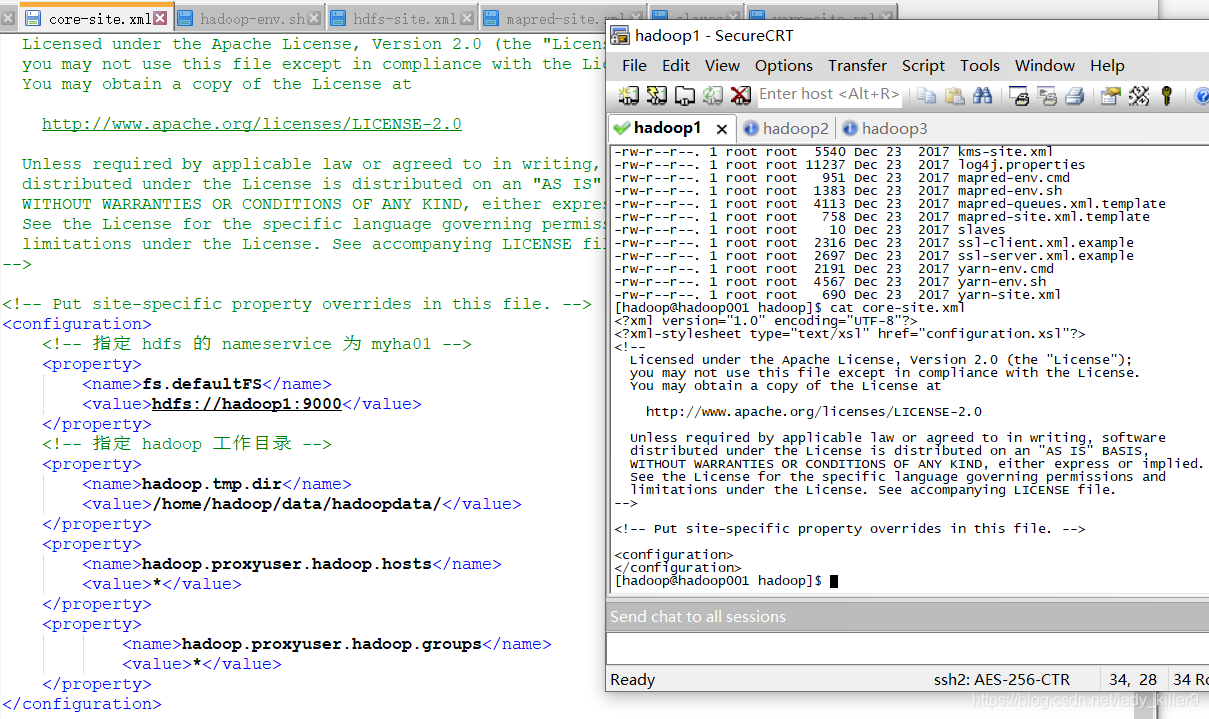
core-site.xml的配置
指定了工作目录等,读者根据自己的用户名等进行修改。
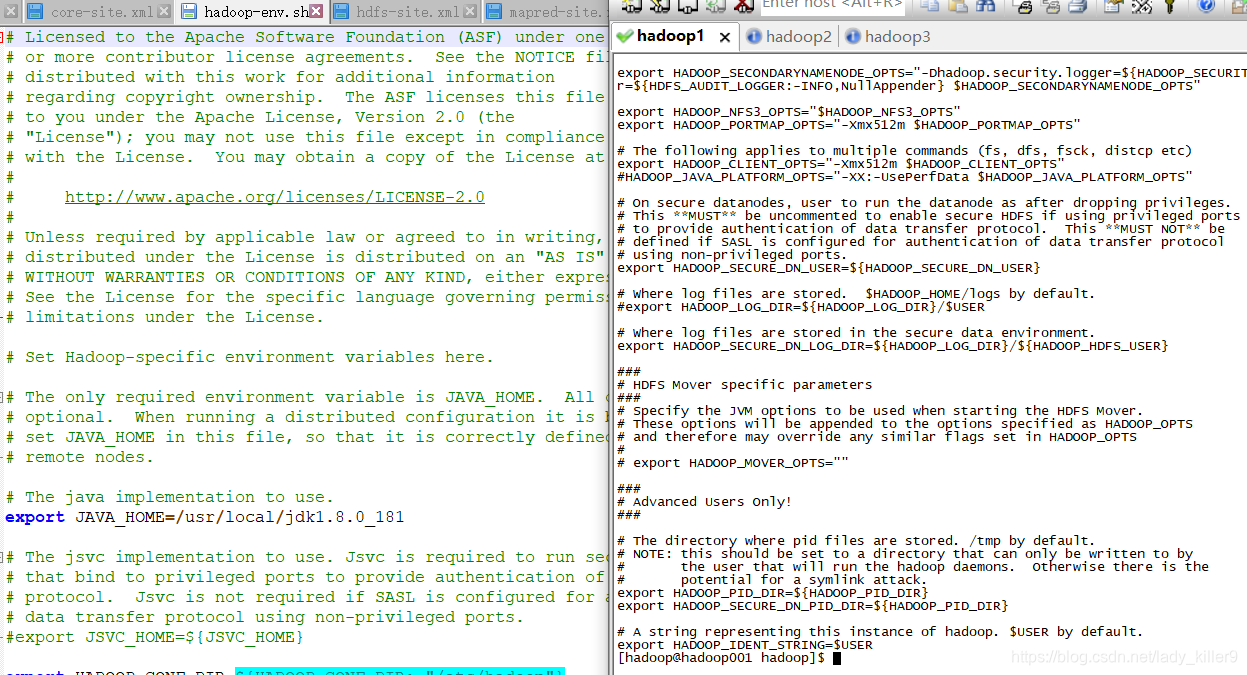
hadoop-env.sh的配置
指定了jdk路径,读者根据自己的进行修改。
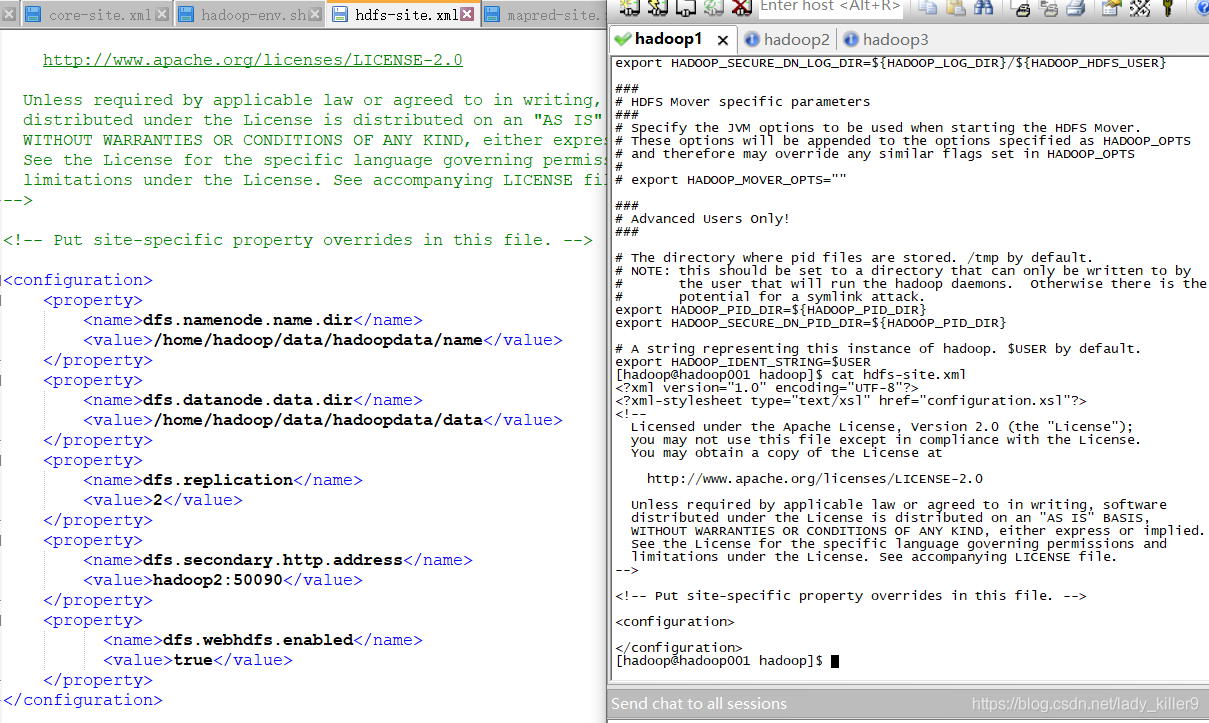
hdf-site.xml的配置
指令了一些数据目录等,读者根据自己的进行修改。
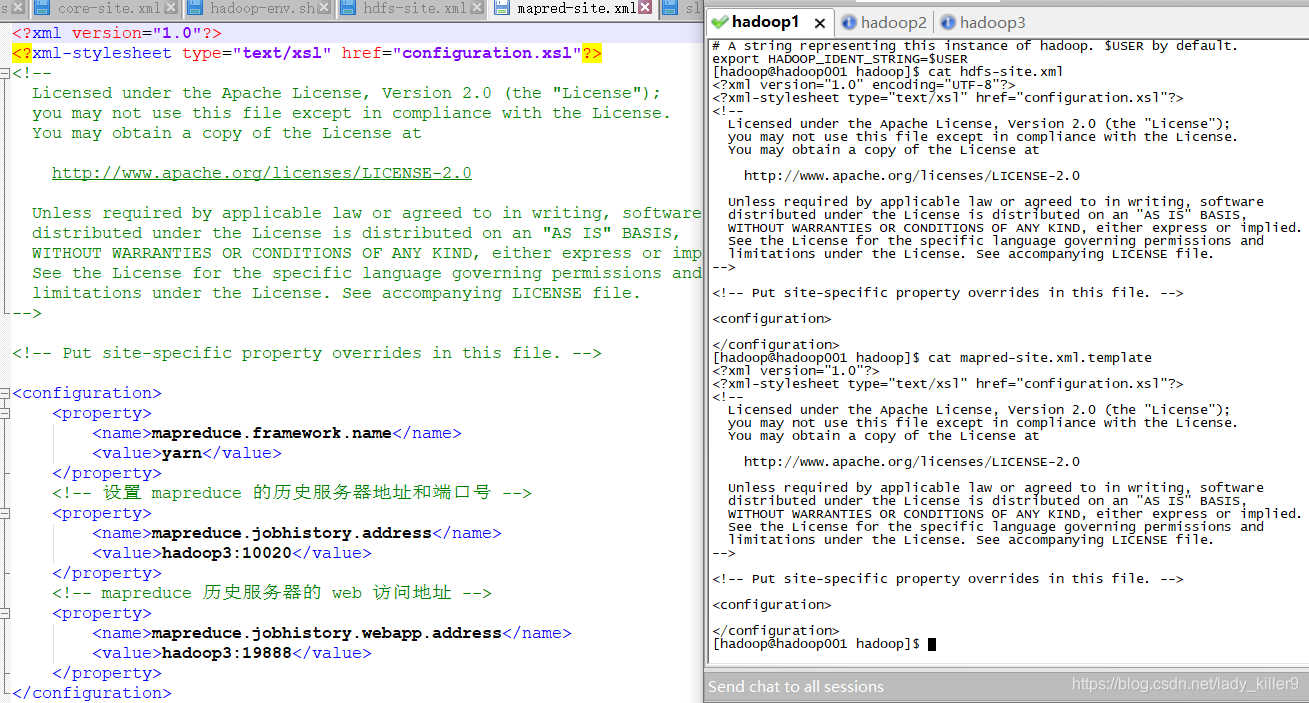
mapred-site.xml的配置
hadoop自带的是.template结尾的,如果你不是上传的我的文件,是自己在vi/vim编辑器下编辑的,记得改后缀。
slaves的配置
填入主机名即可,读者根据自己的进行修改。

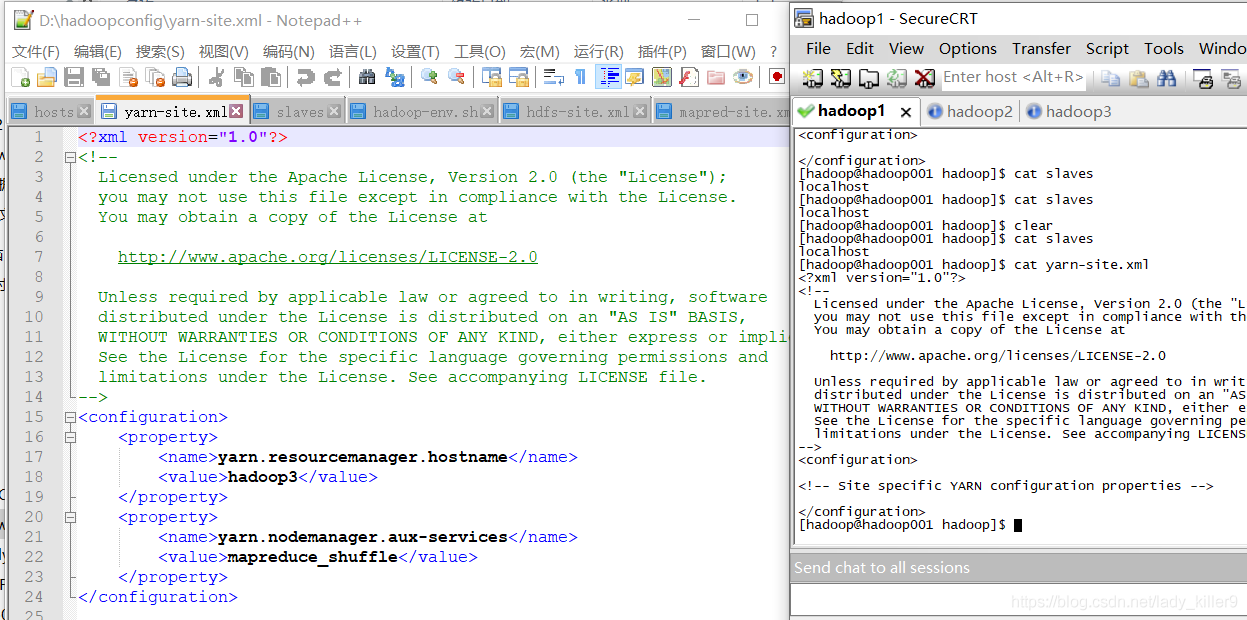
yarn-site.xml的配置
添加了yarn结点的主机名等,读者根据自己的进行修改。
- cd ~/apps/hadoop-2.7.5/etc/hadoop/
- put D:\hadoopconfig\* (\*是上传所有文件,这样就会覆盖掉了)
使用hadoop namenode -format,初始化namenode。

start-dfs.sh(任意结点启动dfs均可)、使用stop-dfs.sh关闭。

start-yarn.sh(只能在YARN的主节点启动,否则ResourceManager进程无法启动,YARN主节点设置的为hadoop3 )、使用stop-yarn.sh关闭。

验证集群
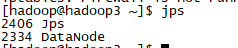
1、使用jps
dfs启动后


yarn启动后

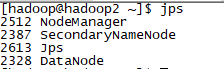
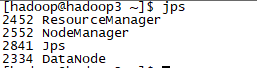
可以看到,每台虚拟机作为什么结点,如同规划的一样。
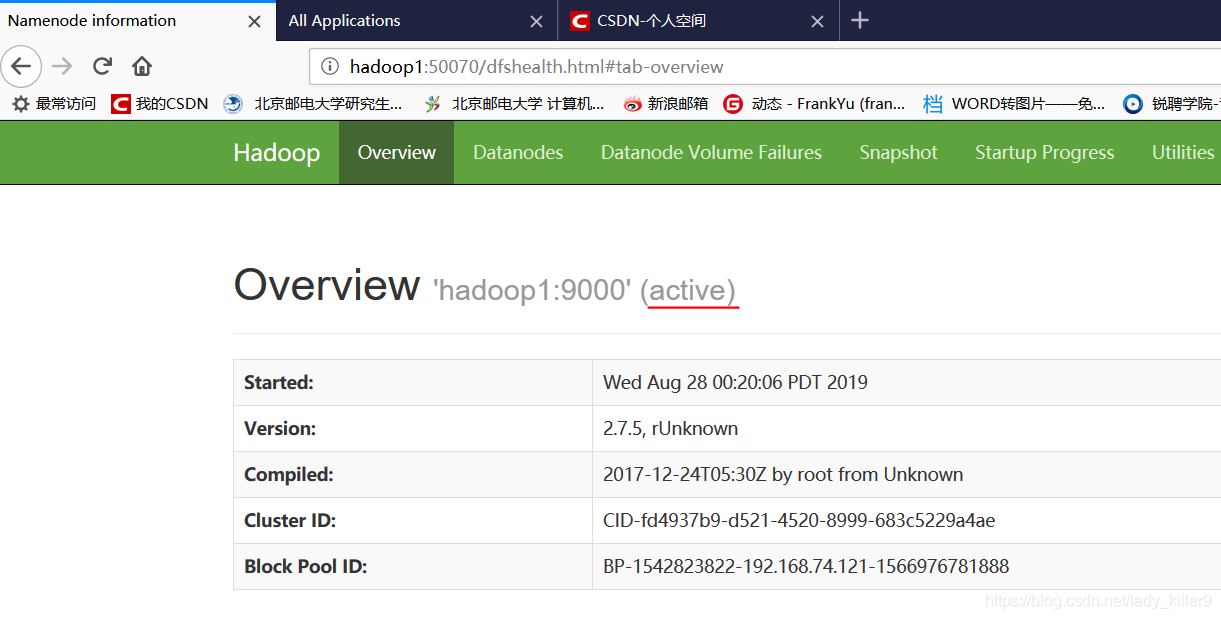
2、web验证
可以在本机的hosts里面也添加映射,如同上篇文章的hadoop001一样,这样在SecureCRT以及浏览器地址栏用主机名代替ip即可,比较方便。输入hadoop1:50070,即可打开如下界面,可以看到激活了。
输入hadoop3:8088即可查看到如下界面。

总结
今天主要学习了以下内容
安装hadoop并配置
克隆虚拟机,搭建集群
配置免密登录
配置集群
网盘链接:
链接:https://pan.baidu.com/s/1yIHOlRPpcGYkKTYM4-64bA
提取码:ims7
更多大数据知识请查看:大数据自学目录
有问题请下方评论,转载请注明出处,并附有原文链接,谢谢!如有侵权,请及时联系。
