EDITORIAL:
I white Kenichi, just beginning to learn the depth of learning, his first experiment conclude, read a lot of Daniel's blog, in the following programs also taken a lot of big cattle blog. In the beginning of entry to the study, direct download programming data set, but then you might need to manually build data sets. So, if you reference a number of blog, try to manually constructed from the data set - to build Resnet34 network - a whole process of validation - training. Will own experiment are reported below. This article focuses on building their own data sets and neural networks to build part
I Caishuxueqian, just getting started, there are flaws in the wrong place implore you criticism.
Chapter One:
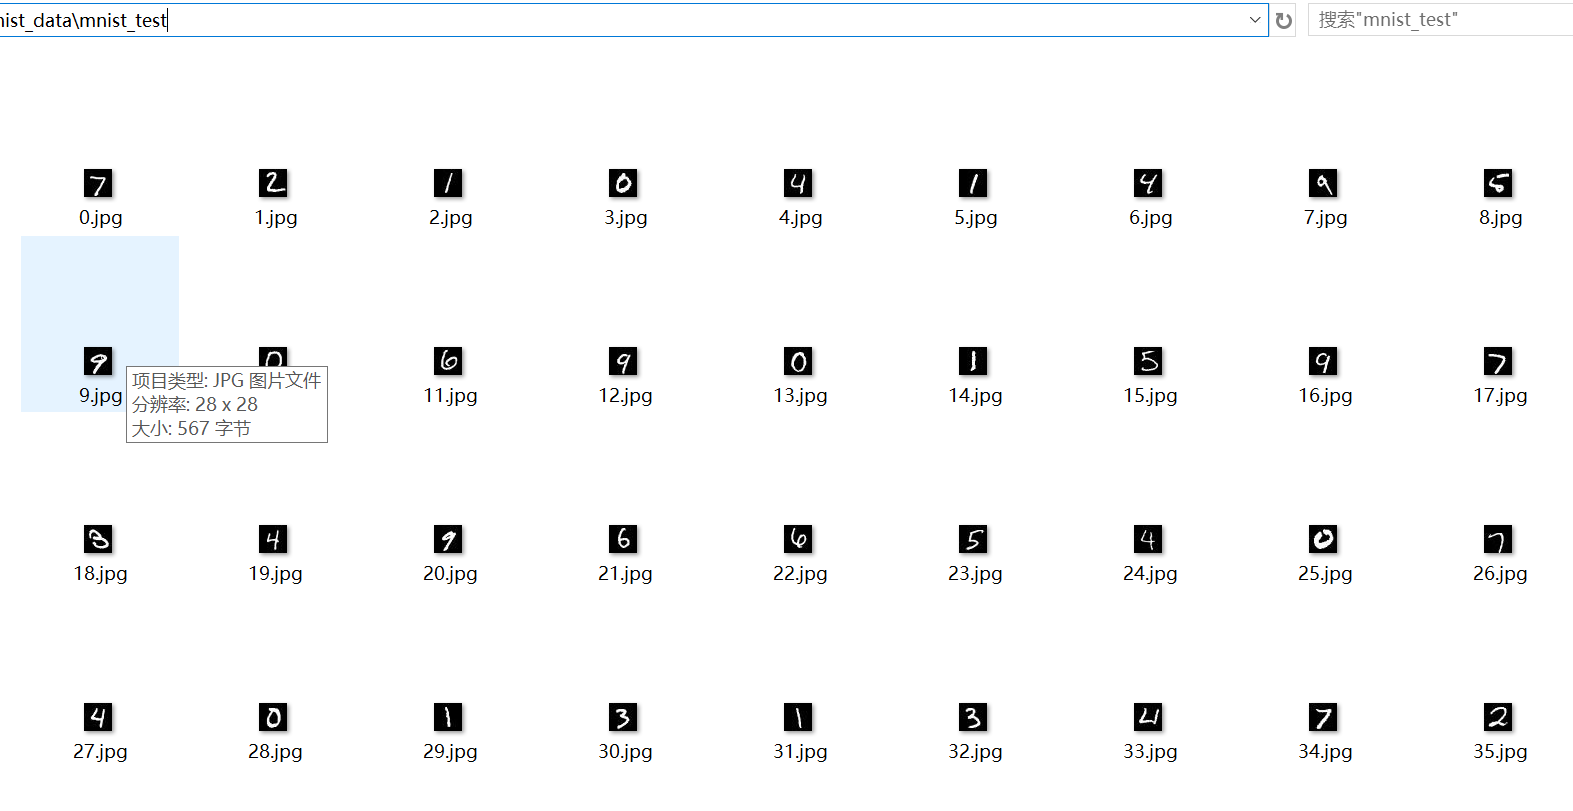
Mnist first need to build their own data set, of course, can download from the Internet. Here, for a bit because I want to try to construct their own data set, man of few words said, directly attached to the code
. 1  # ! / Usr / bin / the env Python 3.6
2  # _ * _ Coding: UTF-_ * _. 8
. 3  # @time: 2019/11/7 9:10
. 4  # @author: White Control Engineering
. 5  # @FileName: Mnist produce their own data sets .py
. 6
. 7  # @Software: PyCharm
. 8  Import Torch
 . 9  Import torchvision
 10  from skimage Import IO
 . 11  # Import OS
12 is mnist_train = torchvision.datasets.MNIST ( ' ./make_mnistdata ' , Train = True, downloads = True) #First download data set, and data is divided into a training set and data set
13 is mnist_test = torchvision.datasets.MNIST ( ' ./make_mnistdata ' , Train = False, downloads = True)
 14  Print ( ' testset -: ' , len (mnist_test))
 15  # txt_path = "G: /Mnist_Recognition/mnist_label.txt"
16  # IF Not os.path.exists (txt_path):
. 17  #      os.makdirs (txt_path)
18 is F = Open ( " ./mnist_test.txt " , ' W ' ) # generated .txt file under the specified path
. 19  for I, (IMG, label) inthe enumerate (mnist_test):
 20 is      img_path = " ./mnist_test/ " + STR (I) + " .jpg "
21 is      io.imsave (img_path, IMG) # picture image data to specify the presence .jpg format path
22 is      img_paths = img_path STR + (I) + " .jpg "
23 is      f.write (img_path + '  ' + STR (label) + ' \ n- ' ) # path are combined into a string tag presence .txt file
24 f.close () # close the file
Note that you should run before the new code in the root directory of a mnist_train folder used to store the training set of images, the new mnist_test folder used to store test set of pictures, run this code and then generates a mnist_test.txt mnist_train.txt file for storing each character string, the string composed by the path of each image corresponding to the label, so as to what to do with, see below. Posted about the results of running the above code

Chapter two:
The following will be used .txt file generated in the previous chapter, the first on the code
 1 #!/usr/bin/env python 3.6
 2 #_*_coding:utf-8 _*_
 3 #@Time    :2019/11/7 11:38
 4 #@Author  :控制工程小白
 5 #@FileName: My_dataset.py
 6
 7 #@Software: PyCharm
 8 from PIL import Image
 9 import torch
10 from torch.utils import data
11 import torchvision.transforms as transforms
12 from torch.utils.data import DataLoader
13 importAS PLT matplotlib.pyplot
 14  class myDataSet (data.Dataset):
 15      DEF  the __init__ (Self, datatxt, Transform = None, target_transform = None):
 16          Super (myDataSet, Self). the __init__ ()
 . 17          FH = Open (datatxt, ' R & lt ' ) # reading the tag file .txt
18 is          imgs = [] # temporarily define an empty list
. 19          for Line in FH:
 20 is              line.strip ( ' \ n- ' ) # out end of the string of blanks, tabs
21              words = line.split ()# The name of the tag out of the separation path
22 is              imgs.append ((words [0], int (words [. 1]))) # Word [0] indicates image path name, word [1] represents the digital image corresponding to the label
23 is          self.imgs = imgs
 24          self.transform = Transform
 25          self.target_transform = target_transform
 26 is          # self.loader = Loader
27      DEF  the __getitem__ (Self, index):
 28          Fn, self.imgs label = [index] # Fn picture represented path
29          IMG Image.open = (Fn) # .convert ( 'RGB'), where the time required to convert RGB image optic network structure set, reads the file path name, i.e. open the picture
30          IF self.transformIS  Not None:
 31 is              IMG = self.transform (IMG)
 32          return IMG, label # returns an image tag
33 is      DEF  the __len__ (Self):
 34 is          return len (self.imgs)
Construct a class code, for obtaining the data set just created, is thought to read a .txt file just created, the path name where the picture image corresponding to the label separating, and according to the path name of the image obtaining the data set.
third chapter:
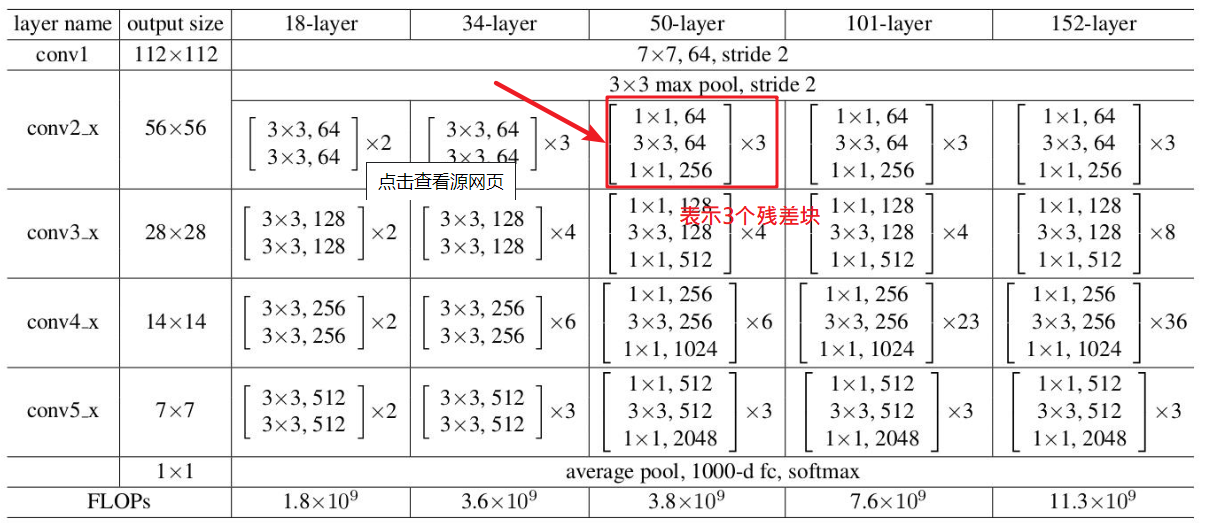
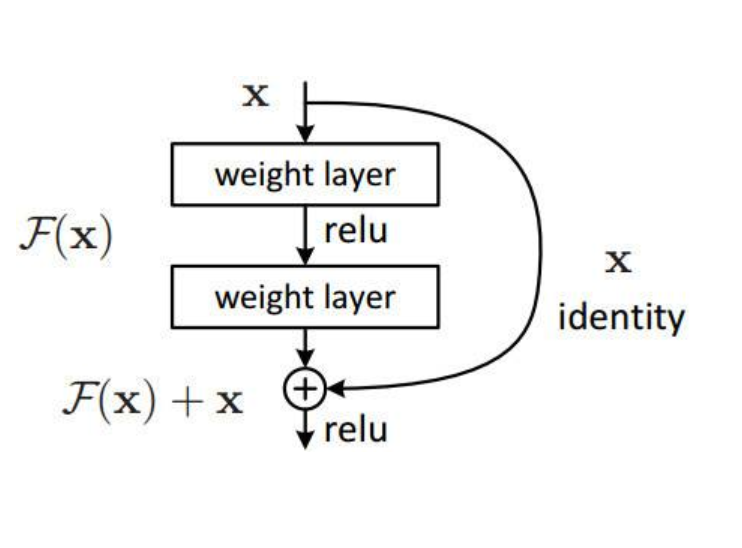
Build a neural network, with the development of deep learning, there have been a variety of neural networks, in general, neural networks, the more the better, but too dimensional neural network, it can cause neural network overfitting, so developers developed a residual neural network Resnet, which is faster by a number of residuals, each block containing a residual hop connections, to prevent over-fitting, so as to affect the network can not be deeper while performance overfitting .
The following code is directly attached Resnet34
#!/usr/bin/env python 3.6
#_*_coding:utf-8 _*_
#@Time    :2019/11/7 15:44
#@Author  :hujinzhou
#@FileName: neural_network4.py

#@Software: PyCharm

import torch.nn as nn
class Reslock(nn.Module):
     def __init__(self, in_channels, out_channels, stride=1):
         super(Reslock, self).__init__()


         self.conv1 = nn.Conv2d(in_channels, out_channels, kernel_size=3, stride=stride, padding=1)
         self.bn1 = nn.BatchNorm2d(out_channels)
         self.relu = nn.ReLU(inplace=True)


         self.conv2 = nn.Conv2d(out_channels, out_channels, kernel_size=3, stride=1, padding=1)
         self.bn2 = nn.BatchNorm2d(out_channels)

         if in_channels != out_channels:
            self.downsample = nn.Sequential(
                 nn.Conv2d(in_channels, out_channels, kernel_size=1, stride=2),
                 nn.BatchNorm2d(out_channels)
             )
         else:

             self.downsample = None

     def forward(self, x):
         identity = x

         out = self.conv1(x)
         out = self.bn1(out)
         out = self.relu(out)

         out = self.conv2(out)
         out = self.bn2(out)

         if self.downsample is not None:
             identity = self.downsample(x)

         out += identity
         out = self.relu(out)

         return out


class ResNet34(nn.Module):
     def __init__(self, num_classes=10):
         super(ResNet34, self).__init__()


         self.first = nn.Sequential(

             nn.Conv2d(1, 64, 7, 2, 3),
             nn.BatchNorm2d(64),
             nn.ReLU(inplace=True),


             nn.MaxPool2d(3, 1, 1)
         )


         self.layer1 = self.make_layer(64, 64, 3, 1)


         self.layer2 = self.make_layer(64, 128, 4, 2)
         self.layer3 = self.make_layer(128, 256, 6, 2)
         self.layer4 = self.make_layer(256, 512, 3, 2)

         self.avg_pool = nn.AvgPool2d(2)
         self.fc = nn.Linear(512, num_classes)

     def make_layer(self, in_channels, out_channels, block_num, stride):
         layers = []


         layers.append(Reslock(in_channels, out_channels, stride))


         for i in range(block_num - 1):
             layers.append(Reslock(out_channels, out_channels, 1))

         return nn.Sequential(*layers)

     def forward(self, x):
         x = self.first(x)
         x = self.layer1(x)
         x = self.layer2(x)
         x = self.layer3(x)
         x = self.layer4(x)
         x = self.avg_pool(x)

         # x.size()[0]: batch size
         x = x.view(x.size()[0], -1)
         x = self.fc(x)
         return x
Chapter Four:
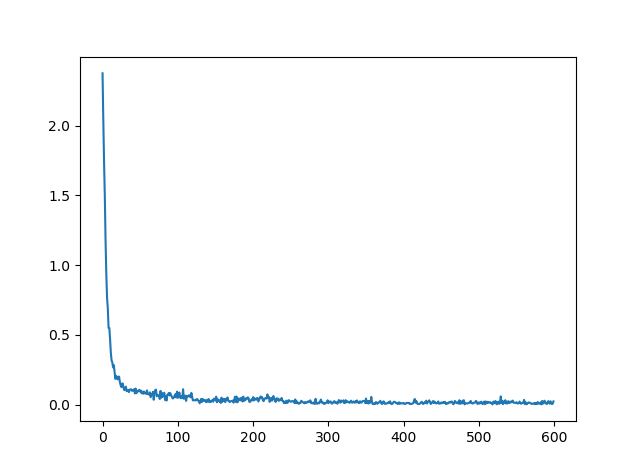
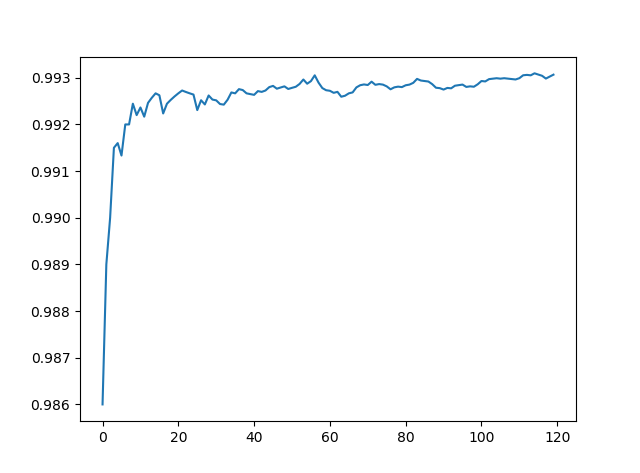
Somehow above procedure, the following procedure is very simple, direct examination of the following training and identify it, the training code validation code is very simple, directly attached to the training and recognition accuracy results of FIG herein FIG.