Article directory
Preface
Kingdee Cloud Star focuses on providing open ERP cloud platforms for large and medium-sized enterprises, paying special attention to the needs of multiple organizations and multiple profit centers. In modern enterprise management, ERP system is an indispensable auxiliary tool. It allows enterprises to digitally manage resources such as personnel, finance, and materials to achieve better economic benefits. Due to the constraints of different locations and times, the ERP system must have remote access capabilities so that employees on business trips or branches can access data anytime and anywhere. Through Kingdee Cloud Starry Sky, enterprises can realize a new digital marketing ecology and management reconstruction, thereby improving their digital capabilities.
In this article, we will take Kingdee Cloud Starry Sky as an example to introduce in detail how to use the cpolar intranet penetration tool to achieve external Internet access to the company's local internal ERP system in a network environment without public IP.
How can Kingdee Cloud Starry Sky Enterprise Edition v8.0 easily realize remote working through intranet penetration?
1. Kingdee Cloud Starry Sky Enterprise Edition v8.0 installation and download
1.1 Log in to Kingdee official website to download the installation package
Kingdee official website: https://www.kingdee.com/
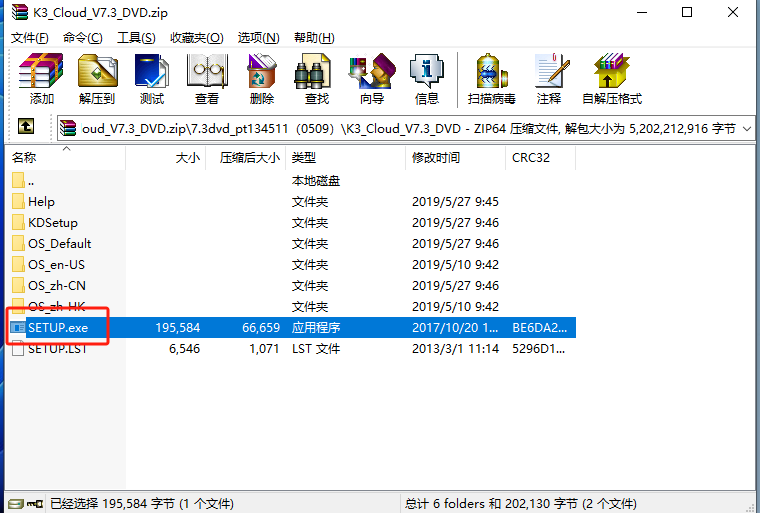
After unzipping, click **"SETUP"**
After clicking **"SETUP"** to run the program, the following window will pop up and click [Start];
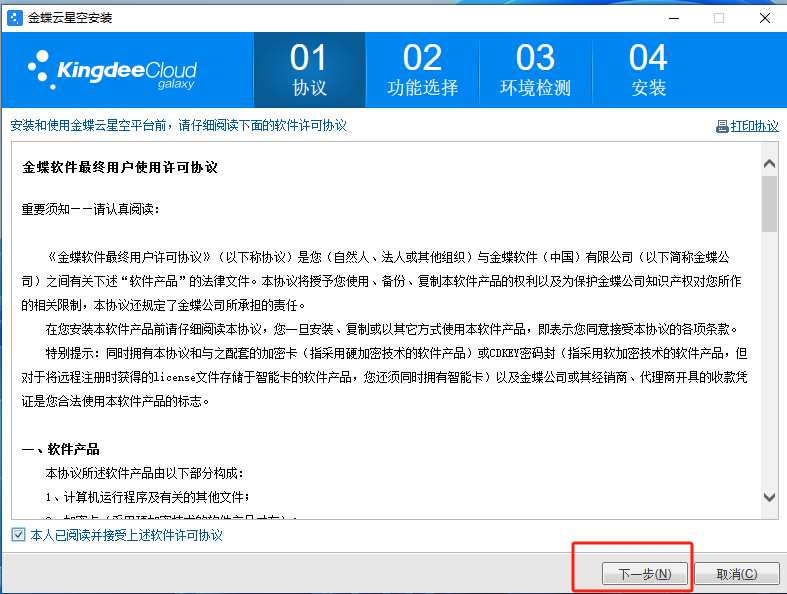
Click [Start] to enter the agreement interface, check Read the License Agreement, and then click [Next];
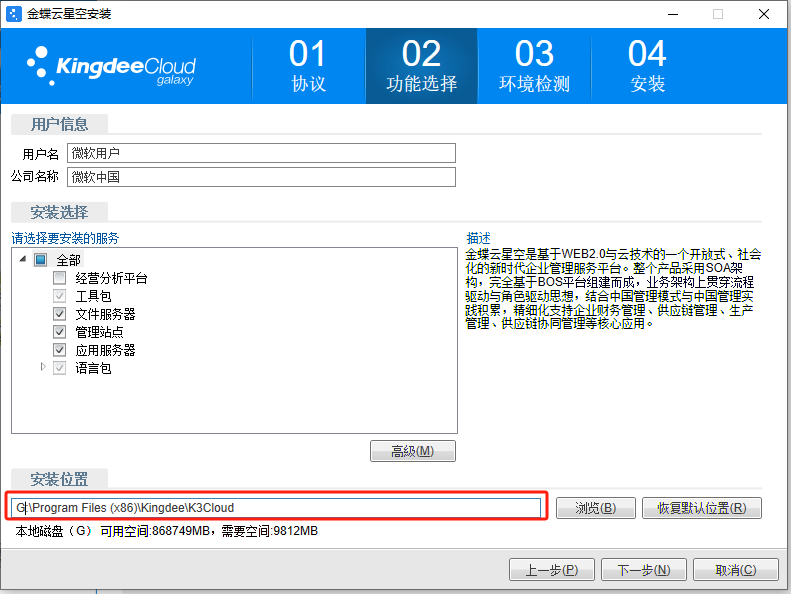
Click [Next] to enter the function selection interface, fill in the user information, select the functions to be installed, and the installation location.
Then click [Next] to enter the single server installation mode (the management site, application server, and file server must be checked and are checked by default);
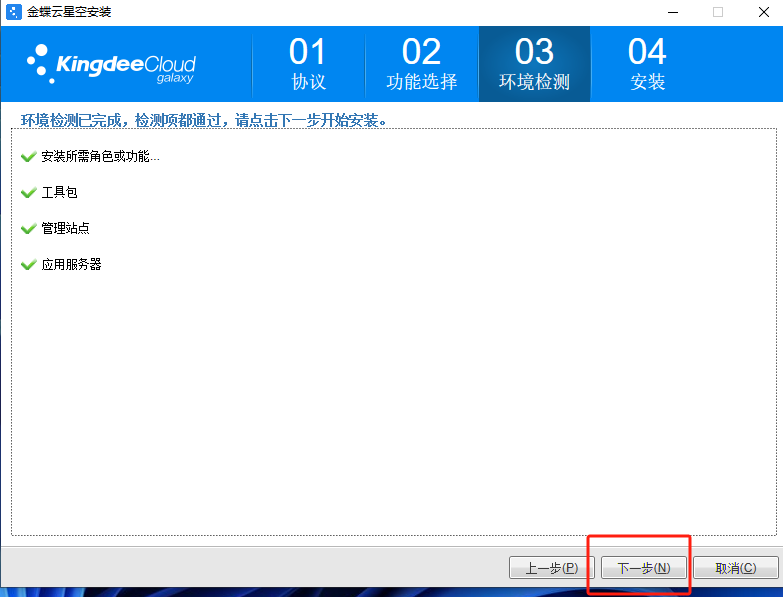
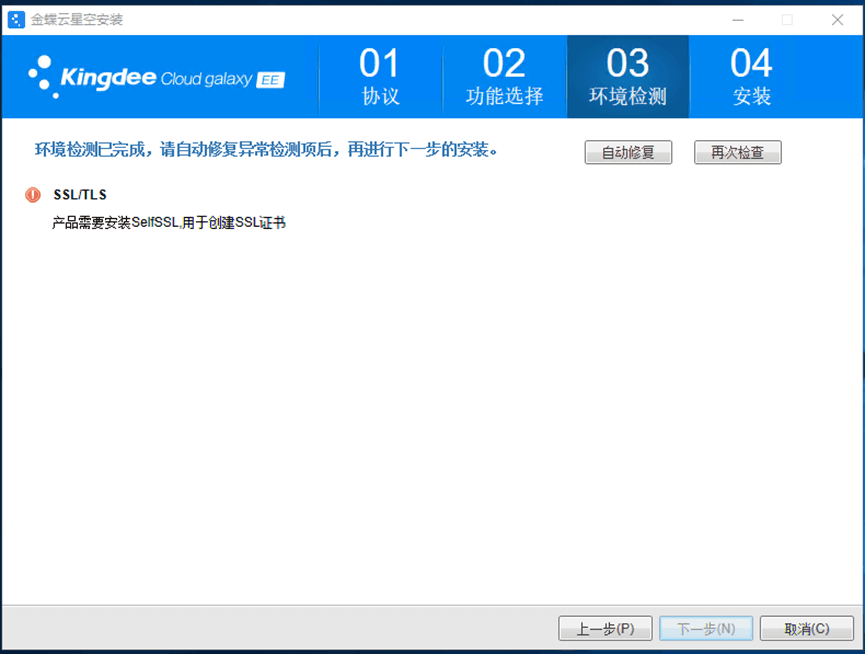
Click [Next] to enter the environment detection interface to automatically detect the environment, and then click [Next];
During the environment detection process, a failed detection item SSL/TLS will appear. Just click [Automatic Repair] next to it to complete.
If it cannot be repaired, you can refer to the following solutions to deal with SSL/TLS failure to detect;
After the repair is completed, the following interface will appear and you can proceed to [Next Step];

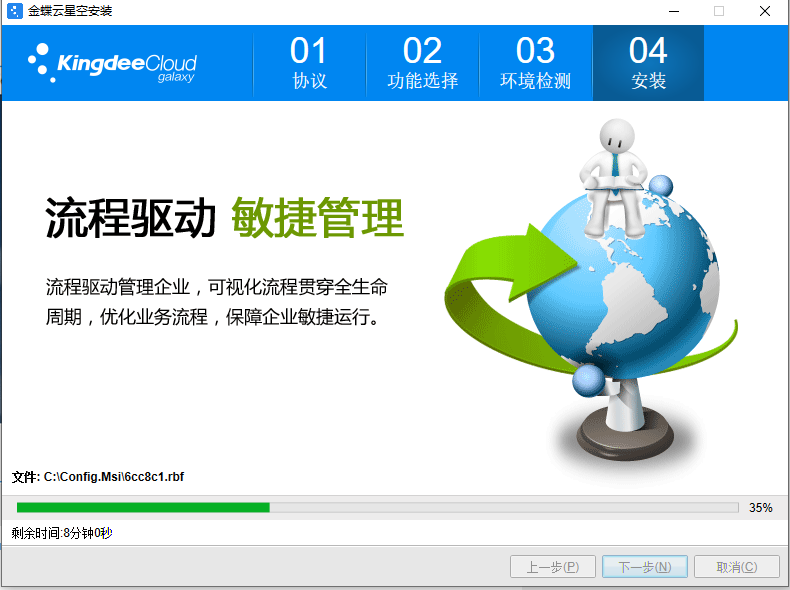
Click [Next] to enter the formal installation stage and wait patiently for completion;
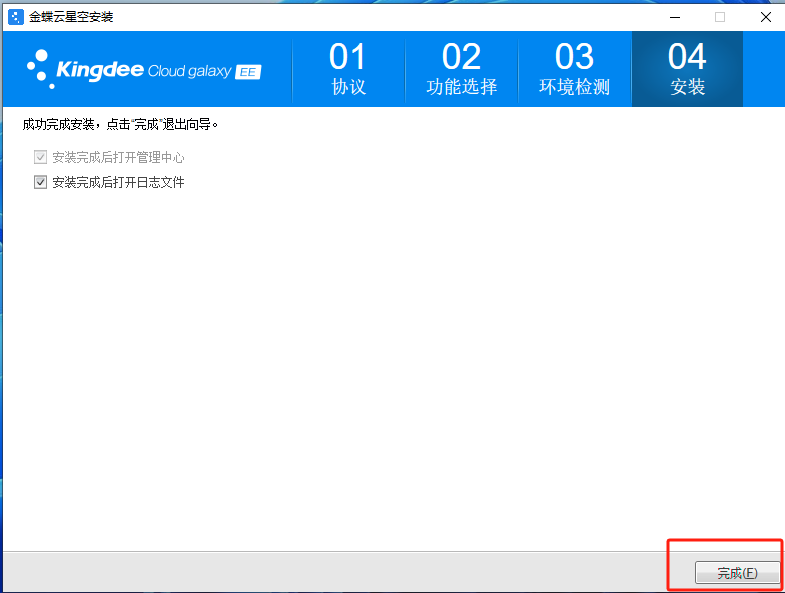
After the installation is completed, as shown below, the Kingdee Cloud Starry Sky server is installed.
1.2 Common installation and download problems
When Kingdee Cloud Starry Sky is installed on the server side, the IIS6RKT package will be required by default for self-signed SSL certificate processing when necessary. Because the production environment should actually use a trusted domain name certificate, this component package is not a required item during installation. And the new version of the operating system cannot install this component, so it will prompt that SSL/TLS cannot be detected. There are several treatment options available:
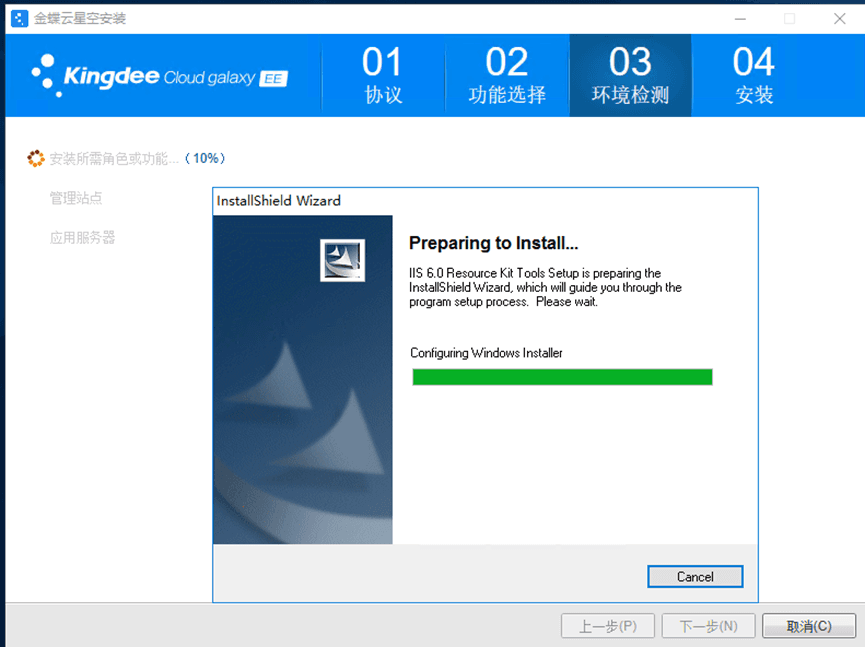
**Method 1:** Automatic repair, follow the prompts to install the roles and functions and click Next to proceed until the repair is completed.
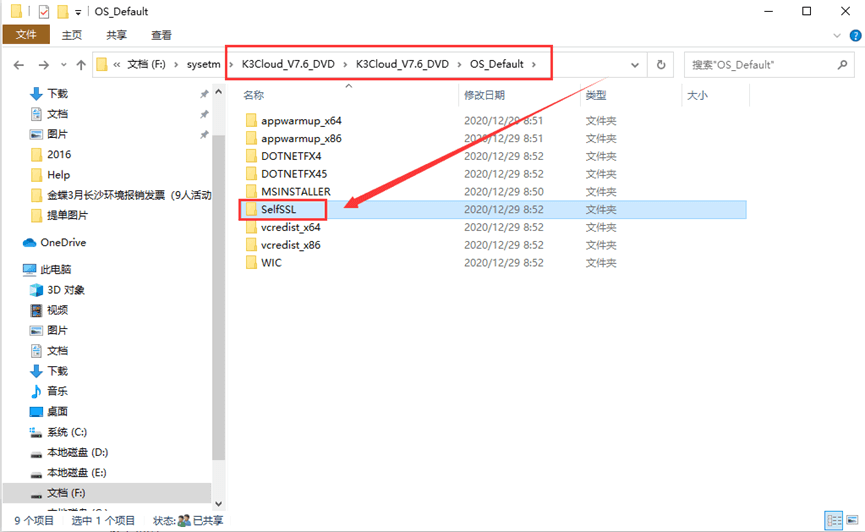
**Method 2:** Find the selfSSL file in the OS_Default folder of the decompressed installation package and install it manually. Recheck after the installation is completed to solve the problem.
**Method 3:**Run SkipSsICheck.bat batch process to skip SSL environment detection
2. Kingdee Cloud Starry Sky configuration SQL Sever database
After installing the product, click on the server's IE browser and enter http://localhost:8000/
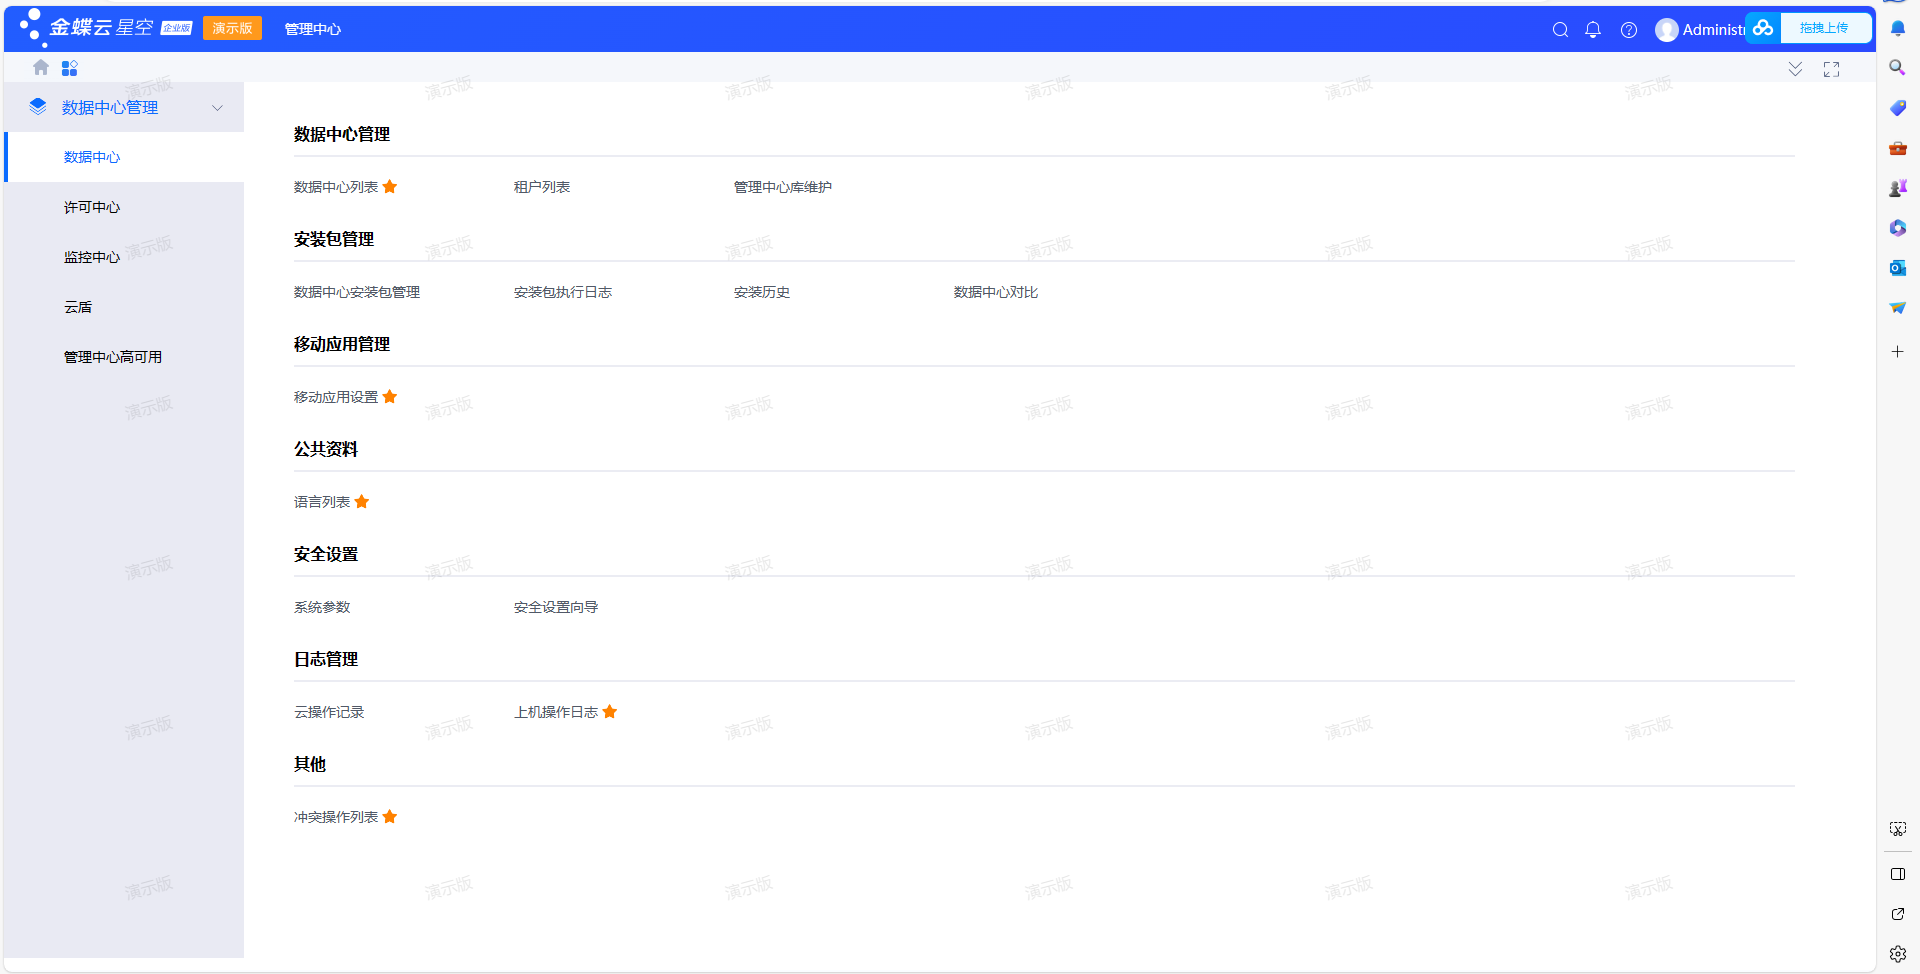
Enter the management center and create a data management center.
2.1 Create data management center
Select the operation type of creating the management site (create or register) and the type of database creation (Oracle will not demonstrate it for the time being, no)
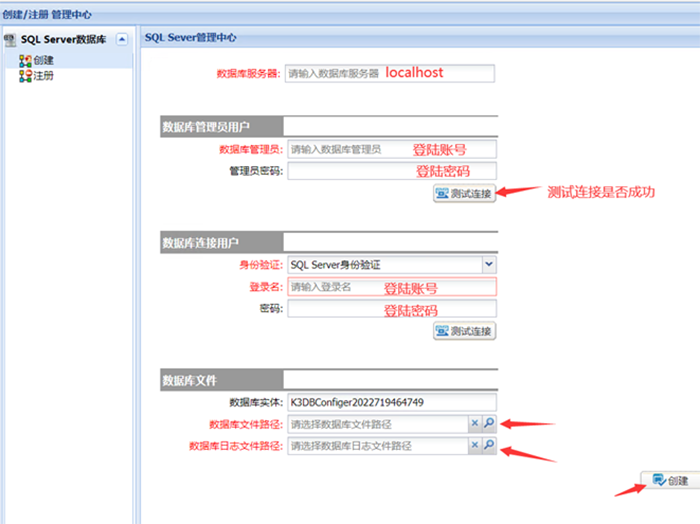
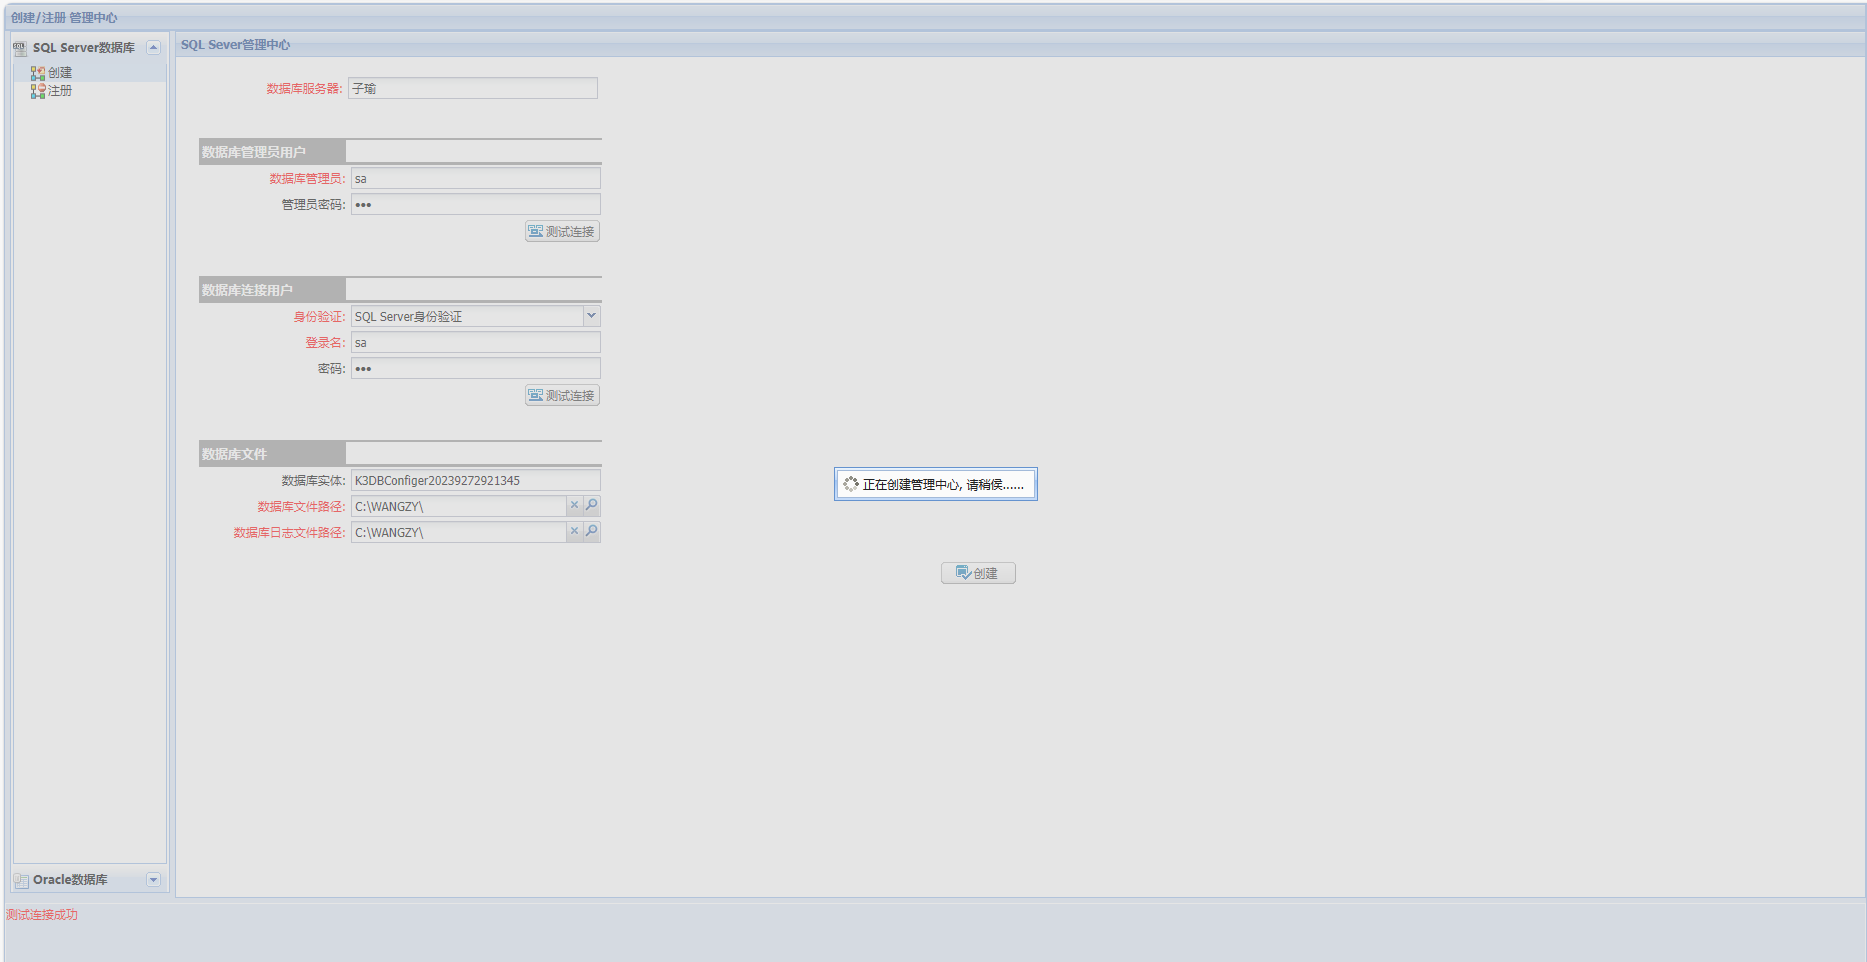
Set database related information:
Create a SQL Server management data center, fill in localhost, database administrator user name and password, database connection user name and password, database entities are automatically generated according to default rules and do not need to be modified. Make sure the database server information, user name, and password are filled in correctly. You can use a test connection to test the database connection.
Select the data file path and log saving path. Click Create to create the management center. (Note that the data file path and log saving path do not contain Chinese characters)
2.2 After creation, log in to the management site on the server
Default administrator name: Administrator, default password: 888888
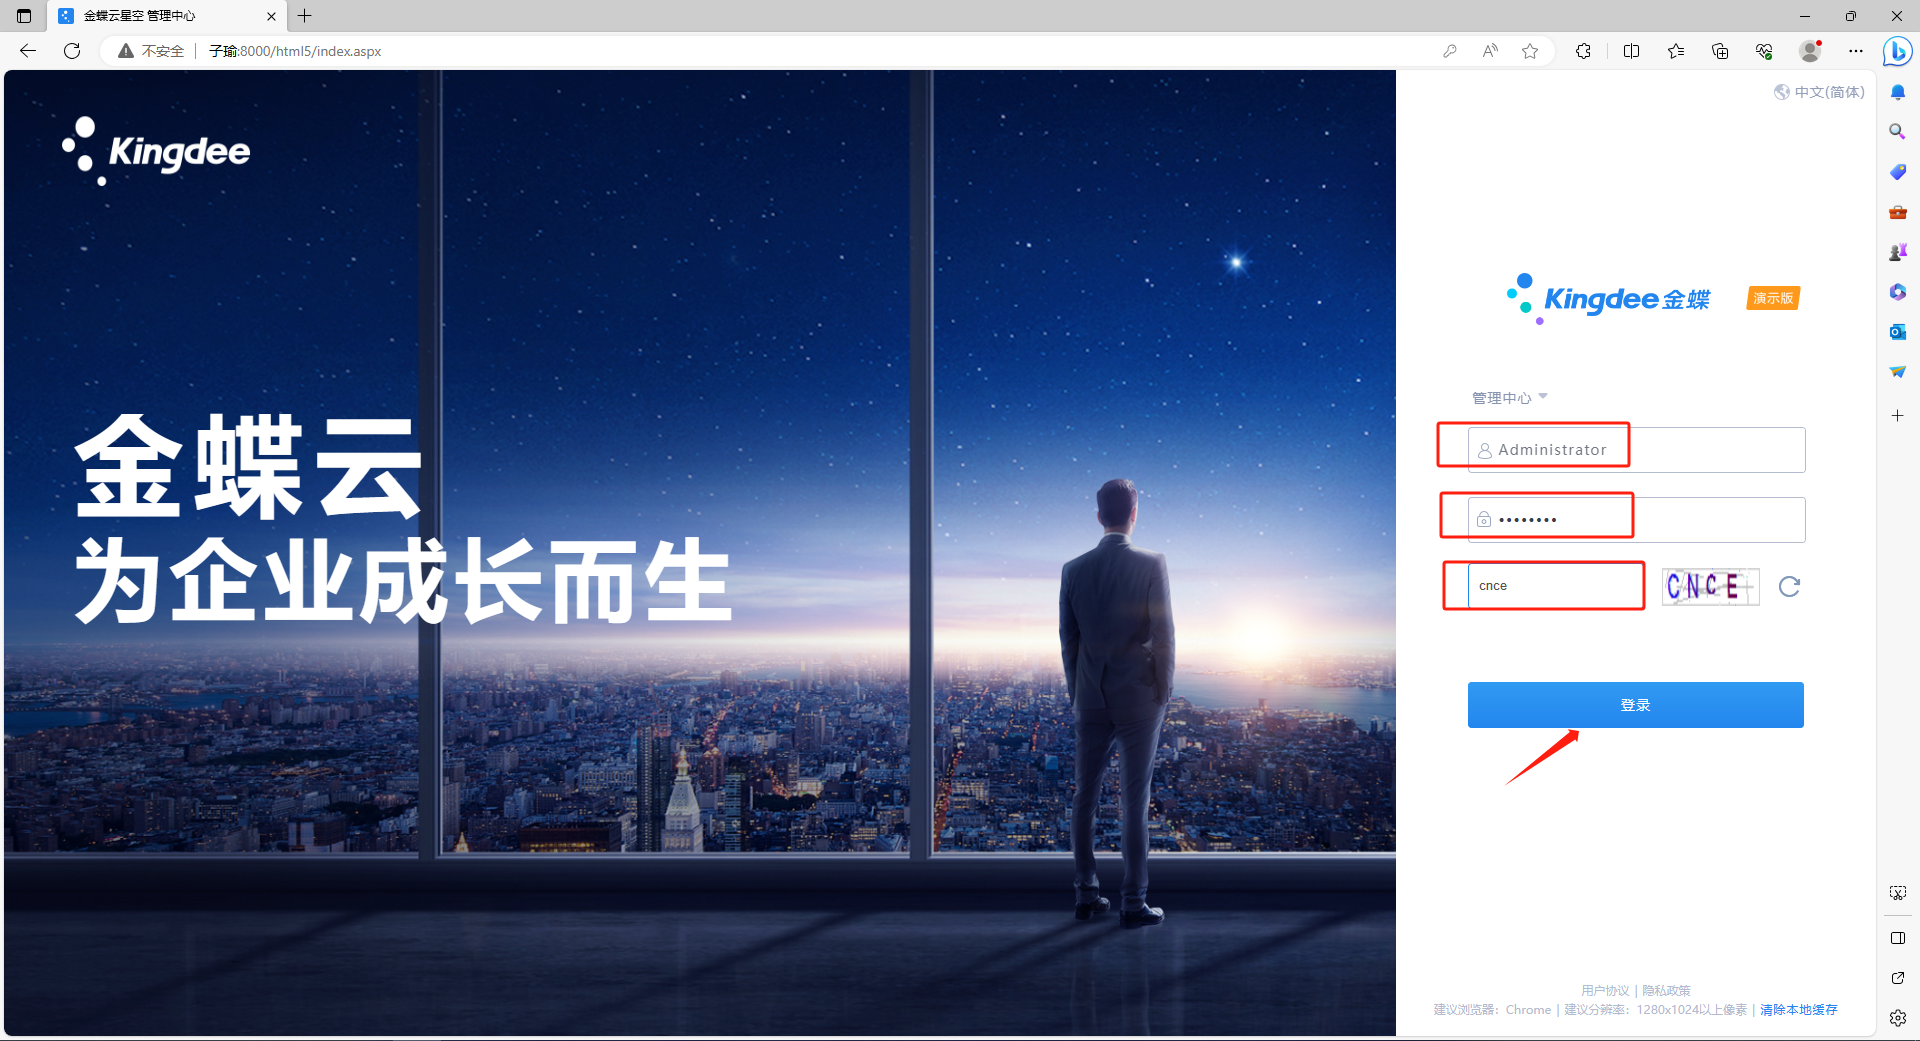
After logging in, you will enter the Kingdee Cloud Starry Sky 8.0 interface. Next, you need to access the intranet from the remote public network.
3. Download, install and register cpolar
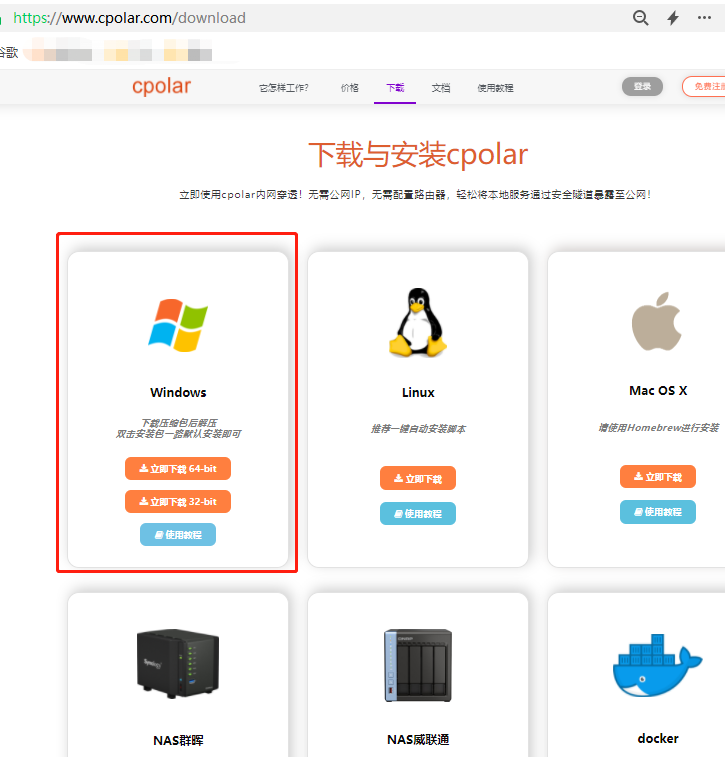
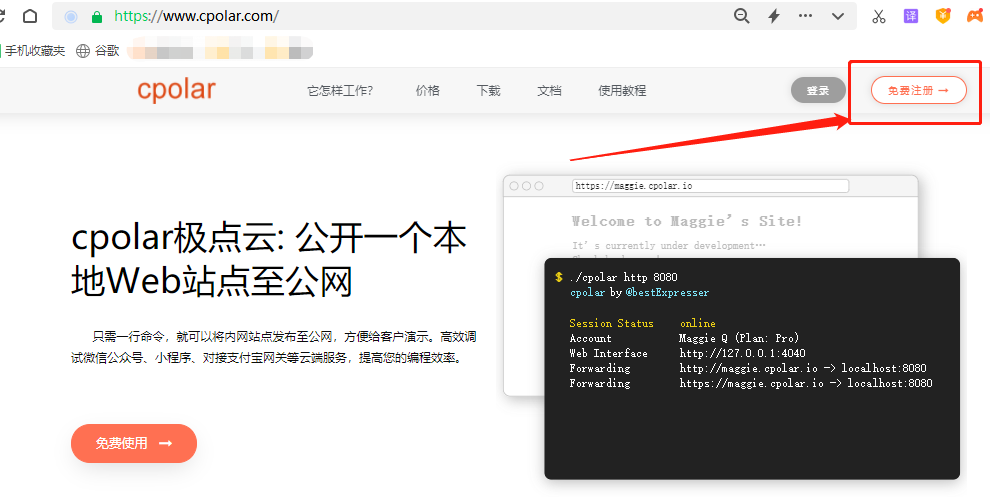
Log in to the cpolar official website: www.cpolar.com and find the download address.

On the download page of cpolar, find the corresponding version of the cpolar installation program. The author is using the Windows operating system, so I chose the Windows version to download.
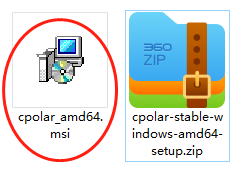
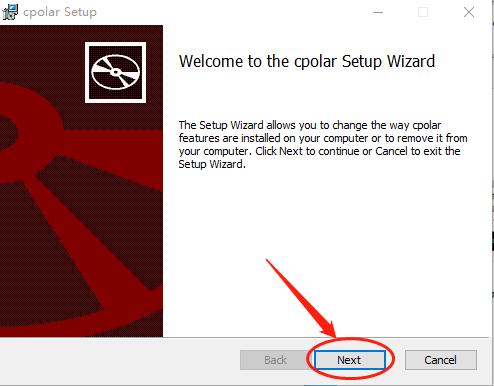
After the download is completed, unzip the downloaded file and double-click .msithe file to automatically execute the cpolar installation program. We only need to go all the way Nextto complete the installation.
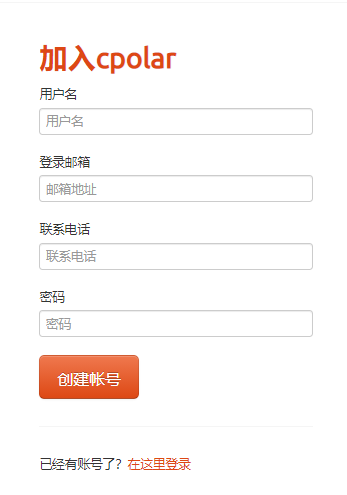
Since cpolar will create an independent data tunnel for each user, supplemented by user passwords and token codes to ensure data security, we need to register users before using cpolar. The registration process is also very simple. Just click on the upper right corner of the cpolar homepage 用户注册and fill in the necessary information on the registration page to complete the registration.
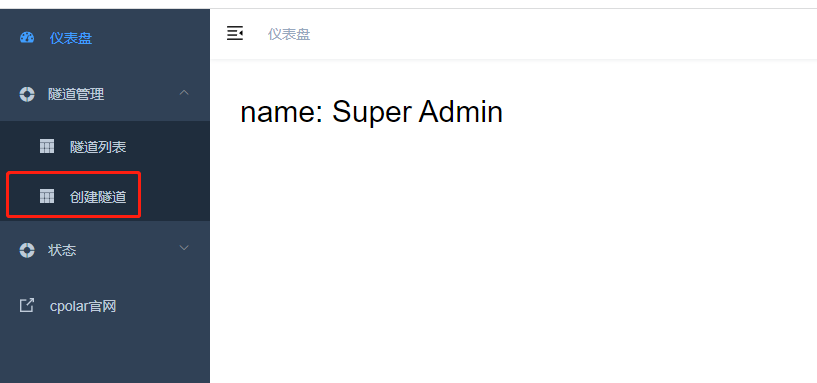
After registration, log in to the cpolar client (you can localhost:9200directly access it by typing in the browser, or click the cpolar client shortcut in the start menu), click the 隧道管理- 创建隧道button on the left side of the client's main interface to enter the local tunnel creation page
隧道名称: Can be regarded as the local tunnel information annotation of cpolar, as long as it is convenient for us to distinguish协议:choosehttp协议本地地址: The local address is the output port number of the local website. The default port of Kingdee’s intranet is 8000. Fill it in here.8000域名类型: If you plan to create a temporary data tunnel, directly check "Random domain name" and let the cpolar client generate the network address by itself.地区: The same as the information reserved in cpolar cloud, we can fill it in according to the actual place of use.
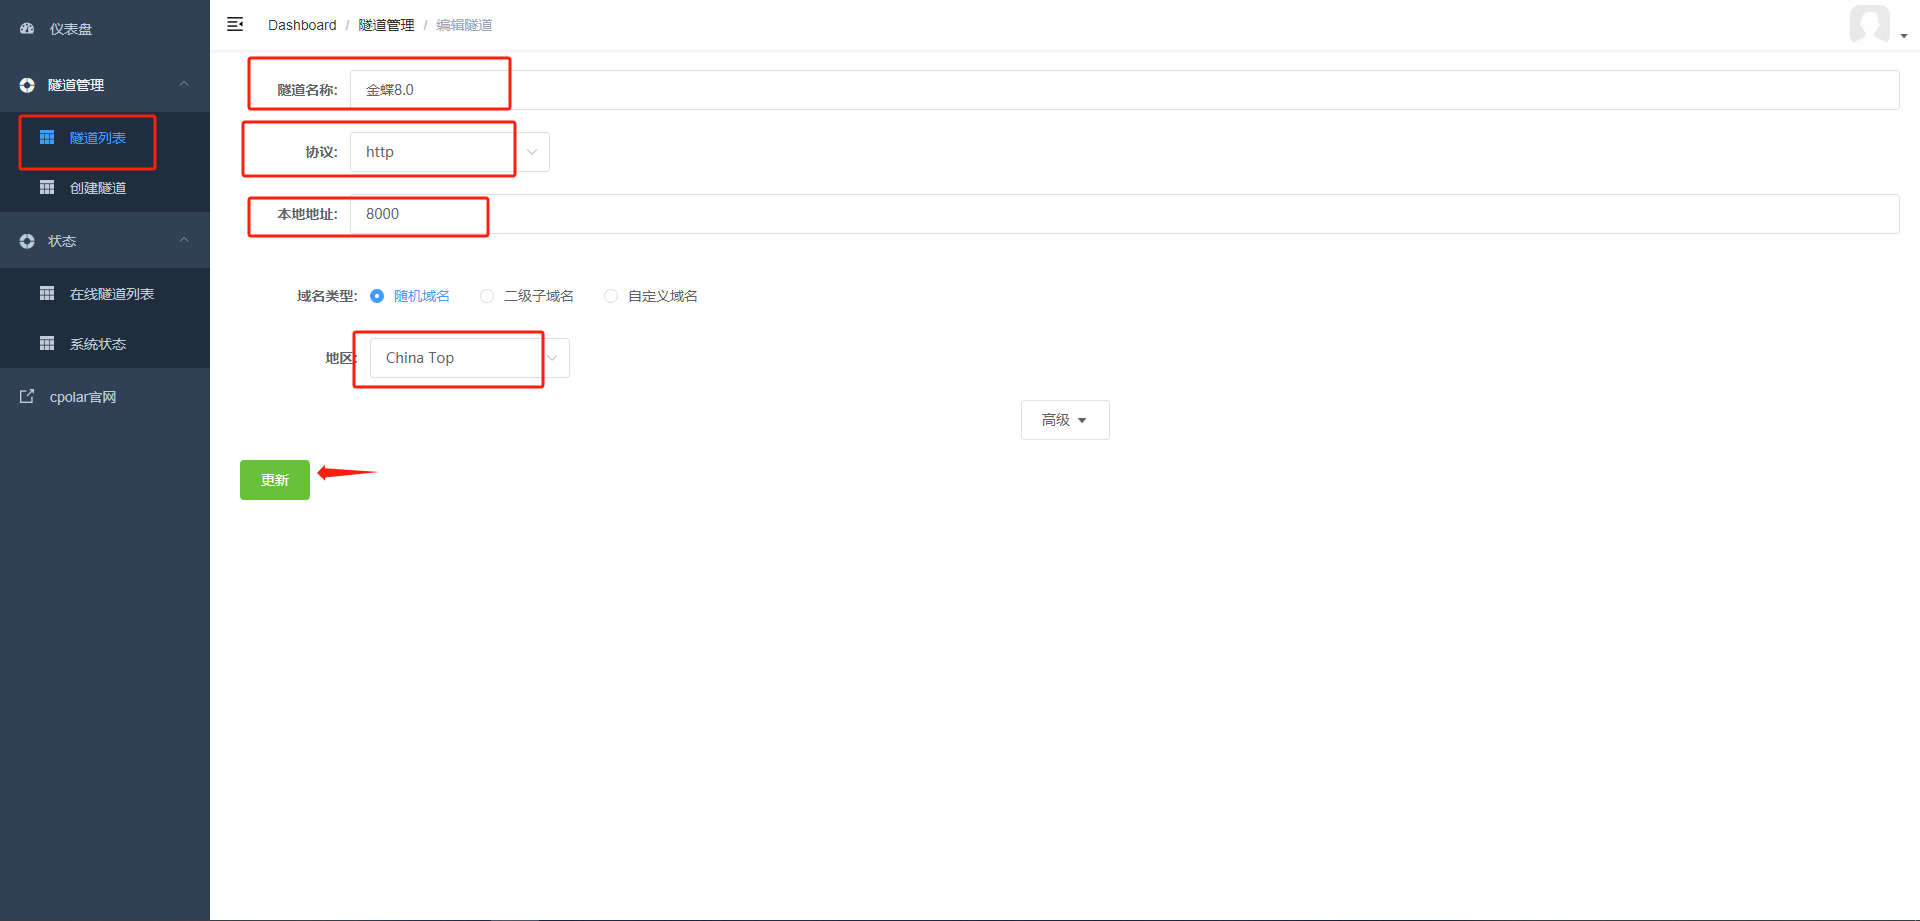
After completing these settings, you can click the button below.
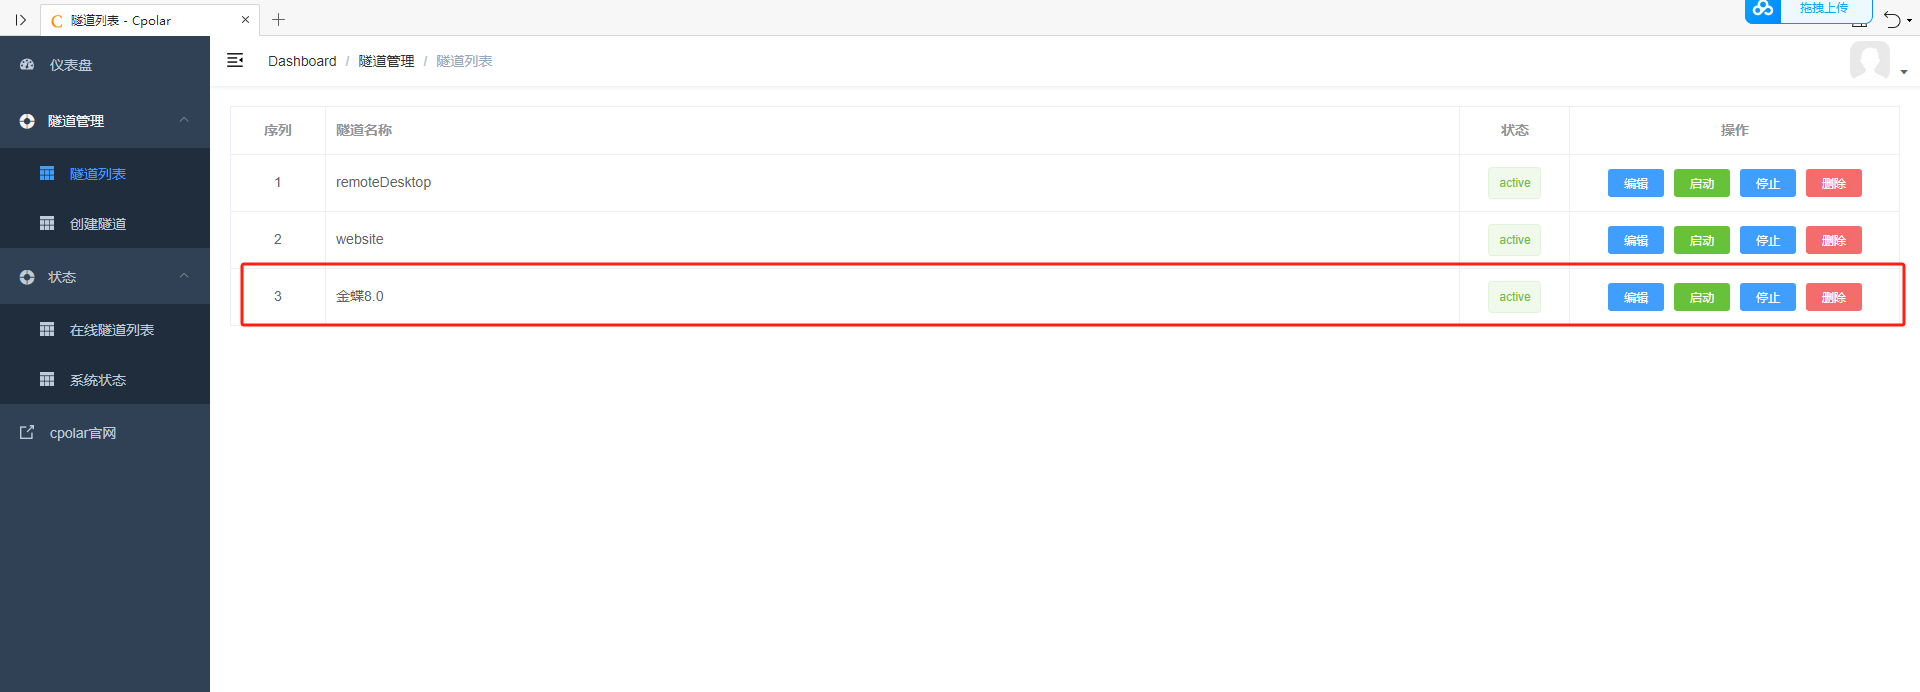
After the data tunnel is created, cpolar will automatically jump to the 隧道管理- 隧道列表page. On this page, we can manage this data tunnel, including opening, closing, or deleting this tunnel. We can also click 编辑the button to modify the information of this data tunnel.
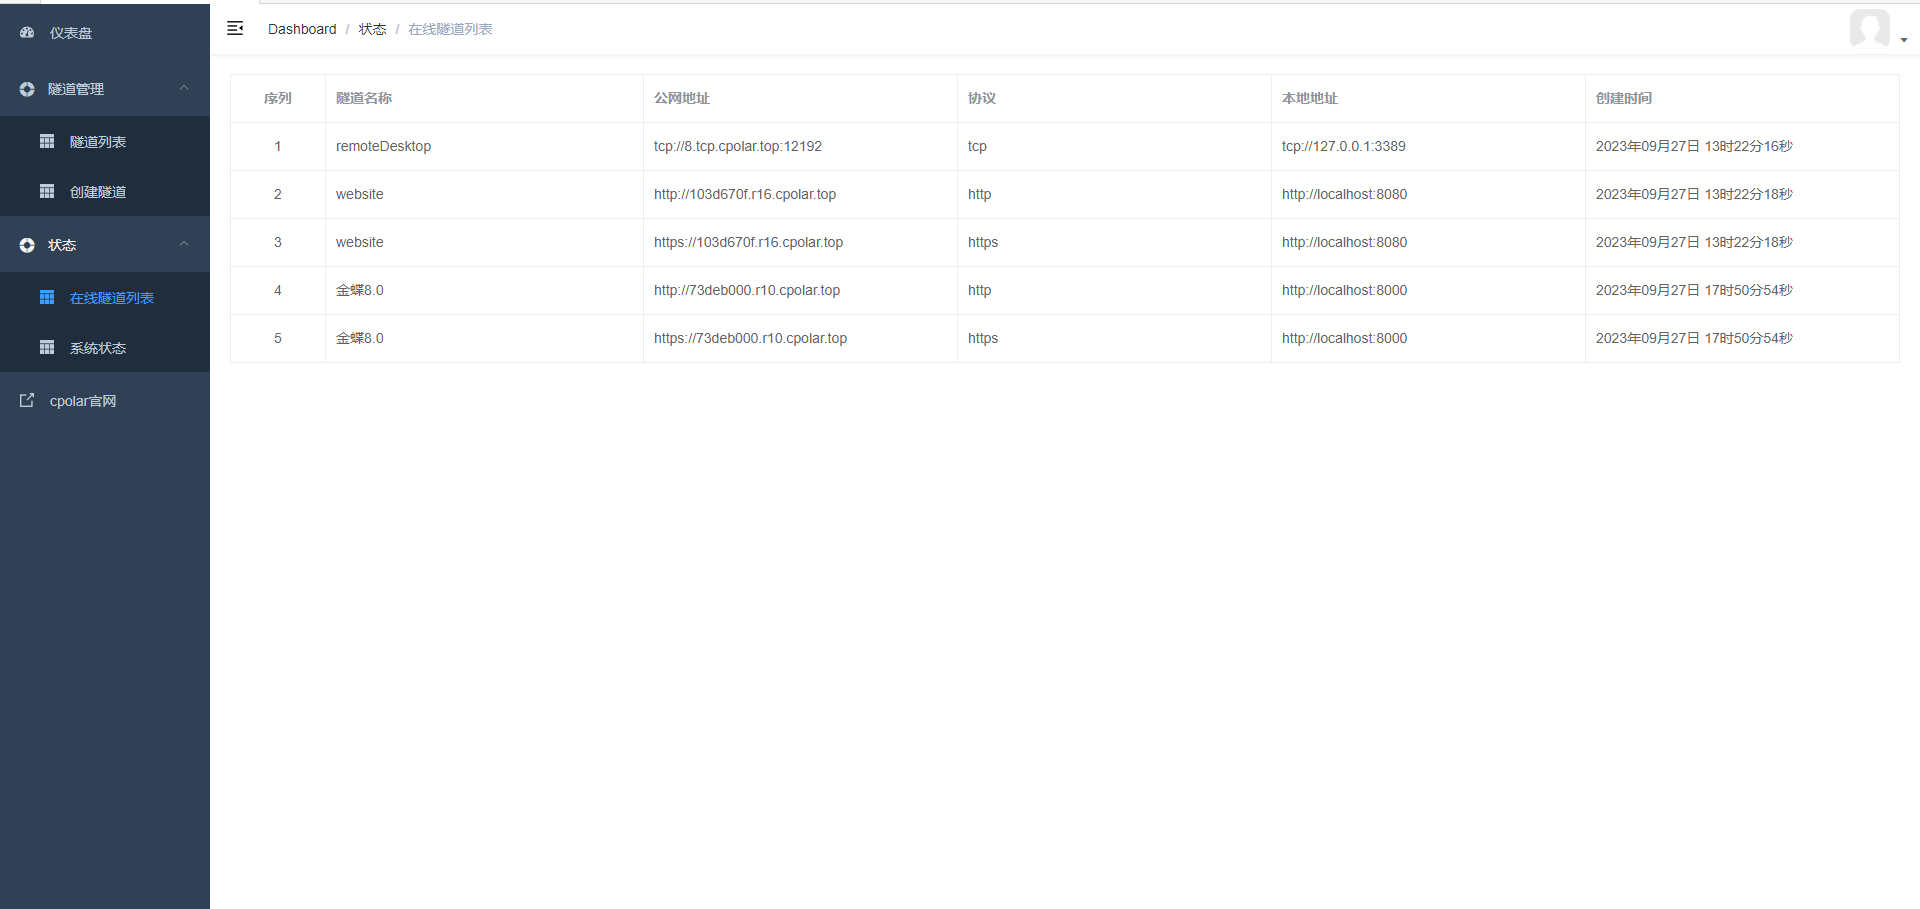
The data tunnel entrance (public Internet access address) of Kingdee Cloud Starry Sky can be found in 状态- 在线隧道列表.
3.1 Public network access test
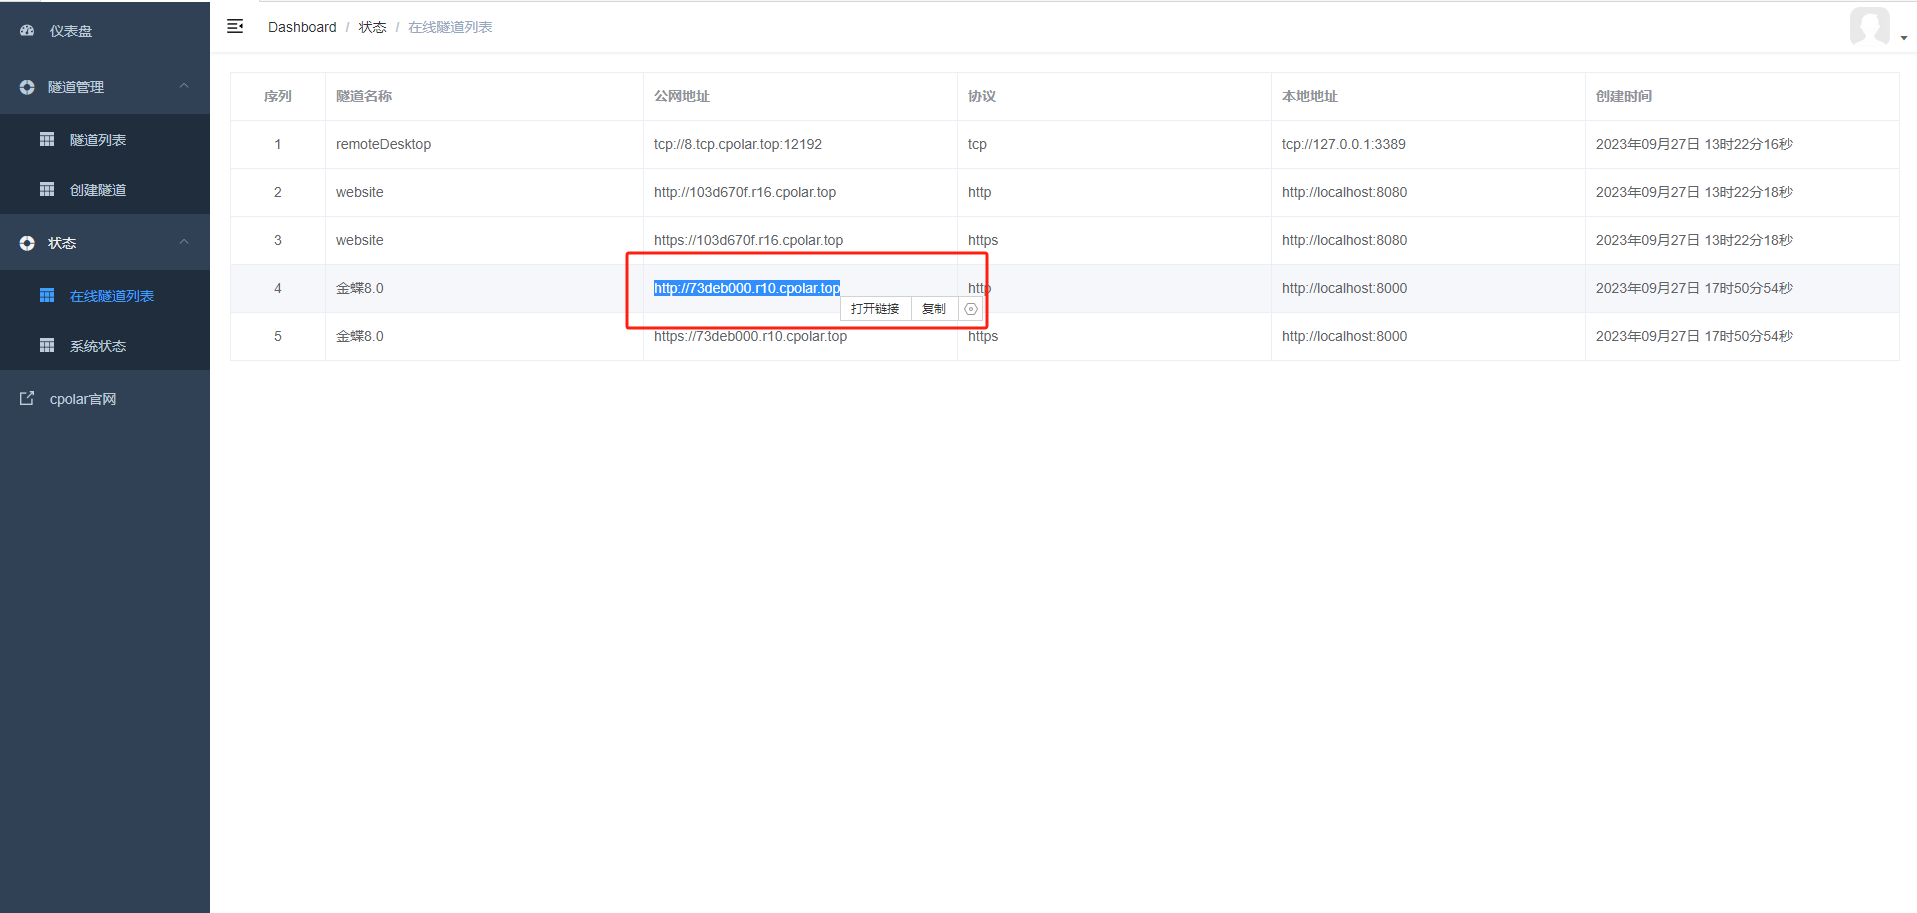
Copy any public network address of the two tunnels and paste it into a public network browser.
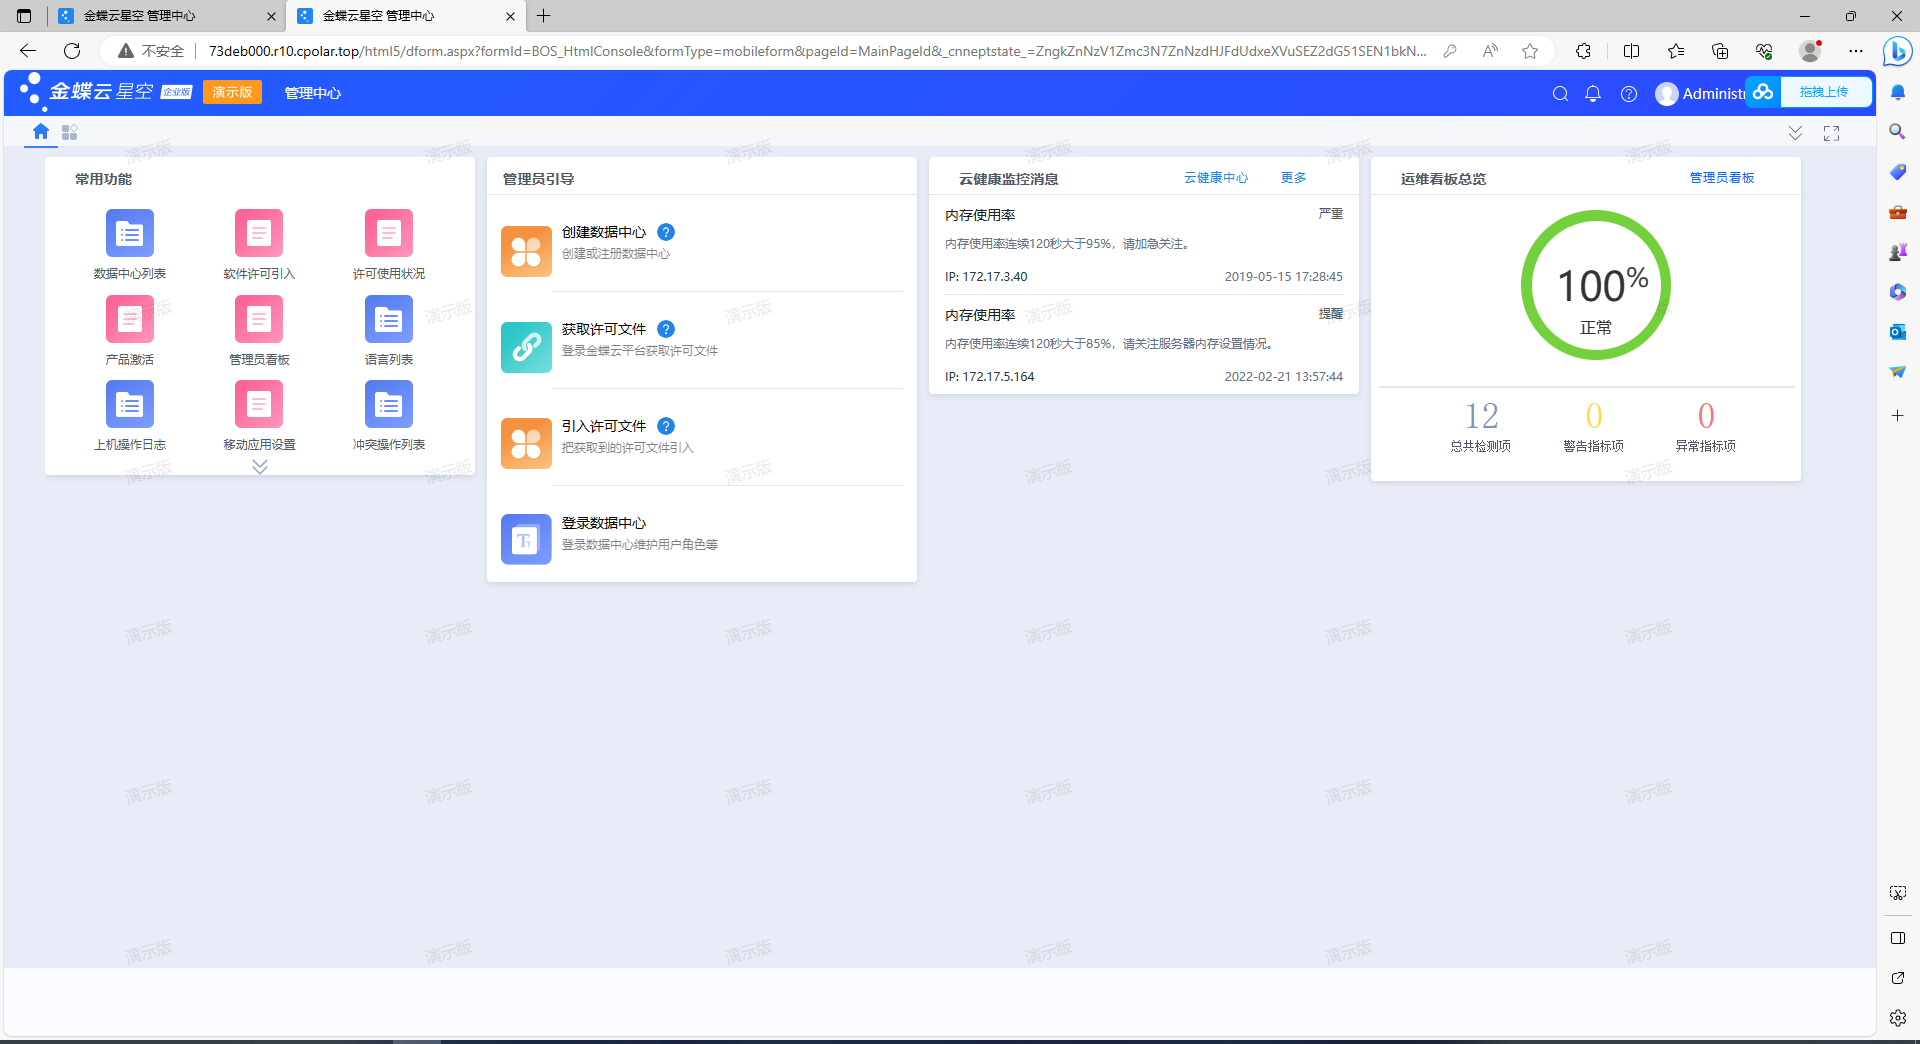
After pasting the public network address into the browser, the intranet login interface for accessing Kingdee Cloud Starry Sky from the public network will be displayed. After logging in, the public network can access the intranet.

4. Fixed connection public network address
Since the tunnel created using cpolar above uses a random public network address, it will change randomly within 24 hours, which is not conducive to long-term remote access. Therefore, we can configure a second-level subdomain name for it. This address is a fixed address and will not change randomly [ps: cpolar.cn has been filed]
Note that you need to upgrade the cpolar package to a basic package or above, and the bandwidth corresponding to each package is different. [cpolar.cn has been registered]
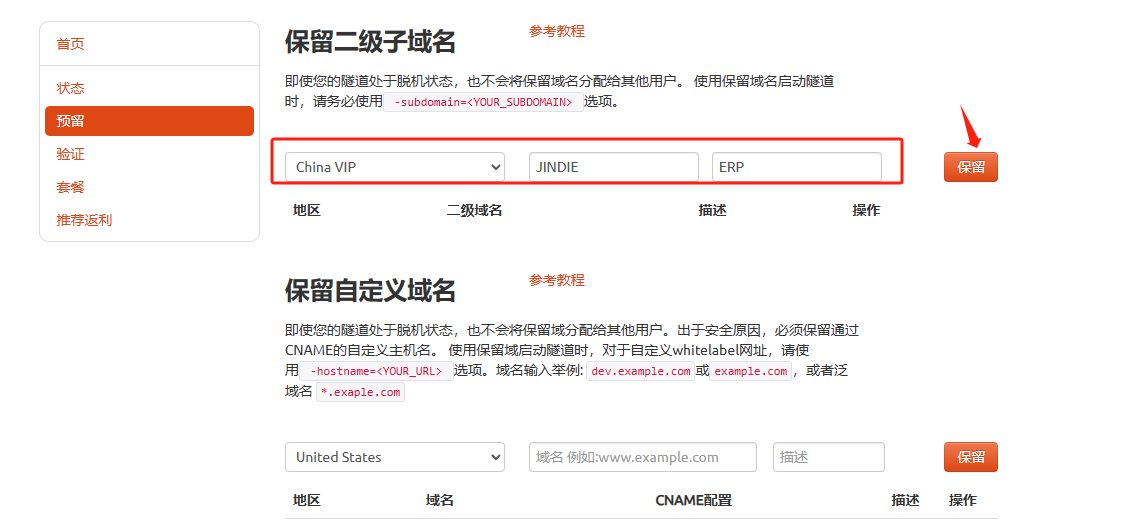
Log in to the cpolar official website , click Reserve on the left, select to reserve the second-level subdomain name, set a second-level subdomain name, click Reserve, and copy the reserved second-level subdomain name after the reservation is successful.
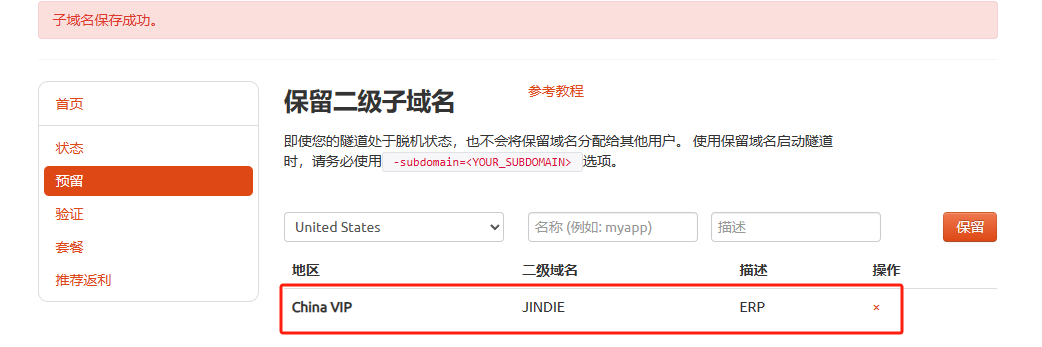
After the reservation is successful, copy the name of the second-level subdomain name that was successfully reserved.
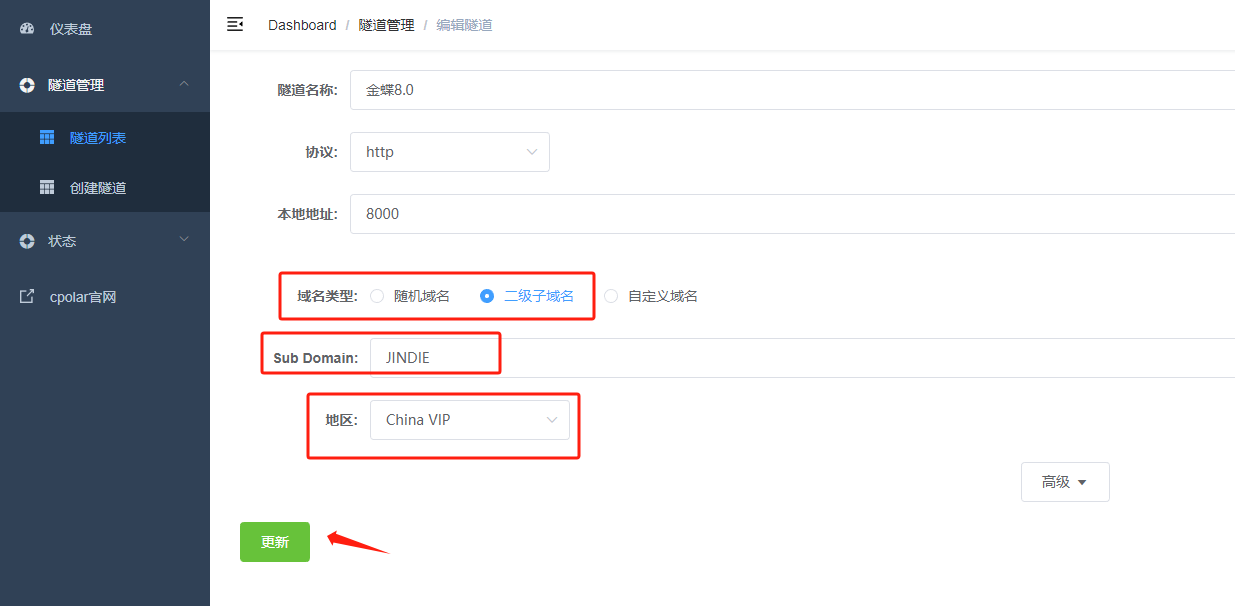
Return to the cpolar web UI management interface, click Tunnel Management - Tunnel List on the left dashboard, find the tunnel you want to configure, and click Edit on the right

Modify the tunnel information and configure the successfully reserved second-level subdomain name into the tunnel.
- Domain name type: Select a second-level subdomain name
- Sub Domain: Fill in the successfully reserved second-level subdomain name
Click 更新(note, click once to update, no need to submit again)
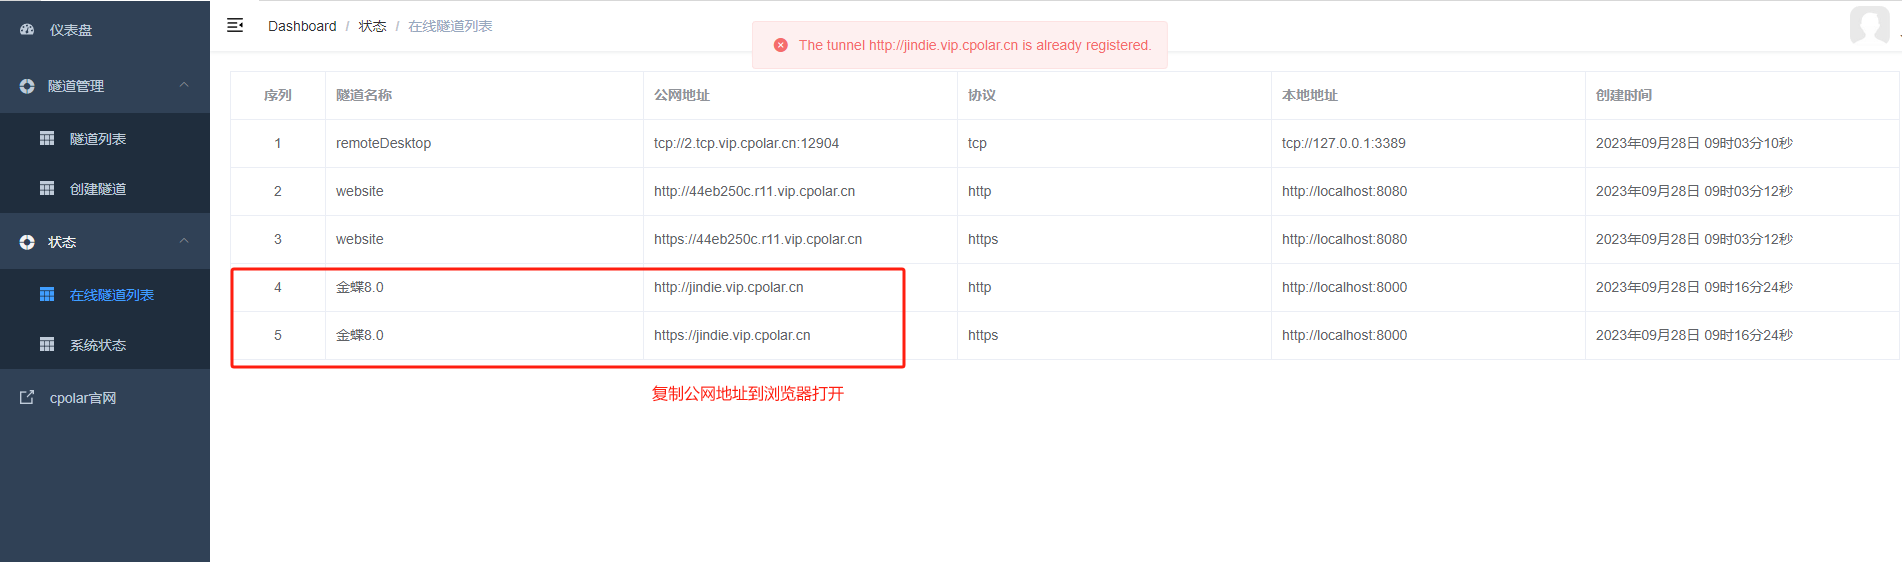
After the update is completed, open the online tunnel list. At this time, you can see that the public network address has changed and the address name has become a fixed second-level subdomain name.
Finally, we use a fixed public network address to access Kingdee Cloud Starry Sky v8.0 (you can copy either address) and you can see that the access is successful. In this way, a fixed and permanent public network address is set. The ERP system can be accessed from outside through the external network address!
