Public network remote connection to MariaDB database [cpolar intranet penetration]
Article directory
This tutorial will use the cpolar intranet to penetrate the local MariaDB database, and use the navicat graphical tool to remotely connect to the MariaDB database on the local intranet in a public network environment.
1. Configure MariaDB database
1.1 Install MariaDB database
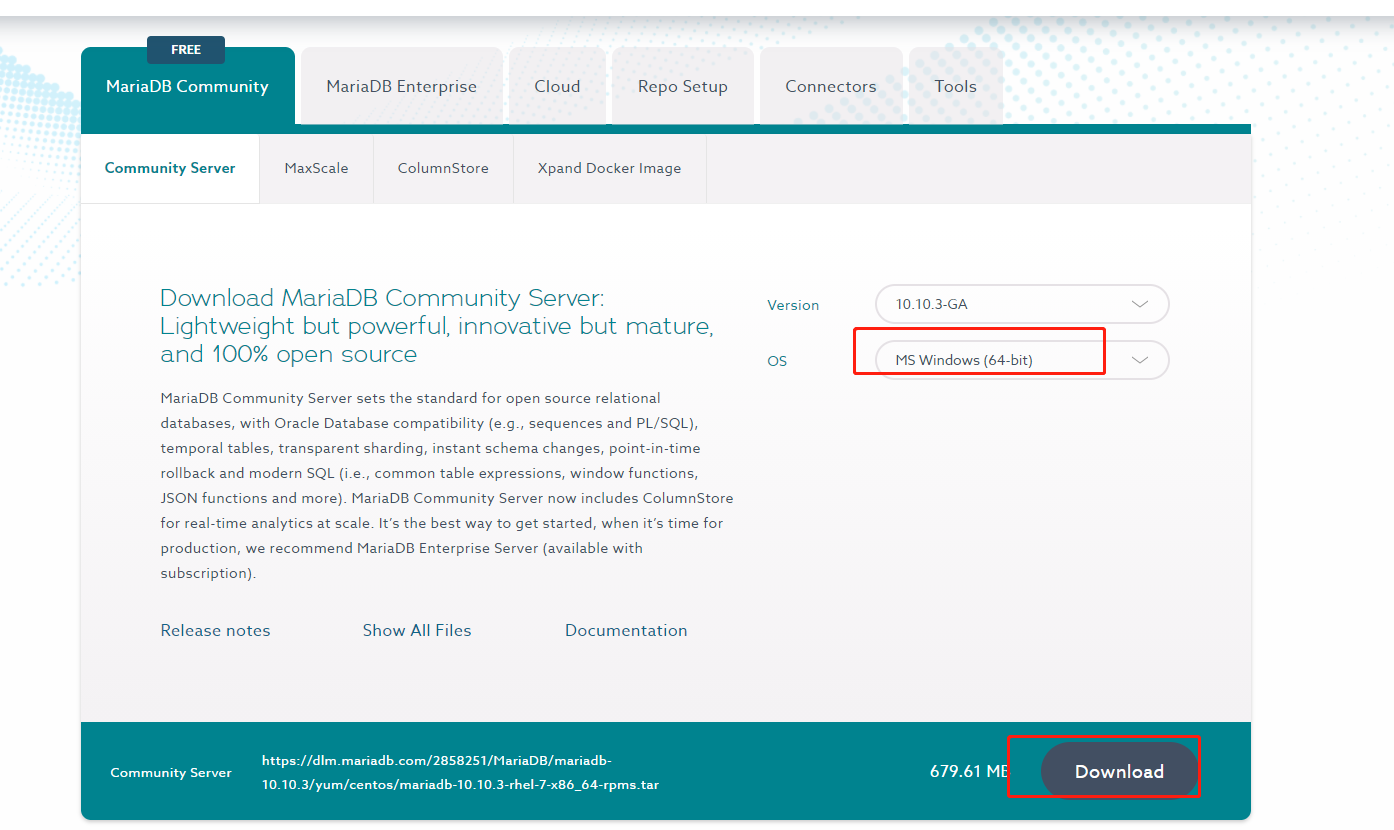
Enter the MariaDB database official website https://mariadb.com/downloads/community/ , and then download the corresponding windows version
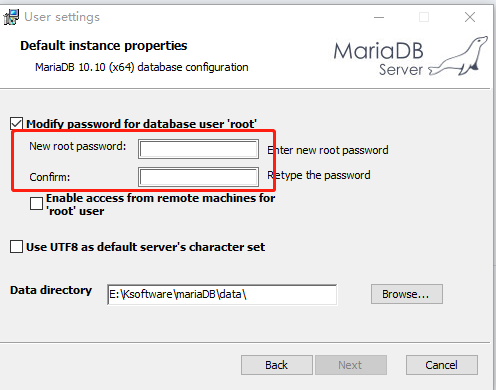
After downloading, click Install. The password setting interface will appear. Set the password. mariaBD and mysql use the same port. If mysql is already installed on this machine, you need to change the mariaDB port or uninstall mysql during the installation process.
1.2 Test remote connection within LAN
After successful installation, use the connection tool to test whether the connection can be connected. Here, navicat is used to test the connection.
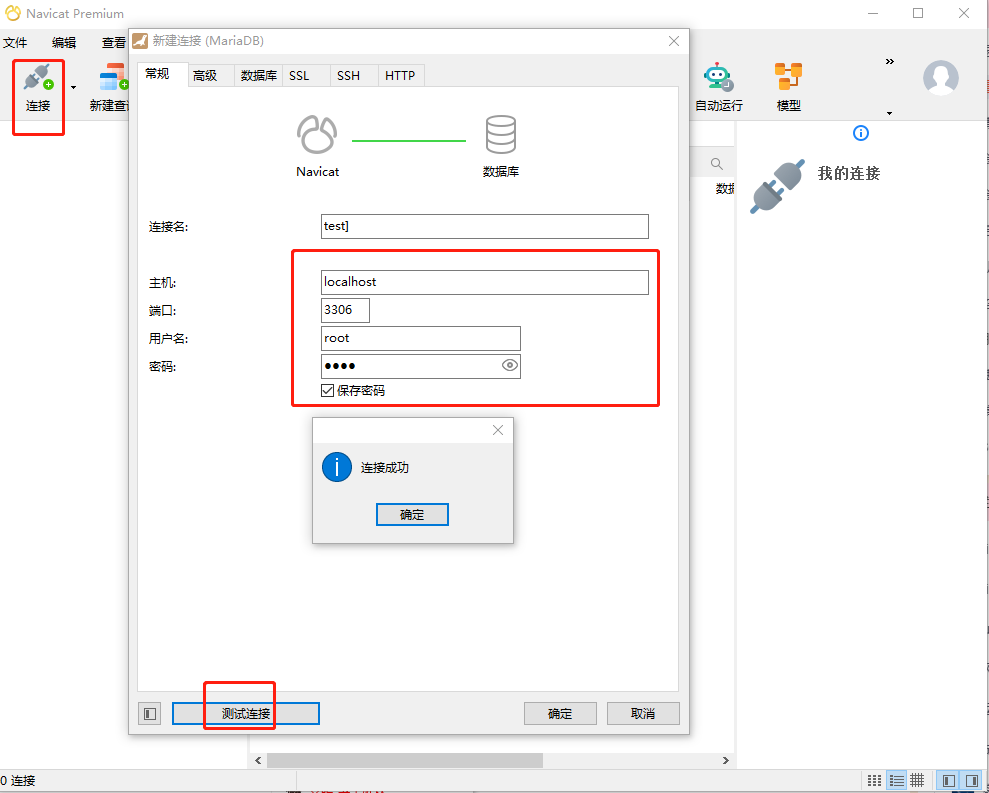
Test the connection within the LAN successfully
2. Intranet penetration
After the local test connection is OK, we will do intranet penetration and publish it to the public network environment for remote access.
Because the database can currently only be accessed within the LAN, we can use the cpolar intranet penetration tool to map the MariaDB database on the intranet to the public network to achieve remote access.
2.1 Create tunnel mapping
cpolar official website: https://www.cpolar.com/
Enter the cpolar official website download page, download the windows installation package locally and then unzip it and install it by default.

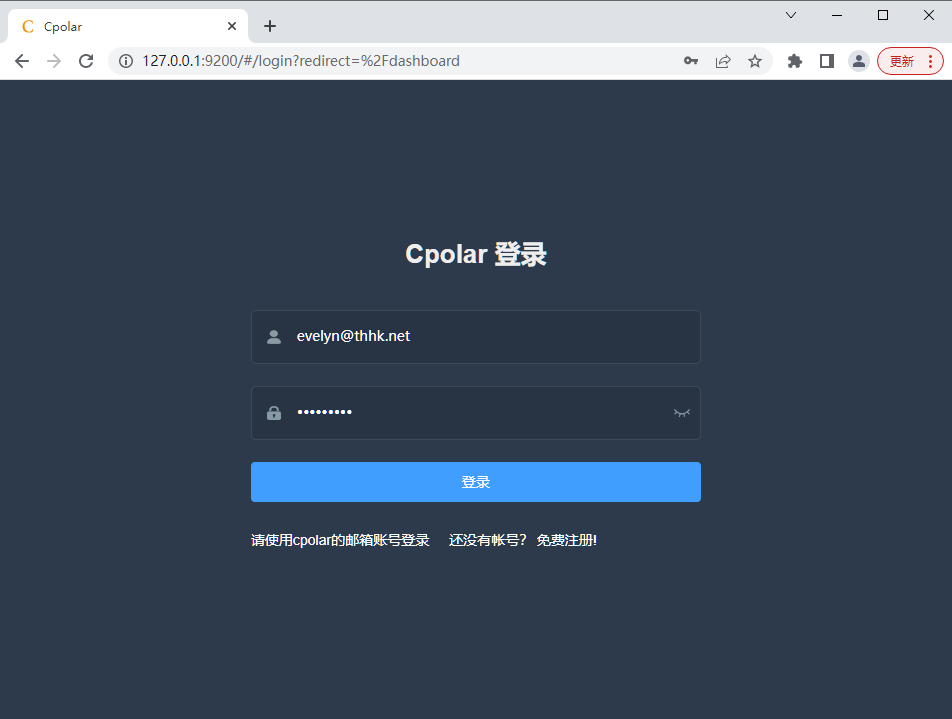
After cpolar is installed successfully, double-click to open cpolar [or access the local 9200 port 127.0.0.1:9200 on the browser], use the cpolar email account to log in to the web UI management interface, if you have not registered a cpolar account, click Free Registration, and you will jump to Just register an account on the cpolar official website.
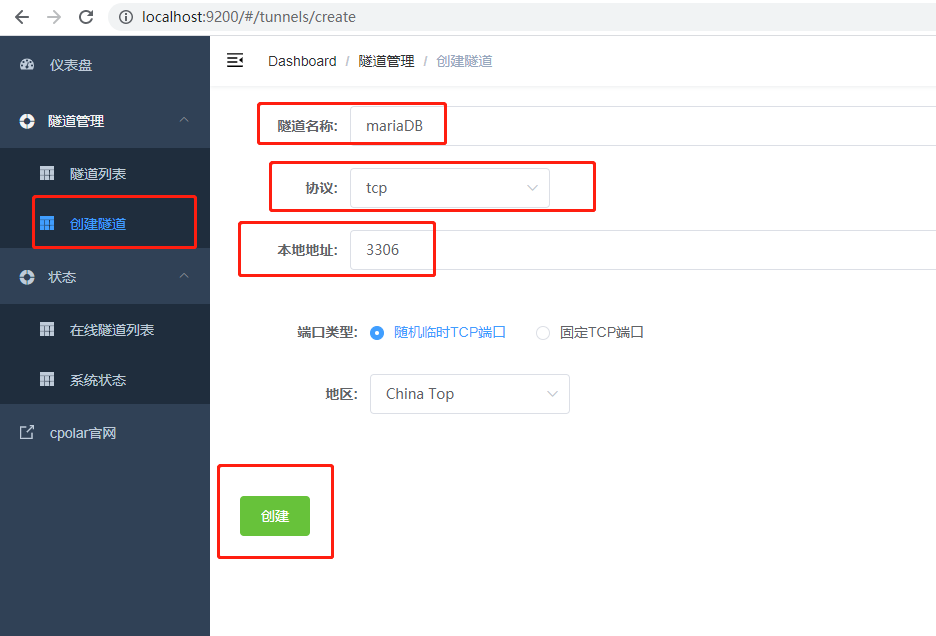
After successfully logging in, click Tunnel Management - Create Tunnel on the left dashboard to create a TCP protocol tunnel pointing to the local port 3306:
- Tunnel name: It can be customized. Be careful not to duplicate the existing tunnel name.
- Protocol: tcp
- Local address: 3306
- Domain name type: Choose a random domain name for free
- Region: Default is China top
Click Create
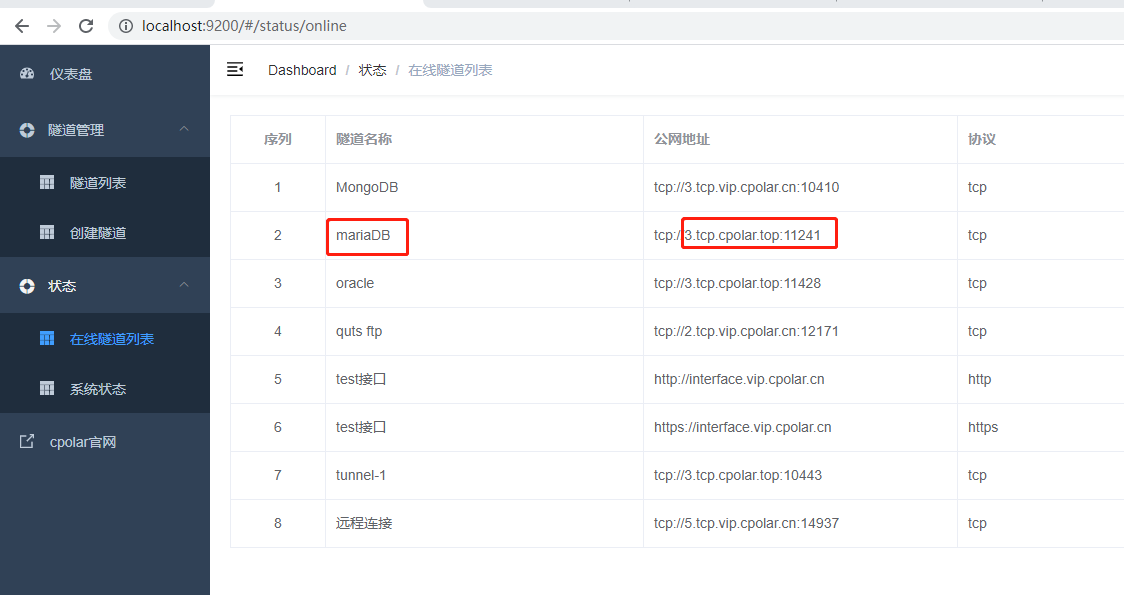
After the tunnel is successfully created, click Status on the left - Online Tunnel List. You can see that the tunnel just created has generated a corresponding public network address. Copy it.
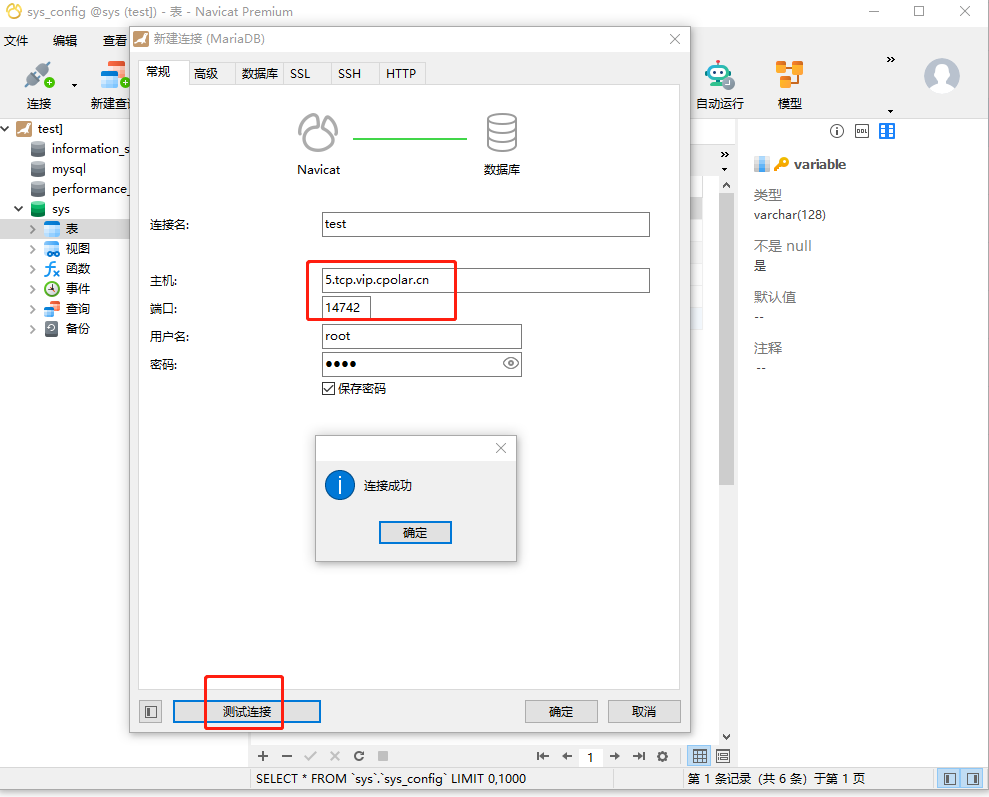
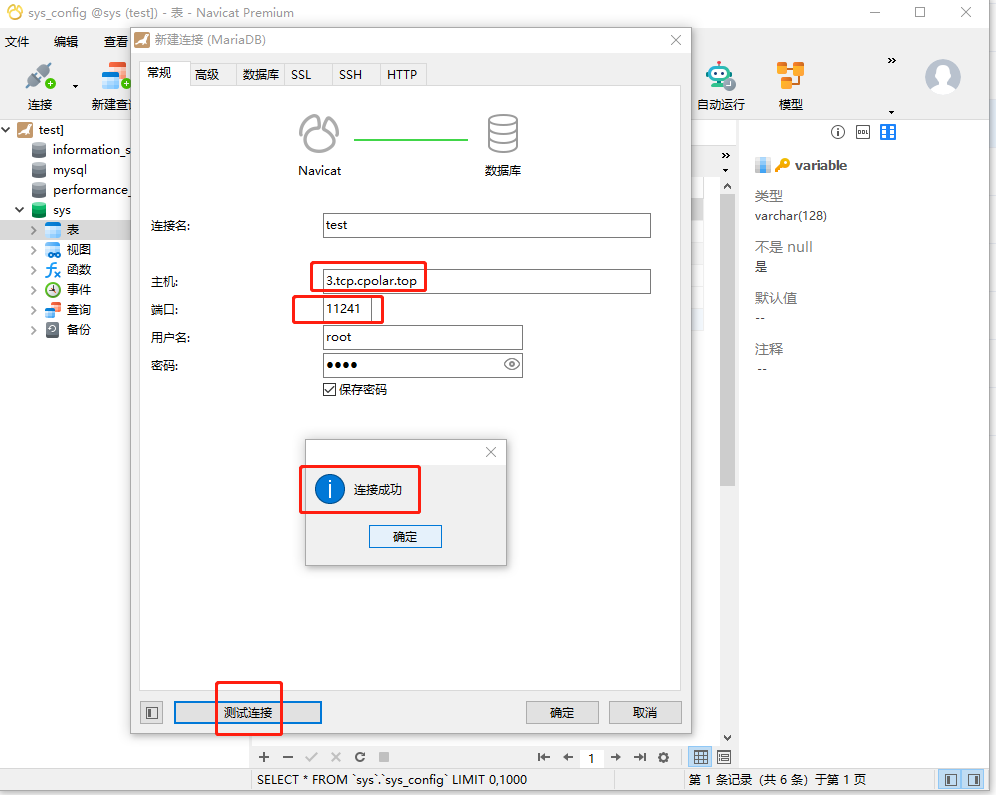
2.2 Test random address public network remote access
Open navicat, enter the tcp public network address: 3.tcp.cpolar.top port number 11241, then click Test Connection, and the connection is successful.
3. Configure a fixed TCP port address
Since the tunnel created above uses a random address tunnel, the address will change within 24 hours. In order to make the connection more stable, we can configure it as a fixed TCP connection address.
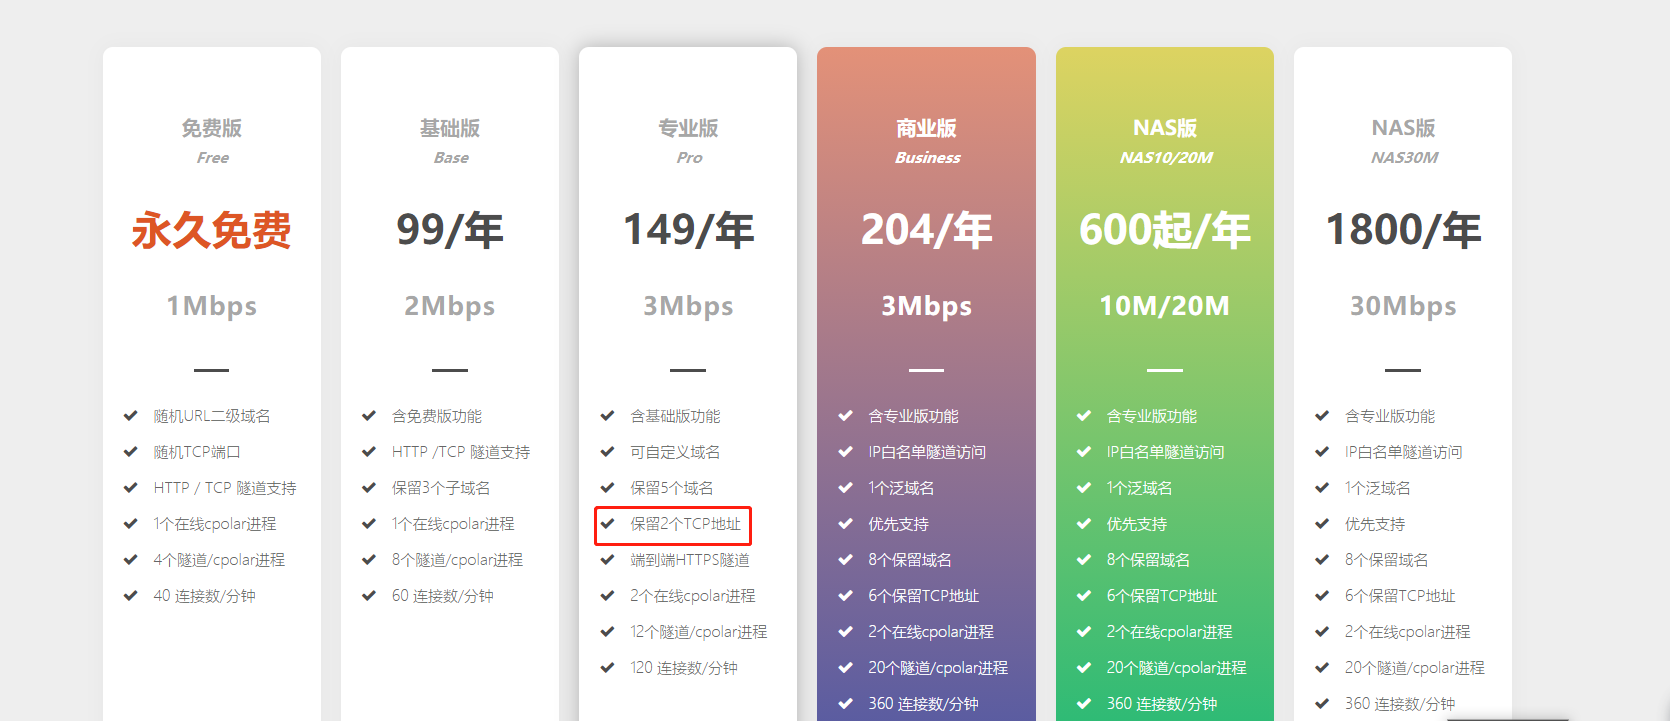
It should be noted that configuring a fixed TCP port address requires upgrading cpolar to the Professional Edition package or above.
3.1 Reserve a fixed public network TCP port address
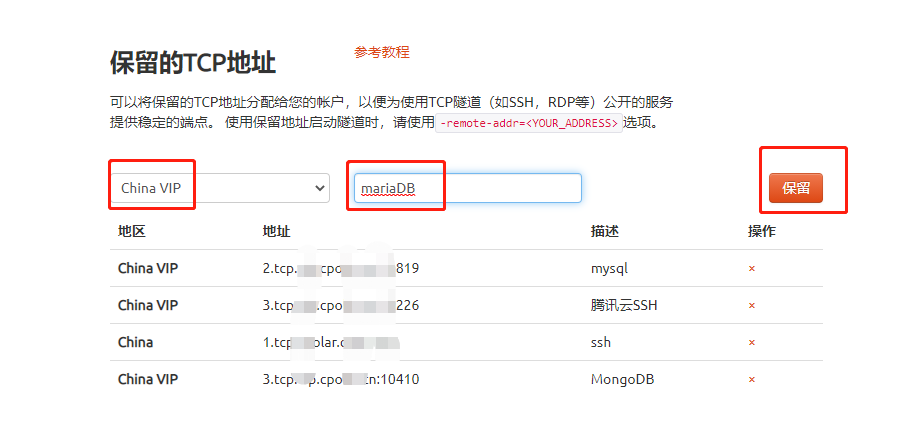
Log in to the cpolar official website backend, click Reserve on the left, and select the reserved TCP address. Let's first reserve a fixed port address for remote MariaDB.
- Region: Select China VIP
- Description: Notes, which can be customized
Click to keep
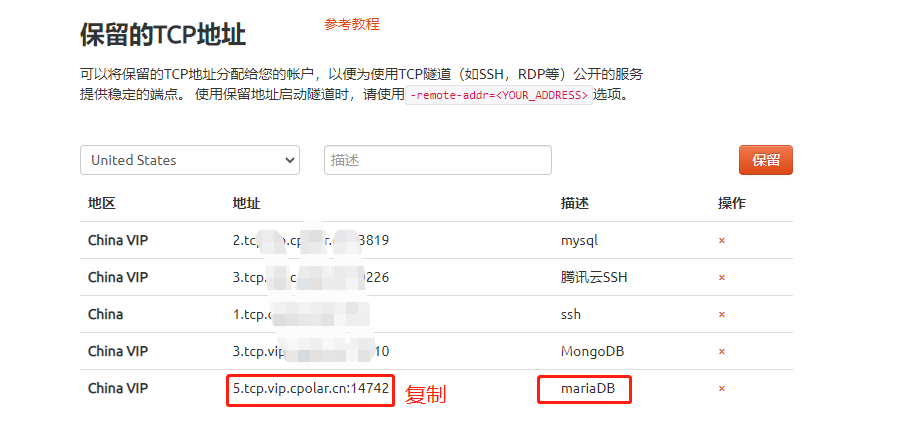
After the address is successfully reserved, the system will generate the corresponding fixed public network address, copy it, and then configure it into the tunnel.
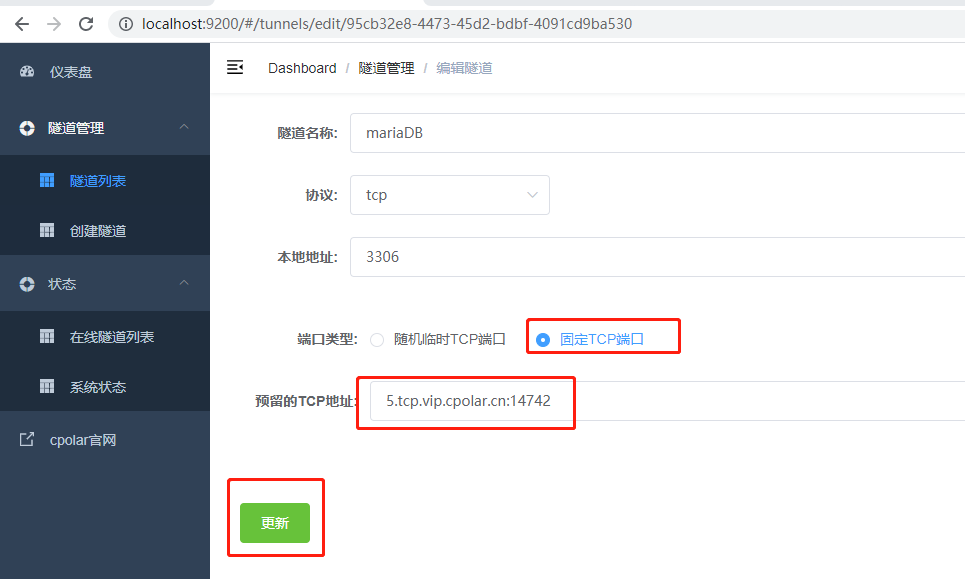
3.2 Configure a fixed public network TCP port address
Access port 9200 on the browser, http://127.0.0.1:9200/, log in to the cpolar web ui management interface, click Tunnel Management - Tunnel List on the left dashboard, find the mariaDB tunnel, and click Edit on the right
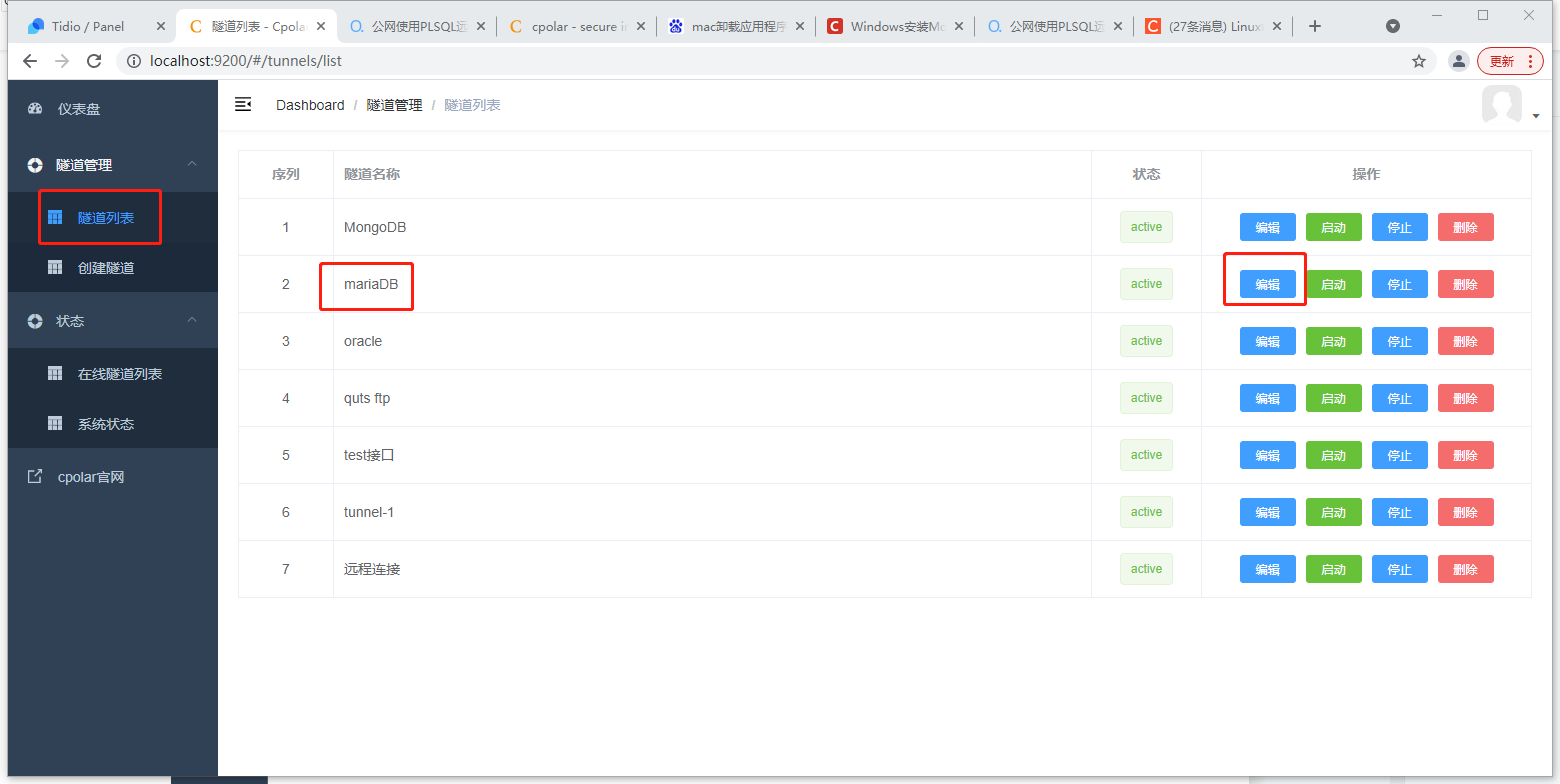
Modify the tunnel information and configure the successfully reserved fixed tcp address into the tunnel.
- Port type: modified to fixed tcp port
- Reserved tcp address: fill in the successfully reserved address
Click to update
After the tunnel is successfully updated, click the status on the left dashboard - Online Tunnel List, find the tunnel that needs to be edited, and you can see that the public network address has been updated to a fixed TCP address.
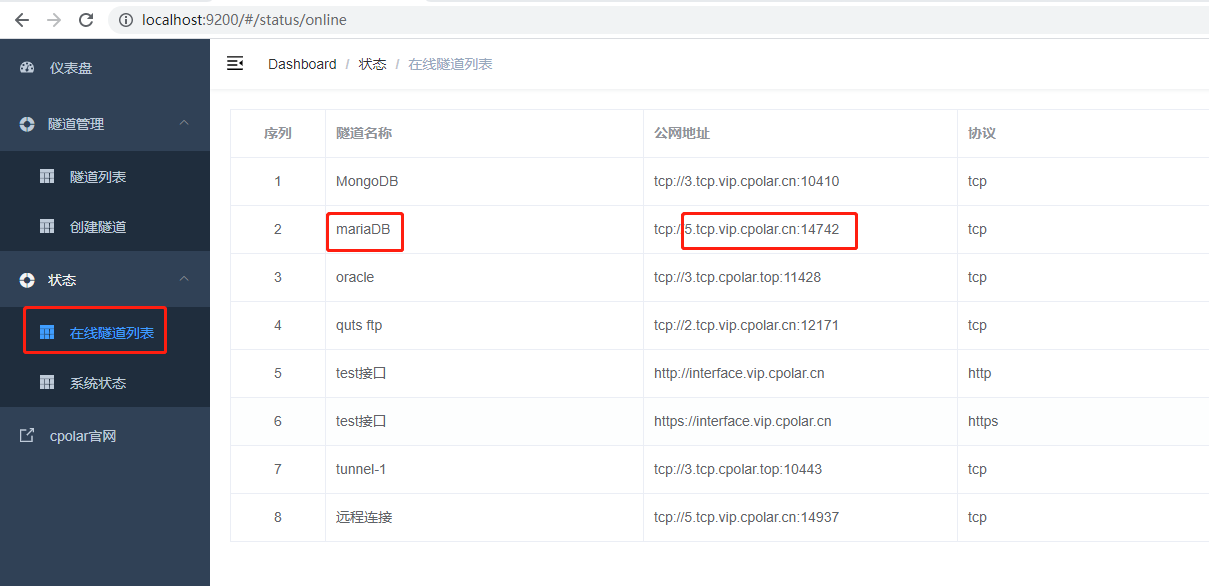
3.3 Test fixed address public network remote access
To test remote mariaDB using a fixed TCP port address, we open navicat again and connect using a fixed TCP address.