E-commerce front-end project - complete registration and login functions, routing guard
Article directory
1. Complete the registration part
1. Get verification code
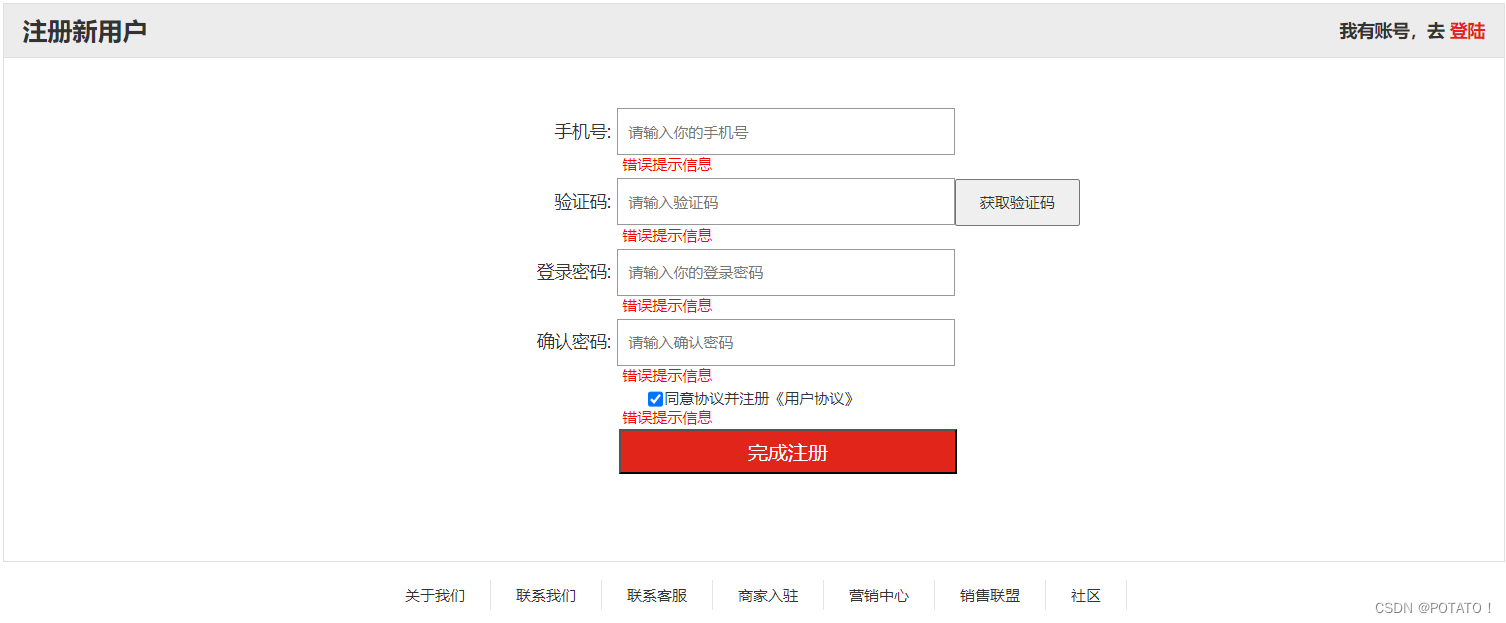
First, create a static page for login and registration, and then implement the verification code part. Enter your mobile phone number, send a request to obtain a verification code, and then display it directly in the text box.
First, write the interface:
// 获取验证码
export const reqGetCode = (phone) => {


  return requests({


    url: `/user/passport/sendCode/${

      phone}`,
    method: "get",
  });
};
Next, there is the vuex we are familiar with:
import {

     reqGetCode } from "@/api";

// 登录与注册模块
const state = {


  code: "",
};
const mutations = {


  GETCODE(state, code) {


    state.code = code;
  },
};
const actions = {


  // 获取验证码
  async getCode({

      commit }, phone) {


    let result = await reqGetCode(phone);
    // console.log("获取验证码" + result.data);
    if (result.code == 200) {


      commit("GETCODE", result.data);
      return "ok";
    } else {


      return Promise.reject(new Error(fail));
    }
  },
};
const getters = {

    };
export default {


  state,
  mutations,
  actions,
  getters,
};
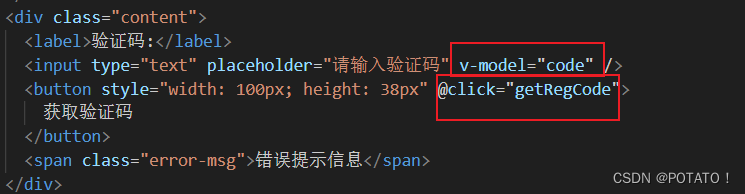
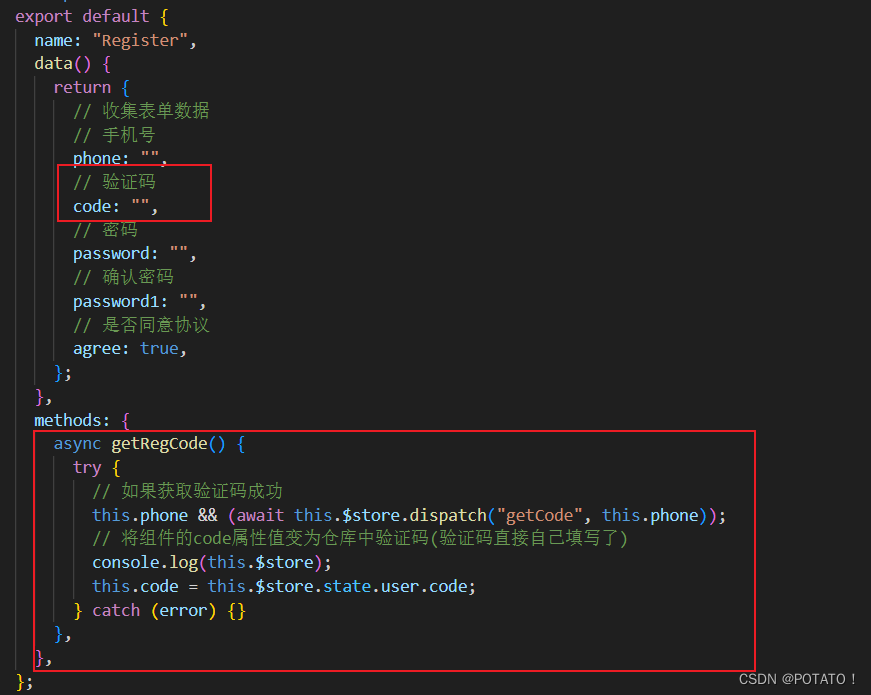
Finally, display the requested verification code in the verification code box:
2. Complete user registration
This part is also relatively simple. It mainly involves sending a request with the mobile phone number, verification code, and password and adding it to the database.
Familiar writing interface links:
// 注册
export const reqUserRegister = (phone, password, code) => {


  return requests({


    url: "/user/passport/register",
    data: {


      phone,
      password,
      code,
    },
    method: "post",
  });
};
Let’s get to the vuex link that we are familiar with
const actions = {


  // 用户注册
  async userRegister({

      commit }, {

      phone, password, code }) {


    try {


      let result = await reqUserRegister(phone, password, code);
      //   console.log(result);
      if (result.code == 200) {


        return "注册成功";
      }
      if (result.code == 223) {


        return "该用户已注册!";
      }
    } catch (err) {


      alert("请求失败", err.message);
    }
  },
};
cons
Finally, click the Register button to dispatch the request:

export default {


  name: "Register",
  data() {


    return {


      // 收集表单数据
      // 手机号
      phone: "",
      // 验证码
      code: "",
      // 密码
      password: "",
      // 确认密码
      password1: "",
      // 是否同意协议
      agree: true,
    };
  },
  methods: {


    .......
    async userRegister() {


      try {


        //来个逻辑短路
        // 若phone、code、password都存在且password=password1,agree=true注册才会成功
        const {

     phone, password, password1, agree, code } = this;
        if (
          phone &&
          code &&
          password &&
          password1 &&
          password == password1 &&
          agree == true
        ) {


          let result = await this.$store.dispatch("userRegister", {


            phone,
            code,
            password,
          });
          alert(result);
          if (result == "注册成功") {


            this.$router.push("/login");
          }
        }
      } catch (err) {


        alert("注册失败!", err);
      }
    },
  },
};
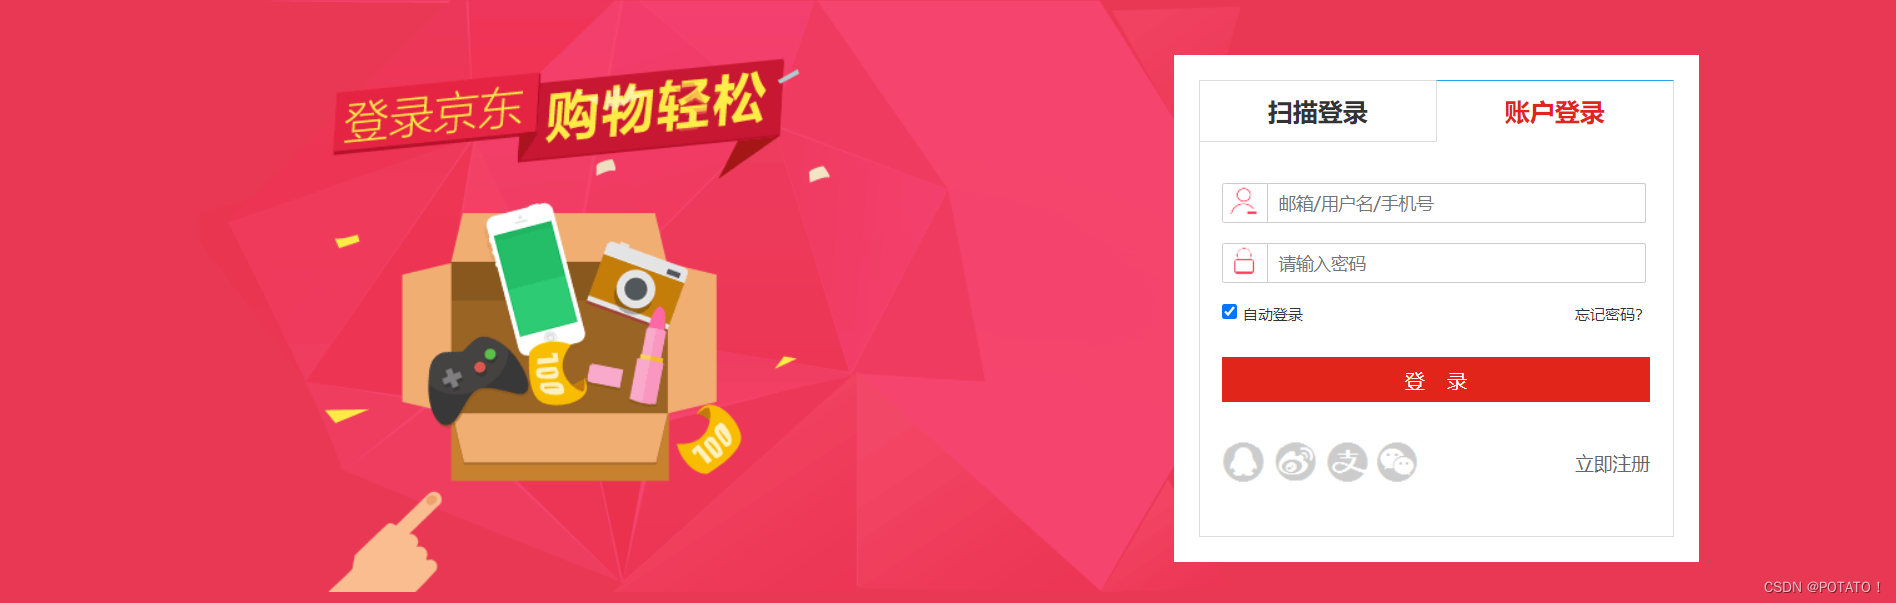
2. Login
First click.preventprevent the default form submission operation to avoid jumping around.

1. Click Login to send request verification
Write login interface:
// 登录
export const reqLogin = (data) => {


  return requests({


    url: "/user/passport/login",
    data,
    method: "post",
  });
};
Write vuex:
async userLogin({

      commit }, data) {


    let result = await reqLogin(data);
    console.log("登录信息" + result);
  },
Dispatch request and route jump:
// 用户登录
    async userLogin() {


      try {


        // 登录成功
        const {

     phone, password } = this;
        phone &&
          password &&
          (await this.$store.dispatch("userLogin", {

     phone, password }));
        // 跳转到路由首页
        this.$router.push("/home");
      } catch (error) {


        alert("登录失败" + error.message);
      }
    },
After requesting data, the server will return a field named, which tokenis used to uniquely identify the user.
2. Save the issued token
When we click to log in, the returned data is like this. There is a field in it token, which is the user's unique identifier. In the future, we will need this when requesting user-related things token.
Since vuex is a non-persistent storage data, it will be gone as soon as it is refreshed, so we need to tokenstore it in local storage.
// 登录与注册模块
const state = {


  ......
  token: localStorage.getItem("TOKEN"),
  ......
};
const mutations = {


  ......
  USERLOGIN(state, token) {


    state.token = token;
  },
};
const actions = {


  .......
  // 登录
  async userLogin({

      commit }, data) {


    let result = await reqLogin(data);
    // console.log("登录信息" + result);
    // 服务器下发的token是用户的唯一标识
    // 经常通过token找服务器要用户信息进行展示
    if (result.code == 200) {


      commit("USERLOGIN", result.data.token);
      // 持久化存储token
      localStorage.setItem("TOKEN", result.data.token);
      return "ok";
    } else {


      return Promise.reject(new Error("fail"));
    }
  },
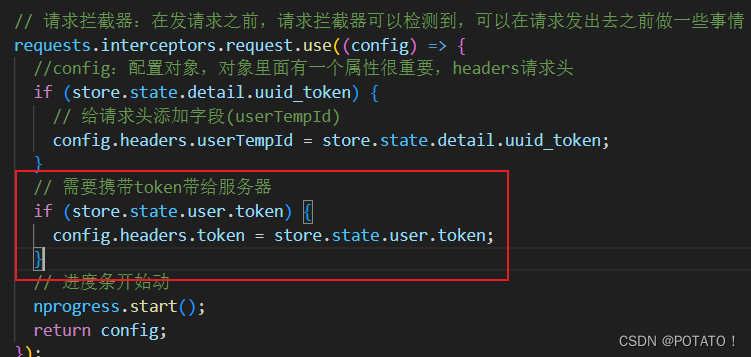
Each subsequent request must be related to the token, so we need to write the token in the request header.
3. Request user data with token and display it
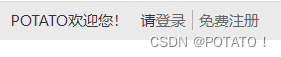
Upper left corner when not logged in:
After successful login:

There is a question here, that is, where should the dispatch of this request be written.
If it is written on the home page, the request will be dispatched on the home page (actually this is wrong, if you refresh it on another page, you will lose the user name)
1. If you only write on the home page, then jump to other pages and click to refresh the user data in vuex and the user data in vuex will be gone; but if every component that uses the user name has to be dispatched, it will be too troublesome.
2. If written in the app, the dispatch request is before logging in. If there is no token, the data cannot be requested. Only by refreshing the page after logging in (there is already a token) can the data be requested (the app must be the first to be mounted when the page is refreshed).
The solution is to use routing guards to make judgments and dispatch requests without user data. (This problem will be solved below, but it will be distributed at home first)
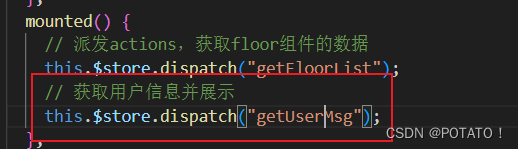
Here we first distribute the distribution to home. First write the interface for requesting user data:
// 获取用户信息(需要带着用户的token向服务器要用户信息,写在请求头里)
export const reqGetUserMsg = () => {


  return requests({


    url: "/user/passport/auth/getUserInfo",
    method: "get",
  });
};
Vuex saves data to the warehouse:
// 获取用户信息
  async getUserMsg({

      commit }) {


    let result = await reqGetUserMsg();
    console.log("用户信息" + result.data);
    if (result.code == 200) {


      // 用户已经登录成功且获取到token
      commit("GETUSERMSG", result.data);
    }
  },
exhibit
computed: {


    userName() {


      return this.$store.state.user.userMsg.name;
    },
  },
4. Log out
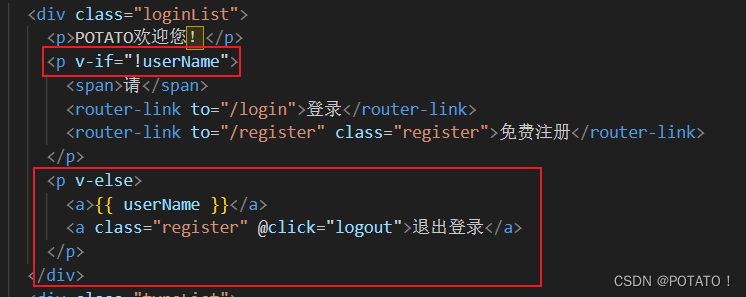
In the Header component, read the user data of vuex and get the user name

Log out of the login interface:
// 退出登录
export const reqLogout = () => {


  return requests({


    url: "/user/passport/logout",
    method: "get",
  });
};
vuex clears related user information:
const mutations = {


  CLEAR(state) {


    // 把仓库中相关用户信息和本地存储清空
    state.token = "";
    state.userInfo = {

    };
    localStorage.removeItem("TOKEN");
  },
};
const actions = {


  // 退出登录
  async UserLogout({

      commit }) {


    let result = await reqLogout();
    if (result.code == 200) {


      commit("CLEAR");
      return "ok";
    } else {


      return Promise.reject(new Error("fail"));
    }
  },
};
Return to homepage after exiting:
   // 退出登录
    async logout() {


      try {


        // 需要发请求通知服务器退出登录(清除一些数据)
        // 清除项目当中的数据(userInfo、token)
        // 退出成功
        await this.$store.dispatch("UserLogout");
        // 回到首页
        this.$router.push("/home");
      } catch (error) {


        alert("退出登录失败" + error.message);
      }
    },
5. Route guard
There are still some unresolved issues above.
- You should not be able to return to the login page after logging in. The normal logic should be that you can only enter the login page when you are not logged in or after logging out.
- Since the above request is only sent to the Home page to obtain user information, when we go to other pages, the user information is gone. We can send requests to every page, but this is too troublesome.
Both of the above problems can be solved using route guards. Click to review routing guards
src/router/index.js
// 全局守卫——前置守卫
router.beforeEach(async (to, from, next) => {


  // 用户登录了才会有token
  let token = store.state.user.token;
  // 用户是否登录
  if (token) {


    // 登录了就不能再回到登录页,停留在首页
    if ((to.path = "/login")) {


      next("/home");
    }
    // 登录了去其他的页面
    else {


      // 如果有用户数据,放行
      if (store.state.user.userMsg.name) {


        next();
      }
      // 如果没有用户数据,先请求成功再放行
      else {


        try {


          // 这个请求在挂载之前,所以刷新也会先请求
          await store.dispatch("getUserMsg");
          next();
        } catch (err) {


          console.log("请求用户数据失败!", err);
          // 这里还有一种情况,token过期请求不到
          // 那么就要清空token,重新登录
          await store.dispatch("userLogout");
          // localStorage.removeItem("TOKEN");
          next("/login");
        }
      }
    }
  }
  // 如果没有登录
  else {


    //没登录不能去的路由地址
    let pages = ["/trade", "/pay", "/paysuccess", "/center/myorder"];
    if (pages.includes(to.path)) {


      // 如果没登陆往这几个页面跳,就回到登录页,并传想去的页面的地址
      // 这样能提升用户体验,登录完成后直接跳到刚才的页面
      next(`/login?redirect=${

      to.path}`);
    } else {


      next();
    }
  }
});
At this point, the notes on the login and registration functions are almost organized. I re-read the code I wrote before and found that there are still many areas for improvement, so I made some minor changes. There were indeed many details that were not considered when I wrote them before. I still need to think more. Just look back.