This article first appeared in Muxue’s Humble House
VMware installs CentOS8-Stream virtual machine
1.Install VMware
Since the latest version of VM costs money, here is an installation package for VMware16pro ; I know that the download speed of the disk is slow, but there really are no other options, sorry for that.
In the following, vm will be used to refer to VMware as abbreviation.
提取嘛: gdt9
亚索包解押: 8888
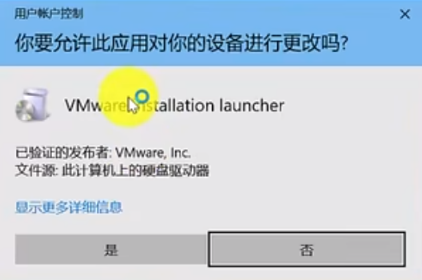
After downloading the installation package, right-click and run as administrator , and select是
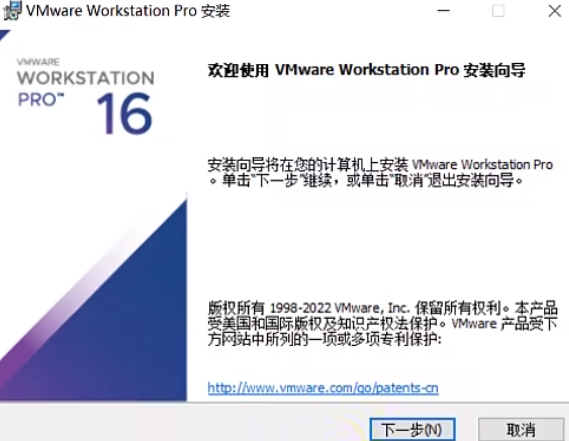
In the first selection box, click Next
Check the box to accept the terms of the agreement and continue to the next step;
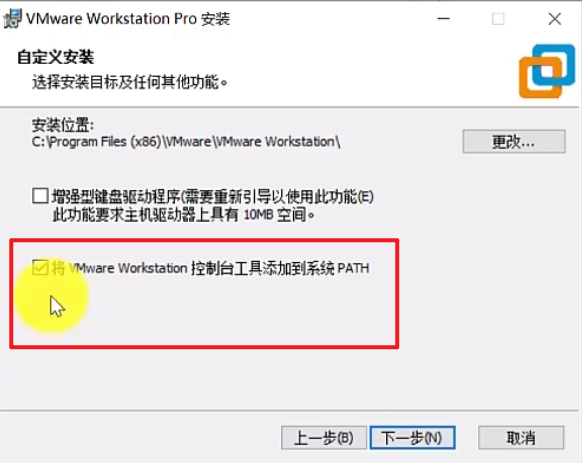
You need to check this page to add it to the system PATH, and you can choose the installation location yourself.
Note: I have kept the default C drive installation path unchanged, so I don’t know if changing it to other drives will cause other problems. If your C drive has enough space, install it on C drive!
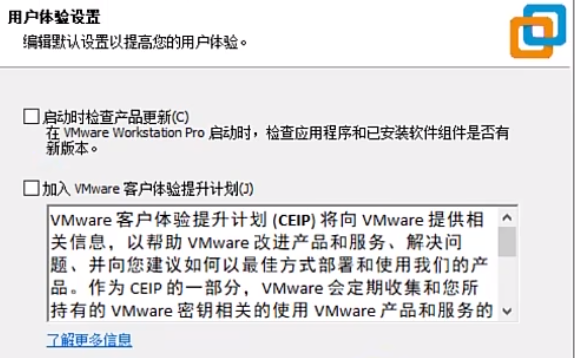
Remove the hooks for checking for product updates and joining the trial plan, next step
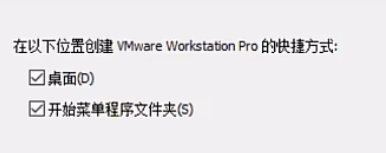
The default shortcut is fine, you can change it yourself later. You must know this!
After clicking Next on this page, click Install and wait for the installation to complete.
After the installation is completed, the following page will appear. Click 许可证to fill in the license key.
You can Baidu for the license key. There is a license code in the compressed package I shared . Just fill in that.
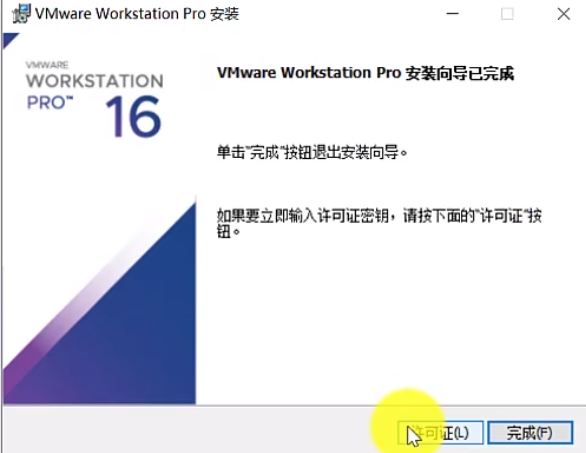
After this step is completed, click Finish and the virtual machine software is successfully installed.
2. Download centos8 system iso
You can download it from two places. It is recommended to follow the instructions in this article and use the Alibaba Cloud image.
- centos official website: https://www.centos.org/download/
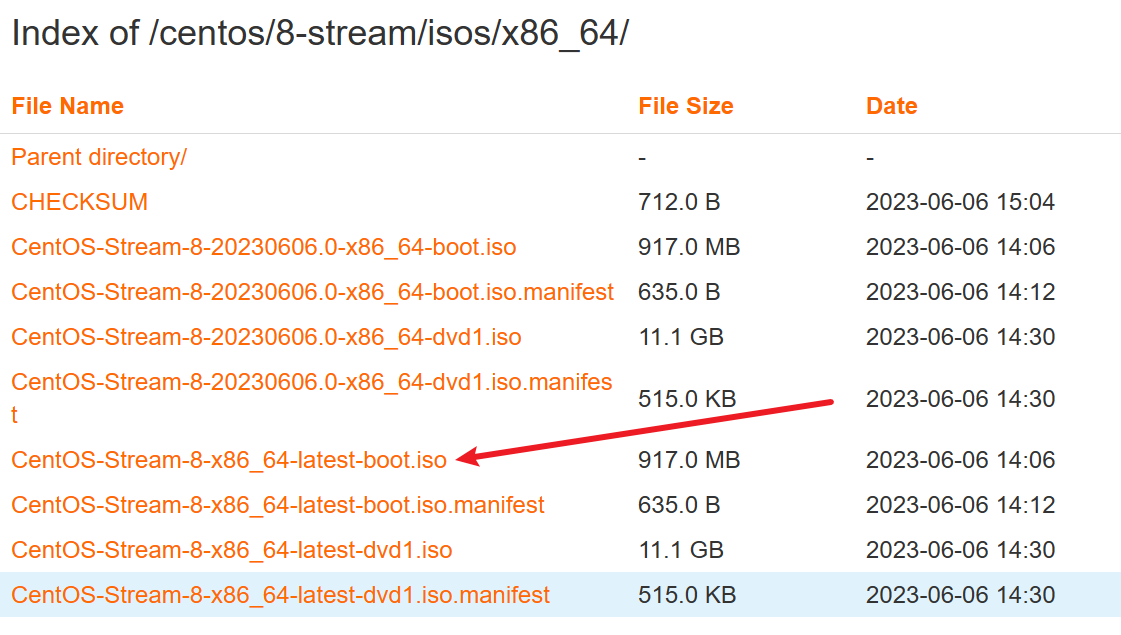
- Alibaba Cloud Mirror: http://mirrors.aliyun.com/centos/8-stream/isos/x86_64/
This article installs centos8-streamthe iso. Most of the Linux blogs written on this site are compatible with operations on this system! Here I choose the iso image pointed by the arrow.
为了避免后续的其他操作和本文不符,这里顺便也把iso镜像给上传了一个
https://pan.baidu.com/s/1jleRo4mxILq2RwSU-rxaaA
提取嘛: t7ay
3.Install Centos
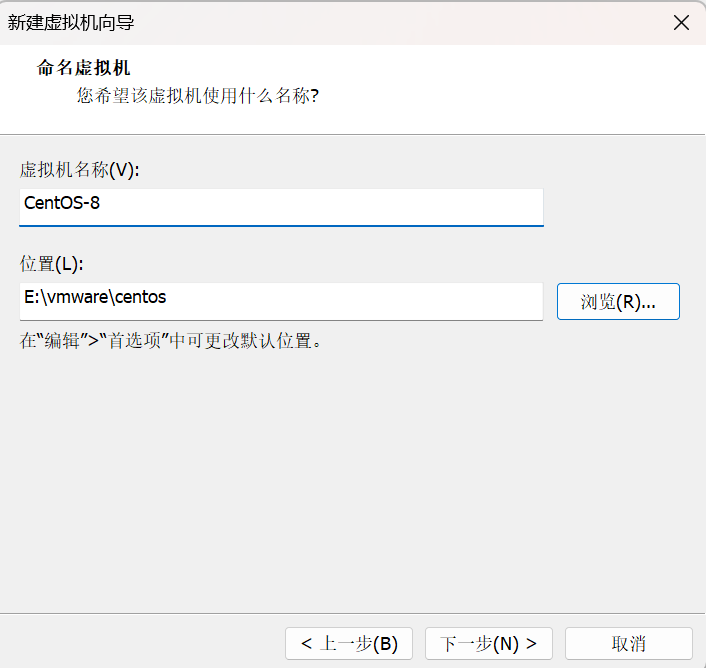
3.1 Create a virtual machine
First, create an empty directory somewhere else on your computer’s hard drive.

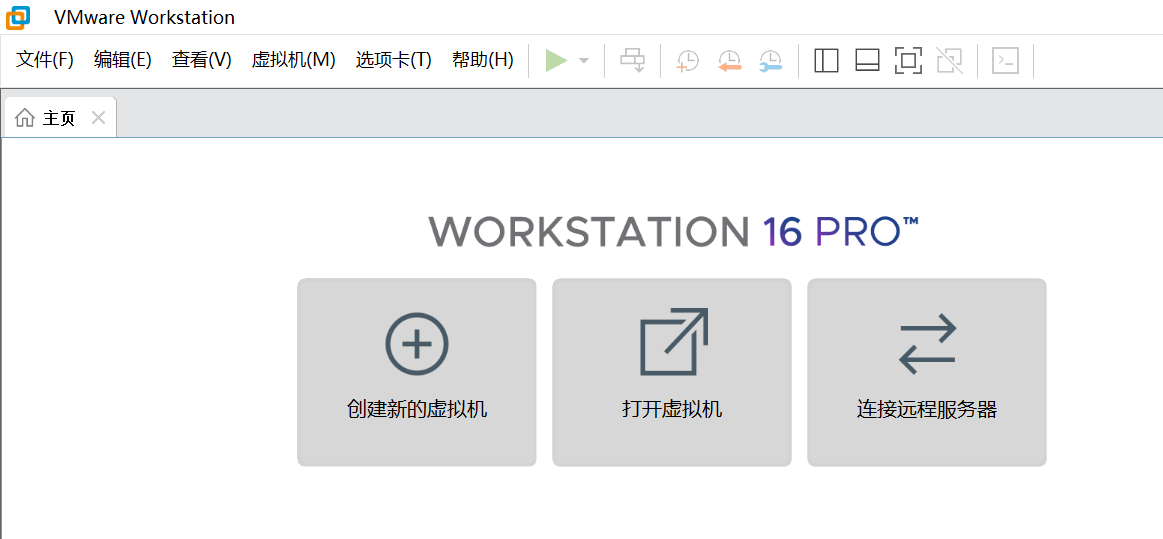
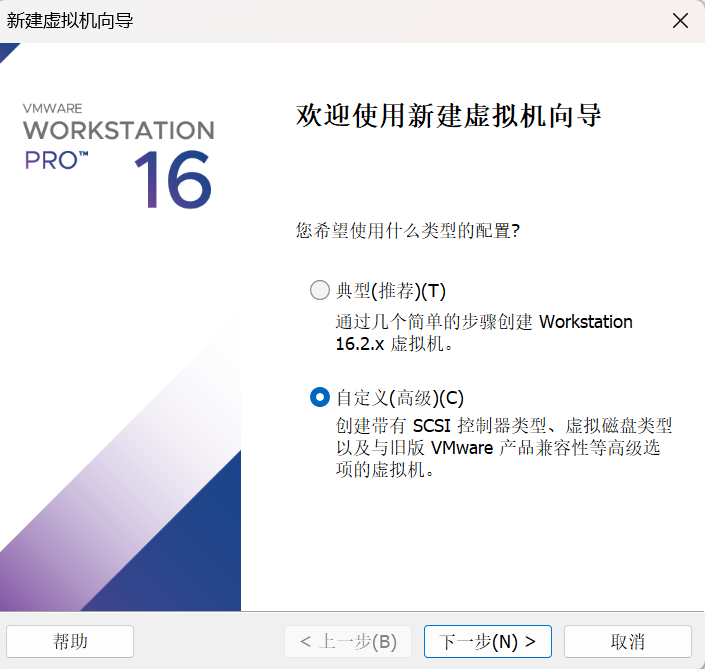
Open the main interface of the vm software and click to create a new virtual machine
customize
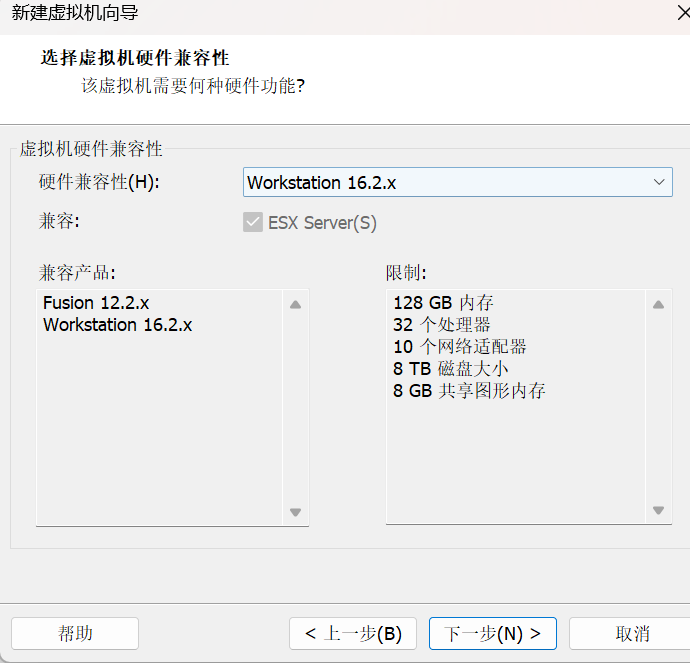
Keep the default here and do not need to modify it.
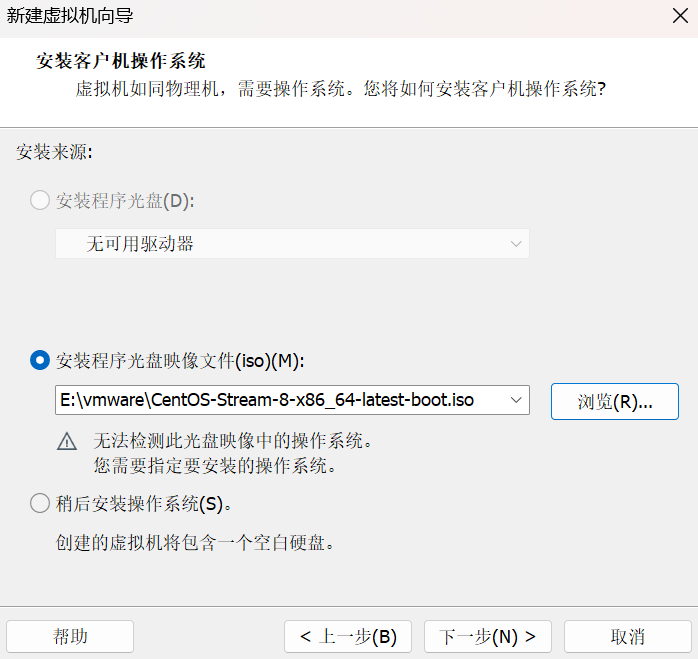
iso selection
iso selects the centos8-stream virtual machine just downloaded
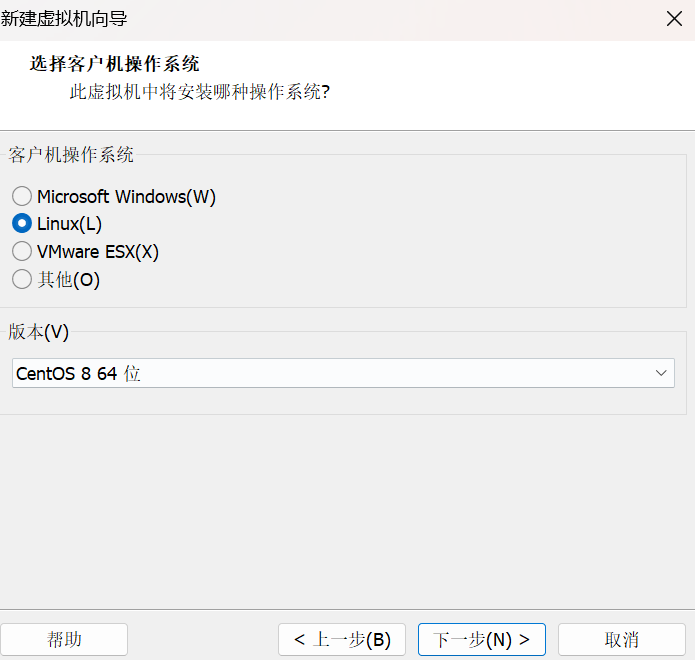
operating system
Operating system selection linux and centos8
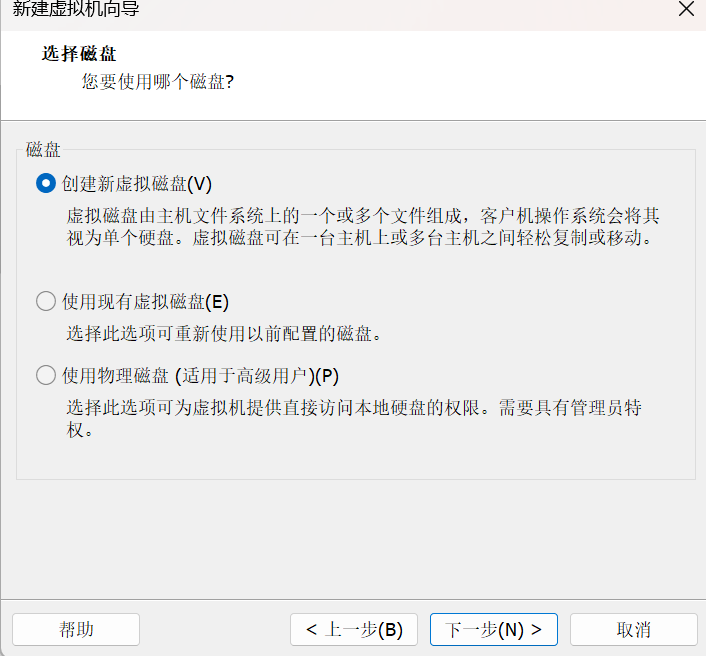
Installation disk
Select the empty folder you just created (this is the installation path of the virtual machine files, so it is recommended to choose an empty disk on your computer to create the folder)
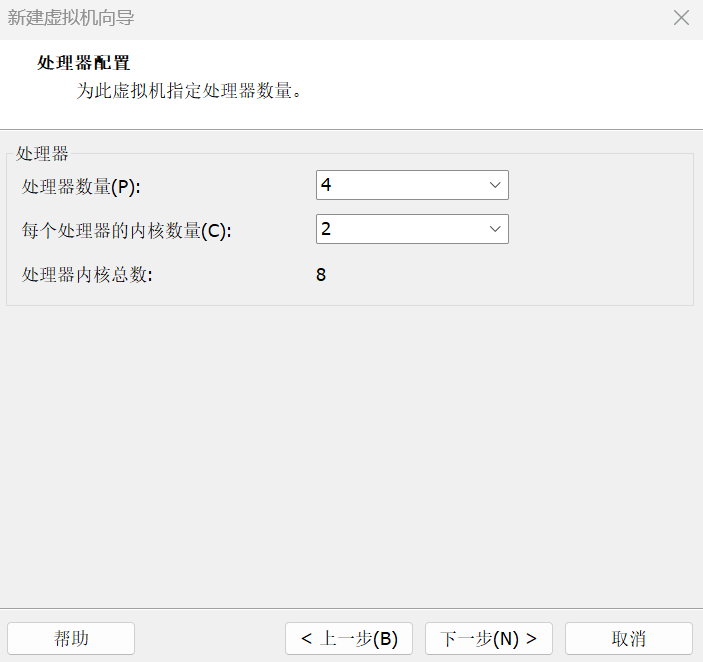
Core selection
Please choose the number of cores according to your CPU. For example, my notebook CPU has 8 cores and 16 threads ( ctrl+alt+deleteopen your computer 任务管理器to check)
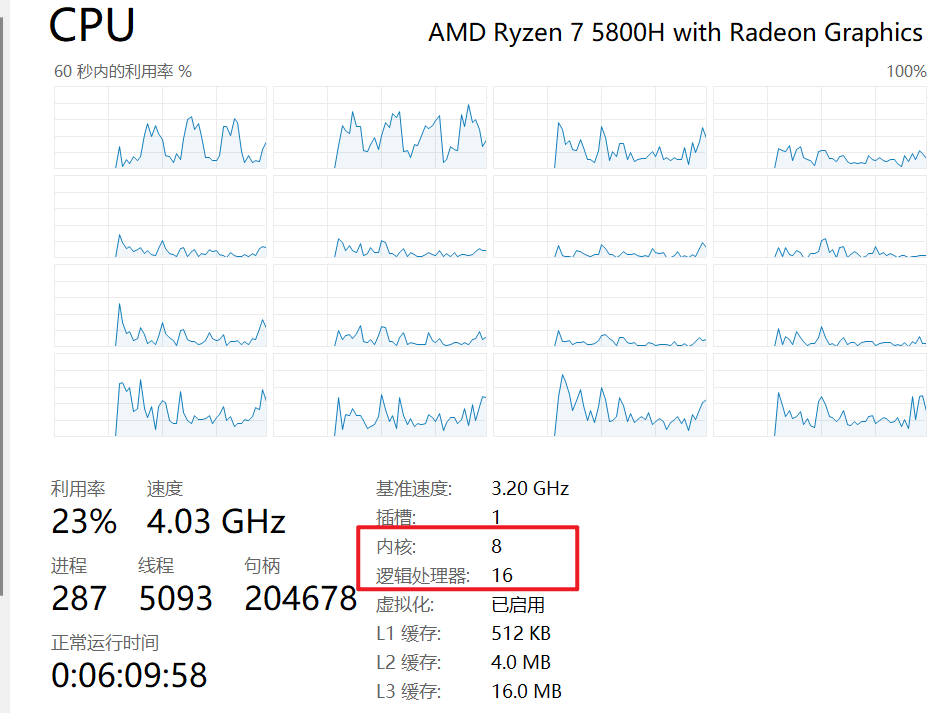
Here I chose 4 cores and the number of cores was 2
Note that this needs to match the CPU of your computer. 8 cores and 16 threads means that each processor has 2 cores, so 2 should be selected. If it is a CPU with Intel's new large and small core design, you can also choose 2. Some older CPUs have one core and only one thread (for example, the n5105 has 4 cores and 4 threads)
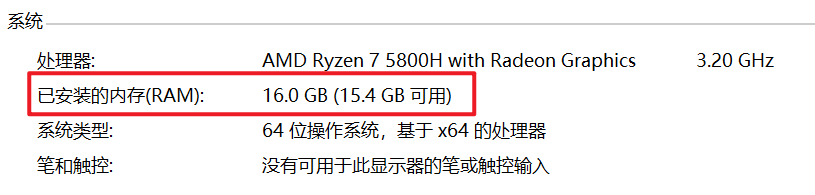
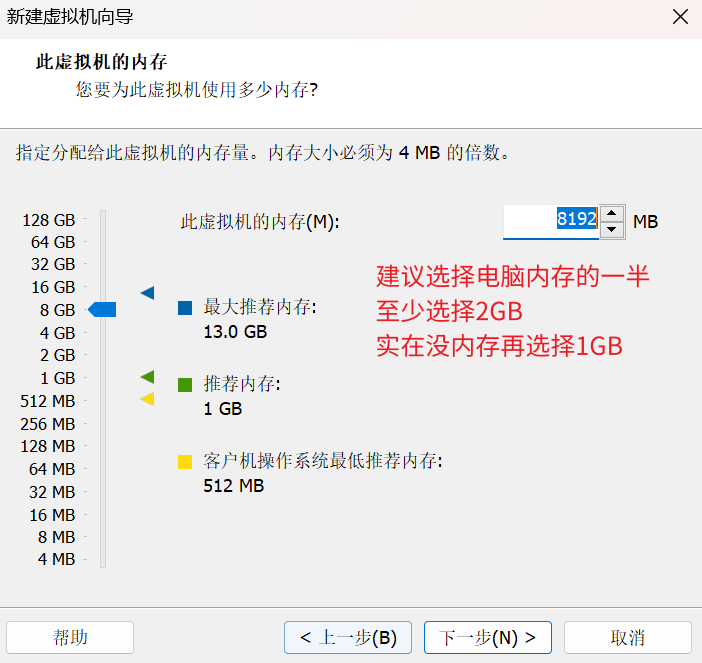
Memory
Depending on the memory selection of your computer, it is recommended to choose less than half of the total memory .
For example, if the computer is 16G, it is recommended to only select 8G. Otherwise, the virtual machine will take up too much memory and the laptop will be stuck, making it impossible to do anything else.
Here we also need to correct some misunderstandings of beginners. Memory refers to running memory , not the hard drive capacity of your computer! ! ! Right-click on your computer desktop
此电脑and click属性to see how much memory your computer has.
CentOS8 itself does not occupy much memory, but if you want to learn Linux programming operations in depth, you may later use vscode to remotely connect to the virtual machine. At this time, if the memory is too low, it will easily become stuck. So it is recommended to choose at least 2GB
Nowadays, computers all have 8G of memory, and 16GB is also common in notebooks at mainstream prices, so everyone’s notebooks can run virtual machines without any problem.
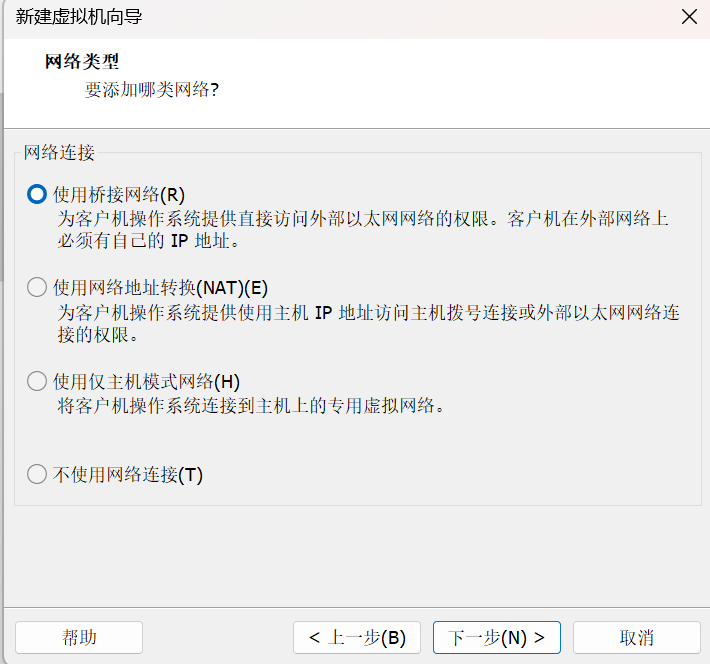
network
Select bridge
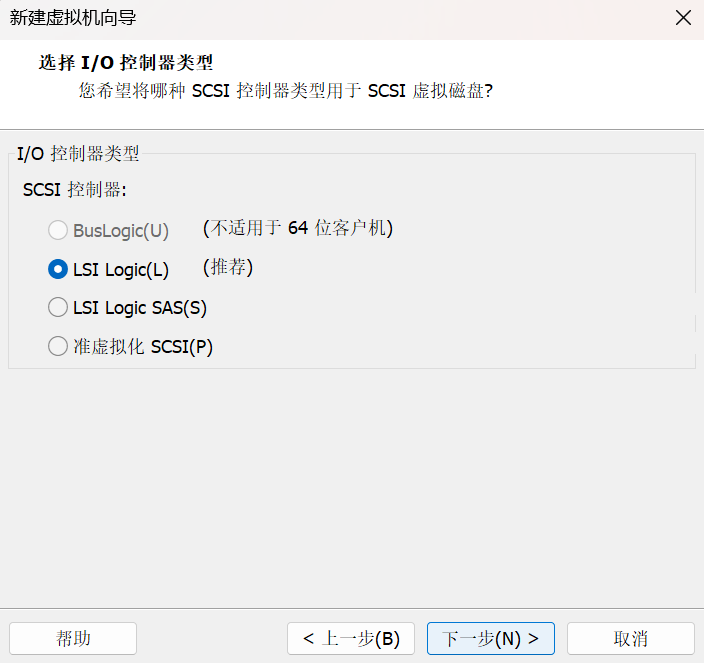
IO and disk
Choose the recommended one, no need to modify it
Just choose the disk type recommended by vm (the recommendations may be different for different computers)
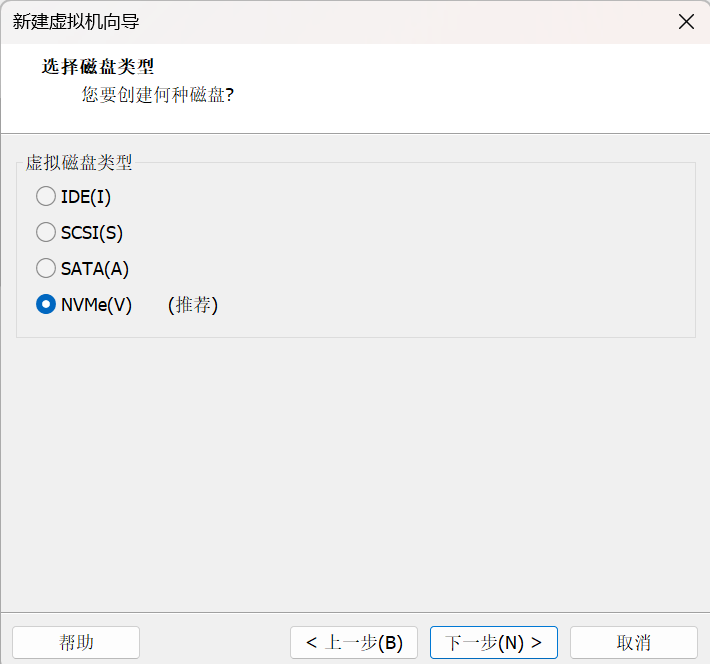
The disk size should be at least 20GB, and you can choose it according to the capacity of your computer’s hard drive. The selected hard drive capacity will not be filled immediately , but will slowly increase with use;
Virtual disk selects a single file
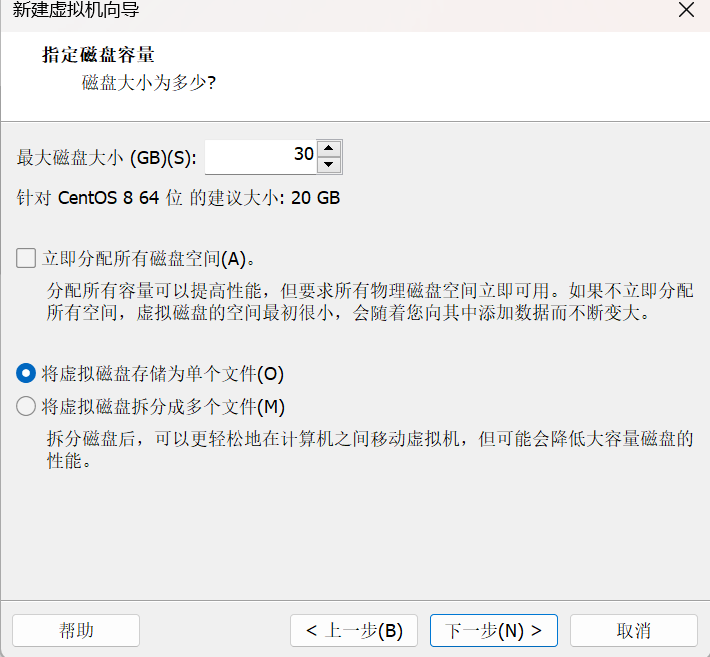
Disk file names do not need to be modified
Finish
Check to see if there are any incorrect settings and click Finish.
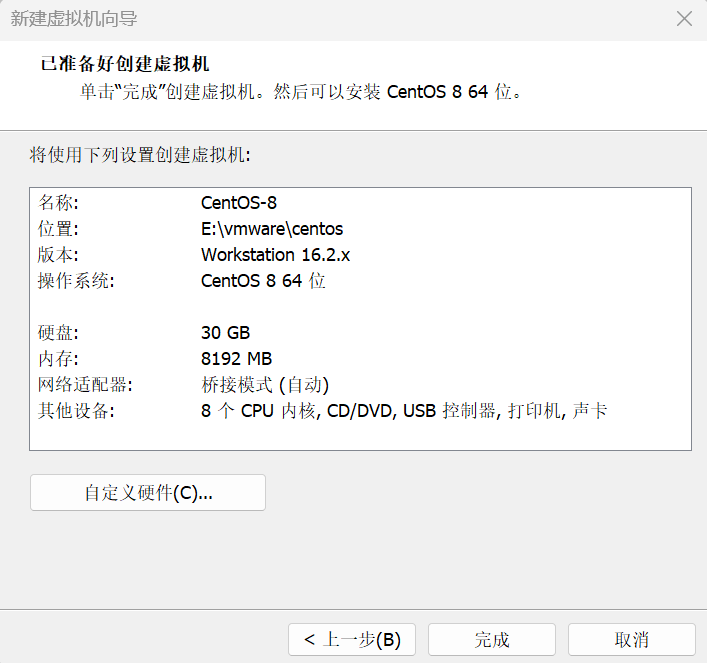
Click to start the virtual machine and centos is started.
3.2 Initialization
Click on the virtual machine screen and use 键盘the arrow keys to select the first install
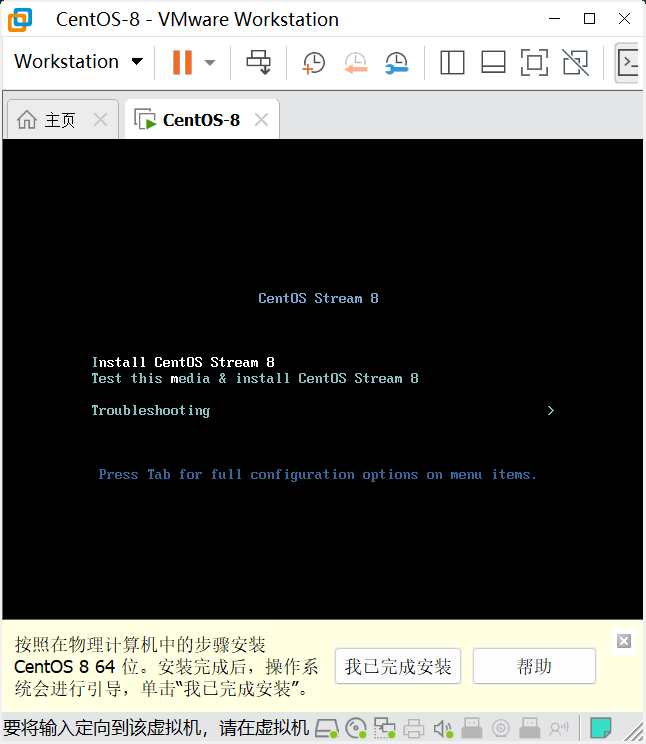
A lot of text will pop up. Wait for it to finish the installation process and you will reach the following interface.
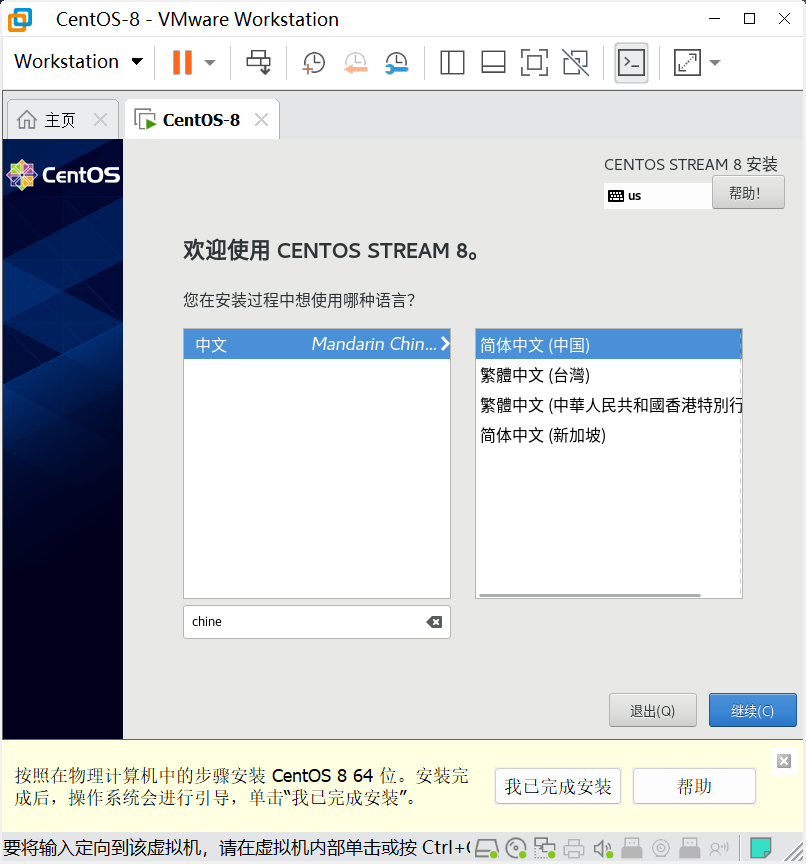
language
You can choose the language as Chinese, but in order to facilitate subsequent learning and integration with other tools (most tools do not have Chinese), it is still recommended to choose English ! And this can be changed in the system, so it’s not a big problem
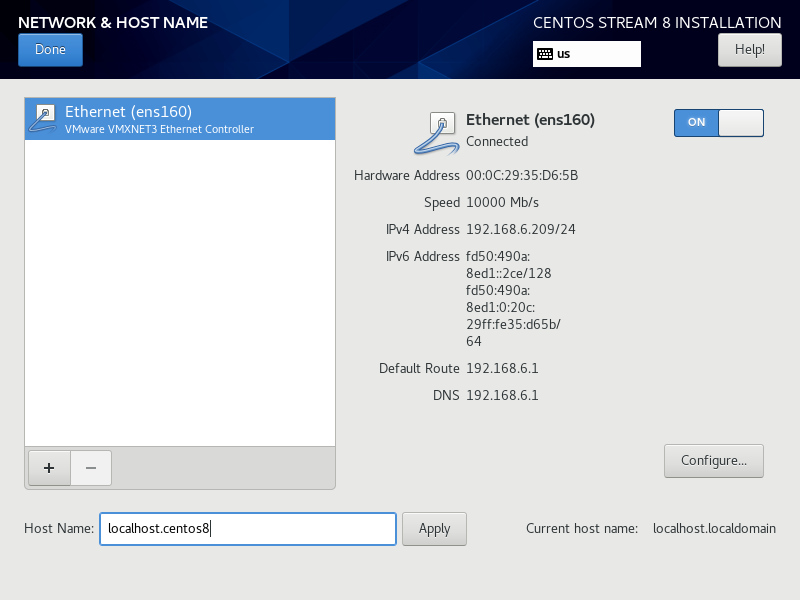
network
click network
Click the button in the upper left corner to open the connection, change the hostName to the one shown below, and applythen click on the upper left cornerDone
Time zone
We are in the East Eighth District, so we have to select the corresponding time zone Asia/Shanghai, which is the time zone of Shanghai.
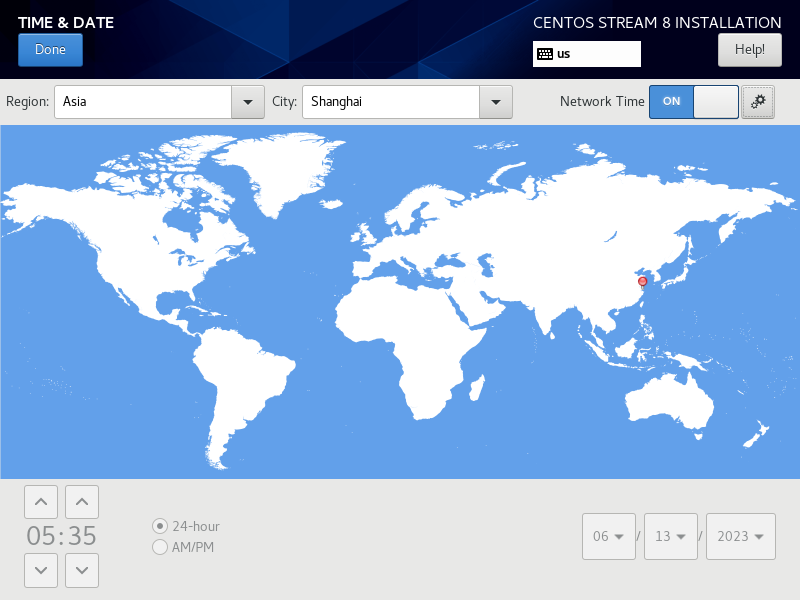
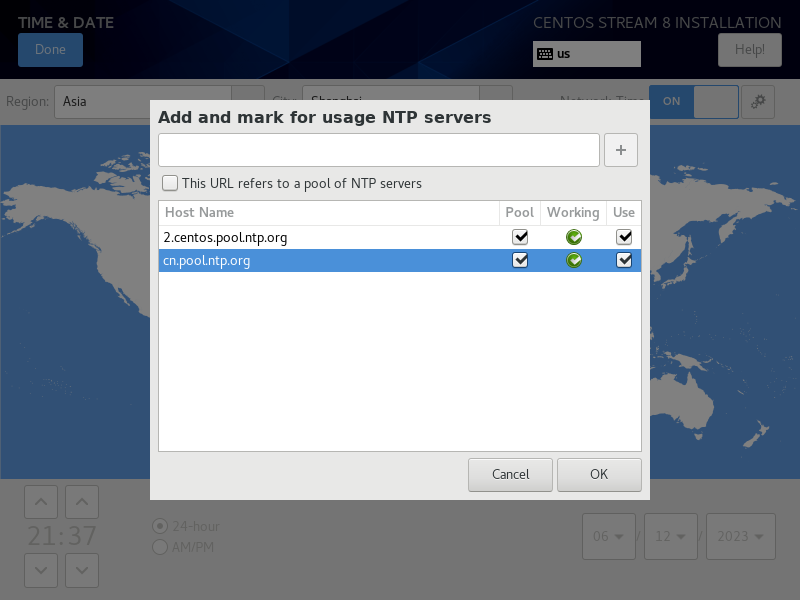
Here you can also choose the NTP timing server (which is a server used to broadcast the current time). Click the gear under help. We can choose a domestic server to facilitate receiving time updates.
cn.pool.ntp.org
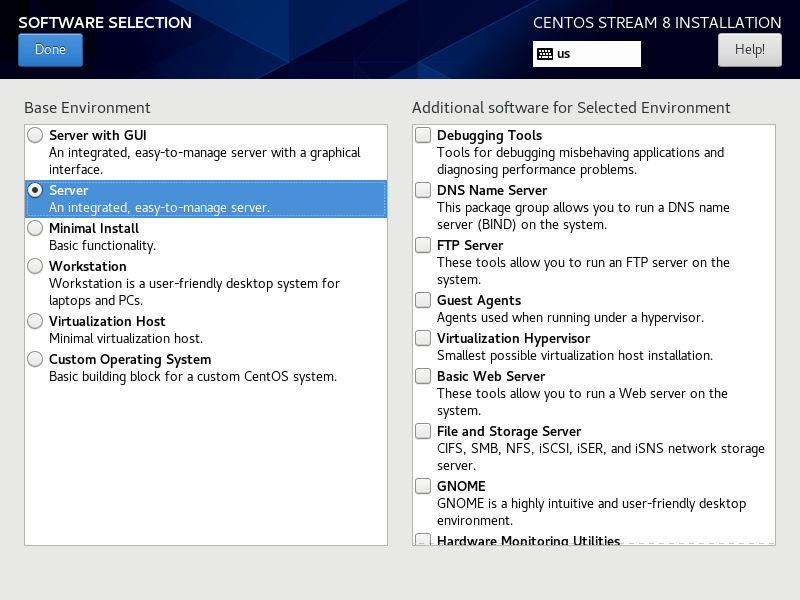
Software selection
Then select software selection, here you choose the software to be installed and the operating method of the system.
Since most of the time we learn Linux command line operations , the command line installation method also places a smaller load on the host. You servercan choose here; do not check the ones on the right.
After selecting, click done in the upper left corner
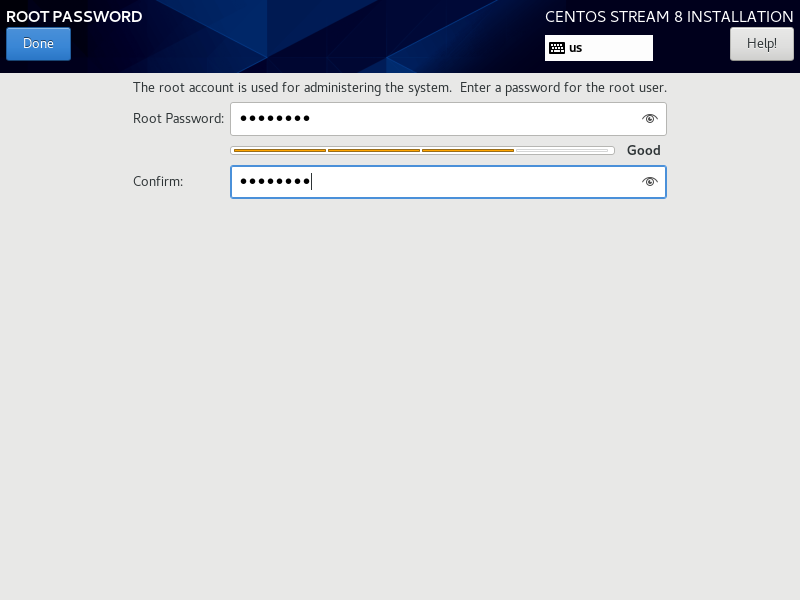
root password
Then click root passwordSettings. The root account is closed by default, which is not good for our learning. Set a password to facilitate subsequent connections!
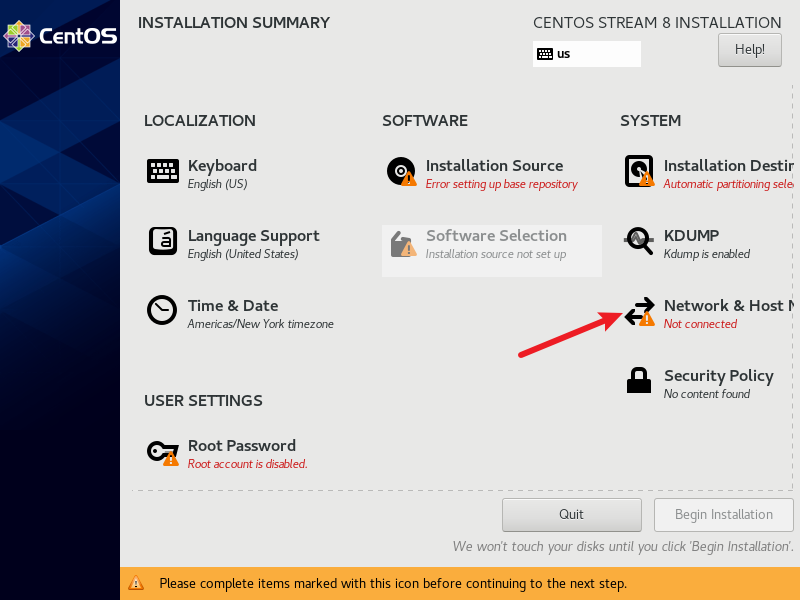
According to the sequence, after the above operations are completed, the installation in the lower right corner will no longer be gray and can be clicked.
If it appears
installation destinationred, click in and then exit and it will be ok.
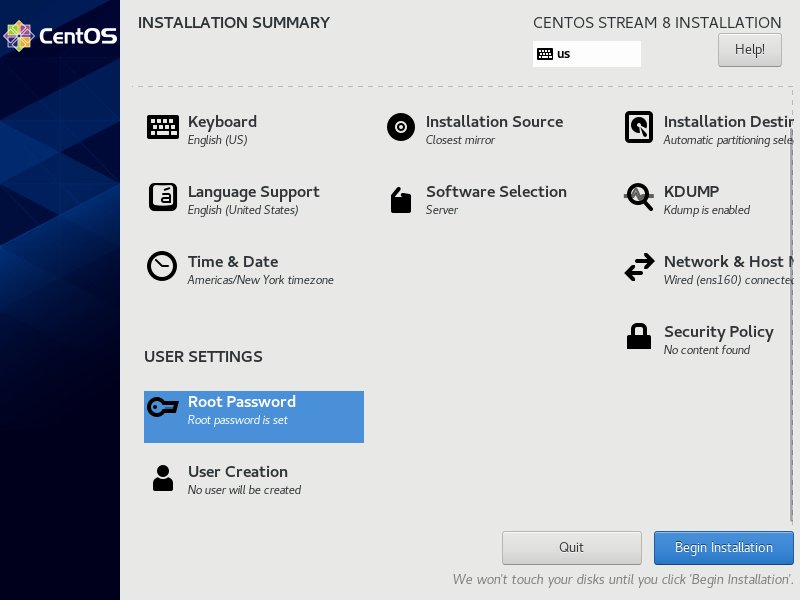
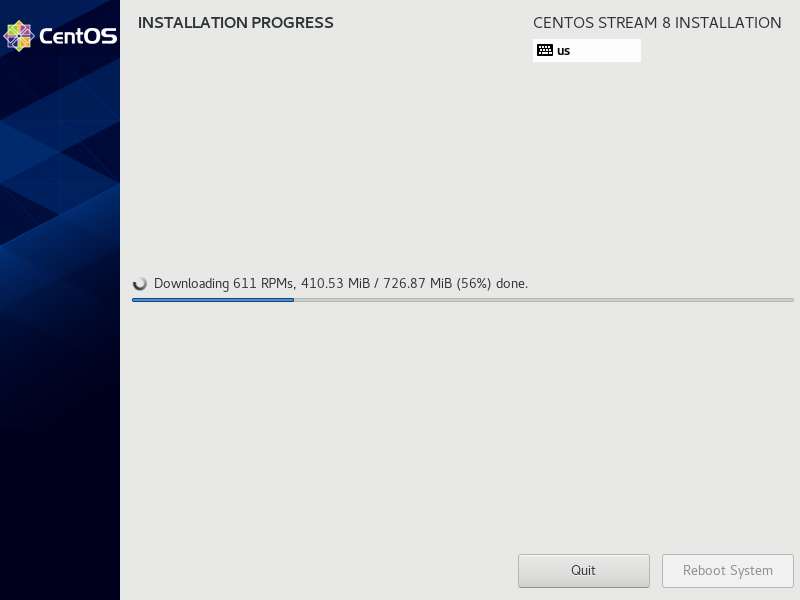
Click and wait for it to be installed! Wait patiently, it takes quite a while.
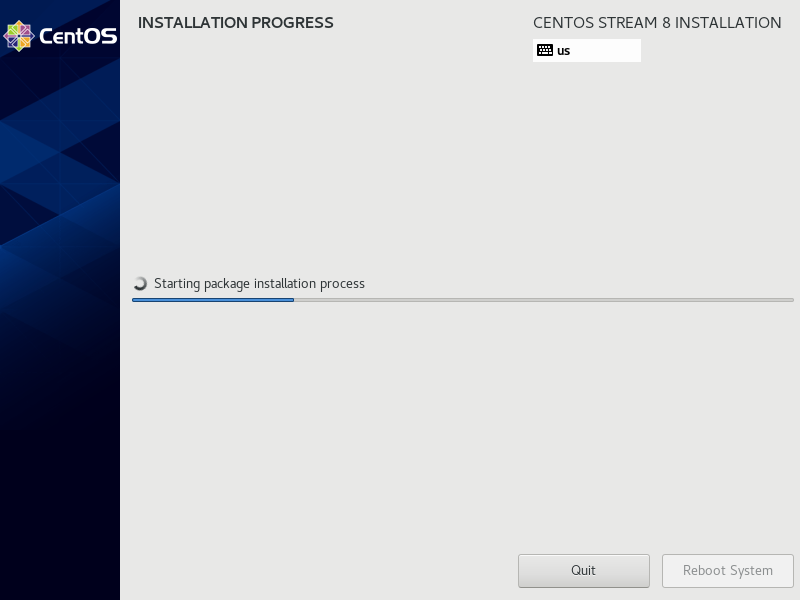
Some system content will also be downloaded here. I chose the one without gui server, so I only need to download 720MB. The one with gui will definitely be larger.
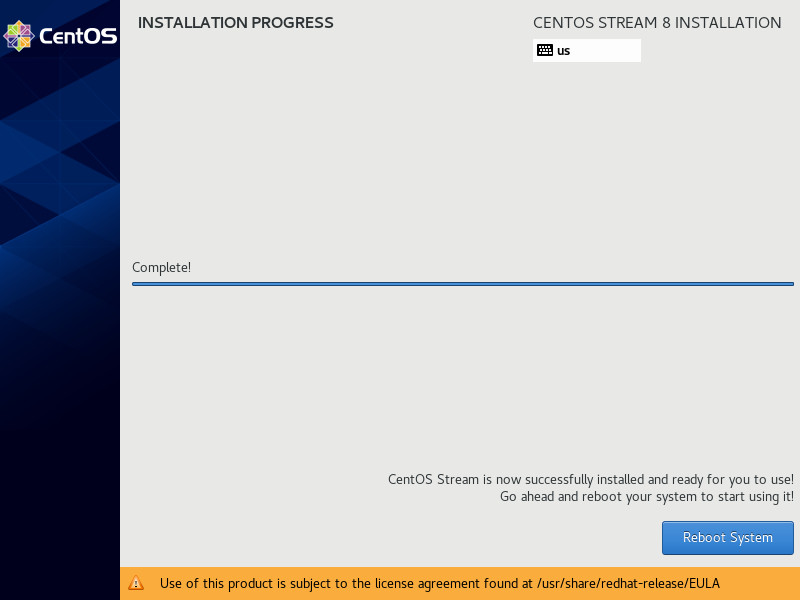
Finish
Click on the lower right corner to restart the system
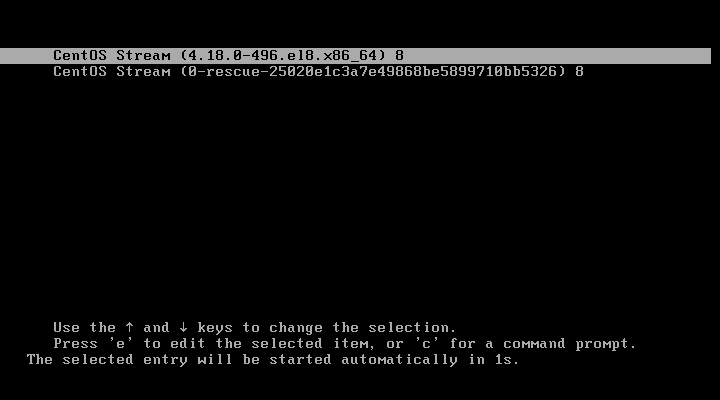
3.3 Startup
Select the first one here (if you don’t select it for a long time, it will start by itself)
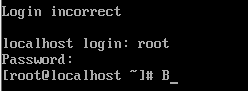
After the following page appears, fill in your username and password and you will be logged in successfully!
4.ssh connection
First download the ssh connection software, such as tabby, xshell, putty, etc.;
4.1 Install and start sshd
First operate in the virtual machine and download the ssh server software
yum install -y openssh-server
The system you are currently using already comes with this software.

start sshd
systemctl start sshd
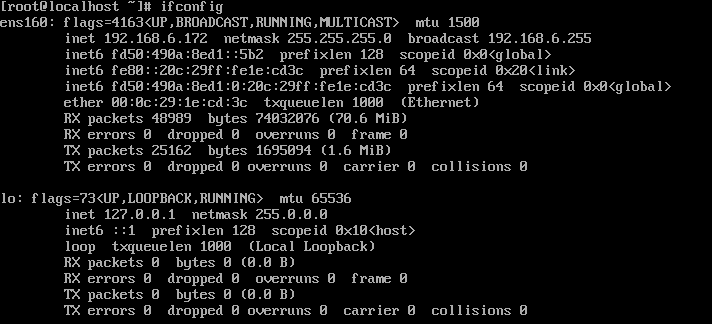
4.2 View IP
ifconfig
Using this command, you can see that the IP address of the current virtual machine is192.168.6.172
4.3 Connection
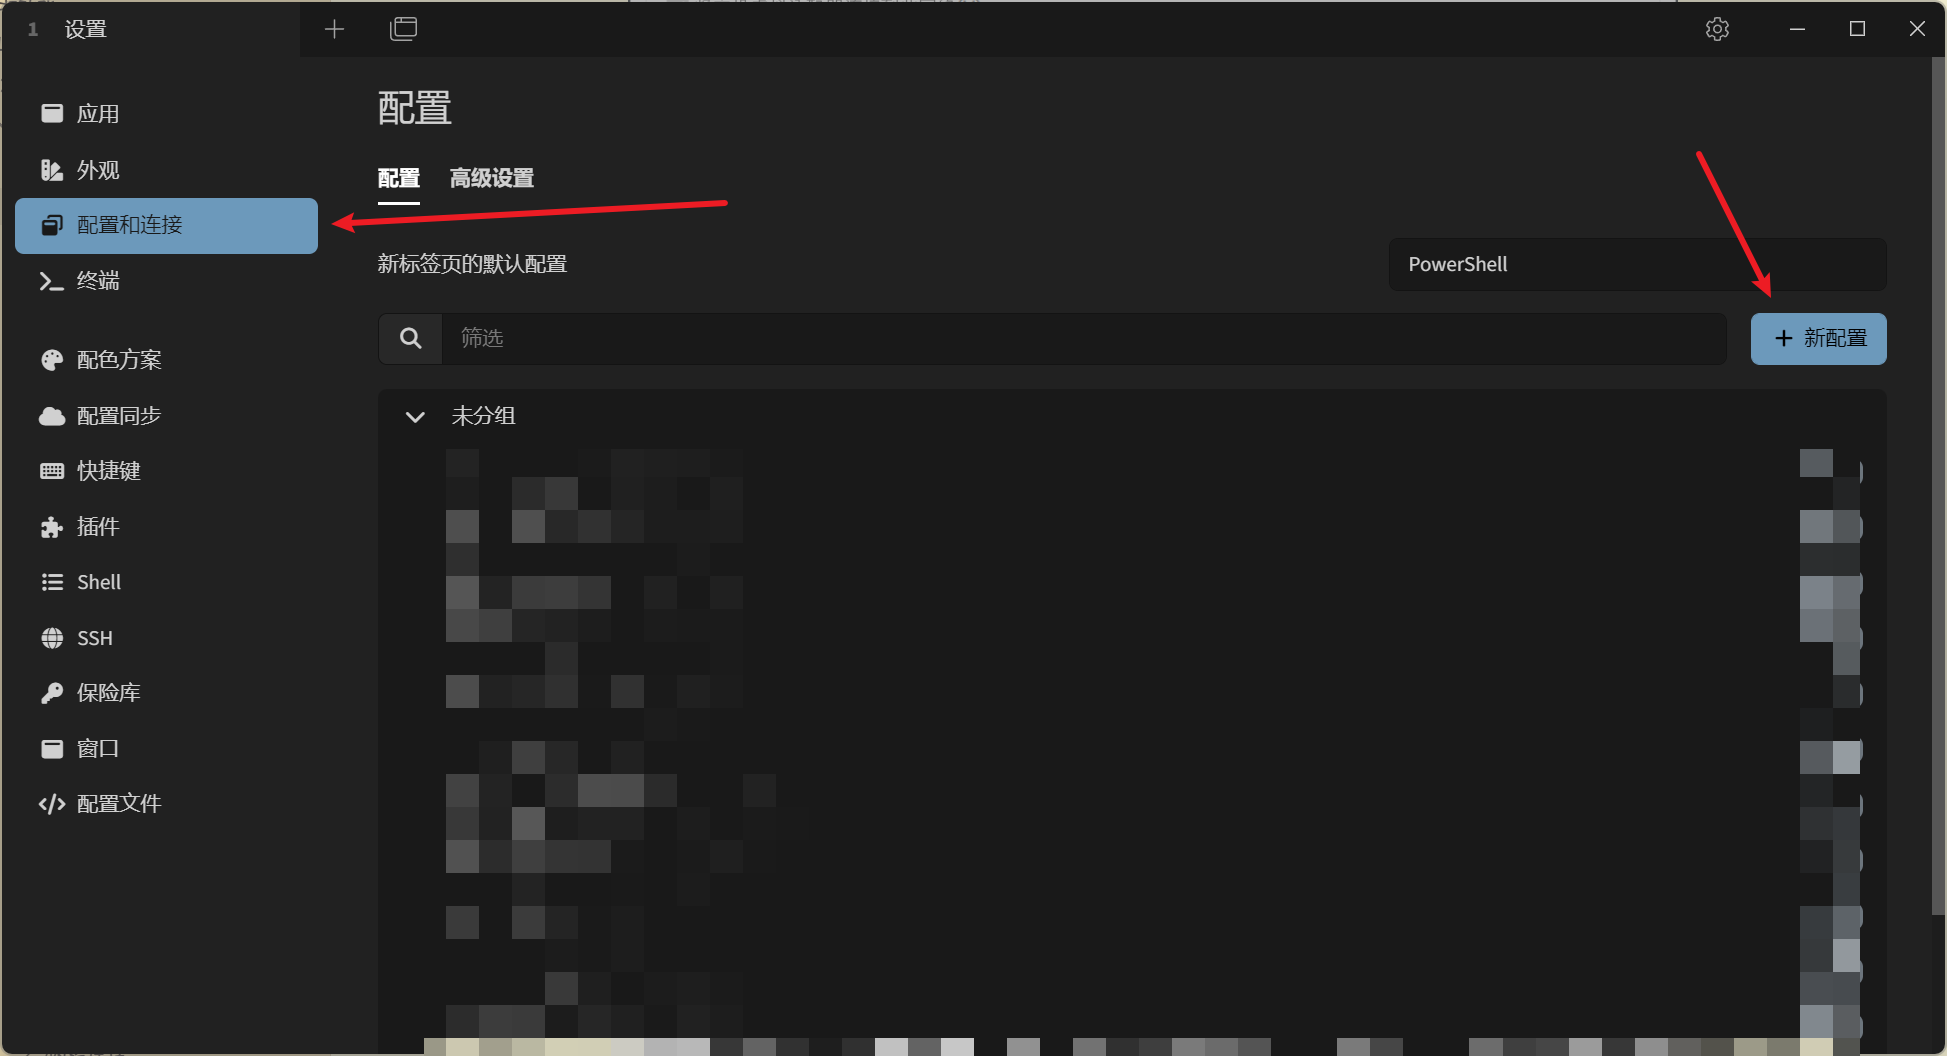
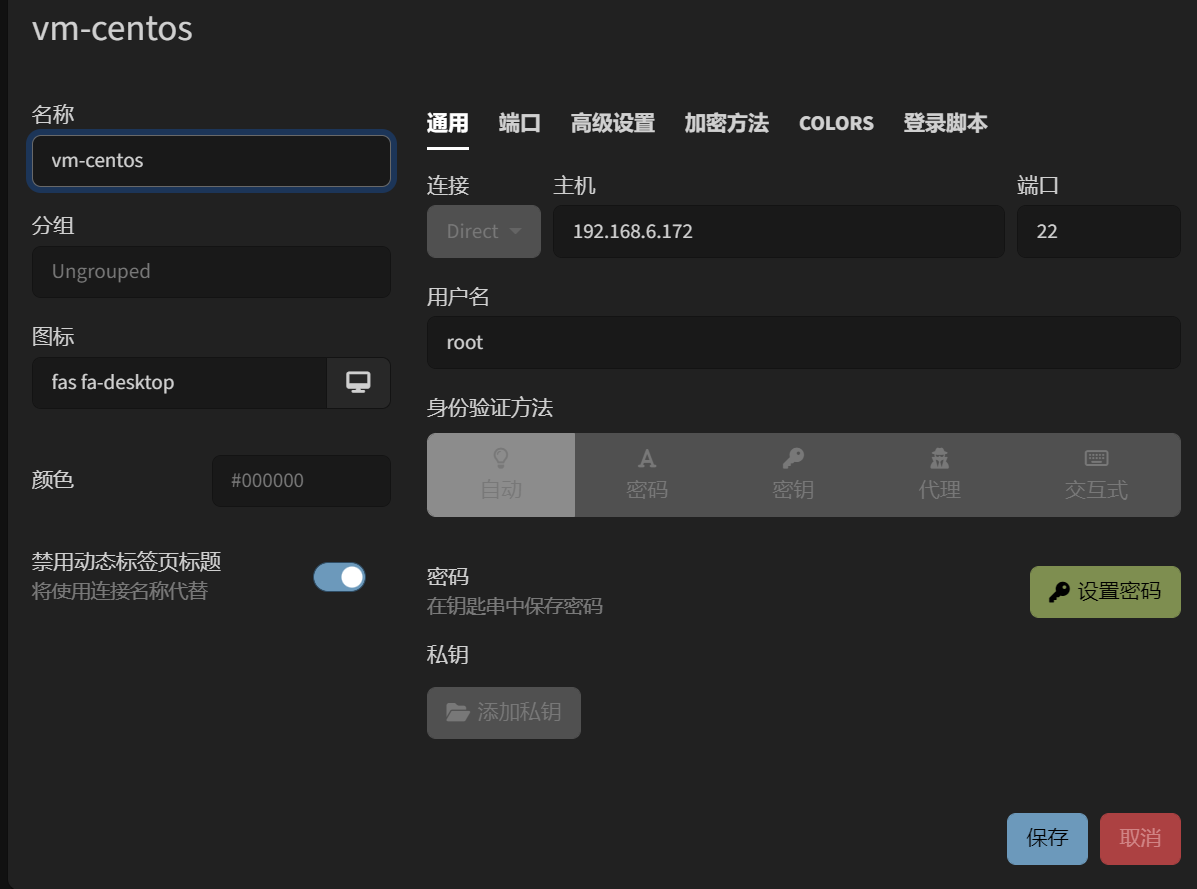
Taking tabby as an example, click Settings, Configuration and Connection, New Configuration
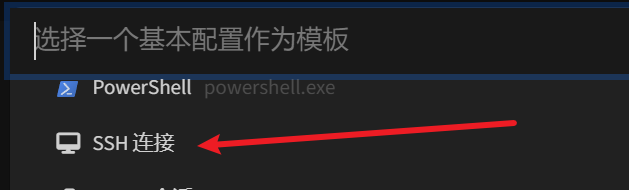
Select ssh connection
Fill in the IP you just saw. Port 22 does not need to be touched by default. The username is root.
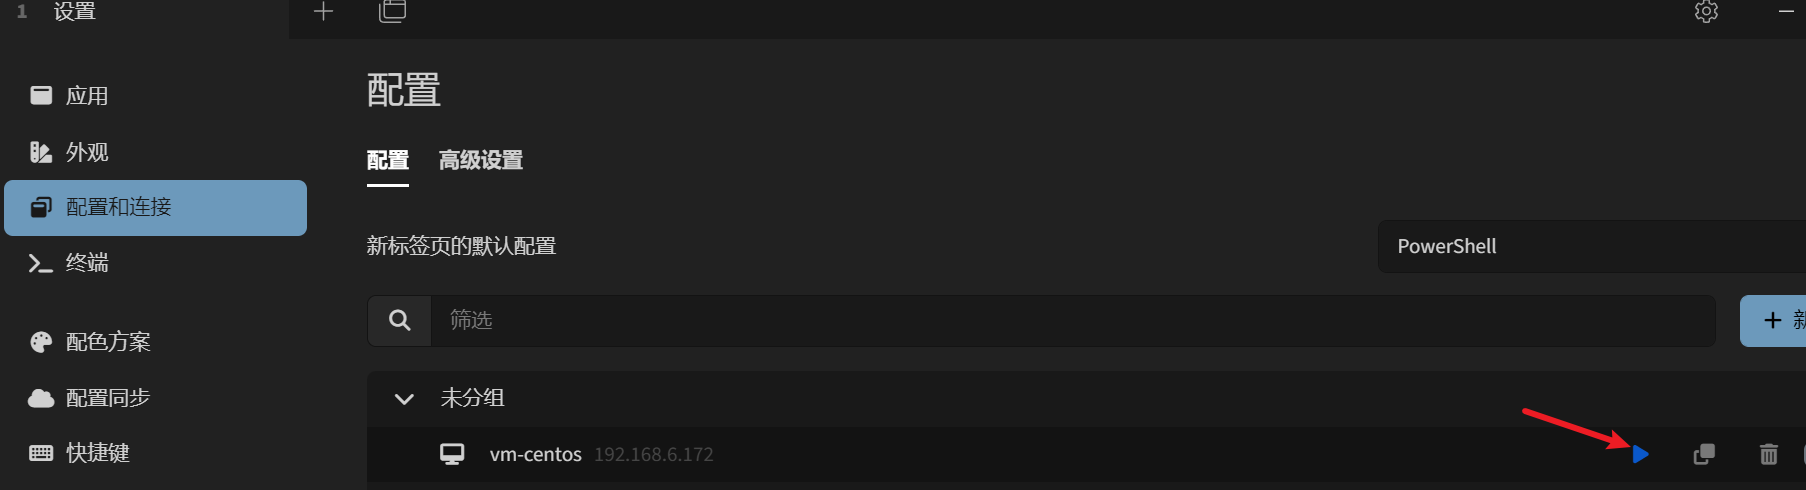
Click the start button to start connecting
The following page will appear. Fill in the root password here and check rememberRemember password.
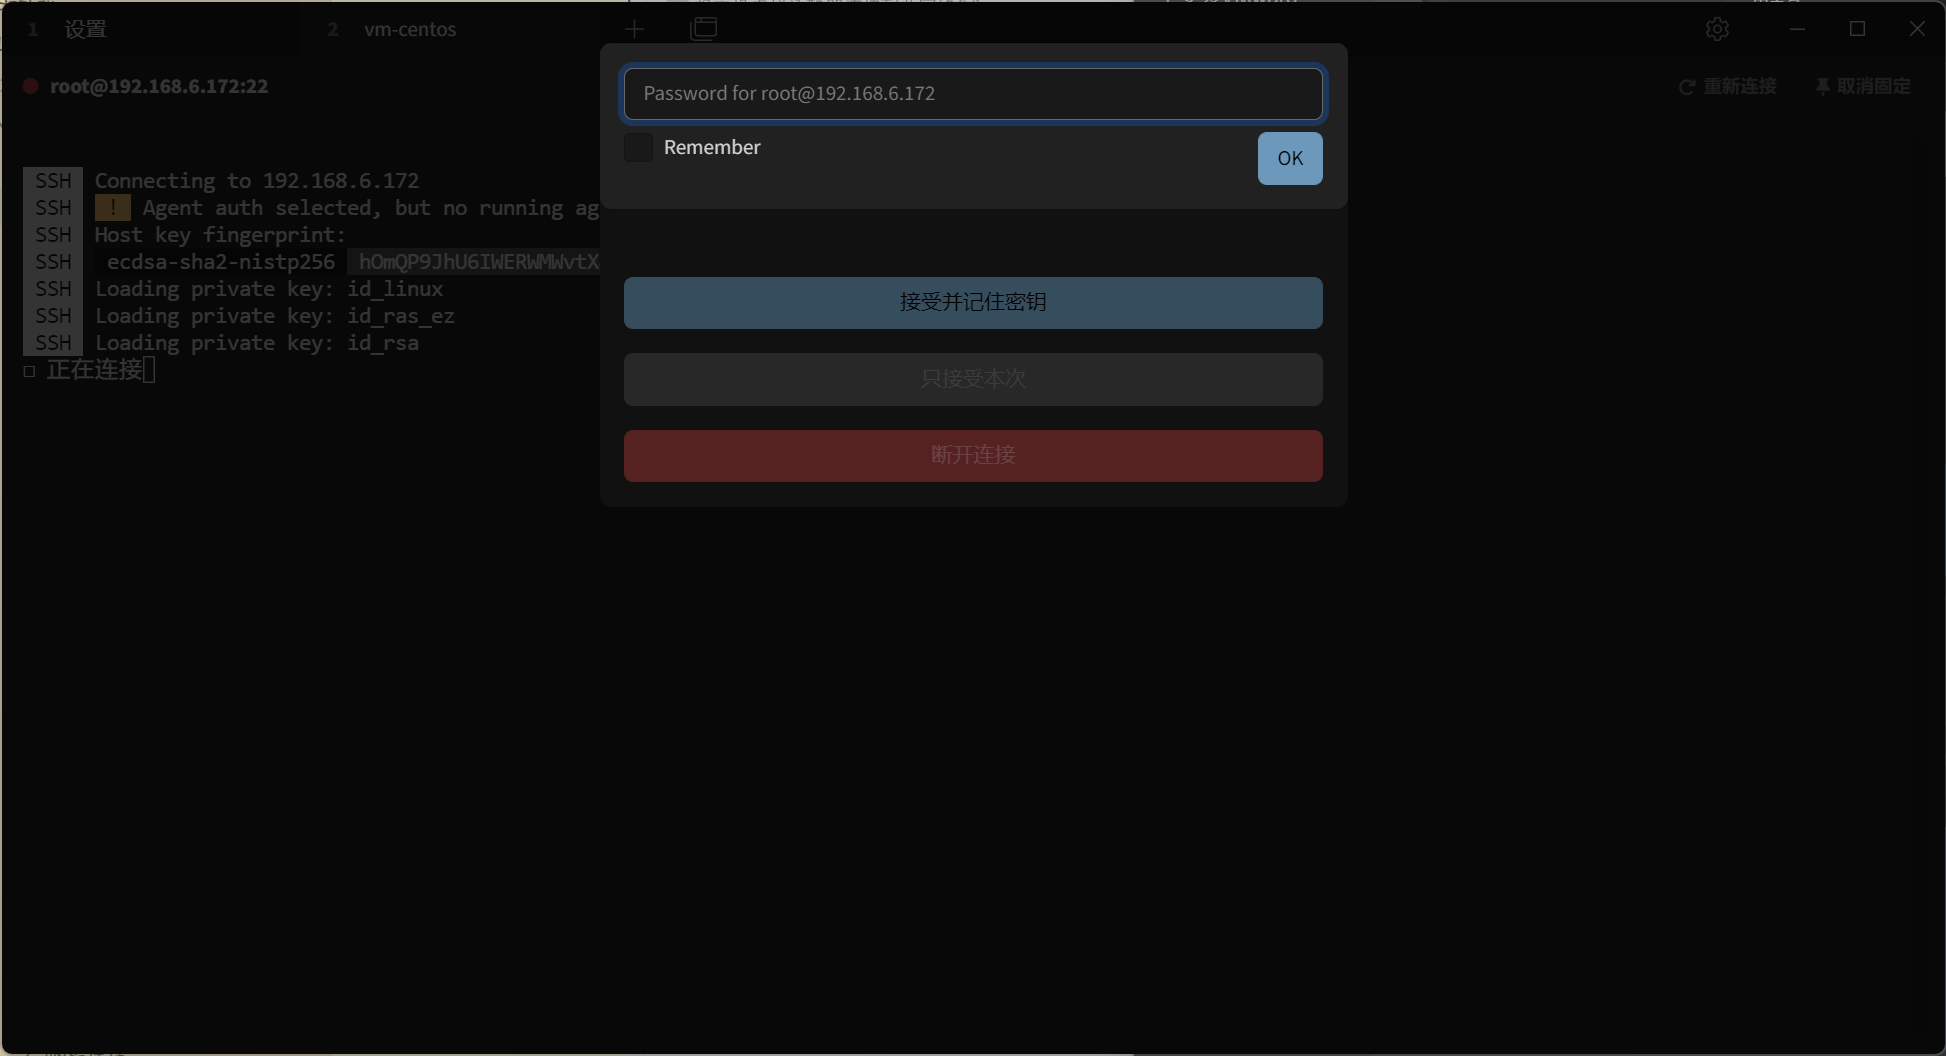
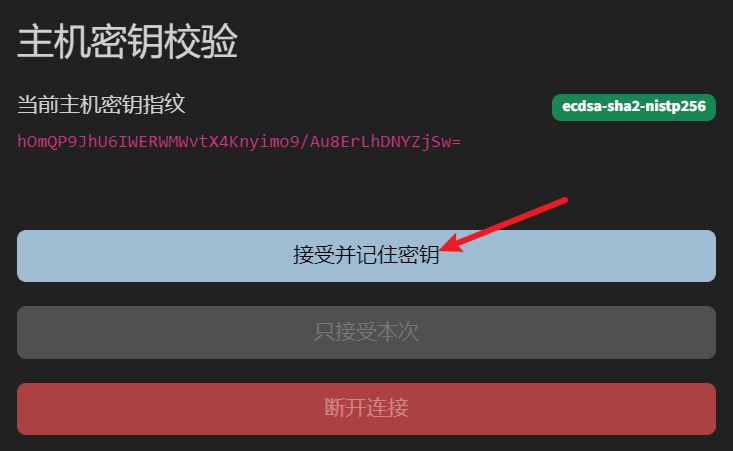
Key verification will appear every time SSH connects to a new host for the first time. Just check the box to accept it and remember it .
At this point, you have successfully connected to Linux in the virtual machine. It is also recommended to operate the Linux command line in the SSH software instead of the virtual machine interface of the VM.

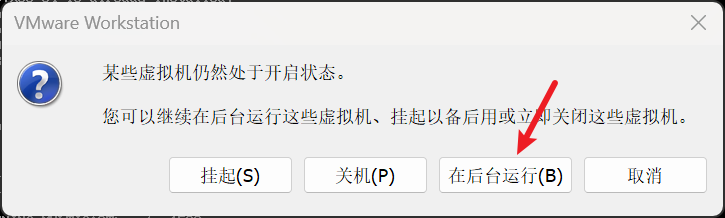
In this way, the vm window can be closed and the virtual machine can run in the background!
Over!
You're done, a Linux learning environment is set up.
By the way, take a look at the following content
- Centos8 installs python3.10 https://blog.musnow.top/posts/847195816/
- Centos7 cloud server learning environment initialization https://blog.musnow.top/posts/656771008/