Jenkins pipeline automation deployment project
1. Introduction to automated deployment
1.1 Introduction to the current situation of the industry
As the complexity of software development continues to increase, how to better collaborate among team development members to ensure the quality of software development has gradually become an unavoidable issue in the development process. The development and release of Internet software has formed a set of standard processes.
For example: In Internet companies, there are changes in requirements and bug fixes every moment. In order to update the changes to the production server in time, we need to execute the following picture N times a day. After the developer completes the code self-test Submit to git, then you need to generate a mirror of the latest code in git and deploy it to the test server. If the test passes, you also need to deploy the latest code to the production server:
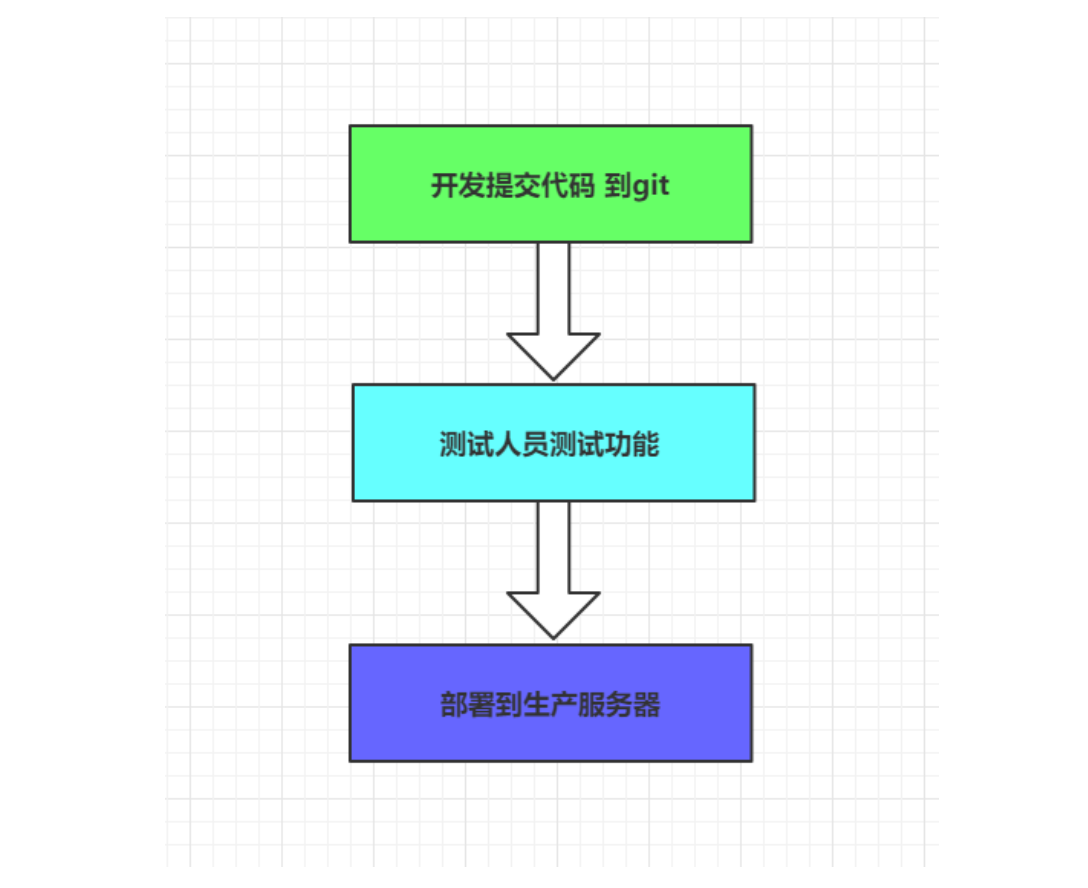
Obviously, if manual operation is adopted, a lot of time will be wasted in operation and maintenance deployment, affecting work efficiency;
Today’s Internet companies will basically adopt the following solutions:
- Continuous integration (CI)
- Continuous deployment (CD)
1.2 Introduction to devops concept
1. Continuous integration
Continuous integration (CI) refers to integrating code into the trunk frequently (multiple times a day).
There are two main benefits.
-
Find errors quickly. Every time an update is completed, it is integrated into the backbone. Errors can be quickly discovered and it is easier to locate errors.
-
Prevent branches from deviating significantly from the trunk. If integration is not frequent and the backbone is constantly being updated, it will become more difficult or even difficult to integrate in the future.
The purpose of continuous integration is to enable products to be iterated quickly while maintaining high quality. Its core measure is that before the code is integrated into the trunk, it must pass automated testing. As long as one test case fails, it cannot be integrated.
Martin Fowler said, "Continuous integration does not eliminate bugs, but makes them very easy to find and correct."
There are two concepts related to continuous integration, namely continuous delivery and continuous deployment.
2. Continuous delivery
Continuous delivery refers to frequently delivering new versions of software to the quality team or users for review. If the review passes, the code goes into production.
Continuous delivery can be seen as the next step in continuous integration. It emphasizes that no matter how it is updated, the software can be delivered anytime and anywhere.
3. Continuous deployment
Continuous deployment is the next step of continuous delivery, which means that after the code passes review, it is automatically deployed to the production environment.
The goal of continuous deployment is that the code is deployable and ready for production at any time.
The premise of continuous deployment is to be able to automate testing, construction, deployment and other steps.
4 Demonstration process description
In order to ensure the quality of code submitted by team developers and reduce the pressure when releasing software;
any link in continuous integration is completed automatically without too much manual intervention, which helps to reduce repeated
processes to save time, cost and work. volume; next we will demonstrate a basic set of automated continuous integration and continuous deployment solutions to help everyone understand the software deployment solutions of Internet companies.
The process is as follows:
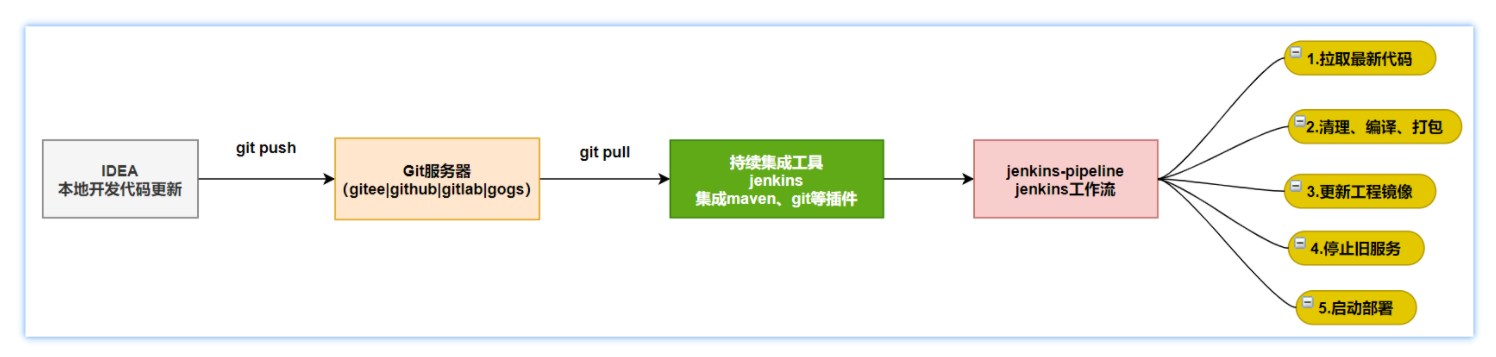
Implementation process:
- Developers continue to integrate feature code into public feature integration branches, such as: dev
- When the functions accumulate to a certain point, online project upgrades need to be carried out, and one-click release based on continuous integration software is required;
- The continuous integration tool first pulls and updates the dev|master branch code, and then cleans, compiles, tests, packages, mirrors, and deploys the latest functional code;
- If the build fails, an email will be sent to remind the code submitter or administrator;
To implement the above process, we need to understand a software that supports continuous integration: jenkins;
2. Jenkins environment preparation
2.1 Introduction to jenkins
Jenkins, formerly known as Hudson, was changed to its current name in 2011. It is an open source software tool for continuous integration . Official website: https://www.jenkins.io/zh/
Jenkins can implement monitoring errors in integration, provide detailed log files and reminder functions, and can also use charts to
vividly display the trend and stability of project construction.
Features:
- Easy to configure : Provides a friendly GUI configuration interface;
- Change support : Jenkins can obtain and generate a code update list from the code repository (Subversion/CVS) and
output it to the compilation output information;
supports permanent links: users access Jenkins through the web, and the link addresses of these web pages are
Permanent link address, so you can use the link directly in various documents; - Integrated E-Mail/RSS/IM : When an integration is completed, these tools can tell you the integration results in real time (as far as
I know, it takes a certain amount of time to build an integration. With this function, you can wait for the results.
in, doing other things); - JUnit/TestNG test report: It is used to provide detailed test report function in the form of charts and other forms;
- Supports distributed builds : Jenkins can distribute work such as integrated builds to multiple computers for completion;
file fingerprint information: Jenkins will save which jars files were generated by which integrated build, which version of jars files
were used by build record; - Support third-party plug-ins : making Jenkins more and more powerful
2.2 Install and configure jenkins
jenkins installation
1. Step by step installation of jenkins based on Docker
1.1 Download and install
Download jenkins image
# 拉取镜像
docker pull jenkins/jenkins:2.387.3
Create jenkins container
# 构建jenkins数据挂在目录
mkdir -p /usr/local/images/jenkins-data
# 启动容器
docker run \
  -u root \
  -d \
  -p 58888:8080 \
  --name myjenkins \
  --env JAVA_OPTS="-Duser.timezone=GMT+08" \
  -v /usr/local/images/jenkins-data:/var/jenkins_home \
  -v /var/run/docker.sock:/var/run/docker.sock \
  -v $(which docker):/usr/bin/docker \
  jenkins/jenkins:2.387.3
View jenkins startup log
docker logs -f myjenkins
After successful startup, visit:
http://192.168.200.129:58888
Unlock jenkins
When running for the first time, you need to unlock jenkins first
Specific steps:
- Go to the specified file in the container to view the administrator password
- Copy the password into the text box
- Just click to continue
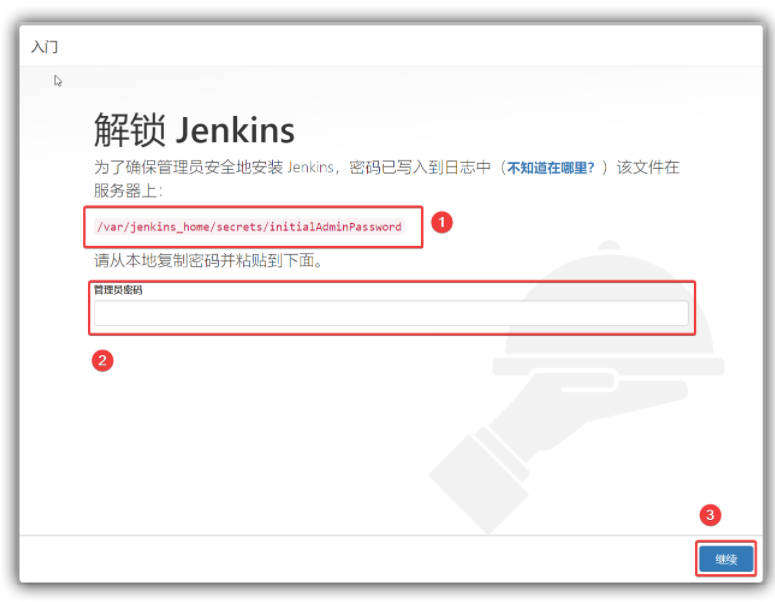
The specific unlocked administrator password is in the Jenkins installation directory. Because we are installing it in a container, we need to enter the container to view it. The command is as follows:
# 进入到jenkins容器
docker exec -it myjenkins bash
# 查看密码
cat /var/jenkins_home/secrets/initialAdminPassword
# 将密码复制到上图管理员密码文本框,然后点击继续 完成解锁
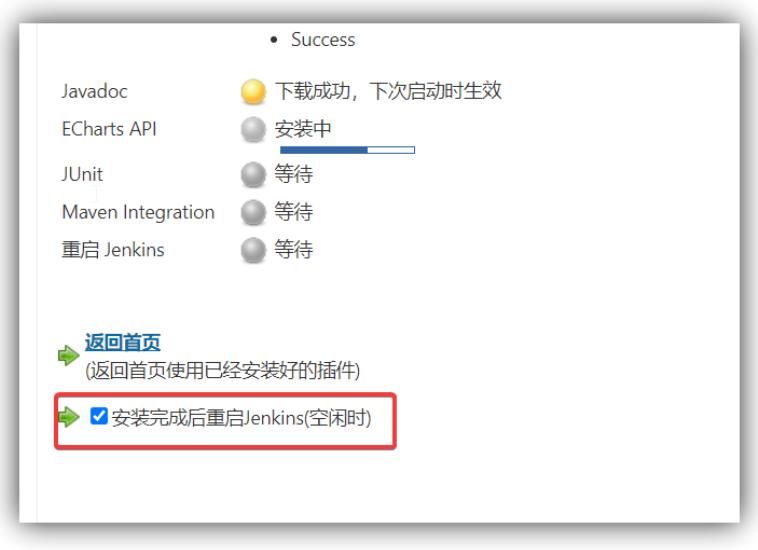
Install recommended plugins
Various functions of Jenkins depend on various plug-ins, which can be installed manually or as recommended.
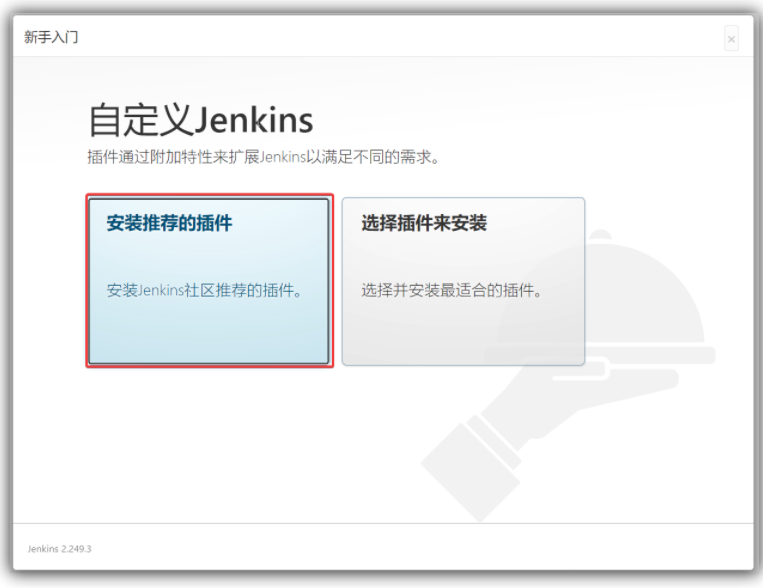
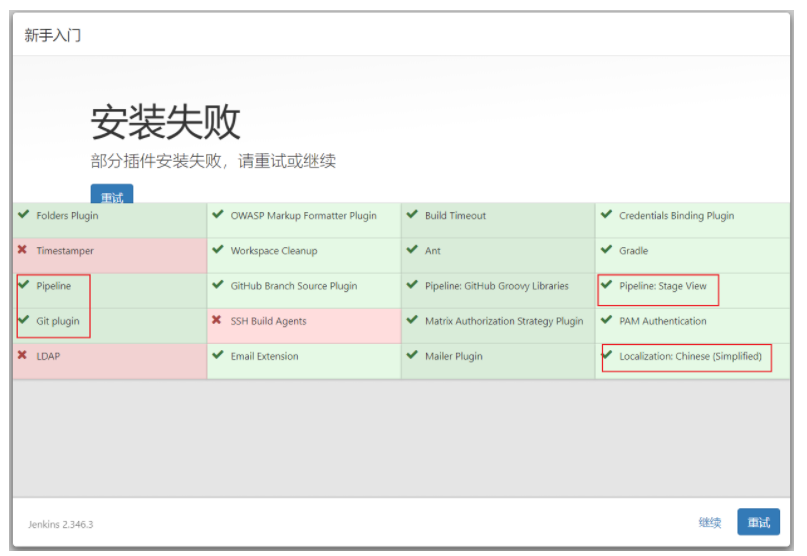
Install the recommended plug-ins directly in the course. Note that if the acceleration is not configured successfully, it will be very slow or the download will fail.
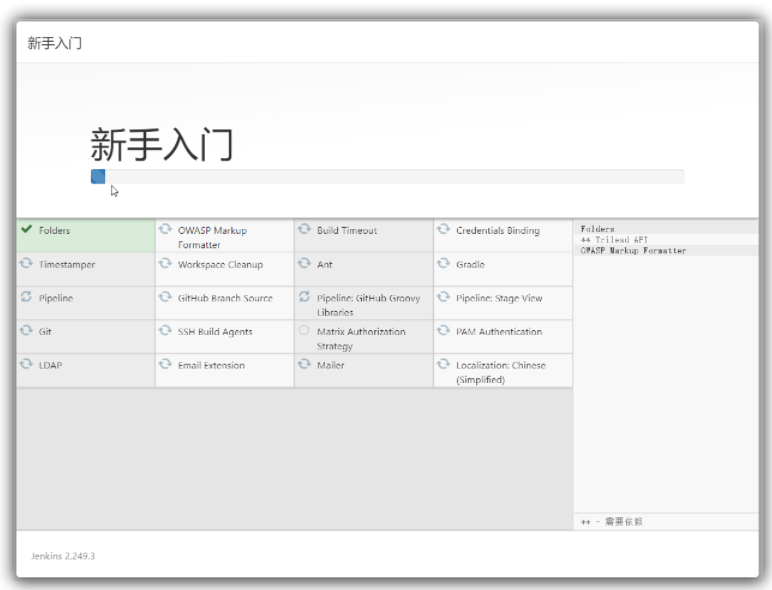
The installation may fail due to the network. Our courses mainly use git, pipeline and Chinese Chinese plug-ins. You can directly continue to ignore the wrong plug-ins, or click Retry to try to reinstall:
Create admin user
After the plug-in is installed, you will enter the setting administrator user page. Just set it according to your needs. You can use it for subsequent logins.
After setting up, click Save and Complete to enter the Jenkins welcome page.
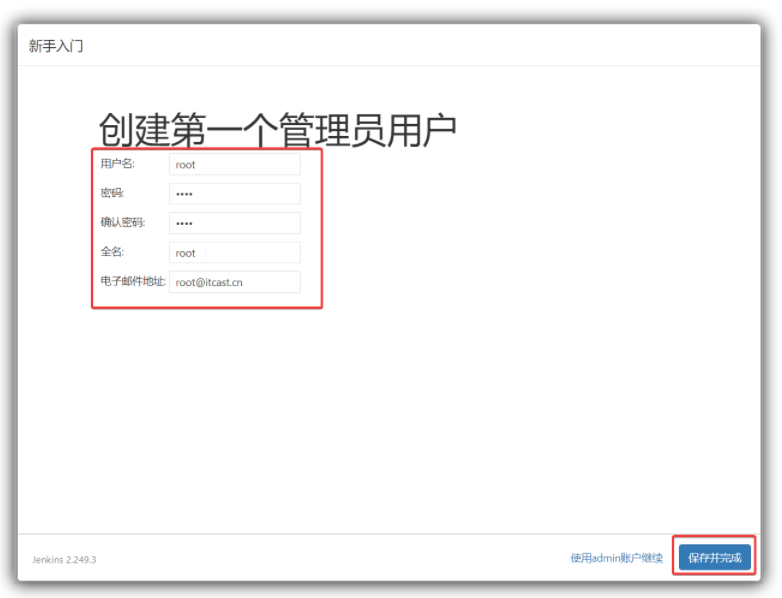
Unified account password: root|root
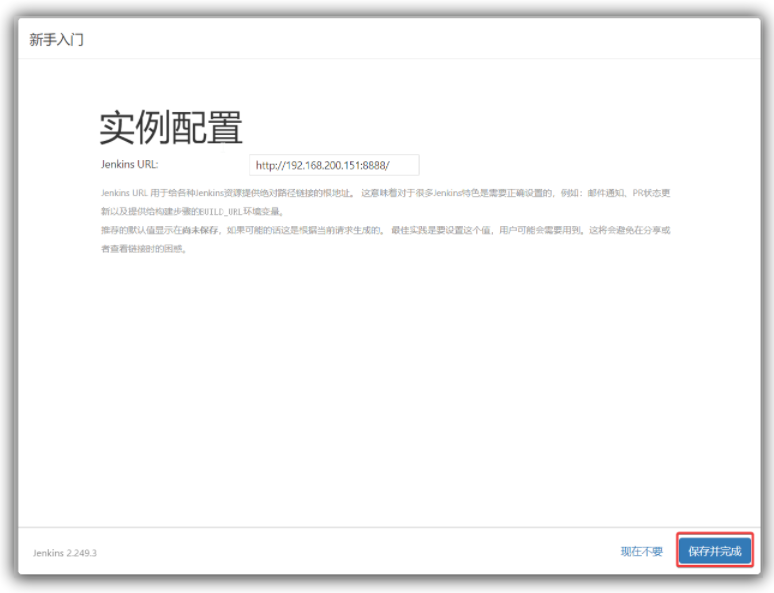
Next, Jenkins will ask us to confirm the address of the Jenkins server. Just take the next step.
Then click Start using jenkins to enter the jenkins page
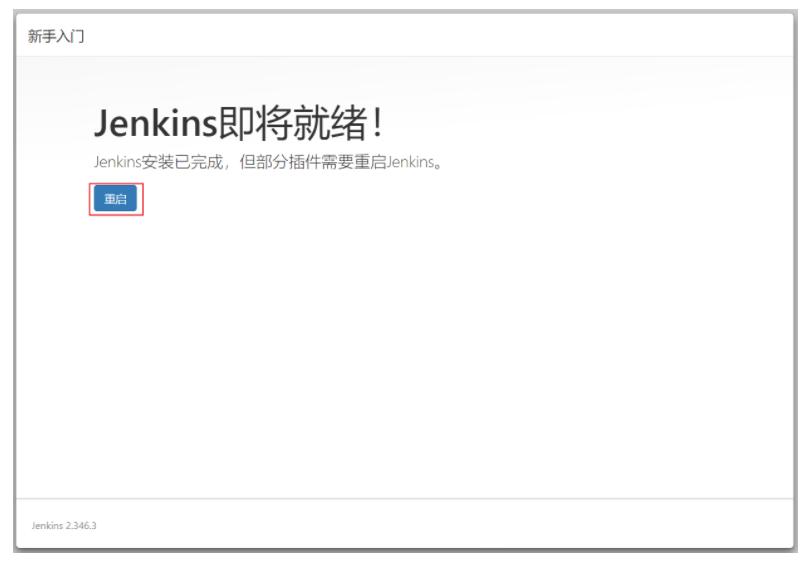
Enter the jenkins page. If all your pages are in English at this time, just restart it.
(Because the Chinese plug-in has already been installed in the default plug-in installed above)
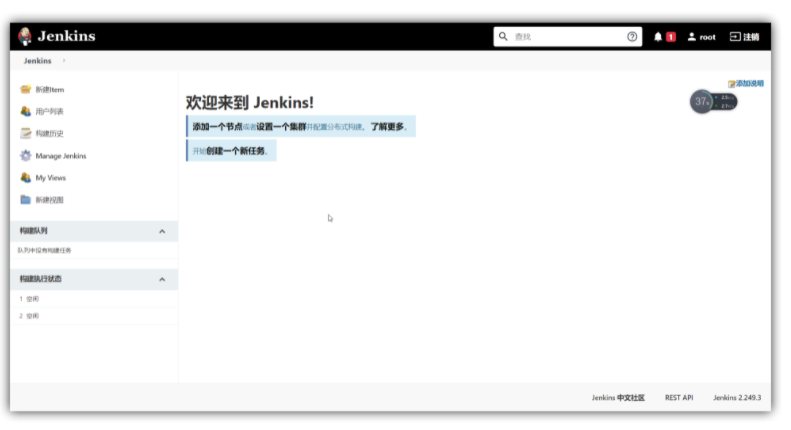
Restarting Jenkins can convert Manager Jenkins into Chinese style;
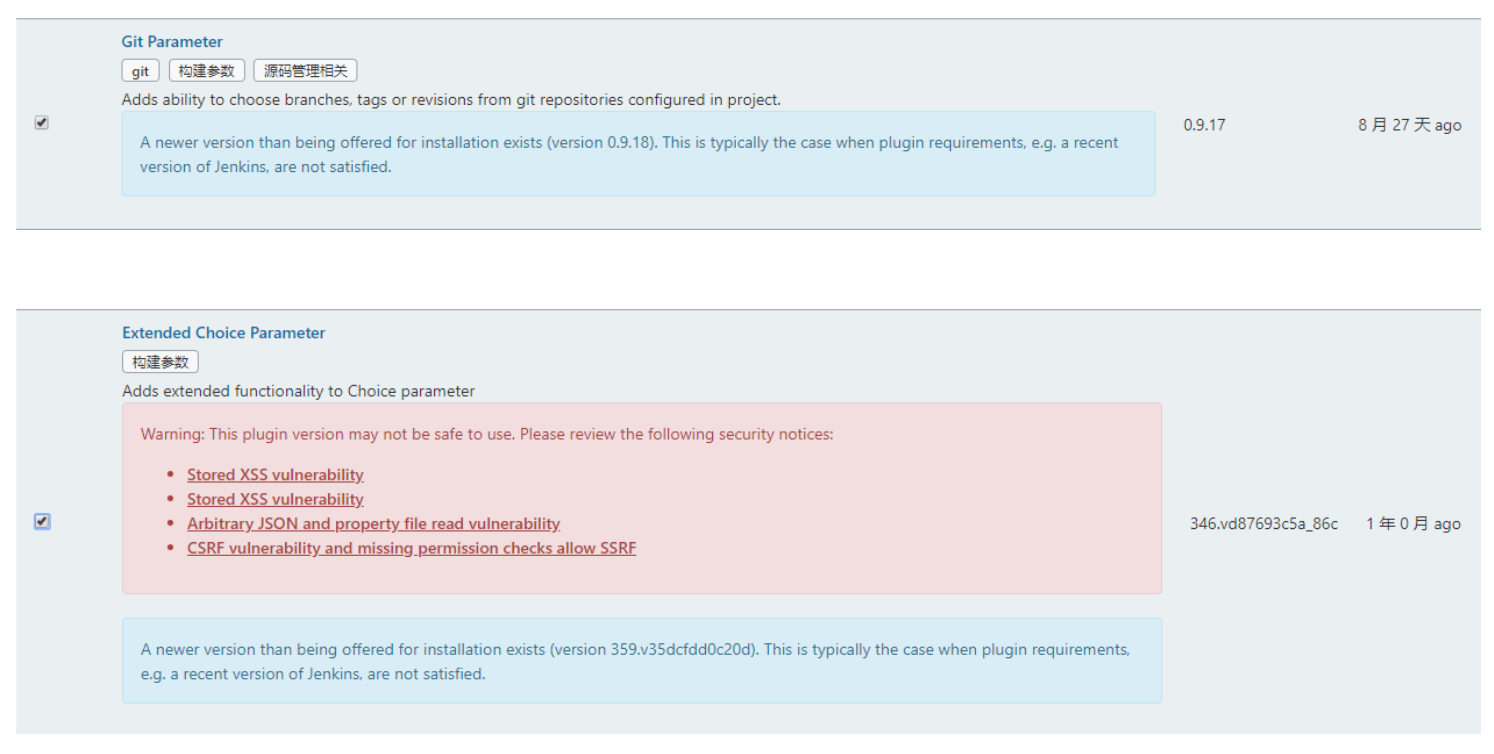
1.2 Plug-in installation
Core plug-ins: git, git Paramter, maven integration, maven pipeline, etc.
(1) Download the maven plug-in:
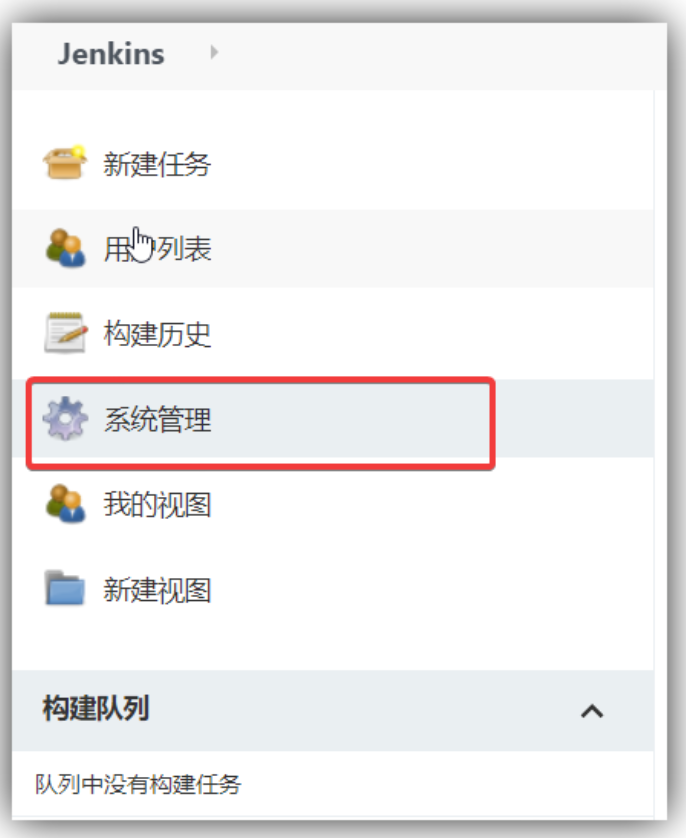
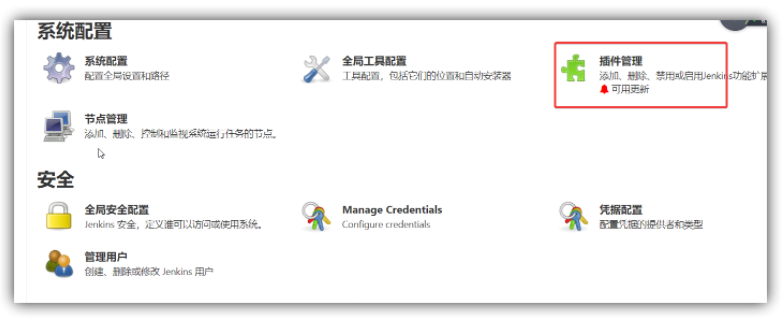
Click System Management --> Click Plug-in Management --> Enter the plug-in management page
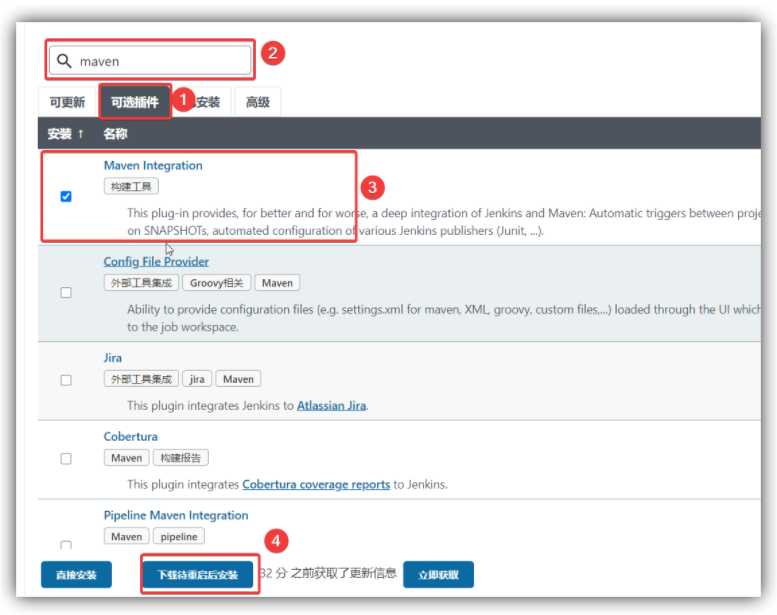
Click on the optional plug-in --> enter maven --> check Maven Integration --> download and wait for restart installation
Wait for the download to complete and restart the jenkins container.
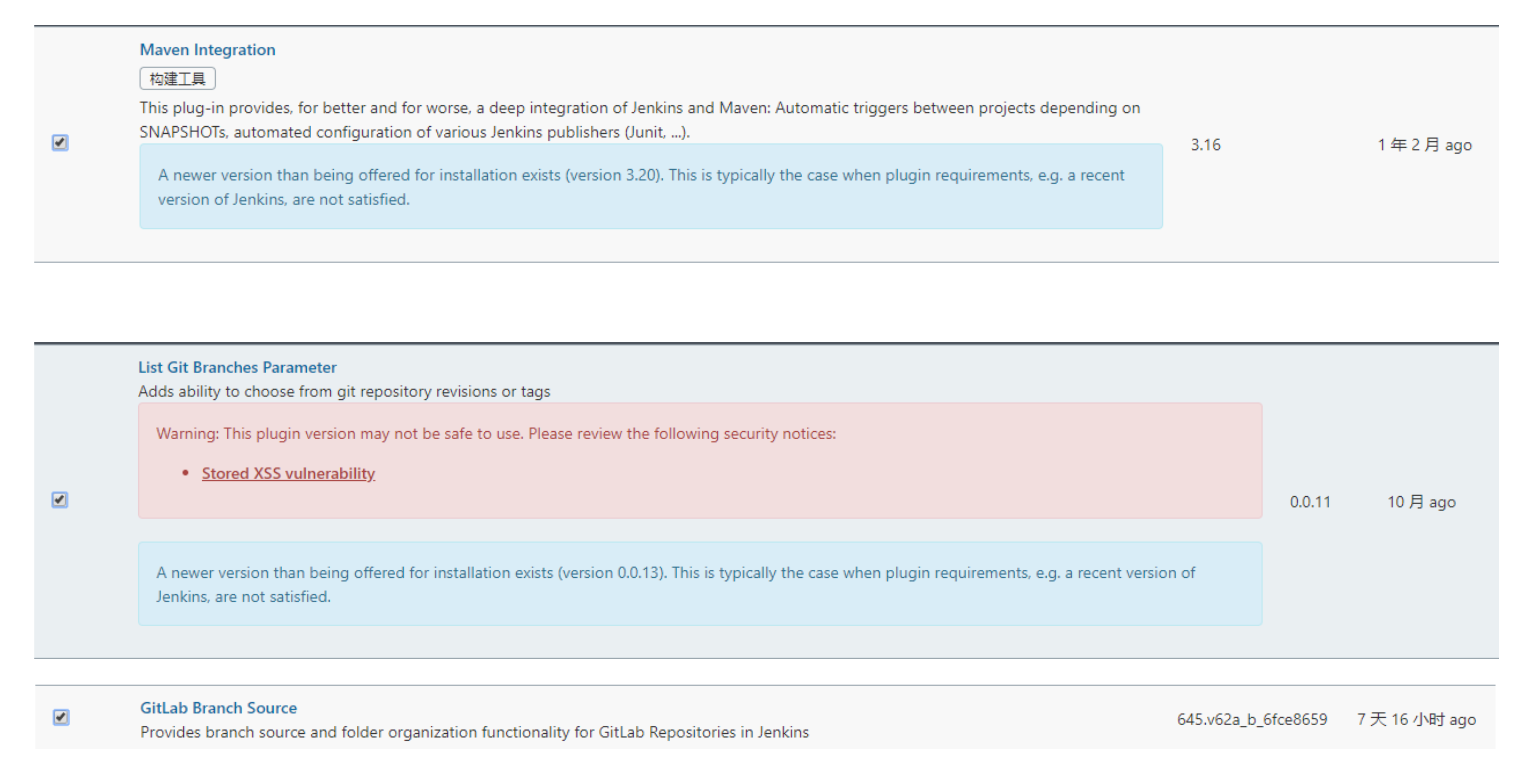
Install other extensions:
2. Mount and install based on existing data packages
The step-by-step installation process of Jenkins is relatively cumbersome and requires the installation of various Jenkins plug-ins, and sometimes the installation of these plug-ins is very time-consuming. Here we have provided you with the installed data package, eliminating the plug-in installation process:
The installation process is as follows:
- Upload the data package: jenkins installation\data\jenkins-data.tar.gz to the /usr/local/images/ directory;
- Unzip jenkins-data.tar.gz to obtain /usr/local/images/jenkins-data
tar -zxvf jenkins-data.tar.gz
- Pull the jenkins image and start it
  # 拉取镜像
  docker pull jenkins/jenkins:2.387.3
  # 启动容器
  docker run \
    -u root \
    -d \
    -p 58888:8080 \
    --name myjenkins \
    --env JAVA_OPTS="-Duser.timezone=GMT+08" \
    -v /usr/local/images/jenkins-data:/var/jenkins_home \
    -v /var/run/docker.sock:/var/run/docker.sock \
    -v $(which docker):/usr/bin/docker \
    jenkins/jenkins:2.387.3
- Visit the login page, account root | password root
2.3 Deployment environment configuration
1. Install maven environment
Copy the maven installation package in the resource to the container and decompress it. After configuring the Alibaba Cloud image
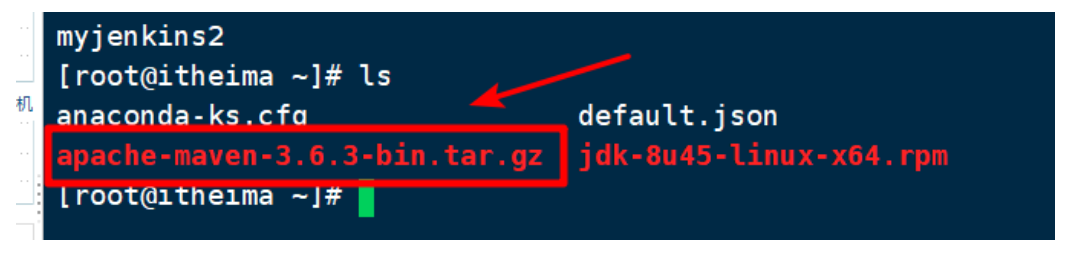
Unzip the maven compressed package copy container:
# 1.将maven压缩包上传到/usr/local/images/jenkins-data下,等价于上传到容器内的/var/jenkins_home下
# 2.将maven解压
tar -zxvf /var/jenkins_home/apache-maven-3.6.3-bin.tar.gz
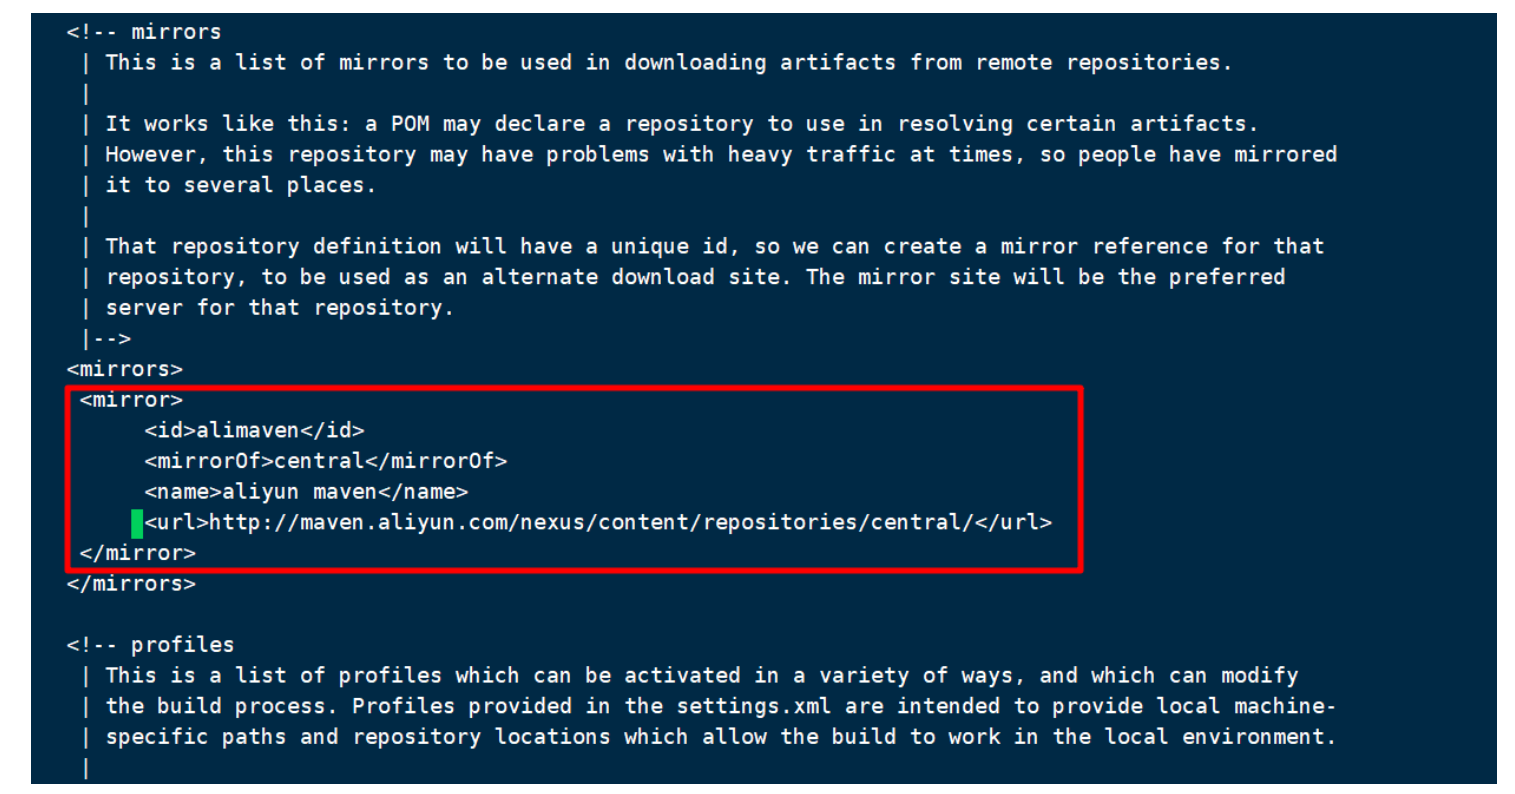
Configure maven image:
# 在jenkins-data目录下配置阿里云镜像
vi /usr/local/images/jenkins-data/apache-maven-3.6.3/conf/settings.xml
# 阿里云镜像  maven.ali
<mirror>
  <id>aliyunmaven</id>
  <mirrorOf>*</mirrorOf>
  <name>ali_repo</name>
  <url>https://maven.aliyun.com/repository/public</url>
</mirror>
The Alibaba Cloud address has changed. For details, please see: https://developer.aliyun.com/mvn/guide
Set maven environment variables:
# 进入jenins容器内,发现容器内没有安装vi|vim:
docker exec -it myjenkins bash
# 设置maven_home环境变量时,可将/etc/profile文件复制到/ver/jenkins_home下,在容器外部修改,然后再移动回去即可
vi /etc/profile
#点击i进入编辑模式 输入
MAVEN_HOME=/var/jenkins_home/apache-maven-3.6.3
export MAVEN_HOME
export PATH=${

    PATH}:${MAVEN_HOME}/bin
#保存退出
:wq

# 进入容器,配置资源生效(这样就不用重启系统了)
source /etc/profile
# 查看是否配置成功
mvn -v
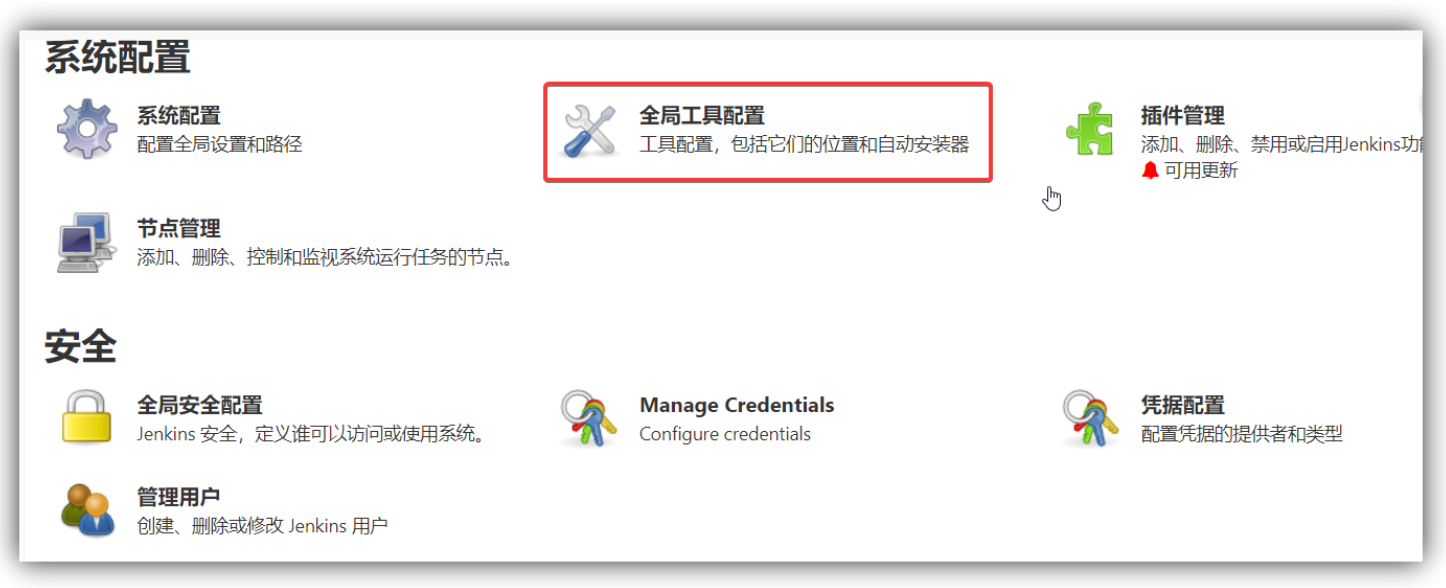
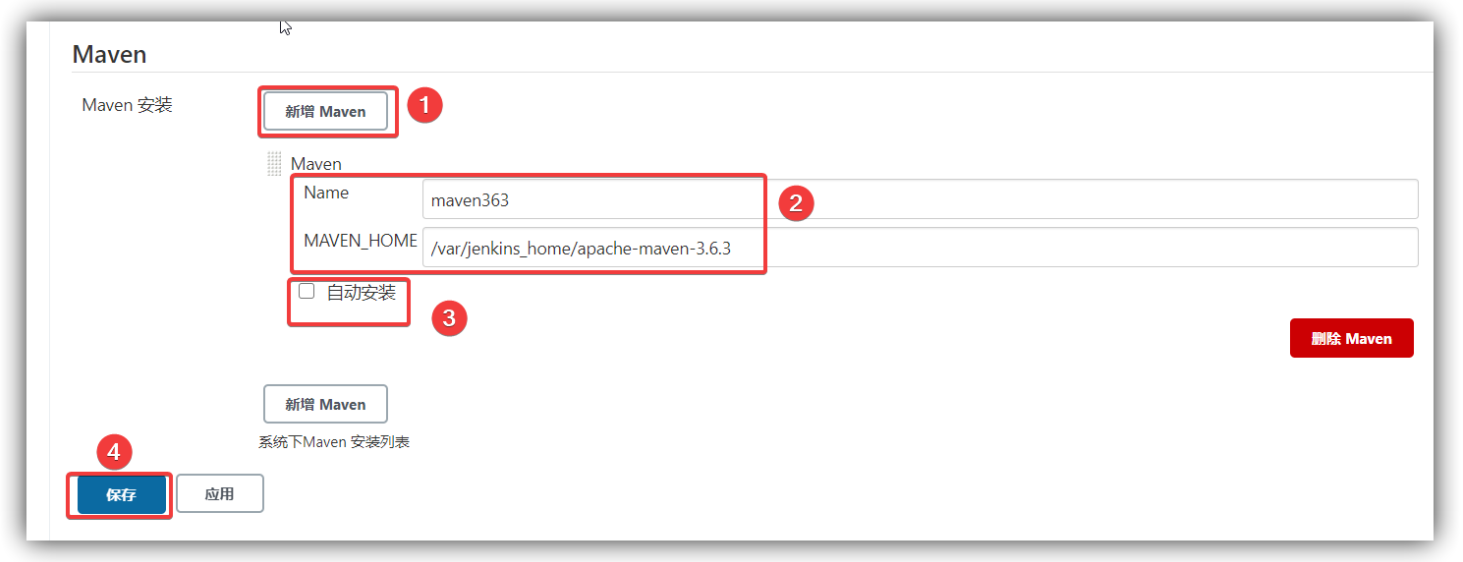
2. Configure the maven environment in jenkins
Click Global Tool Configuration in System Management
- Add maven
- The name is arbitrary, MAVEN_HOME: /var/jenkins_home/apache-maven-3.6.3
- Uncheck automatic installation
- Just save it
3. Configure jdk environment
Configure environment variables: The default javahome path can be obtained through the whereis java command in Jenkins;

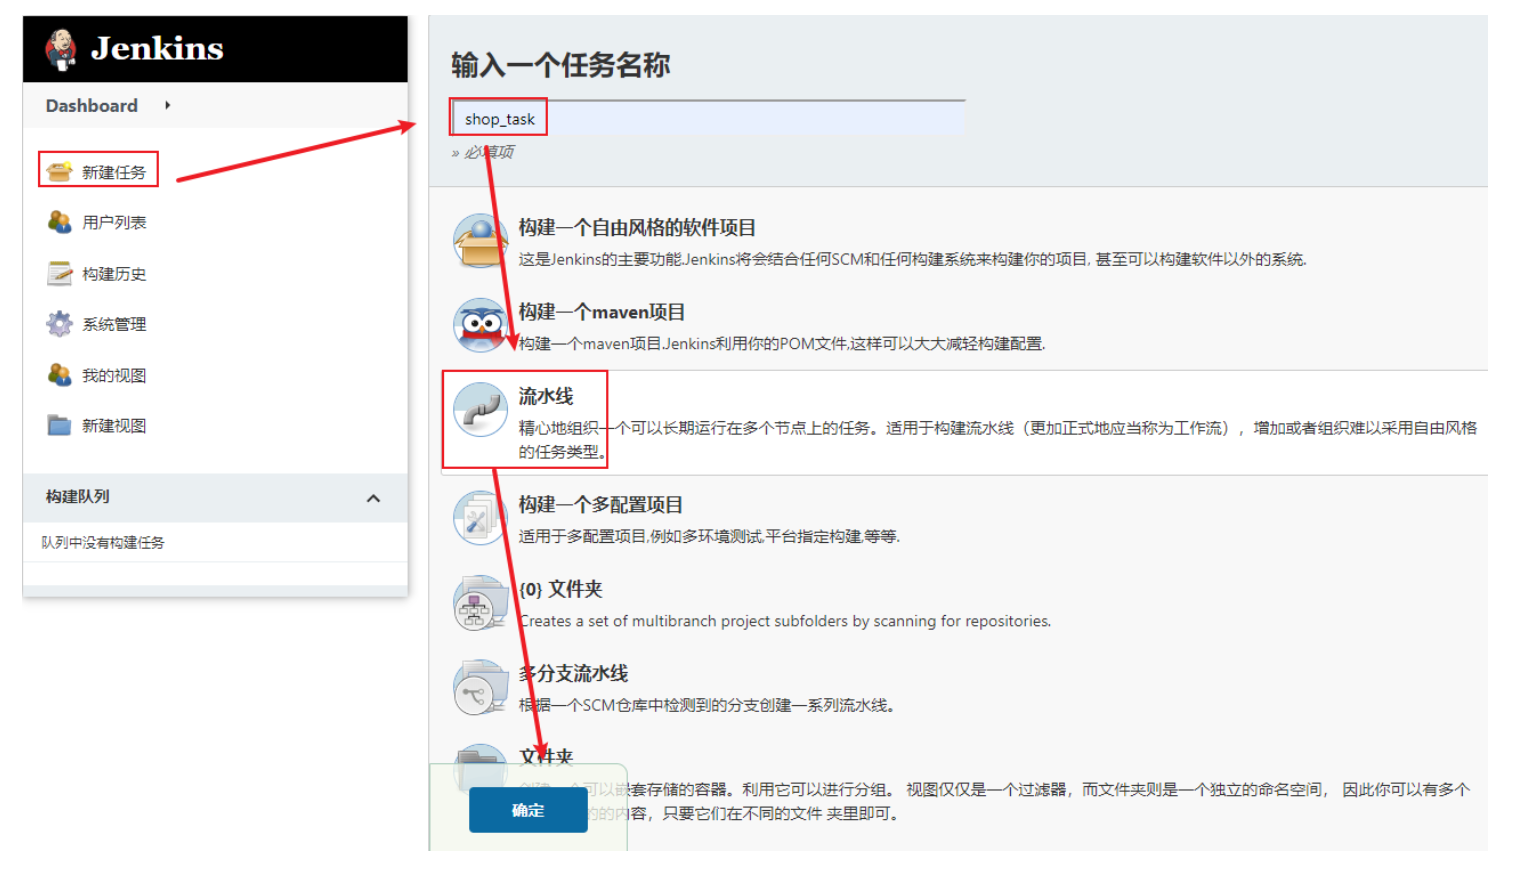
3. jenkins pipeline configuration
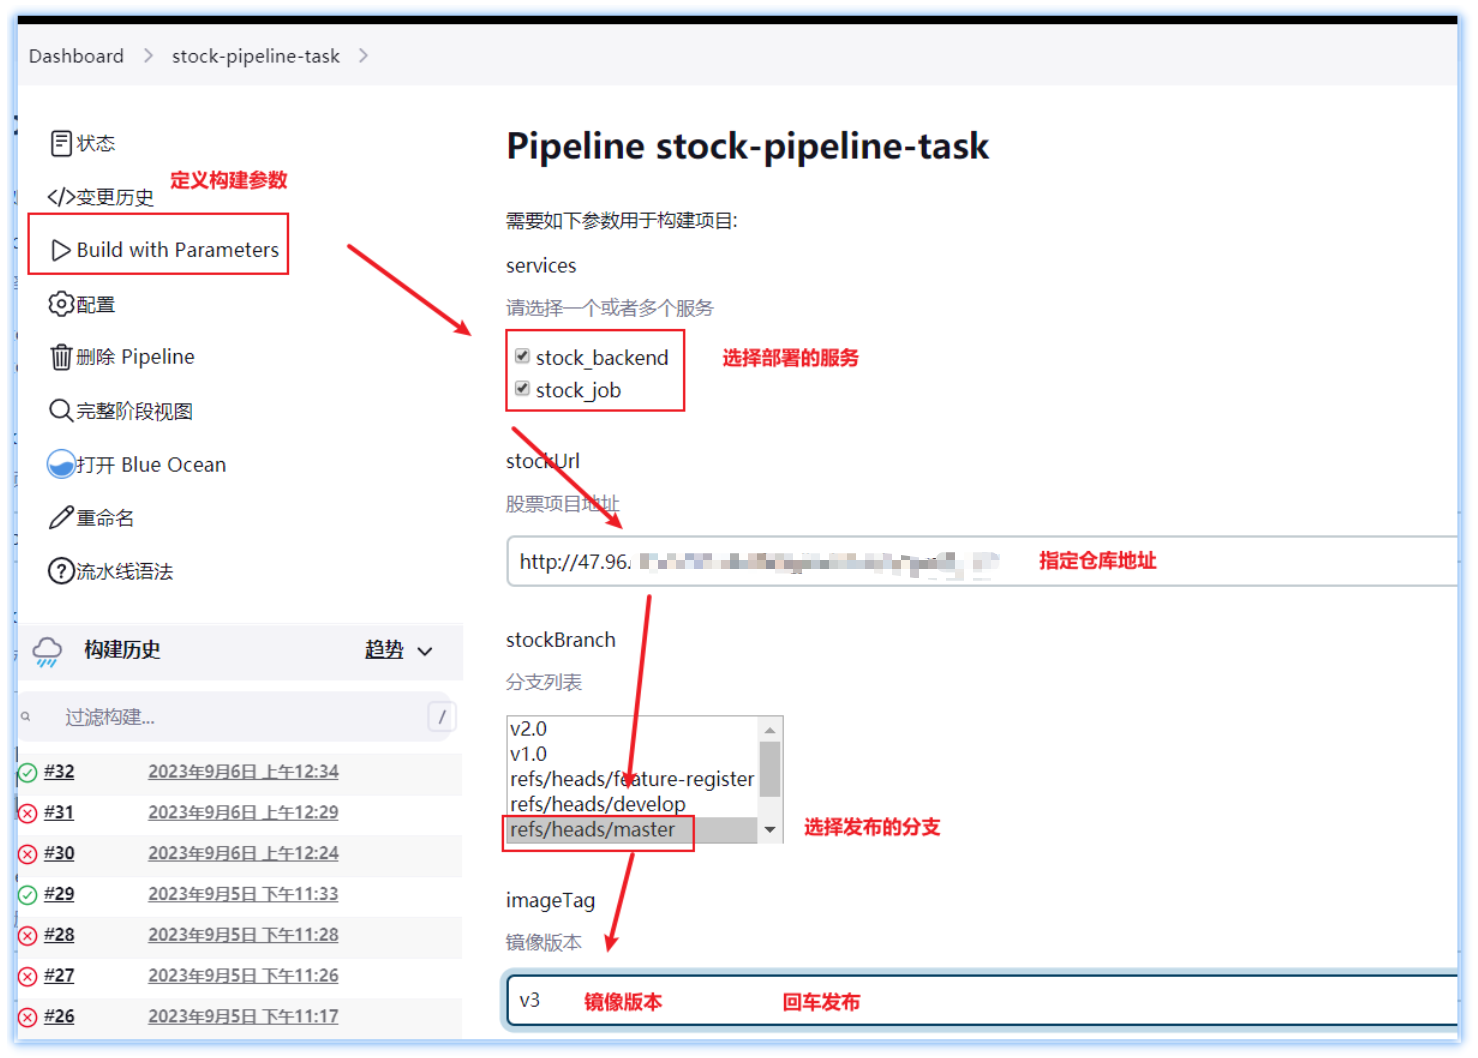
3.1 Pipeline parameter setting
After downloading the configuration, restart Jenkins, and then build the pipeline task:
Fill in the public parameters:
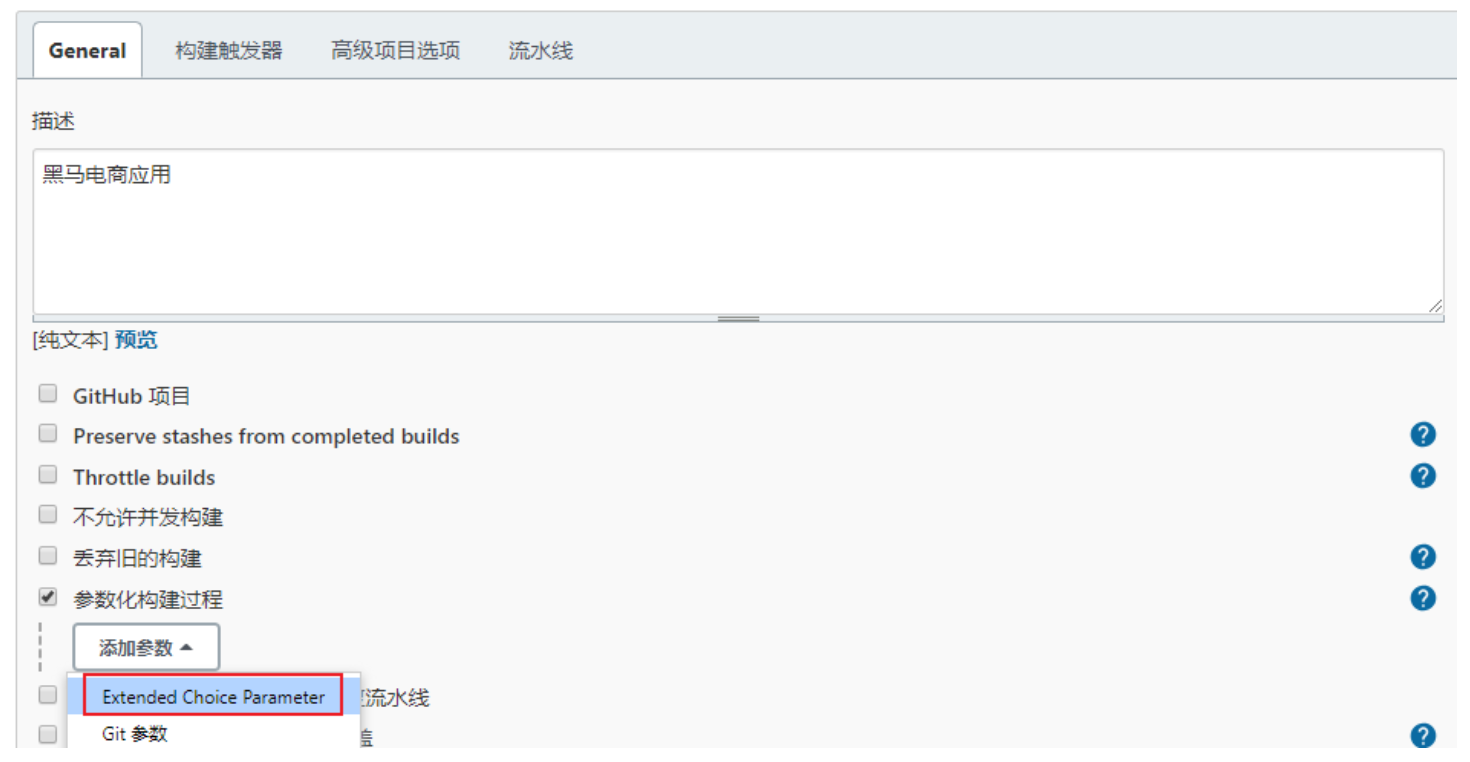
Define service list variables -services:
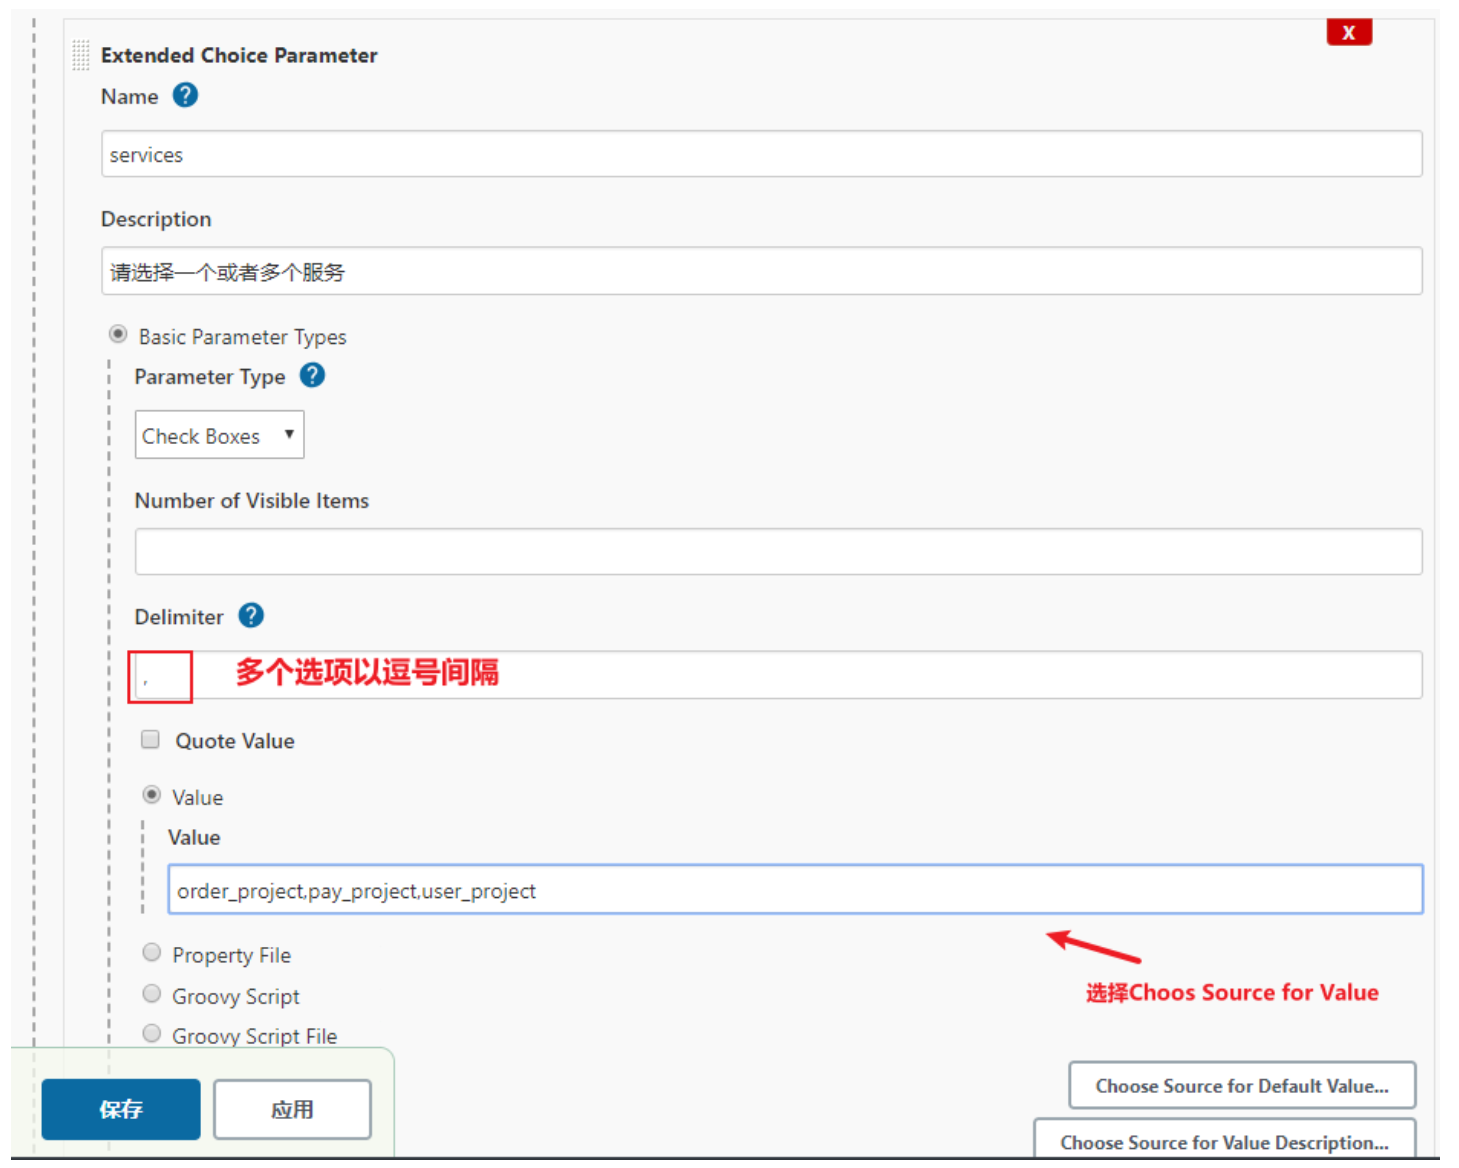
Precautions:
For project one, you need to change the name to: stock_backend and stock_job service names, separated by commas ! ! !
Do not check the Quote Value option, otherwise subsequent analysis will require special processing! ! !
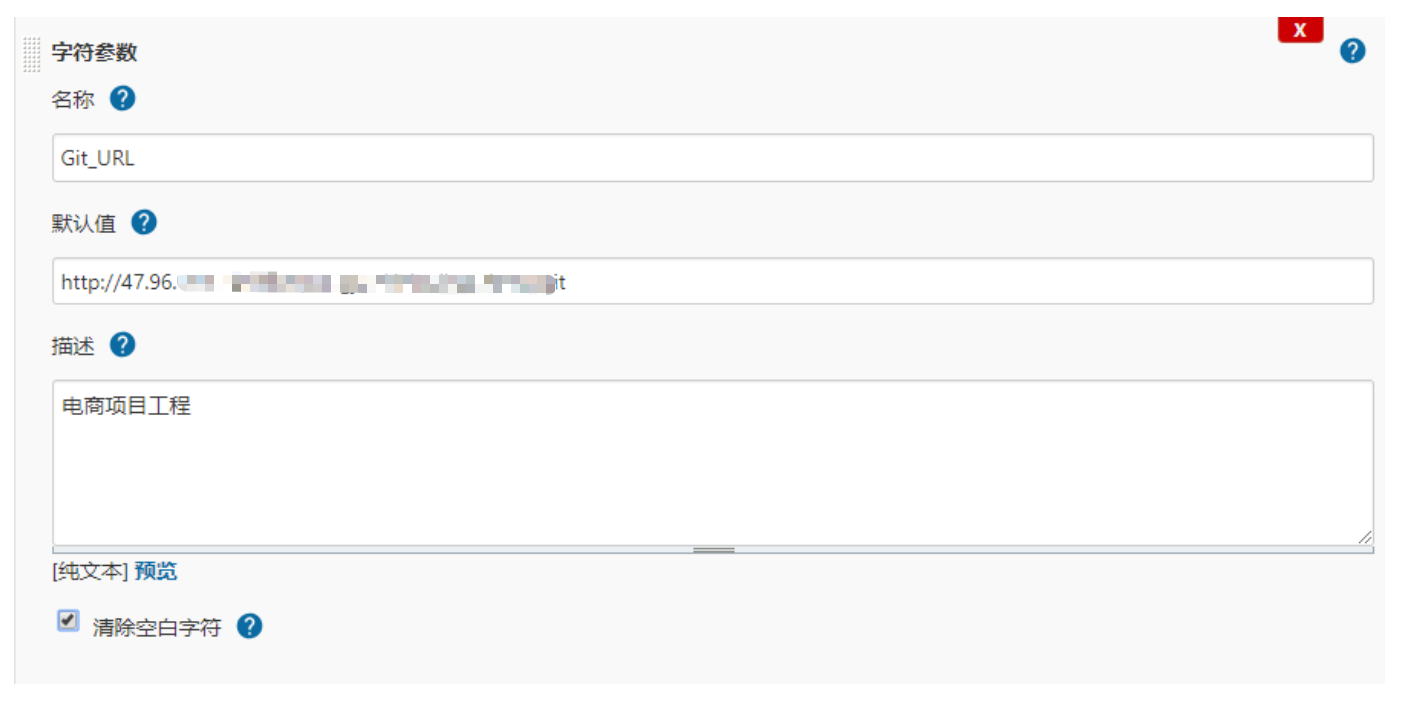
Define the second parameter: stockURL:
Fill in the gitlab code warehouse address here:
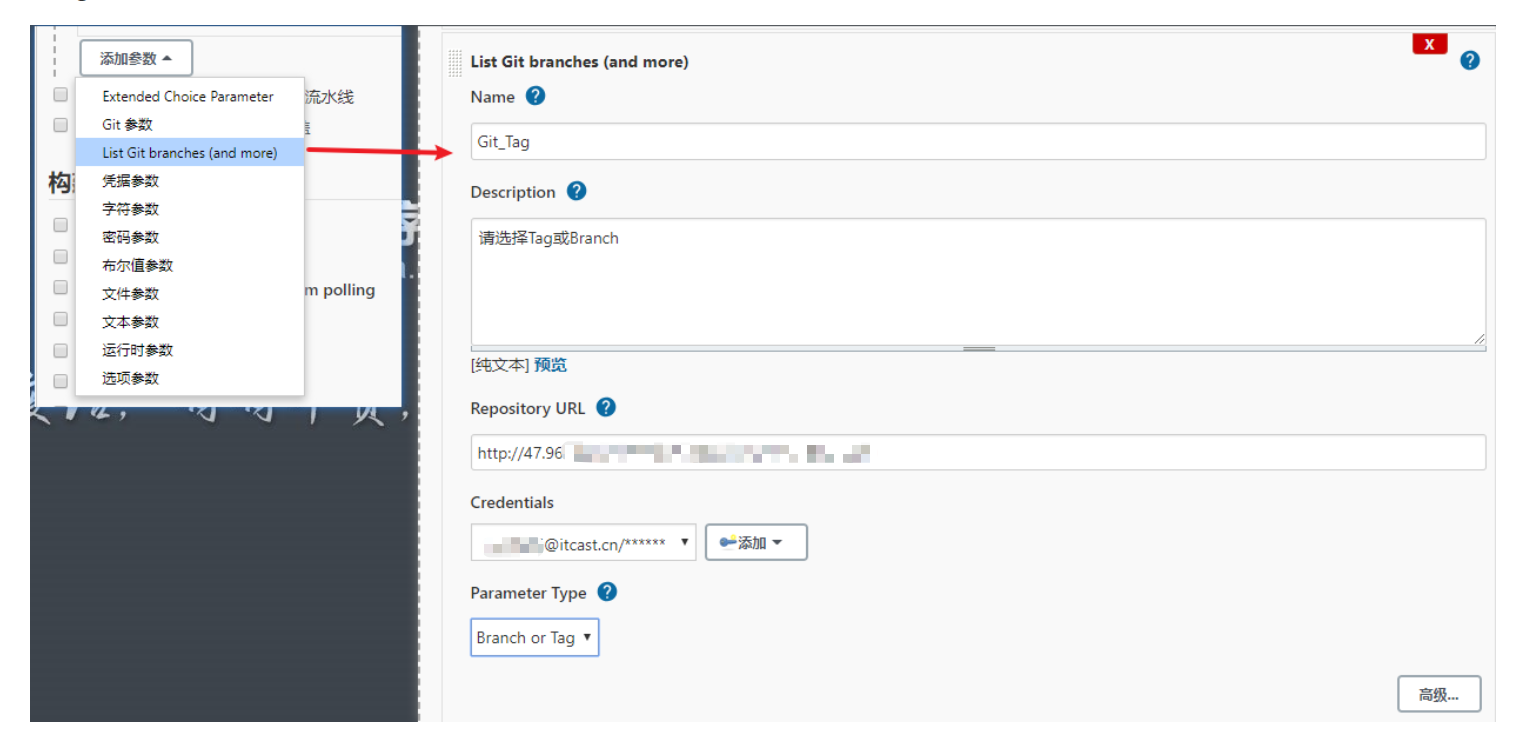
Maintain the gitlab code branch list display, we named it: stockBranche
After parameter selection is completed, the final effect is:

Note: Click Build with Paramters to display the effect! ! !
Supplement the docker mirroring tag:

3.2 Pipeline script settings
Next build the pipeline script:
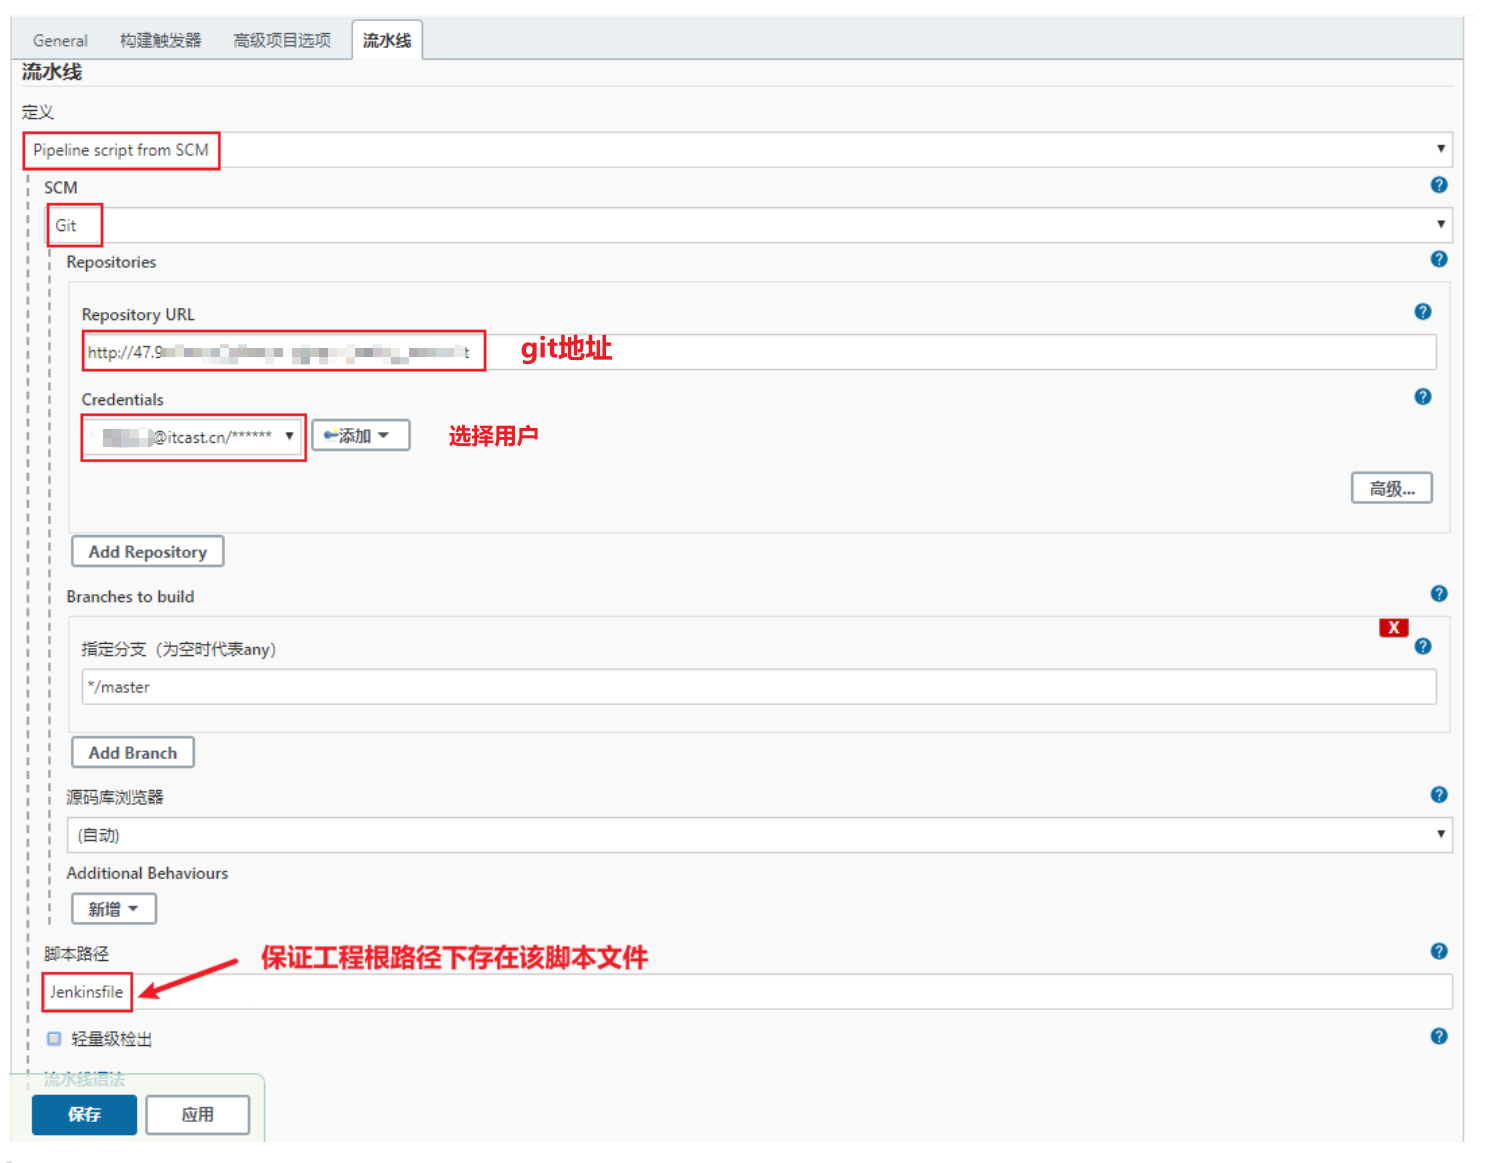
By default, the master branch is pulled, and then you can switch to other branches from master.
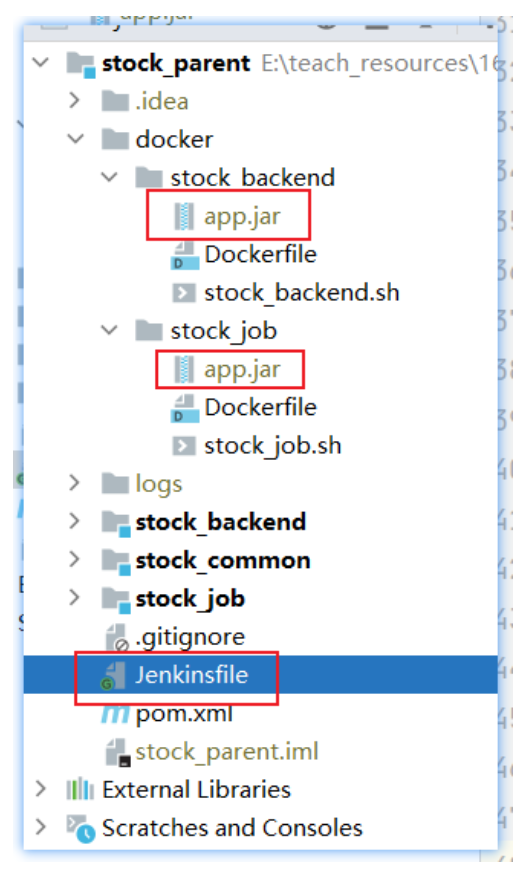
Add the Jenkinsfile script in the project root directory:
jenkins-pipeline syntax reference official website: https://www.jenkins.io/zh/doc/book/pipeline/syntax/
pipeline {


    agent any
    options {


        timestamps()
    }
    tools {


        maven 'mavenstock'
        jdk 'java11'
    }
//    environment {


//        BUILD_ID = 'v1.0'
//    }
    stages {


//        stage('清除工作空间') {


//            steps {


//                cleanWs()
//            }
//        }
        stage('更新Git代码') {


            steps {


                echo "正在拉取代码..."
                echo "当前分支:${stockBranch},当前服务:${services}"
                checkout([$class: 'GitSCM',
                          branches: [[name: stockBranch]],
                          doGenerateSubmoduleConfigurations: false,
                          extensions: [],
                          submoduleCfg: [],
                          userRemoteConfigs: [[credentialsId: '890fda75-00af-437a-926d-c96cf198a186', url: stockUrl]]
                ])
                sh "pwd"
            }
        }
        stage('重新Maven打包') {


            steps {


                script {


                    echo "打包:stock_common工程....."
//                    sh "mvn clean install -DskipTests -f ./stock_common/pom.xml"
//                    echo "需要打包的服务:${services}......"
//                    for(ps in services.tokenize(",")){


//                        echo "cd ./${ps} && mvn clean install -DskipTests"
//                        sh "cd ./${ps} && mvn clean install -DskipTests"
//                    }
                    echo "整体打包...."
                    sh "mvn clean install -DskipTests"
                }
            }
        }
        stage('重新构建镜像') {


            steps {


                echo "当前打镜像tag:${imageTag}"
                script {


                    for (ds in services.tokenize(",")) {


                         sh "pwd"
                         echo "cd ./docker/${ds} && docker build -t ${ds}:${imageTag} ."
                         sh "cd ./docker/${ds} && docker build -t ${ds}:${imageTag} ."
                    }
                }
            }
        }
        stage('部署服务'){


            steps {


                script {


                    for (ws in services.tokenize(",")) {


                        echo "部署升级:${ws}服务"
                        sh "cd ./docker/ && chmod +x ./deploy.sh && sh deploy.sh ${ws} ${imageTag}"
                    }
                }
            }
        }

    }
    post {


        always {


            echo '任务构建完毕'
        }
    }
}
3.3 Prepare projects to be deployed
3.3.1 Backend project packaging preparation
Add the packaging name and packaging storage location in the stock_backend project:
<build>
  <!--打包名称-->
  <finalName>app</finalName>
  <plugins>
    <plugin>
      <groupId>org.springframework.boot</groupId>
      <artifactId>spring-boot-maven-plugin</artifactId>
      <configuration>
        <!--jar包保存位置-->
        <outputDirectory>../docker/stock_backend</outputDirectory>
      </configuration>
    </plugin>
  </plugins>
</build>
Do the same in stock_job:
<build>
  <!--打包名称-->
  <finalName>app</finalName>
  <plugins>
    <plugin>
      <groupId>org.springframework.boot</groupId>
      <artifactId>spring-boot-maven-plugin</artifactId>
      <configuration>
        <!--jar包保存位置-->
        <outputDirectory>../docker/stock_job</outputDirectory>
      </configuration>
    </plugin>
  </plugins>
</build>
Run the packaging command, the effect is:
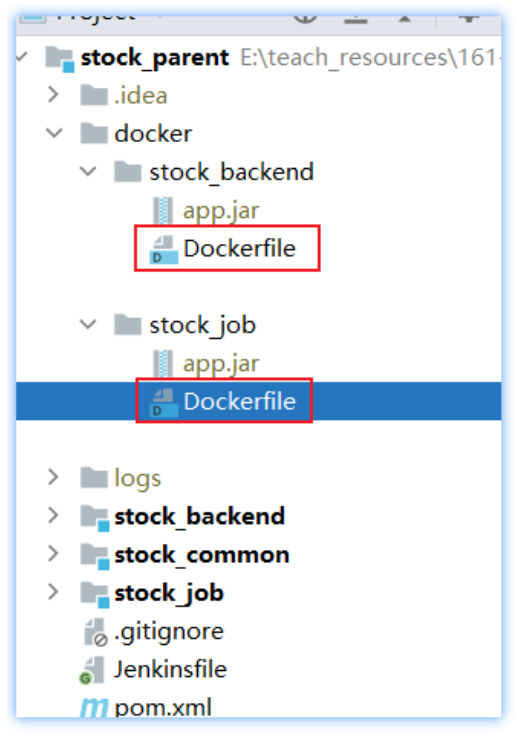
3.3.2 Define Dockerfile
Define the Dockerfile:
FROM java:8
COPY ./app.jar /tmp
ENTRYPOINT java -jar /tmp/app.jar
The storage location is as follows:
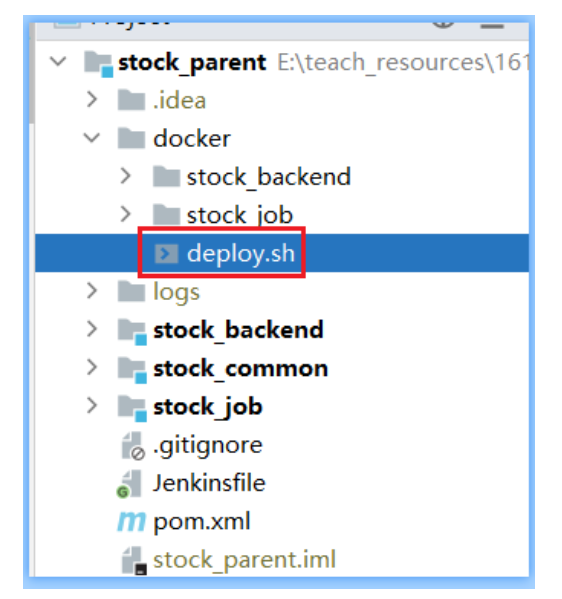
3.3.3 Define container release script
Define common scripts for container deployment in the project docker directory:
#!/bin/bash
# 容器名称
container_name=$1
# 镜像名称
image_name=$1
# 镜像tag
image_tag=$2

# 判断容器是否存在
if docker ps -a | grep $container_name | awk '{print $1}'; then
  echo "容器 $container_name 存在"
  if docker ps | grep $container_name | awk '{print $1}';then
     echo "关闭正在运行的容器 $container_name"
     docker stop `docker ps | grep $container_name | awk '{print $1}'`
  else
    echo "容器 $container_name 都已关闭"
  fi
  # 删除容器
  echo "删除容器 $container_name"
  docker rm `docker ps -a | grep $container_name | awk '{print $1}'`
else
  echo "容器 $container_name 不存在"
fi

# 删除镜像
#if  docker images | grep $image_name | awk '{print $3}'; then
#  echo "镜像 $image_name 存在"
#
#  echo "删除镜像 $image_name"
#  docker rmi `docker images | grep $image_name | awk '{print $3}'`
#else
#  echo "镜像 $image_name 不存在"
#fi

# 重新构建镜像
#echo "重新构建镜像 $image_name"
#docker build -t $image_name .

# 启动容器
echo "启动容器 $container_name"
if [ $container_name = "stock_backend" ]; then
    docker run -d --name $container_name -p 8091:8091 $image_name:$image_tag
elif [ $container_name = "stock_job" ]; then
    docker run -d --name $container_name -p 8092:8092 $image_name:$image_tag
fi
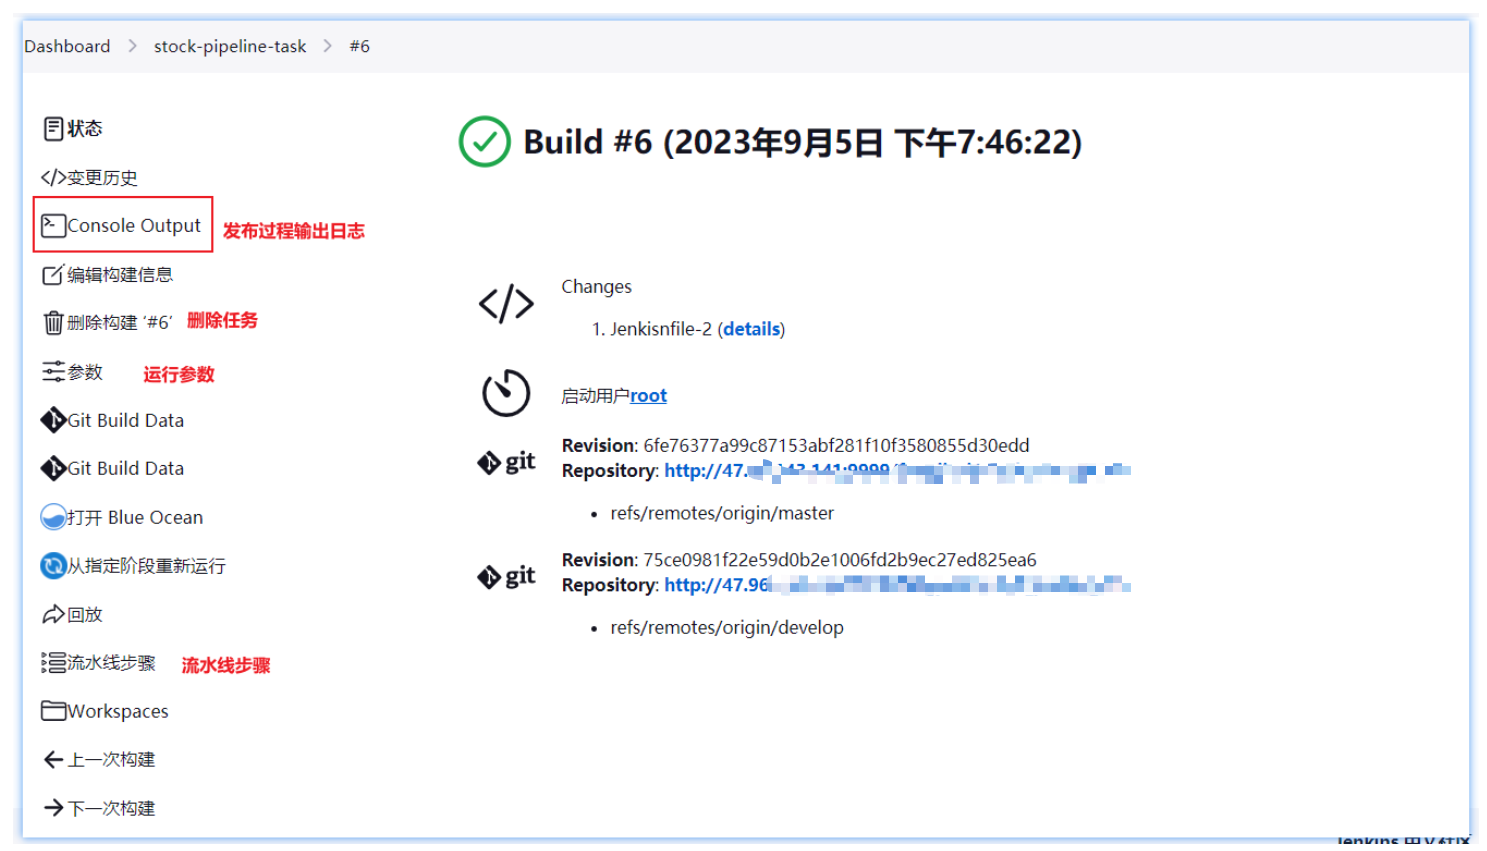
4. Overall presentation
After the updated code is pushed to the gitlab remote warehouse, publish the operation in the jenkins control terminal: