How to use cpolar intranet penetration in Synology nas
Article directory
Today, we will introduce to you how to use cpolar with a graphical interface in the Synology system.
After the graphical transformation of cpolar, the usage method has become much easier. It is basically the same as other application software. You can click different buttons in the software interface to realize different functions according to your needs . Of course, some necessary settings for cpolar are still required before official use.
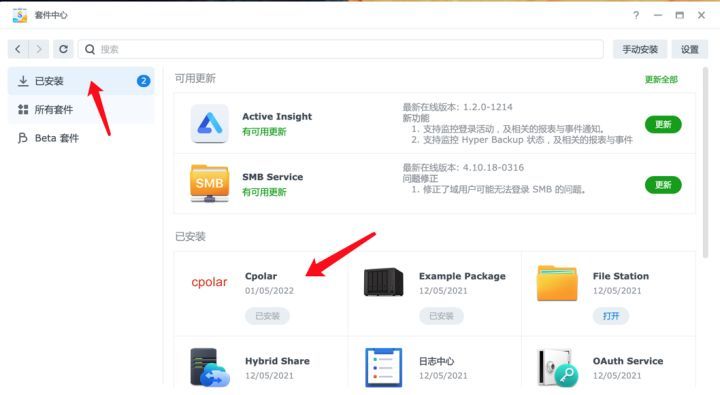
First, we open the "Package Center" of the Synology system, select the "Installed" option, and find the cpolar package in the interface
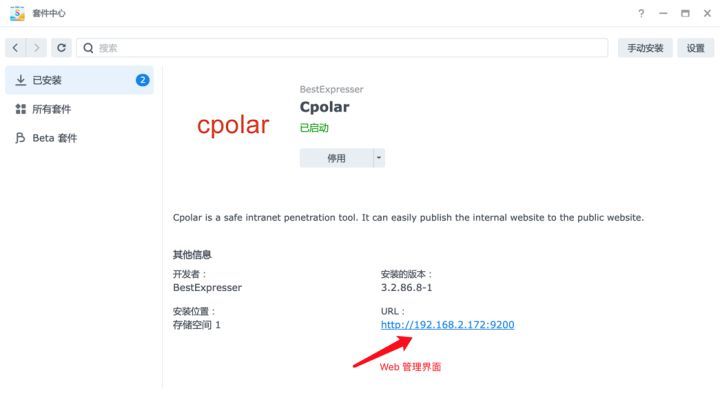
Then click to enter the cpolar suite, click the address pointed by the arrow to enter the web management interface, usually the default port of cpolar is 9200.
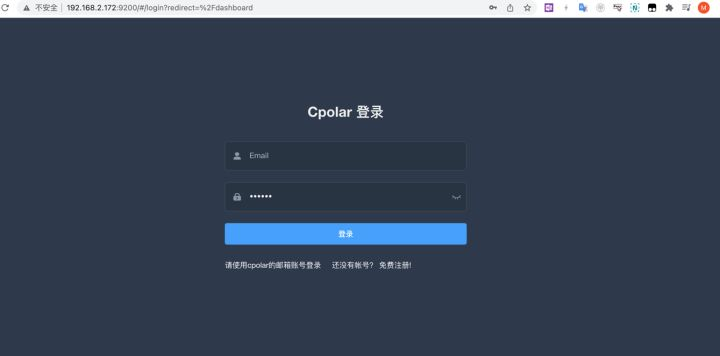
After entering the cpolar web management interface, you need to enter the cpolar login account and password. For users who log in to the cpolar Synology client for the first time, cpolar will automatically obtain the password (authtoken) and configure it into the corresponding configuration file, eliminating the need for manual activation steps.
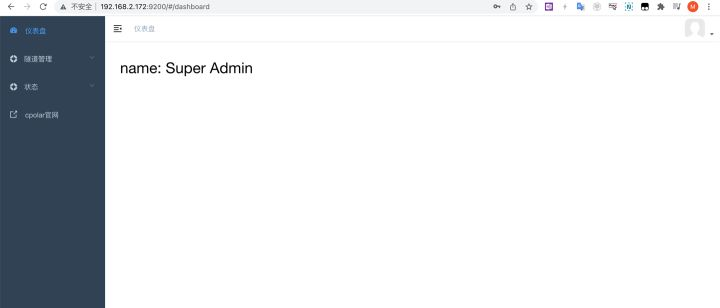
After entering the account and password, it will be automatically transferred to the main account interface of cpolar (currently only supports displaying the login administrator account).
After entering the web interface of cpolar, we can proceed to the next step. At this time, we can first try to establish an exclusive data tunnel. We can click the "Tunnel Management" button on the left side of the cpolar web interface, and select "Create Tunnel" in the drop-down menu.
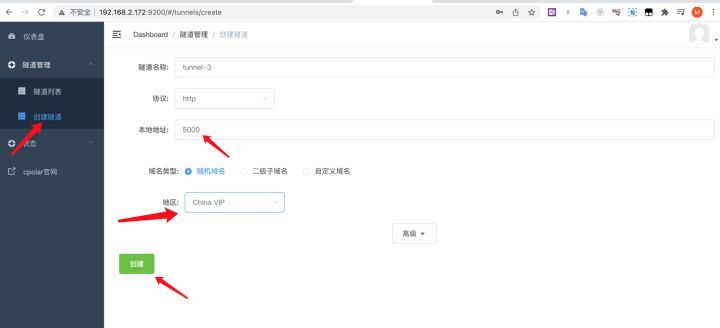
Among them, the tunnel name can be customized, but it cannot be the same as the existing tunnel name; fill in the local address as "5000"; select "China VIP" as the region. After filling in the information, you can click the "Create" button to create an exclusive data tunnel for our Synology.
In order to verify that our data tunnel is successfully created, we can click "Tunnel List" on the left side of the same interface. If our tunnel is successfully created, it will be displayed in this interface.
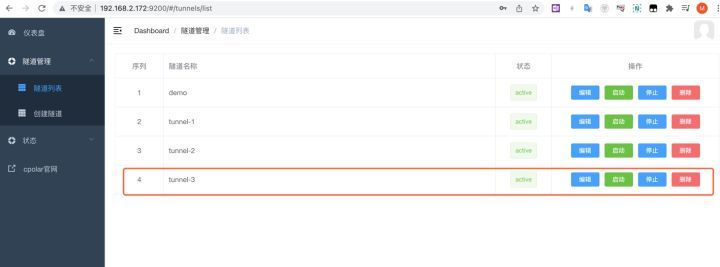
In the red box, we can see that the status of the local data tunnel named Tunnel-3 we created just now is active, which means that the new local data tunnel has been successfully started. After the local tunnel port has been successfully established, we need to check the data tunnel name on the server side as the basis for subsequent data connections.
Open the "Status" button on the left side of the cpolar interface, and select "Online Tunnel List", you can see
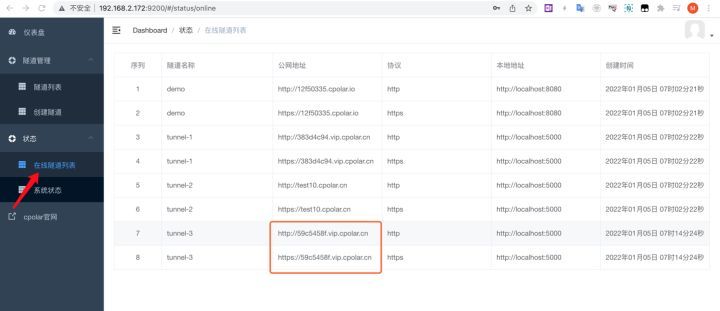
In this interface, we can see that the name of the data tunnel in the last two lines is Tunnel-3, which is the data tunnel we created, and the address in the red box is randomly generated by cpolar, which can access local Synology data for the public Internet Domain name (http tunnel and https tunnel respectively).
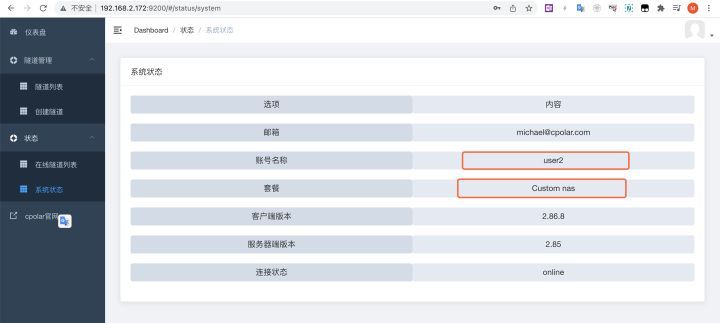
The "system status" in the menu list is a description of the current user, including package information purchased by the user, user account information, data connection status, etc. When a free user upgrades to the basic (and above) plan, it will also be displayed here.
It is not difficult to see from the above introduction that cpolar is easier to use and more user-friendly. It not only saves the trouble of entering Authtoken, but also generates the data tunnel required by users more intuitively through simple button operations. In the following articles, we will introduce more application scenarios of cpolar and expand the scope of application of cpolar. If you have any questions about the use of cpolar , welcome to communicate with us, and we will provide you with the best possible help.
Reprinted from cpolar pole cloud article: How to use cpolar intranet penetration in Synology NAS