Table of contents
2. Maven installation and configuration
1. IDEA configures the Maven environment
2. IDEA creates a Maven project
1. Introduction to Maven
Maven is a project management tool , a tool specially used to manage and build Java projects . It contains an object model. A standard set, a dependency management system, that Maven uses to run plugin goals and logic defined in lifecycle phases.
Its main functions:
- Provides a standardized project structure
- Provides a standardized build process (compile, test, package, release...)
- Provides a set of dependency management mechanisms
Its core functions:
The core function of Maven is to reasonably describe the dependencies between projects , that is, to obtain the jar package through the configuration of the pom.xml file without manually adding the jar package
Maven model:

2. Maven installation and configuration
- Download Maven
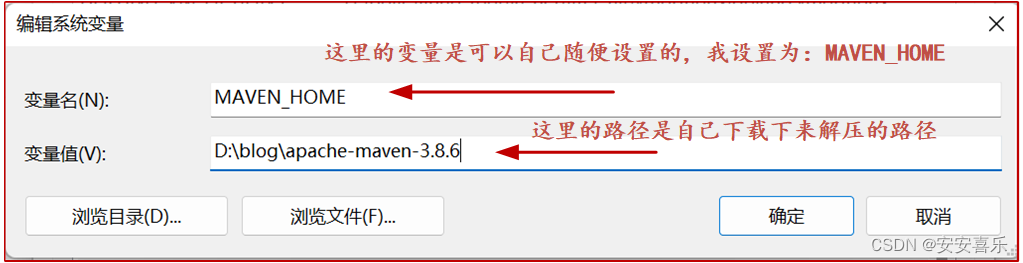
- Configure the environment variable MAVEN_HOME as the bin directory of the installation path
- Configure the local warehouse: modify <localRepository> in conf/settings.xml to a specified directory
- Configure Alibaba Cloud Private Server: Modify the <mirrors> tag in conf/settings.xml and add sub-tags to it
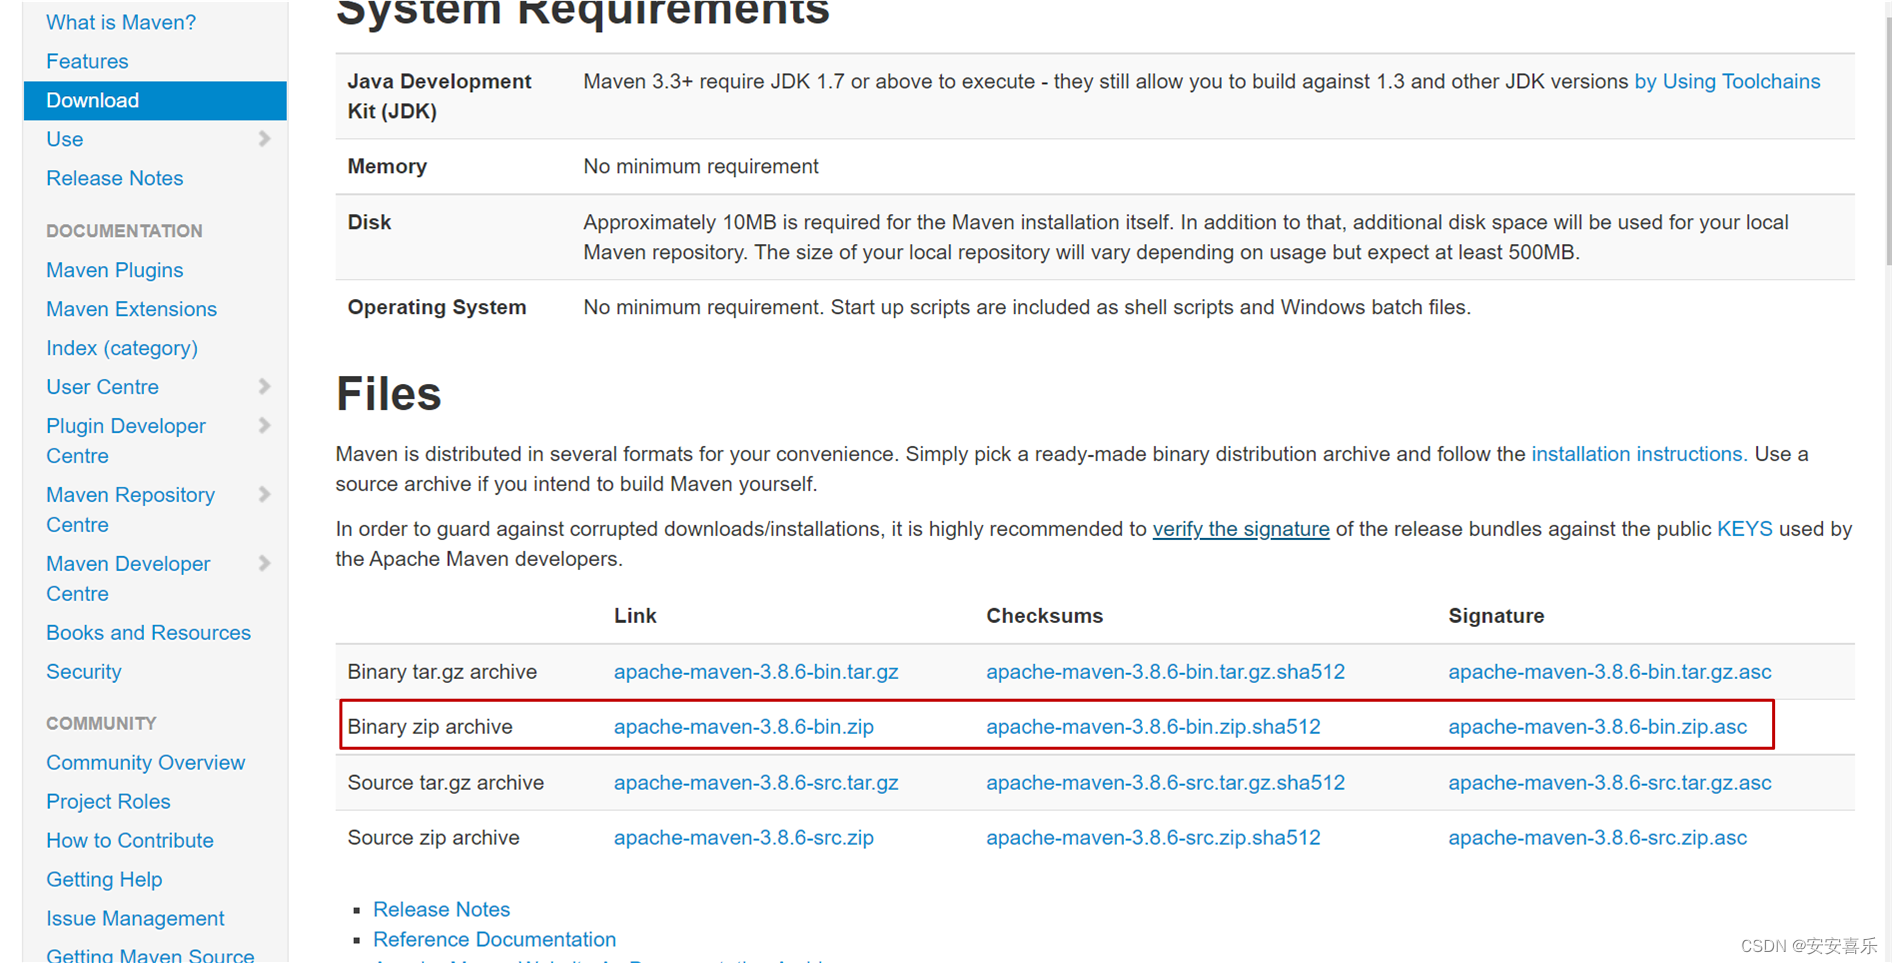
Step 1: Download Maven
Maven download address : https://maven.apache.org/download.cgi maven official website
Note: Binary is an executable version , which has been compiled and can be used directly. Source is the source code version , which needs to be compiled into executable software before it can be used. We choose the compiled windows version to install: choose the zip version (linux choose tar.gz)
Successfully downloaded files:

After the download is complete, unzip it to the path you want to install:

Step 2: Maven environment variable configuration
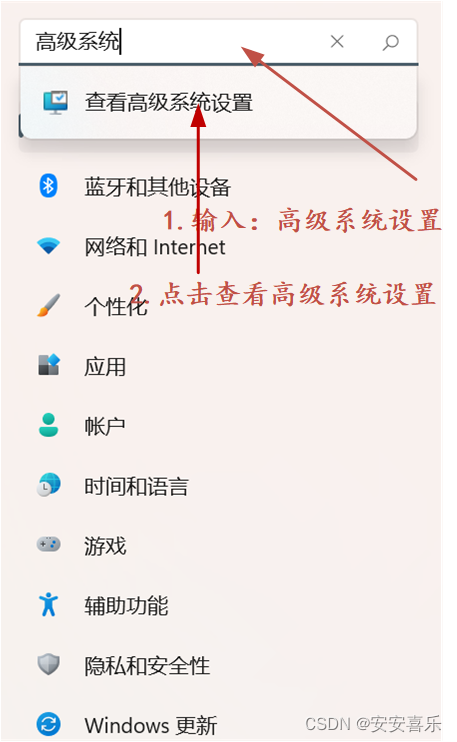
1. Advanced system settings in the computer: right click to start - find settings - open settings - enter advanced settings - click to view advanced system settings

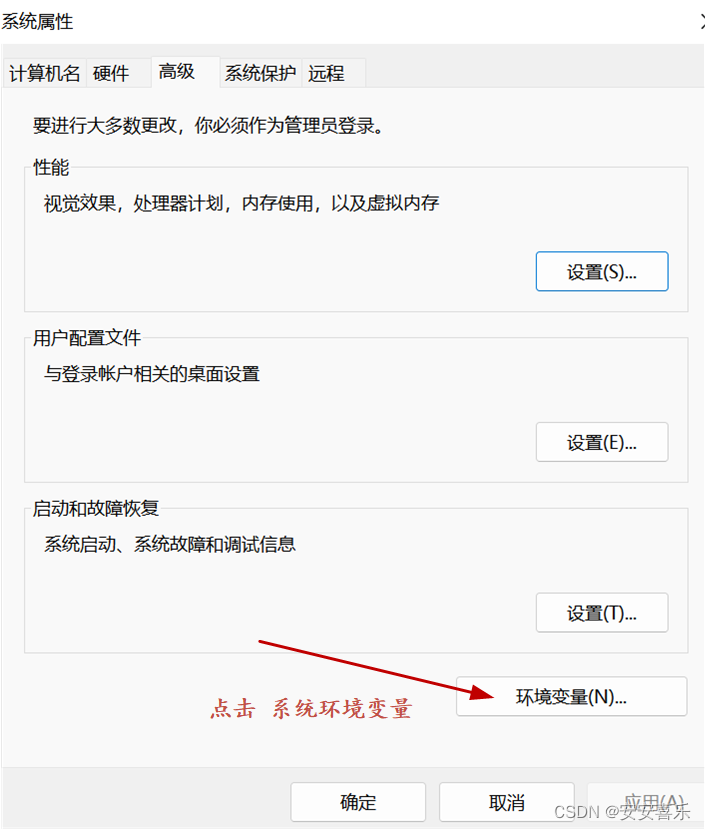
2. Click Environment Variables
3. Create a new system variable

4. Create your maven installation path
5. Edit the path path:
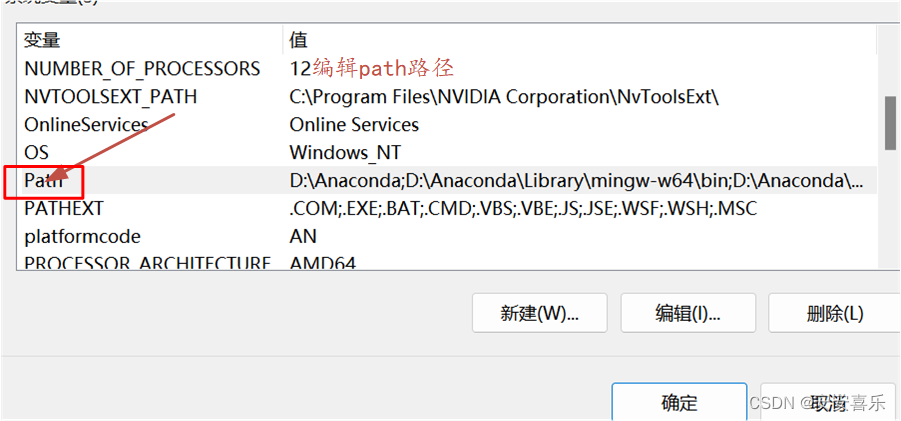
6. Set a new path

7. Verify that maven is configured successfully
Since this is the version I installed before, I have not changed it. If the installation is performed according to the above operation, the version model of maven should be: 3.8.6;

Step 3: Configure the local warehouse
1. Find the conf folder under the maven installation path and open the folder;
 2. Find the settings.xml file under the conf file and open this file

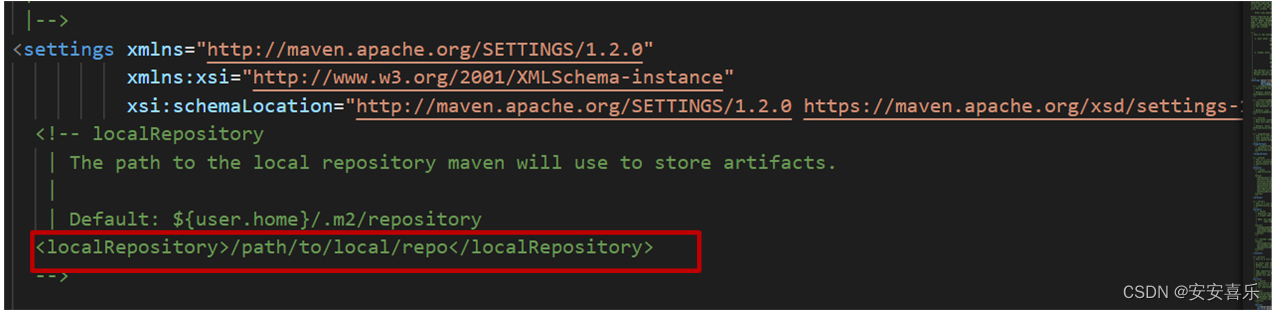
3. Open it with vs or other programming software on the computer, and find the position where the text appears in the red box below;
4. Create a new file in the maven folder as your own local warehouse, and the name of the warehouse can be customized;

5. Copy this line of code from the comment, and replace the code in <localRepository> with the address of the local warehouse you created;

Step 4: Configure Alibaba Cloud private server; in order to improve the download speed of the package
1. Find the conf folder under the maven installation path and open the folder;
2. Find the settings.xml file under the conf file and open this file
3. Open it with vs or other programming software on the computer, and find the mirrors node in the settings.xml configuration file, as shown in the figure below

4. Add the following configuration (note that it should be added between the two tags <mirrors> and </mirrors>, and the other configurations are the same), and put it in front of the default node.
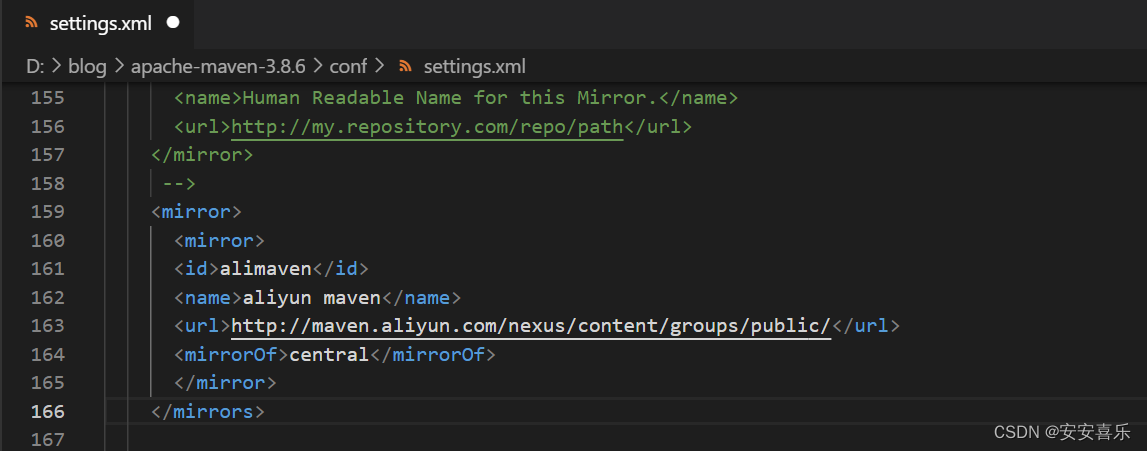
直接复制下列这段代码,然后粘贴到<mirrors>标签下面
<mirror>
<id>alimaven</id>
<name>aliyun maven</name>
<url>http://maven.aliyun.com/nexus/content/groups/public/</url>
<mirrorOf>central</mirrorOf>
</mirror>
Three, the basic use of Maven
Maven's common commands:
- compile : compile
- clean: clean up
- test: test
- package: package
- install: install
4. IDEA configures Maven
- IDEA configures the Maven environment
- IDEA creates a Maven project
- IDEA imports Maven project
- dependency management
Detailed explanation of Maven coordinates
- What are coordinates?
- Coordinates in Maven are unique identifiers of resources;
- Use coordinates to define projects or to introduce project dependencies
- The main components of Maven coordinates
- groupId: defines the current Maven project affiliated organization name
- artifactId: defines the current Maven project name
- version: defines the current project version number
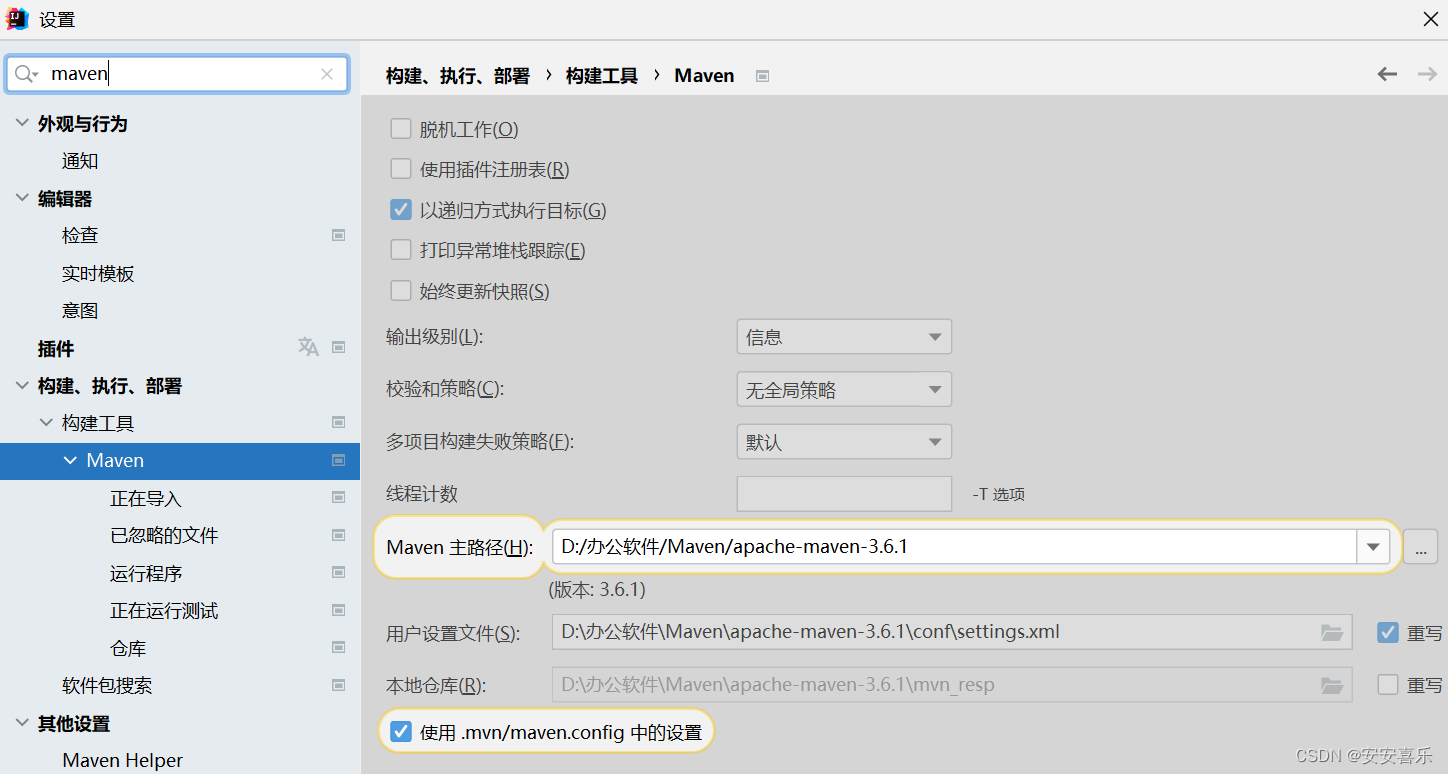
1. IDEA configures the Maven environment
1.1 Select File--Settings in IDEA
1.2 search maven
1.3 Set IDEA to use locally installed Maven, and modify the configuration file path

2. IDEA creates a Maven project
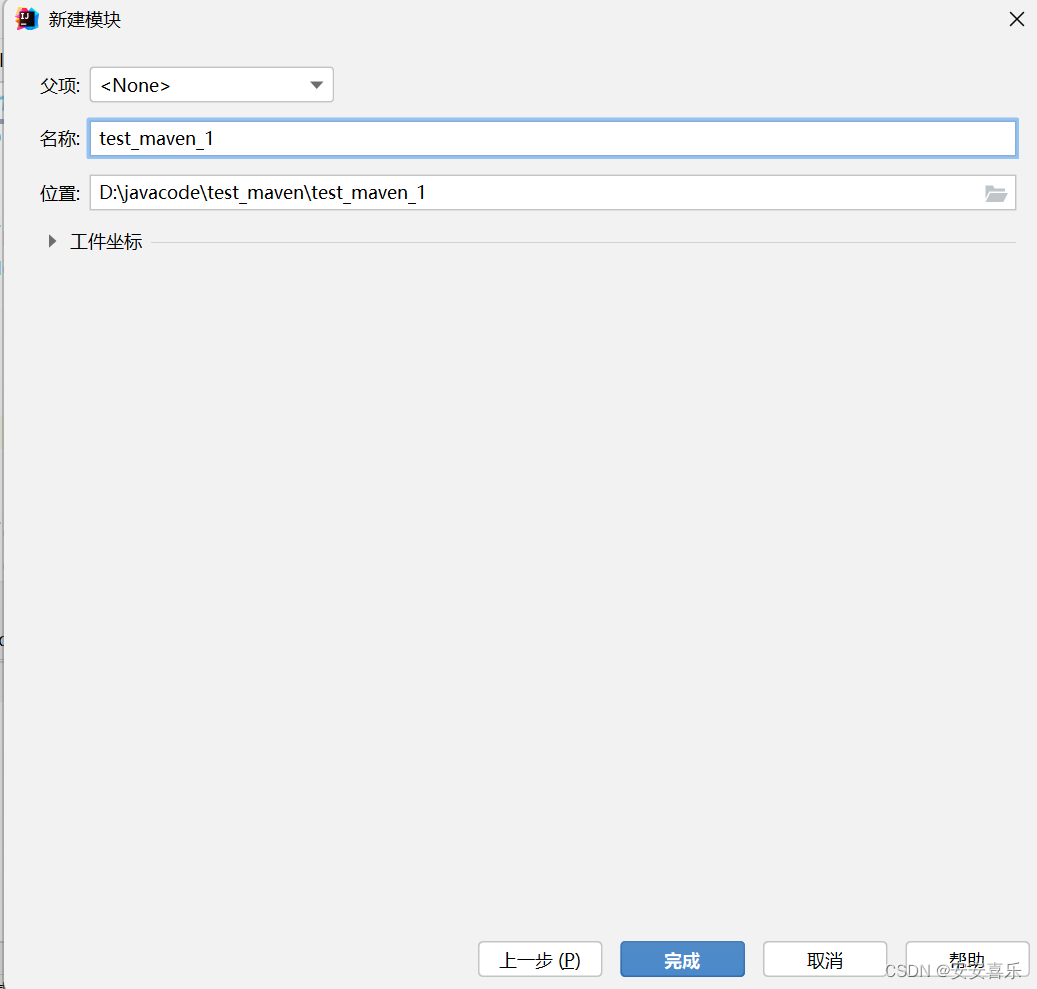
2.1 Create a module, select Maven, and click next
2.2 Fill in the module name, coordinate information, click finish, the creation is complete
2.3 Write the program and run it


You can create your own class under the java package in the main of the created module to write code and run it

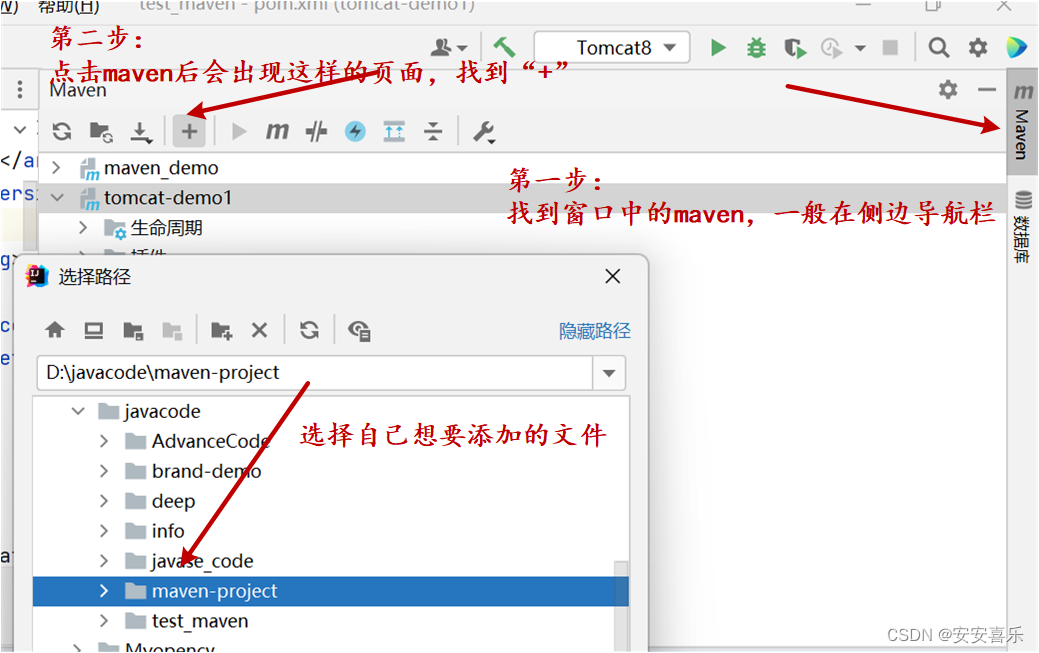
3. IDEA imports Maven project
Supplement: plugins used in maven
Configure the Maven-Helper plugin
1. Select File-->Settings in IDEA
2. Select Plugins
3. Search for Maven, select the first Maven hepler, click install to install, and click Accpet in the pop-up panel
4. Restart IDEA
The purpose of configuring this plugin: Right-click on the implementation class, and the run maven button will appear to make maven run more efficiently

4. Dependency management
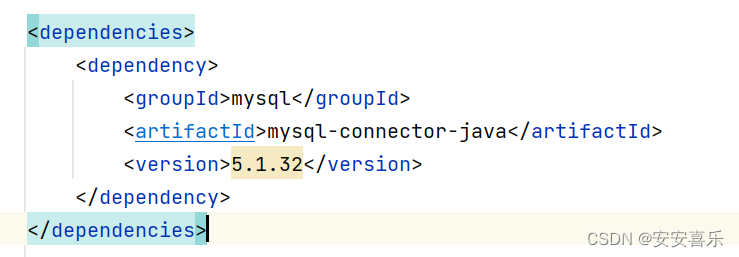
4.1 Import jar package using coordinates
- Write the <dependencies> tag in pom.xml
- Use <dependency> in the <dependencies> tag to introduce coordinates
- define coordinates groupld, artifactld, version
- Click the refresh button to make the coordinates take effect (automatic configuration can be configured to take effect)
4.1 Shortcuts for importing jar packages using coordinates (supplement)
- Press alt+insert in pom.xml and select Dependency
- Search for the corresponding coordinates in the pop-up panel, then double-click to select the corresponding target
- Click the refresh button to make the coordinates take effect
4.2 Range of coordinate dependence
By setting the dependency scope (scope) of the coordinates, you can set the scope of the corresponding jar package: compilation environment, test environment, and running environment ; <scope> default value: compile
- compile : compile, test, run
- test : test
- provided : compile, test
- runtime : test, run
- system : compile, test
