SSH remote login
apt-update
Version number: Ubuntu 16.04
Environment: Vmware 17.2
network
First, check whether the network is unblocked. The usual method is to ping 4.2.2.2. However, in Ubuntu, ping 4.2.2.2 may not find other network problems. The specific performance is: ping 4.2.2.2 can connect, but ping baidu .com could not respond. So here we choose to ping baidu.com to check if there is any problem with our network and DNS.
ping 4.2.2.2

ping baidu.com

Being able to connect means that the DNS server and the network are both unblocked.
renew
Then perform apt update, the command is as follows, where -y means that if there is a choice, choose yes.
sudo apt-get -y update

The above command must be run with sudo, that is, the administrator operation, and then enter the password. However, some errors may occur, which will be discussed in detail below. (There are a lot of mistakes in the pictures that have been reduced)

E: Unable to download http://cn.archive.ubuntu.com/ubuntu/dists/xenial/InRelease Clear text signed file is not available, the result is 'NOSPLIT' (does your network require authentication?)
E: Unable to download http:/ /cn.archive.ubuntu.com/ubuntu/dists/xenial-updates/InRelease Clear signed file not available, result 'NOSPLIT' (does your network require authentication?)
E: Unable to download http://cn.archive. ubuntu.com/ubuntu/dists/xenial-backports/InRelease Clear signed file not available, result 'NOSPLIT' (Does your network require authentication?)
E: Unable to download http://security.ubuntu.com/ubuntu/dists /xenial-security/InRelease Clear signed file not available, result 'NOSPLIT' (Does your network require authentication?)
E: Failed to download some index files. If they are omitted, the old index file will be used instead. This is the problem of the source, you need to switch the source or add the source.
The main thing is to solve the last problem. Generally speaking, as long as the source is ok, then the ssh download configuration can be performed, so next we will add the source. Here I use the command line to operate.
-
Edit the /etc/apt/sources.list file
Enter on the command line: sudo vim /etc/apt/sources.list or sudo gedit /etc/apt/sources.list It is recommended to use the latter, because the latter is to open a graphical interface, and the former is to make changes in the terminal.
sudo vim /etc/apt/sources.listsudo gedit /etc/apt/sources.list -
Add at the beginning of the file opened above (the following is the source of the University of Science and Technology of China, there are many sources, but we will use this first)
deb http://mirrors.ustc.edu.cn/ubuntu/ xenial main restricted universe multiverse deb http://mirrors.ustc.edu.cn/ubuntu/ xenial-security main restricted universe multiverse deb http://mirrors.ustc.edu.cn/ubuntu/ xenial-updates main restricted universe multiverse deb http://mirrors.ustc.edu.cn/ubuntu/ xenial-proposed main restricted universe multiverse deb http://mirrors.ustc.edu.cn/ubuntu/ xenial-backports main restricted universe multiverse deb-src http://mirrors.ustc.edu.cn/ubuntu/ xenial main restricted universe multiverse deb-src http://mirrors.ustc.edu.cn/ubuntu/ xenial-security main restricted universe multiverse deb-src http://mirrors.ustc.edu.cn/ubuntu/ xenial-updates main restricted universe multiverse deb-src http://mirrors.ustc.edu.cn/ubuntu/ xenial-proposed main restricted universe multiverse deb-src http://mirrors.ustc.edu.cn/ubuntu/ xenial-backports main restricted universe multiverse -
Save and exit (this should not be taught)
Add as much as possible! , to force quit, which will save a lot of trouble.
:wq!
and then update
sudo apt-get update

This will still report an error, but it does not affect the configuration of ssh, so we will configure it directly below.
ssh configuration
First, we check whether the ssh service is installed. If nothing is returned in the figure below, that is, it is empty, then the ssh service is not installed.
ps -e | grep ssh

Install the ssh service, and then use the above command to check, it may not be installed, the specific problem is analyzed in detail, since I have solved it, if there is a problem, let's chat privately.
sudo apt-get install openssh-server
After installation, the ssh service is usually opened directly. Let's confirm it with the following command.
service sshd status
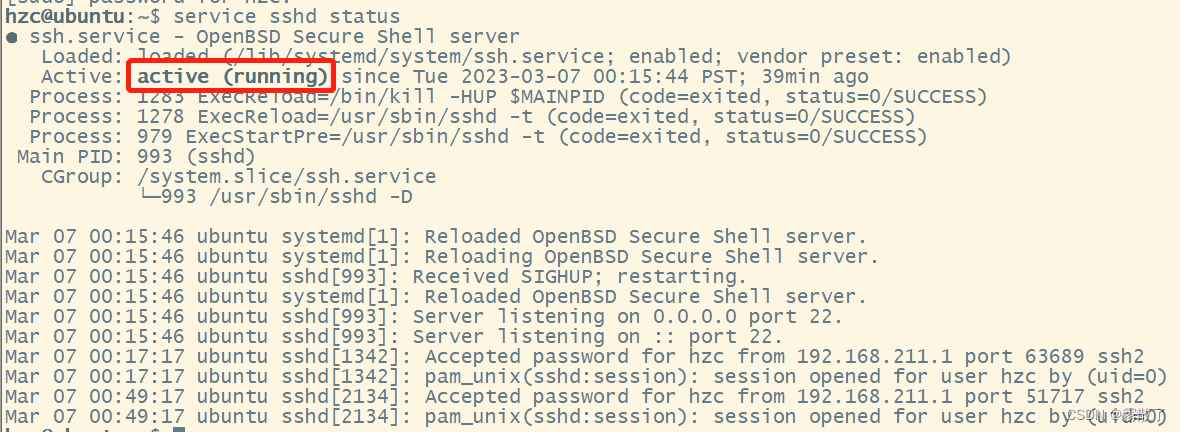
See the red frame part, if it is running, it means it has been opened, if not, use the following command to open the ssh service.
sudo service sshd start
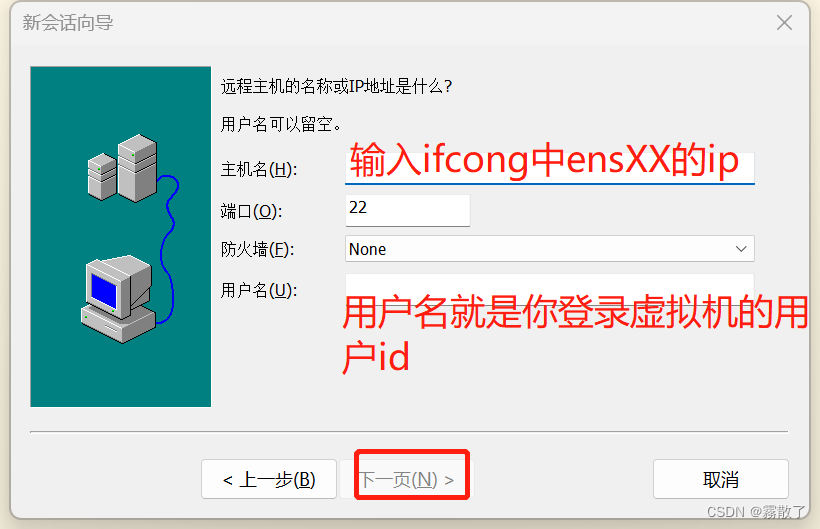
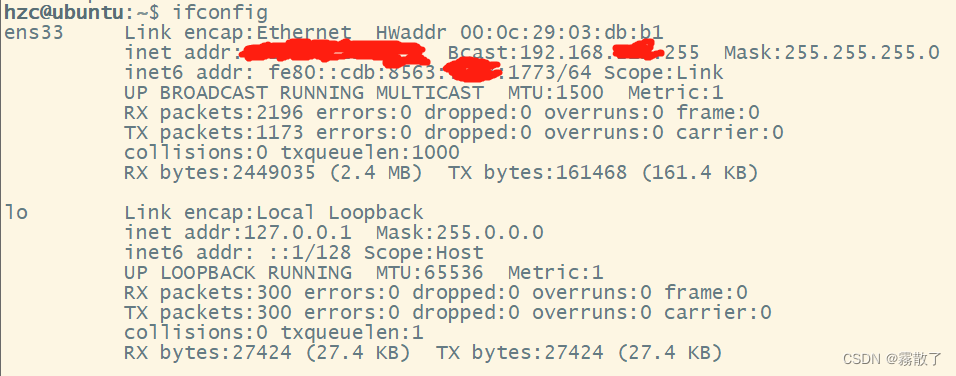
Then we need to look at the IP of the network
ifconfig
Then check whether the ssh port can pass through the firewall. Generally speaking, in terms of learning, we just turn off the firewall directly, but there are some suggestions to understand, so I will list it for everyone.
Check the firewall status first
sudo ufw status

The above state means that the firewall has been turned off. If it is like the following, it can be turned off manually.

sudo ufw disable
understanding part
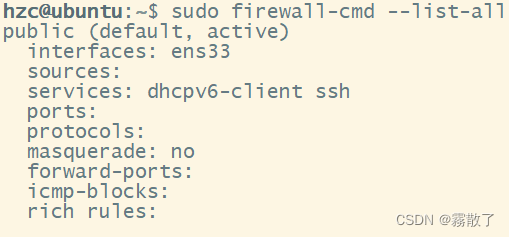
First, check if the port can pass through the firewall
sudo firewall-cmd --list-all

If the above situation occurs, it means that there is no firewall installed, so let's install the firewall first
sudo apt install firewalld
Then check again, whether it can pass through the firewall, like me below is the situation where remote ssh connections can be made
If this is not the case, you can open the firewall to the ssh remote port to allow the ssh service.
Allow tcp port 22
sudo firewall-cmd --permanent --add-port=22/tcp
allow ssh service
sudo firewall-cmd --permanent --add-service=ssh
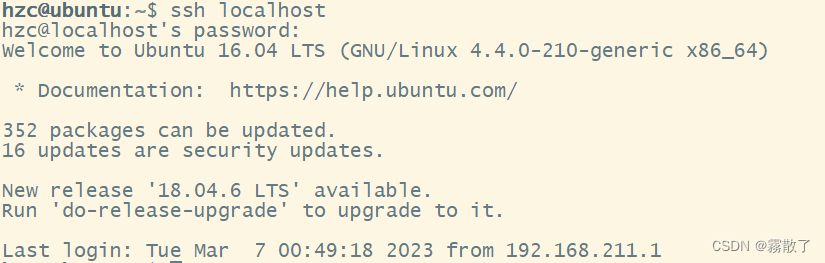
Finally, check whether ssh remote connection can be made
ssh localhost
The following is the case of success.
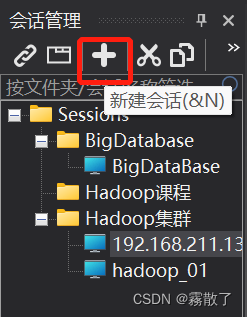
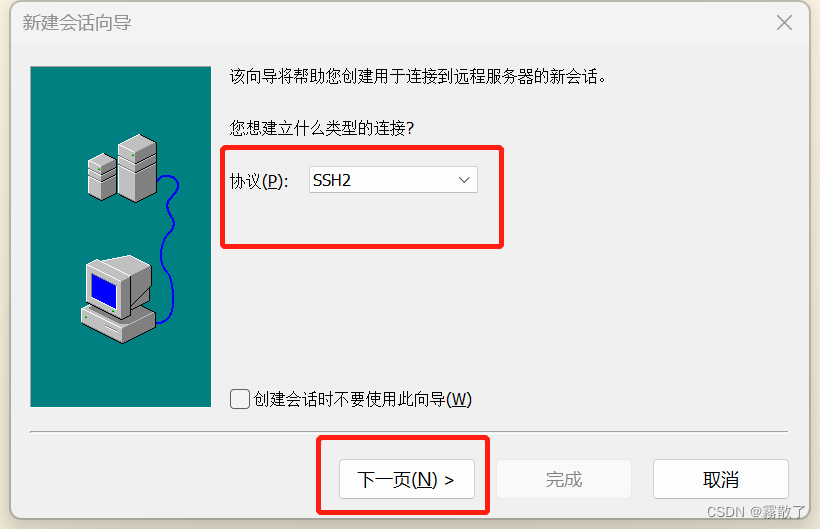
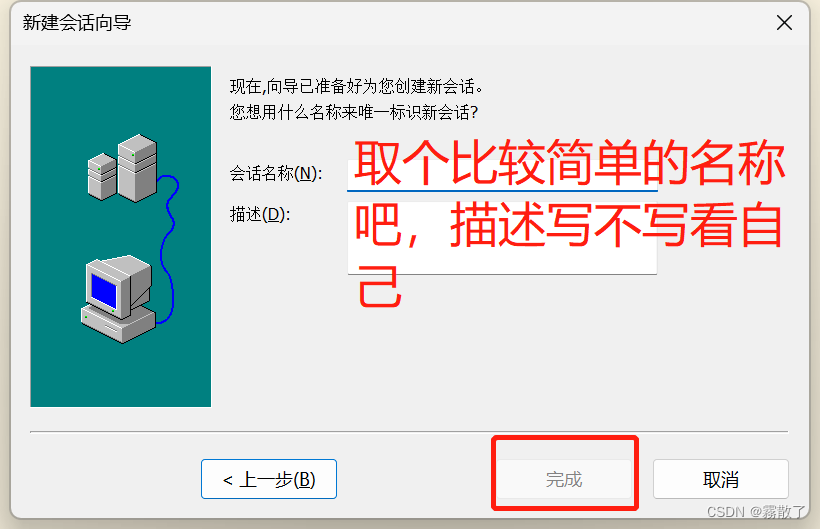
Finally, we use SecureCRTPortable to log in.
SecureCRTPortable login
The specific operation is as follows: