table of Contents
1. Virtual machine installation
What is a virtual machine? Virtual machine, sometimes I want to simulate a real computer environment, because it is too expensive to install using a real machine, so a software that can simulate the operation of the operating system was born. There are currently 2 well-known products for virtual machines:vmware exhibiting vmware workstation, Virtual Box produced by oracle. The blogger recommends that you choose the higher version of VMware to install, otherwise there will be some inexplicable errors. The software download address is as follows:
链接:https://pan.baidu.com/s/1AnxeliGEP2SxyTO96kdogQ
提取码:emyd
复制这段内容后打开百度网盘手机App,操作更方便哦--来自百度网盘超级会员V6的分享
(1) Double-click to open the VMware-workstation-full-15.5.6-16341506.exesoftware, as shown below:

(2) click Next to install

(3) accept the terms of the license agreement, click Next followed by

(4) determine whether changes are needed to install the software needed Location (recommended to be placed under any drive letter except C drive)

Note: The installation directory of all software should preferably be empty during installation
(5) User experience settings, as shown in the figure below, click Next to continue installation

(6) ) Shortcut settings, click Next to continue the installation

(7) Click the Install button

(8) After the installation is over, click the Finish button

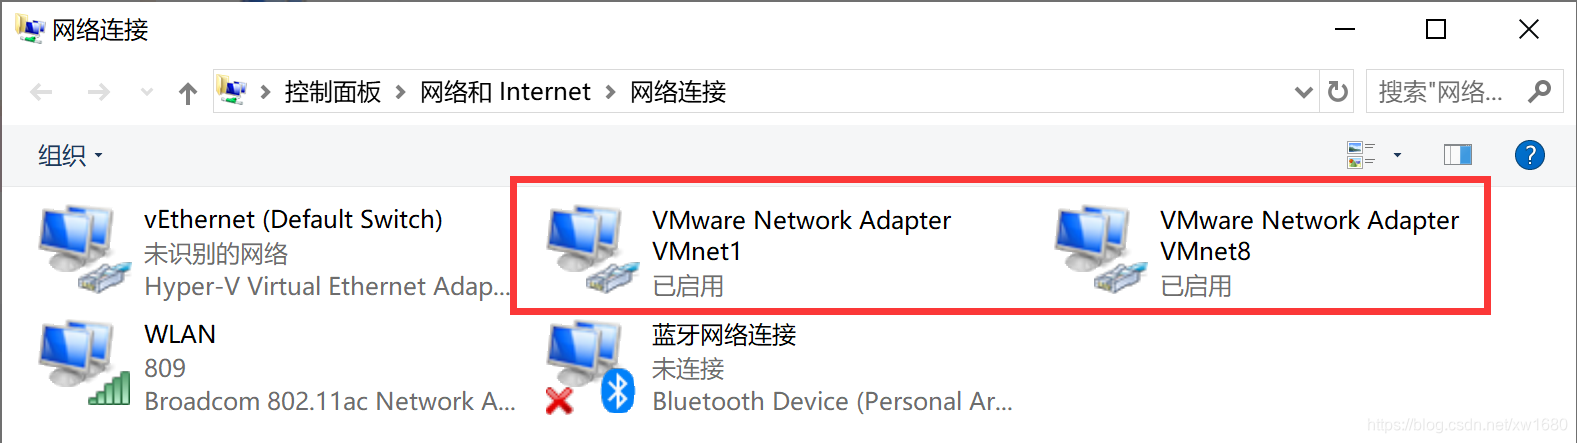
Note: The most important place, after the installation, you need to check, check whether the virtual machine software is available Install 2 virtual network cards
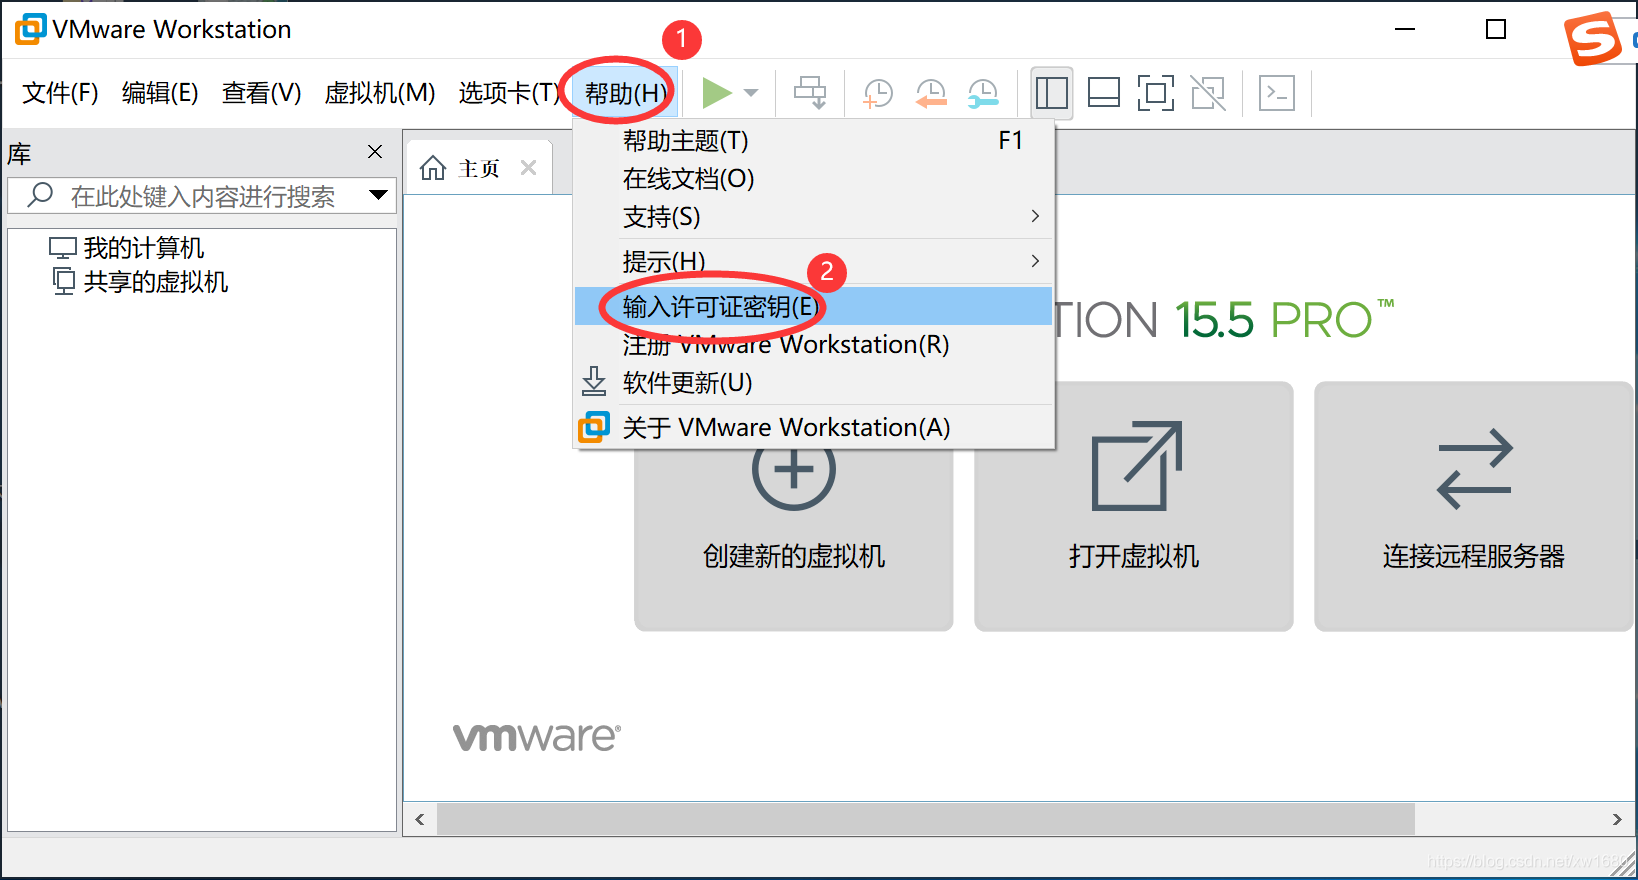
(9) Click the shortcut on the desktop to open the VMware software, enter the key, and click the Continue button (you can also enter the key like the following), the working interface is as follows:
2. Linux system environment deployment
Note: Before installing the virtual machine, you need to confirm whether the virtualization function has been turned on. Different computers have different ways to turn on. This requires you to search the Internet according to your own brand of laptop: How to turn on virtualization. Use the following steps to confirm whether the virtualization function is enabled. Right-click on the taskbar ⇒ Task Manager ⇒ Performance ⇒ CPU, as shown in the figure below:


2.1 Set up CentOS7 operating environment
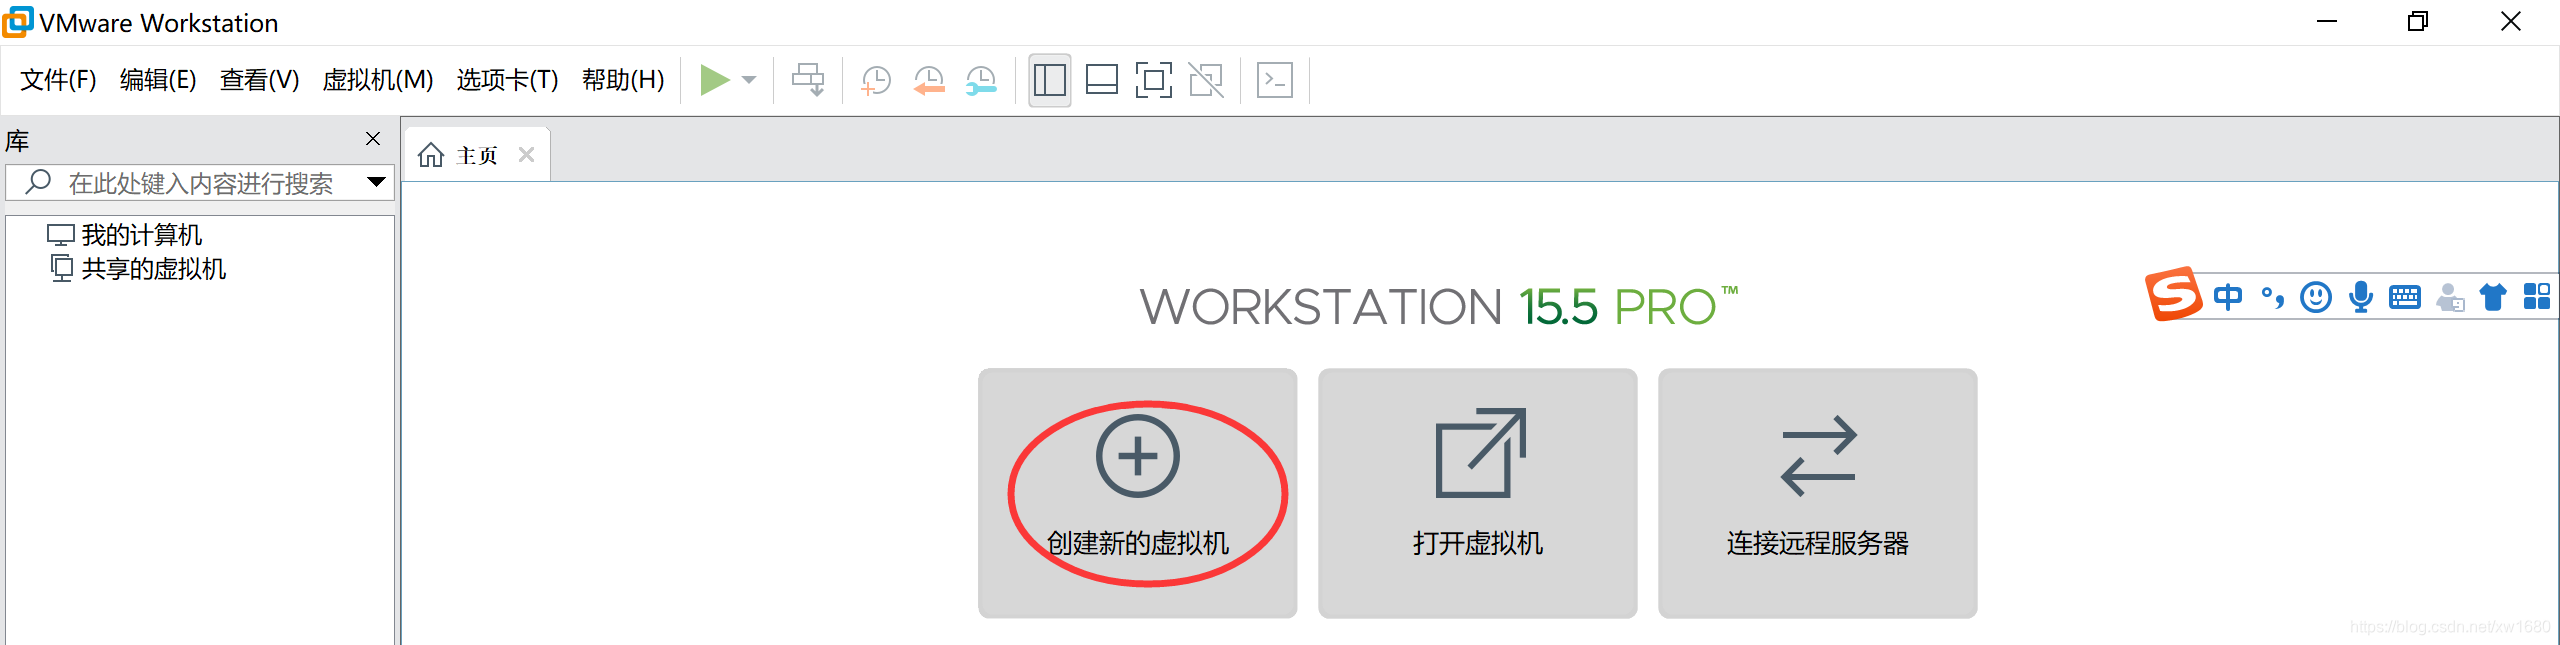
Step one: Open VMware software, the main interface to select 创建新的虚拟机options, choose 自定义, click Next:

Step two: Select compatibility, the default, click Next:

Step 3: Select the image file when selected 稍后安装操作系统and click Next


Step 4: Set the name of the virtual machine (the name will appear on the left side later) and set the installation location of the virtual system

Step 5: CPU settings, prompt: select the CPU settings according to your own computer configuration, generally the default is fine, blogger Choose 2*2 here.

Step 6: Allocate virtual machine memory. Specify the virtual machine memory, it is recommended to 2G or more [if the notebook memory is small, it is recommended to set to 1024, or even 512 is also possible]

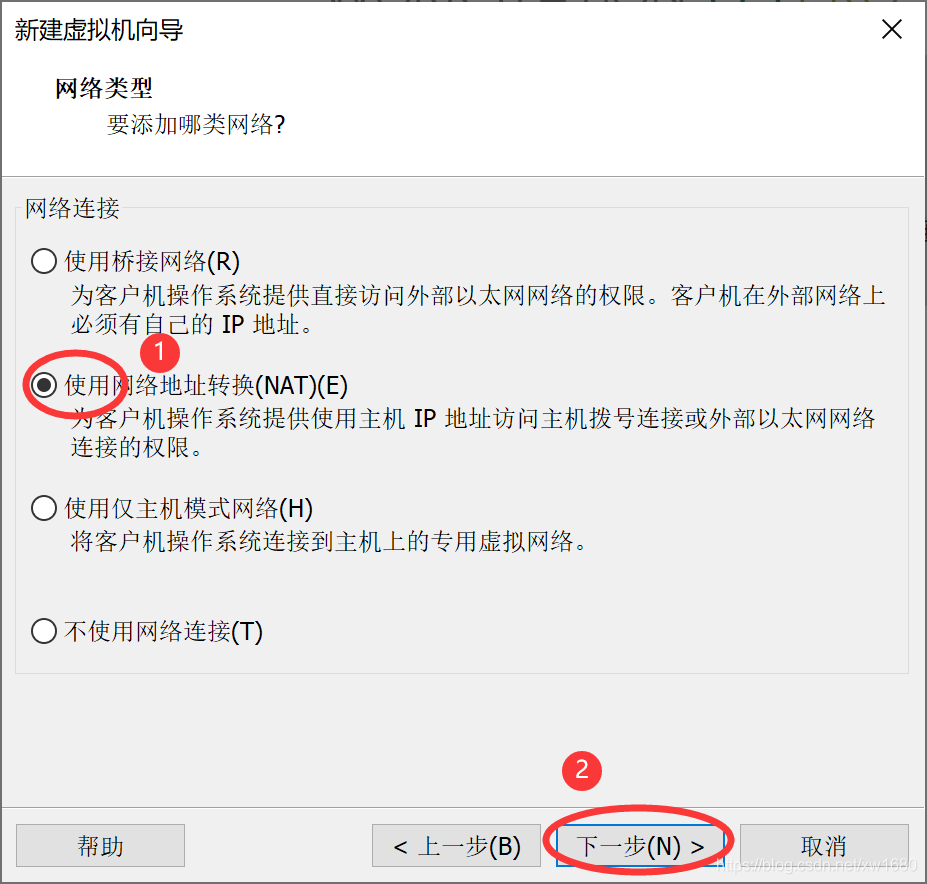
Step 7: Select the virtual machine network type, the default is NAT.
NAT: After configuration, Windows can communicate with the virtual machine, but other students in the classroom can't access it. Only you can access the operating system in the virtual machine. Bridge: After configuration, other students can also access your virtual machine operating system.
Step 8: Follow the default steps, directly to the next step.


After the installation is complete, click Finish:

2.2 Install CentOS7 operating system
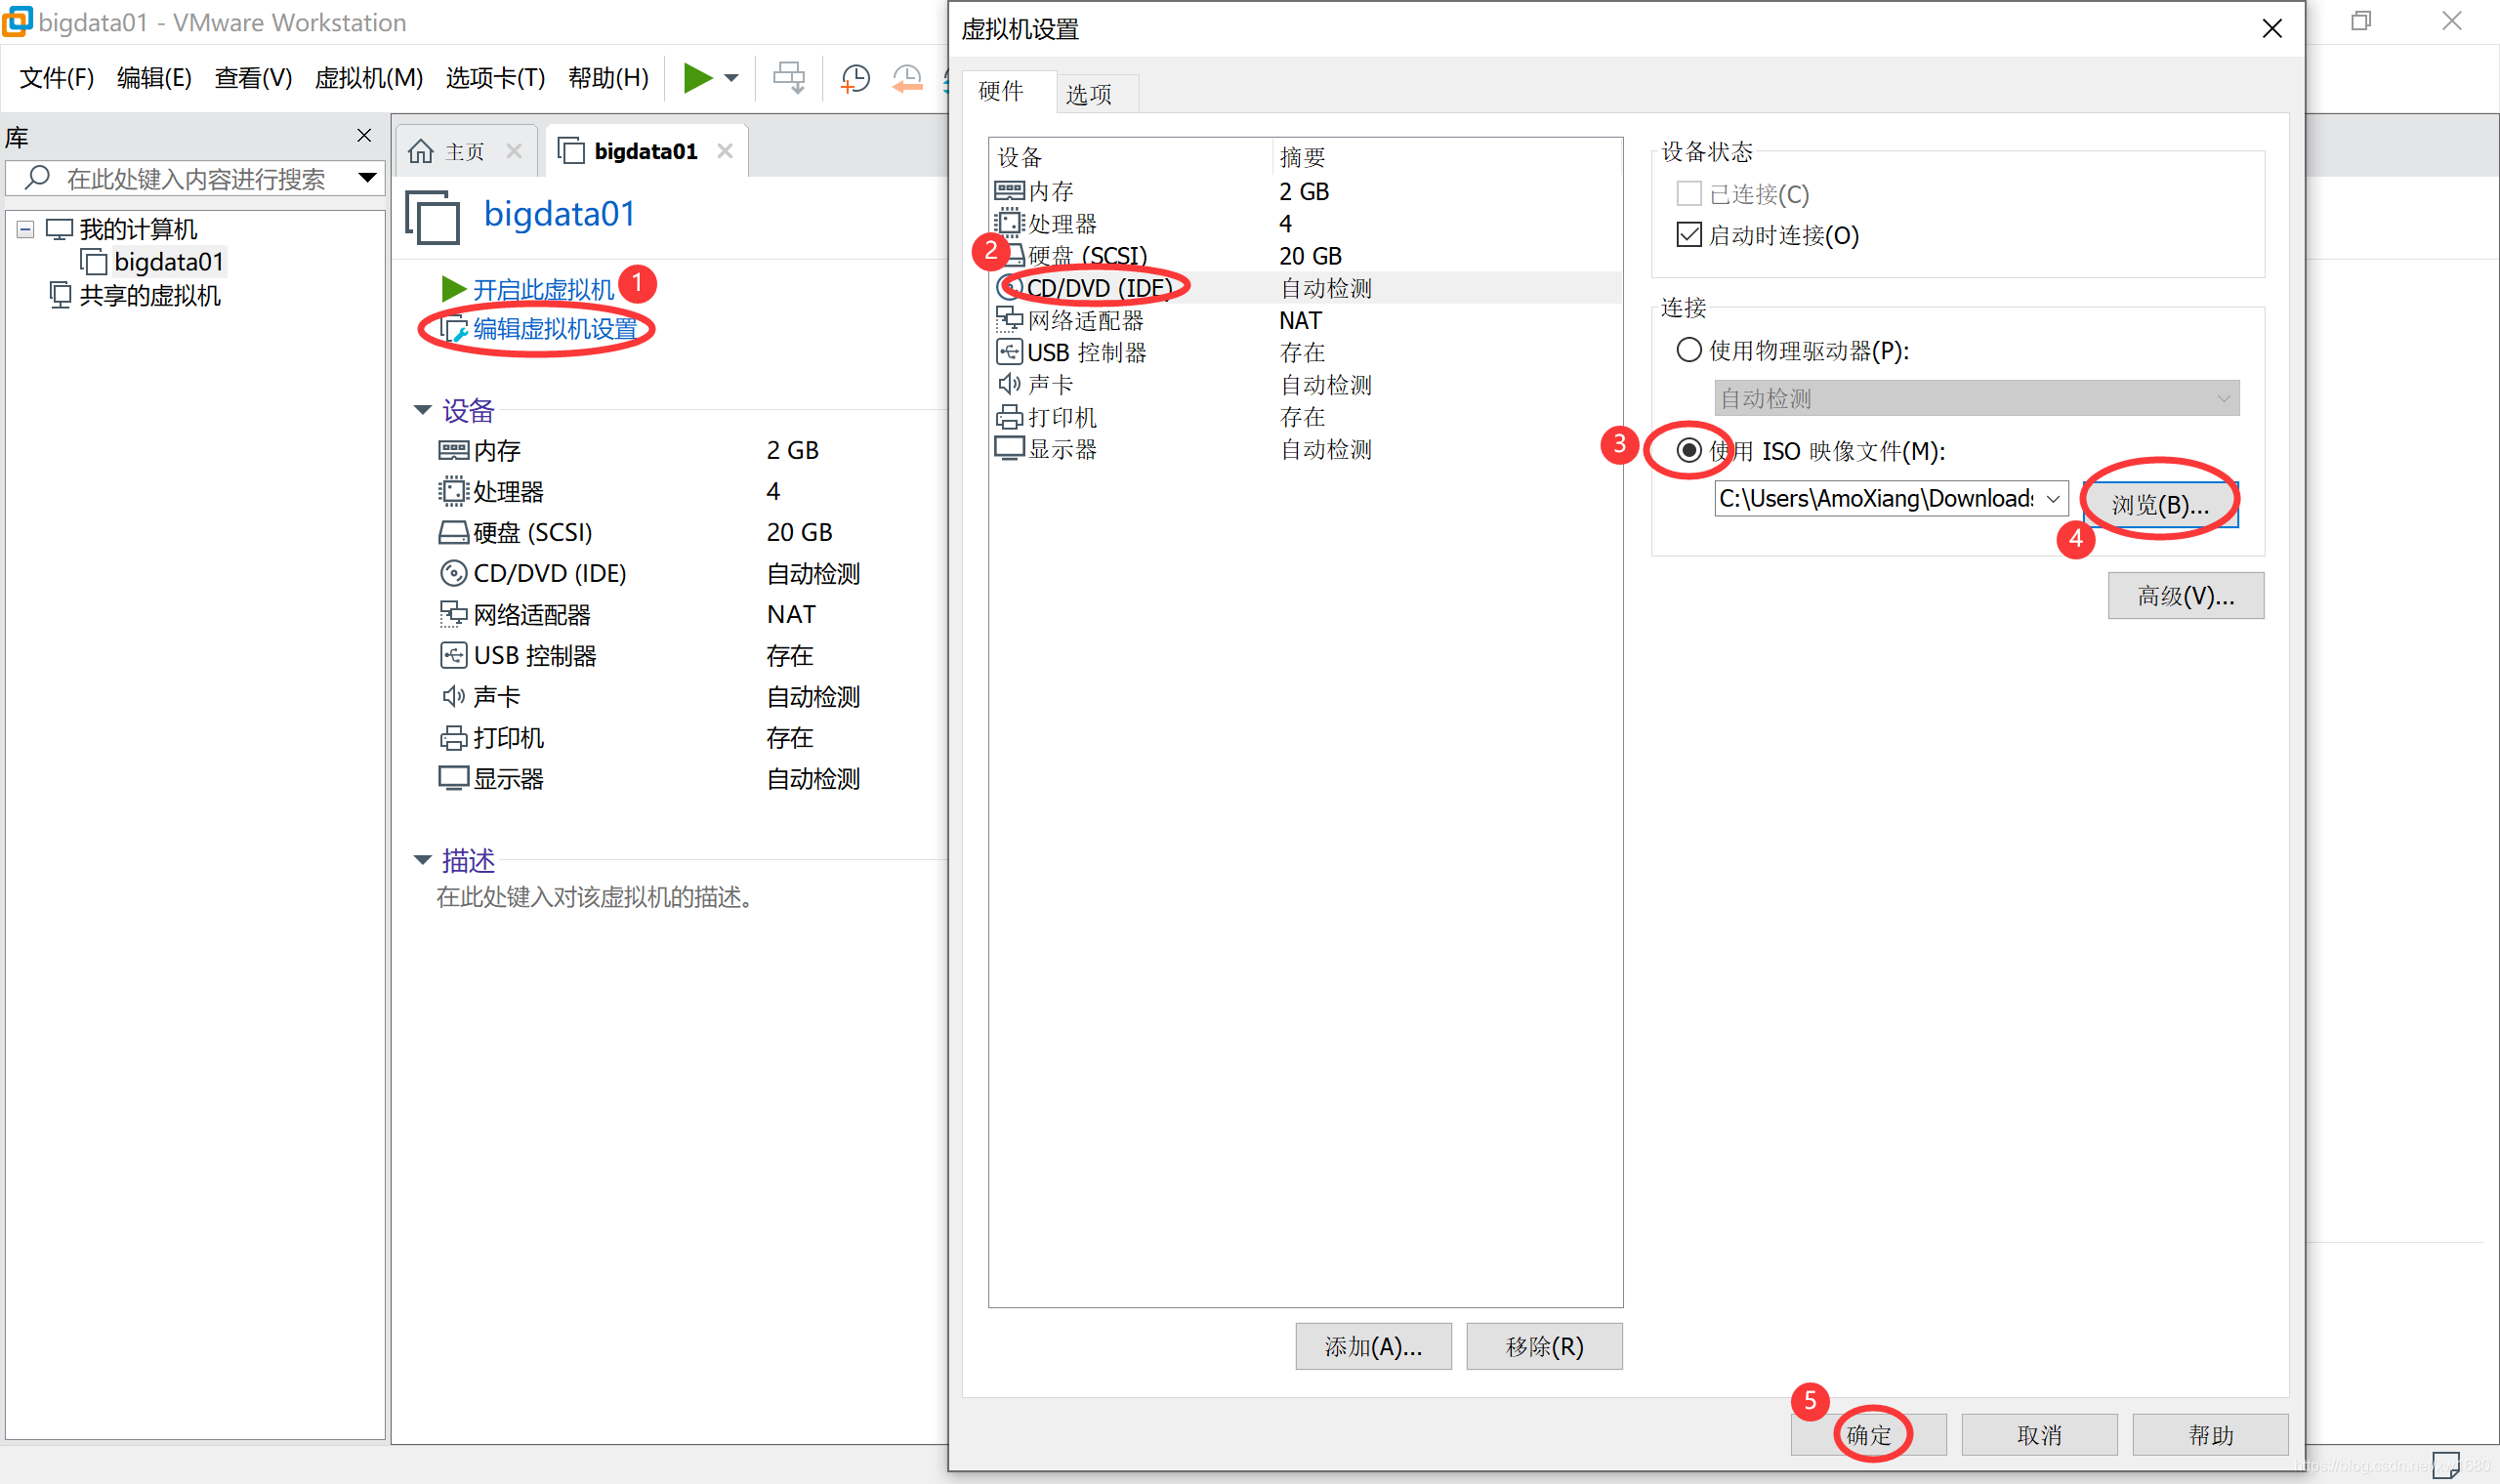
Step 1: Select the CentOS system installation image [*.iso file]
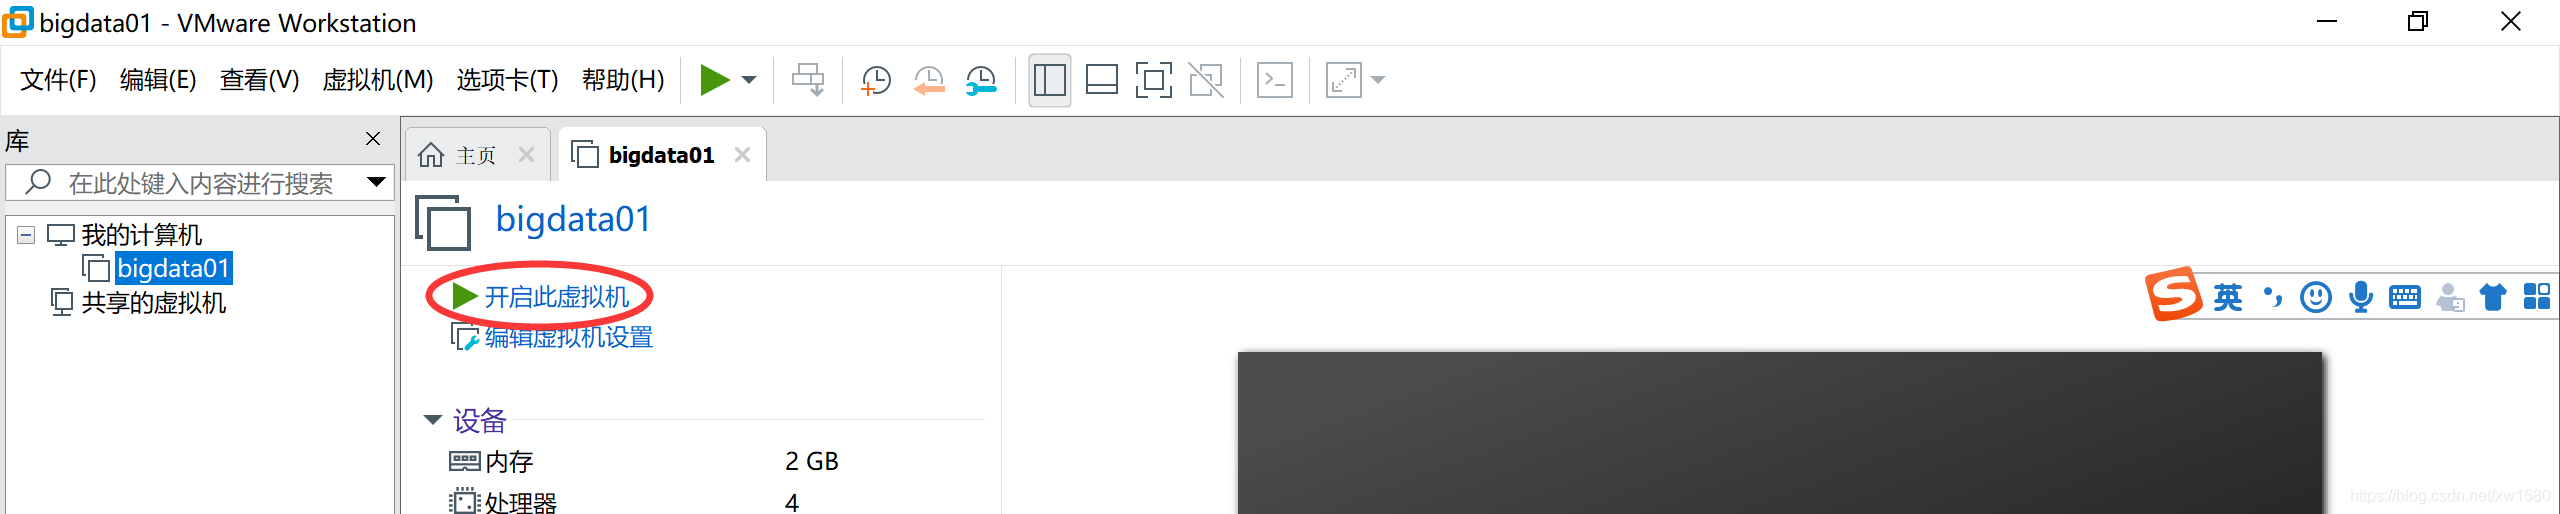
Step 2: Turn on the virtual machine and proceed with the system installation
Step 3: Click the mouse in the started virtual machine, and use the up key on the keyboard to select the first item, Install the operating system and press Enter to continue.
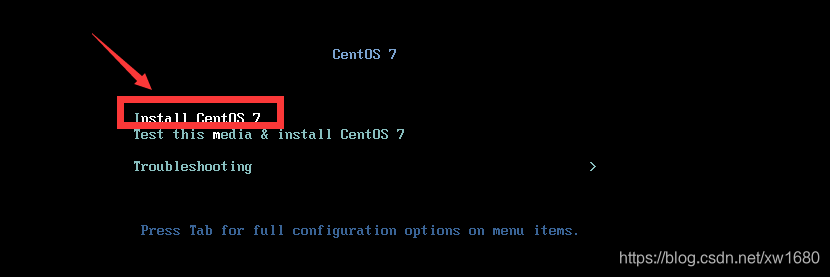
Note: If you can't get out the virtual machine after clicking the mouse, you can press the shortcut key combination Ctrl + Alt.
Step 4: Start the installation, select the language, use the default language, and click the Continue button to continue the installation.

Step 5: Next, you will enter this interface, and you need to click Data&TIME to modify the time information. Change the time to the time in the Shanghai time zone.


Step 6: Then modify the disk partition settings and click to enter. Use the default automatic disk partitioning. After entering, click the Done button directly.

Step 7: Then modify the network configuration and turn on the automatic IP acquisition.

Then click on the Begin Installationbutton to start the installation to continue

Step eight: Set the ROOT user's password, click on the go. Set the password to bigdata, and then continue to wait for the installation.

Step 9: Finally, when you see this interface, it means that the system is installed successfully. Click Reboot to restart the operating system.

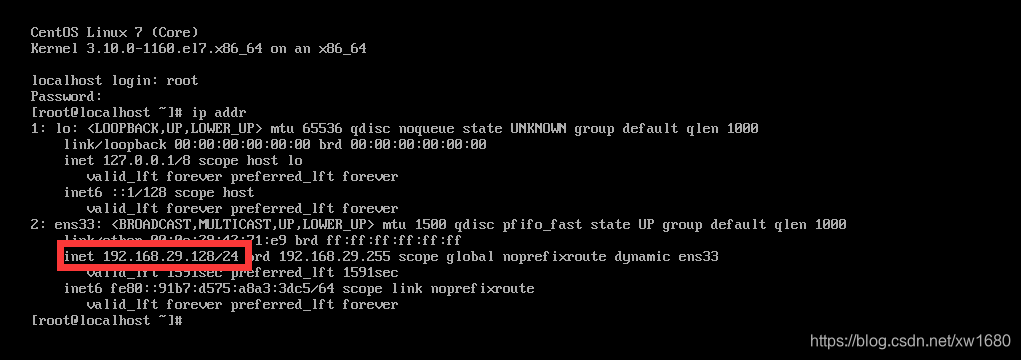
Step 10: The system restarts successfully, enter the account root and password bigdata to log in.

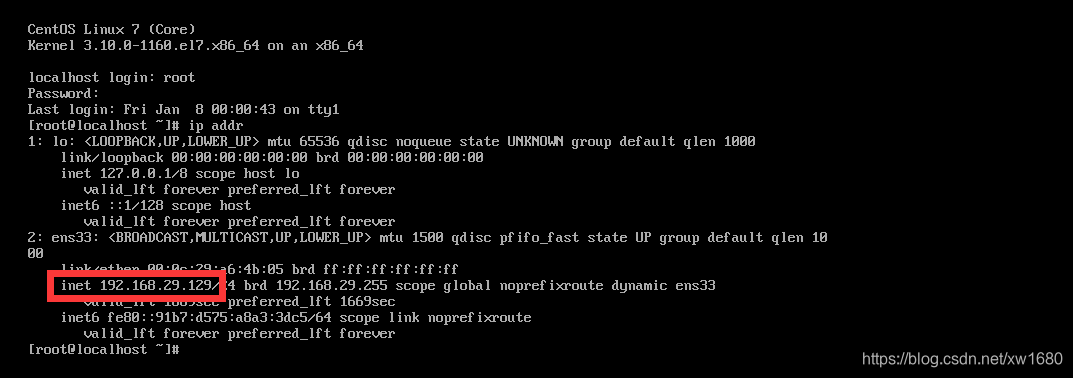
Then execute the ip addr command in the command line to check whether the ip of the linux virtual machine is generated correctly. If you can see the ip like 192.168.29.128 in the figure, it means it is ok. The number in the specific ip may be different from mine. This is normal because this ip is automatically obtained.
2.3 Cloning
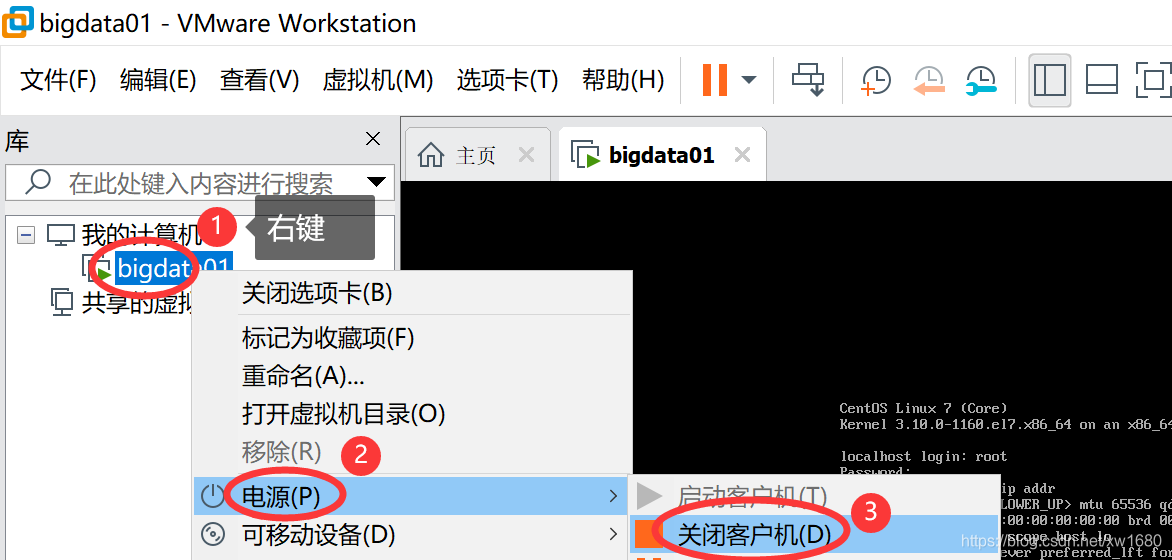
Many times we need to use multiple linux virtual machines. It would be too cumbersome to install according to the above steps every time, so let's learn a new way, based on the existing linux virtual machines. Clone, so you can quickly create multiple linux virtual machines. First stop the specified virtual machine, right-click ⇒ power ⇒ shut down the guest
. Right-click on the virtual machine ⇒ manage ⇒ clone.

Start cloning the host:

select the current status of the cloned virtual machine:

create a full clone (the cloned virtual machine and the previous There is no dependency on the virtual machine):

name the image name and storage location:

start the virtual machine:

and check the ip information of the virtual machine. The ip of this virtual machine is different from the ip of the previous virtual machine. This is correct, here If you can see the ip information normally, it means that the virtual clone is also normal.
3. Remote login method
Now we operate Linux virtual machines in VMware Workstation Pro, which is very inconvenient to use and cannot be copied and pasted, so we need to choose a suitable client tool to operate the virtual machine.
The following three client tools are recommended:
- SecureCRT
- Xshell
- MobaXTerm
You choose one you are more familiar with. If you are not familiar with it, I personally recommend using SecureCRT. Below we take SecureCRT as an example to demonstrate how to connect to a Linux virtual machine. The software download link is as follows:
链接:https://pan.baidu.com/s/1x60MCJHNoaJZmgNFfF20HA
提取码:k1cu
复制这段内容后打开百度网盘手机App,操作更方便哦--来自百度网盘超级会员V6的分享
note:
- SecureCRT_CN.zip The SecureCRT tool in this compressed package can be directly decompressed and used, which is very convenient. Under normal circumstances, both win7 and win10 systems can be used normally, but some computers cannot be used normally. At this time, you can use the section provided below Two compressed packages.
- SecureCRT.zip The SecureCRT tool in this compressed package needs to be finished and activated. For the corresponding activation steps, please refer to the file content in this zip compressed package.
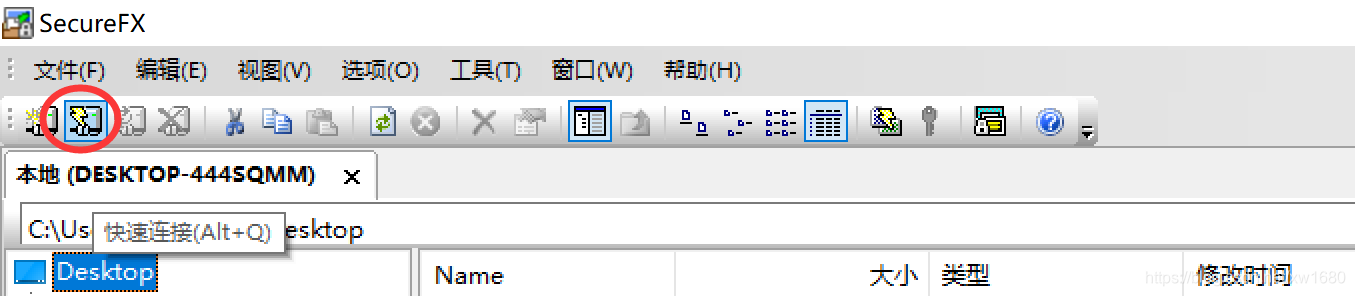
Install the SecureCRT tool, find the SecureCRT.exe file, and double-click to open it.

Step 1: Click the Quick Connect button
Step 2: Enter the relevant information of the Linux virtual machine in the Quick Connect Information box. The host name here is the ip address information that we used ip addr to see earlier. Note: Be sure to ensure that the Linux virtual machine corresponding to 192.168.29.129 is started.

Step 3: Click accept and save in the pop-up box.

Step 4: Enter the password of the root user. This password is the bigdata that we configured when we created the linux virtual machine

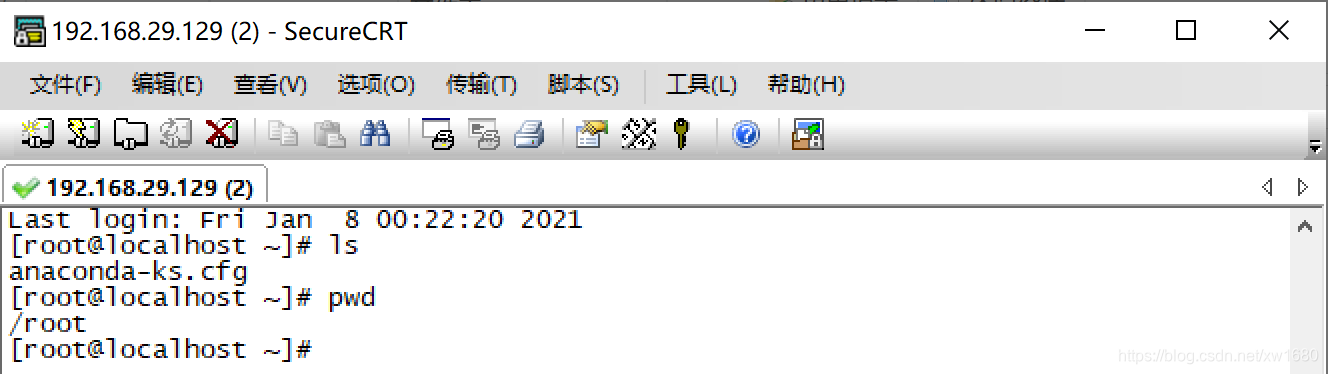
Finally, you can enter this interface, which means that you have successfully connected to the specified Linux virtual machine through SecureCRT. If you want to connect to other virtual machines, you only need to repeat the above steps. You can operate here in the future by operating the virtual machine. This interface supports copying and pasting of content. This tool also has many advanced functions, which readers can dig in later.
Note: If you can’t see this interface after waiting for a long time, first confirm whether the corresponding Linux virtual machine is started in Vmware, then check whether there is any problem with the ip and user name you filled in in the second step, and finally confirm the fourth Whether there is a problem with the password entered in the step.
There is another way to connect as follows:
Step 1: Click the Connect button

Step 2: Click the New Session button

in the pop-up box

Step 3: Click Next in the pop-up New Session Wizard box Step 4: Input Host name and user name

Step 5: Continue to click Next Step

6: Click Finish, of course, the session name inside can be modified to your favorite easy-to-recognize name

, and you can see it after the six steps above are done. This interface is up, or you can click the connect button in the upper left corner to pop up this interface. By default, the virtual machine connection information just added is placed in the sessions directory.

We can directly double-click 192.168.29.129 with the left mouse button to connect to this Linux virtual machine. The machine is turned off, but the prompt box for entering the password will pop up for the first time. Here we enter the password, and then choose to save the password. After connecting to this Linux virtual machine, the password will not be required.

Modify some configurations of SecureCRT
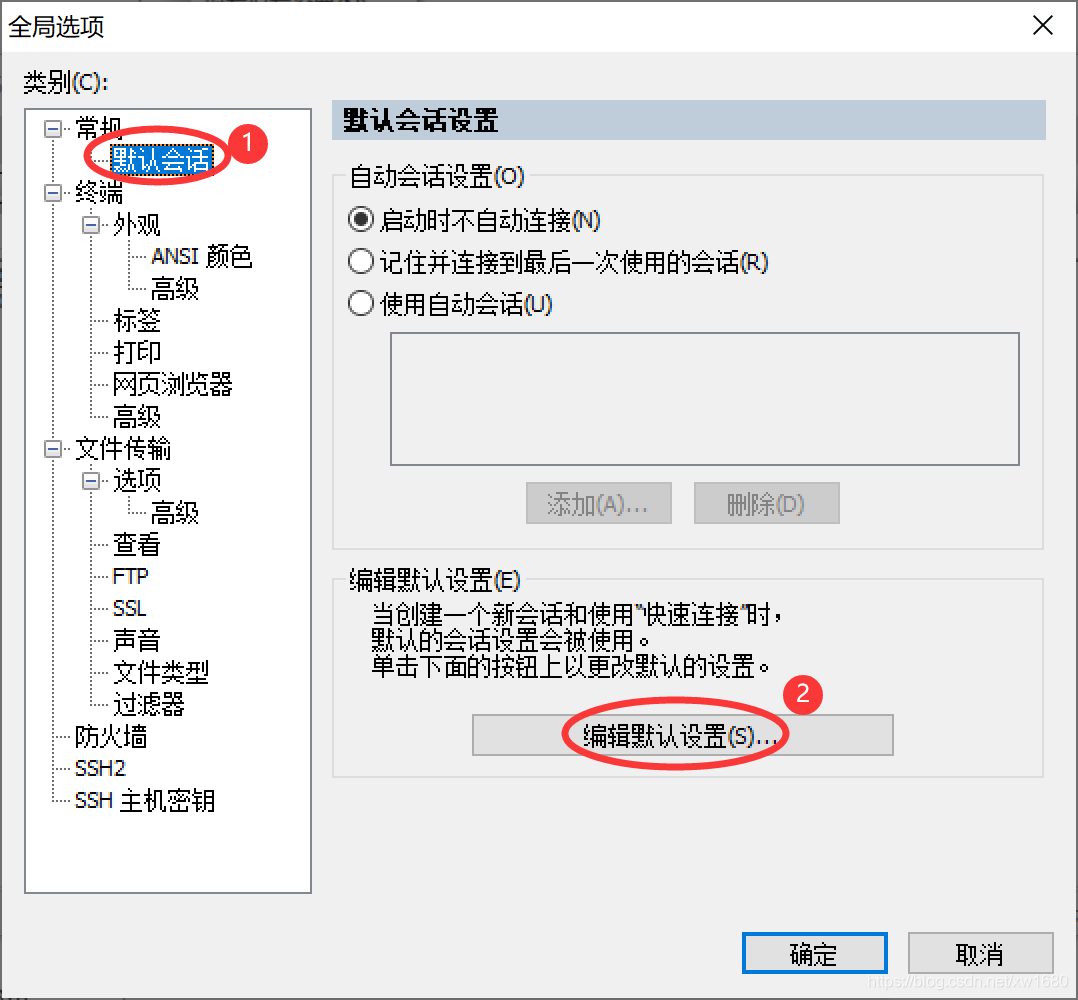
Step 1: Click Options ⇒ Global Options

Step 2: Click Default Session ⇒ Edit Default Settings
Step 3: Click Emulation, modify the contents of the drop-down box corresponding to the terminal, and select Linux

Step 4: Select the mapping key and select Backspace to send delete, so that you can press the Backspace key on the keyboard to achieve the same function of deleting characters as delete.

Step 5: Select the appearance, modify the character encoding, and change it to UTF8, so that the Chinese displayed on the interface will not be garbled.

This is the end of today’s case. The author hereby declares that the author is only writing this article for learning and communication, and to make more changes. Readers who learn more about Linux should avoid some detours, save time, and do not use it for other purposes. If there is any infringement, contact the blogger to delete it. Thank you for reading this blog post, and hope this article can be your leader in programming. I wish you a happy reading!

A good book never gets tired of reading a hundred times, and you know yourself when you are familiar with the lesson. And if I want to be the most beautiful boy in the audience, I must insist on acquiring more knowledge through learning, using knowledge to change my destiny, using blogs to witness growth, and using actions to prove that I am working hard.
If my blog help you, if you like my blog, please点赞,评论,收藏a key triple Oh! I heard that people who like it will not be too bad luck, and they will be full of vitality every day! If you really want to be a prostitute, I wish you happy every day, and welcome to visit my blog.
Coding is not easy, and your support is my motivation to stick to it. After the thumbs do not forget关注me!