
Article directory
-
- 1. Install the virtual machine software VMware Workstation16 Pro.
-
- 1. First, download VMware Workstation16 Pro from the official website to obtain VMware software and a CD image file of Red Hat 7 system.
- 2. Install the virtual machine software VMware Workstation16 Pro.
- 3. Check "I accept the terms in the license agreement", and then click Next.
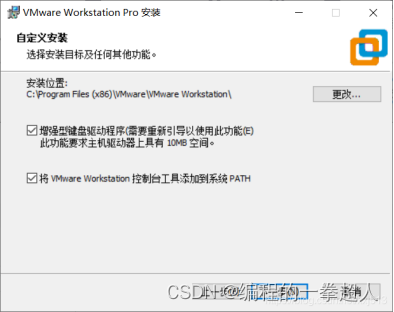
- 4. Check the enhanced keyboard driver, add the VMware Workstations console tool to the system PATH, and click Next.
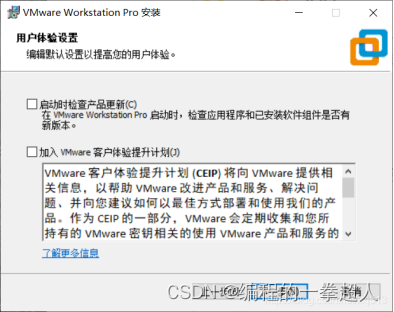
- 5. User experience settings, check "Check for product updates at startup" and "Join VMware customer experience improvement plan" according to your needs, and click Next.
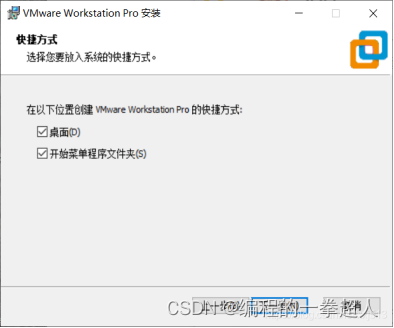
- 6. Check "Desktop" and "Start Menu Program Folder", and click Next.
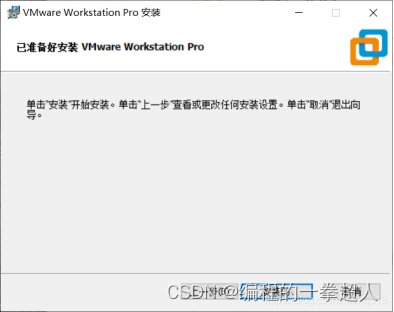
- 7. Click Install.
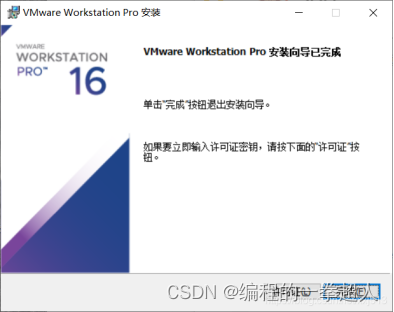
- 8. VMware starts to install until it shows that the installation wizard has been completed, then click the license, enter the license key, and click "Input" in the lower right corner of the interface after the input is completed.
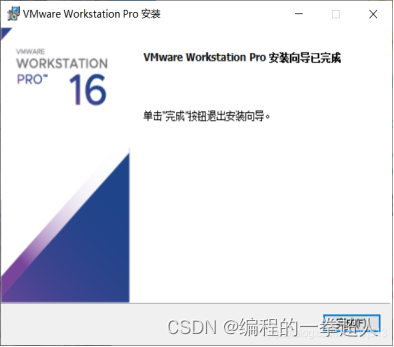
- 9. It prompts that the installation wizard has been completed, click the "Finish" button to exit the installation program, and the installation is complete.
- 2. Configure the RHEL7 installation environment in VMware software.
-
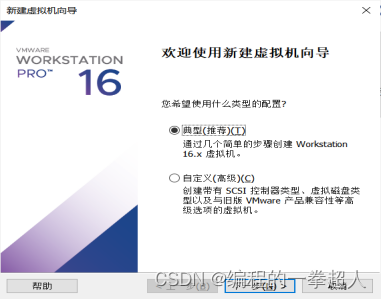
- 1. Open the virtual machine software that has been installed, click the "Create a new virtual machine" option, select the "Typical" option in the pop-up window, and click Next
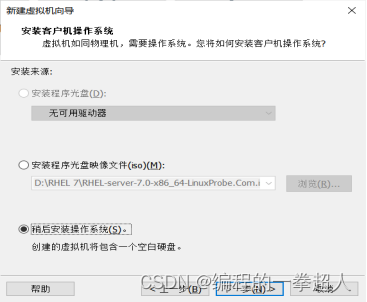
- 2. After typical mode installation, choose to install the operating system later, and click Next. ```Be sure to pay attention later, if you make a mistake, there is a solution below```
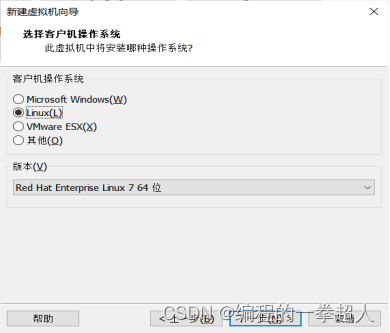
- 3. Select the system.
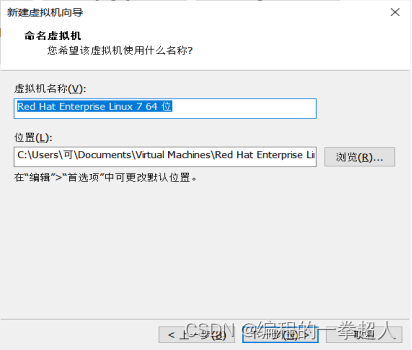
- 4. Confirm the name of the virtual machine and the installation path.
- 5. Set the disk size.
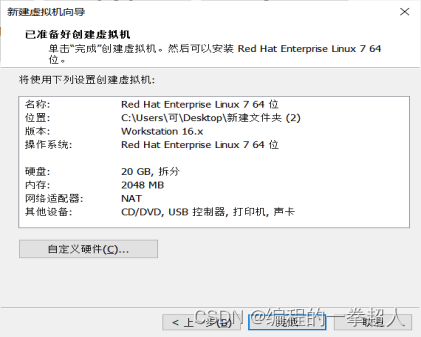
- 6. Prepare to create a virtual machine.
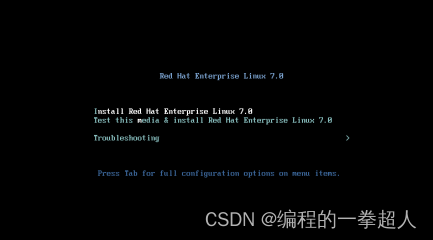
- 7. Run the virtual machine.
- 8. Set the system language.
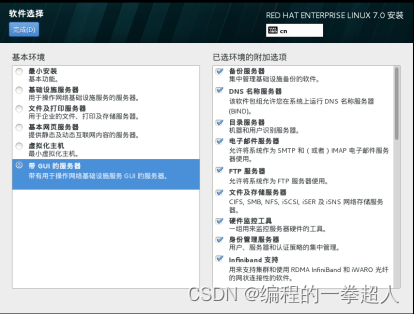
- 9. Set and select the graphical interface.
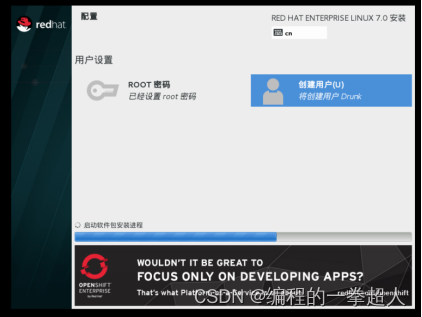
- 10. Set the root password and create a user and wait for the installation.
- 3. Problems and solutions
1. Install the virtual machine software VMware Workstation16 Pro.
1. First, download VMware Workstation16 Pro from the official website to obtain VMware software and a CD image file of Red Hat 7 system.
2. Install the virtual machine software VMware Workstation16 Pro.

3. Check "I accept the terms in the license agreement", and then click Next.

4. Check the enhanced keyboard driver, add the VMware Workstations console tool to the system PATH, and click Next.
5. User experience settings, check "Check for product updates at startup" and "Join VMware customer experience improvement plan" according to your needs, and click Next.
6. Check "Desktop" and "Start Menu Program Folder", and click Next.
7. Click Install.
8. VMware starts to install until it shows that the installation wizard has been completed, then click the license, enter the license key, and click "Input" in the lower right corner of the interface after the input is completed.
9. It prompts that the installation wizard has been completed, click the "Finish" button to exit the installation program, and the installation is complete.
2. Configure the RHEL7 installation environment in VMware software.
1. Open the virtual machine software that has been installed, click the "Create a new virtual machine" option, select the "Typical" option in the pop-up window, and click Next
2. After typical mode installation, choose to install the operating system later, and click Next.千万要注意稍后,如果点错了,下面有解决办法
3. Select the system.
4. Confirm the name of the virtual machine and the installation path.
5. Set the disk size.

6. Prepare to create a virtual machine.
7. Run the virtual machine.
8. Set the system language.

9. Set and select the graphical interface.
10. Set the root password and create a user and wait for the installation.
3. Problems and solutions
(1) Problem: The Linux system in GUI format was not selected when RedHat was created.
Solution: delete and reinstall the virtual machine, choose to install the operating system later after the typical mode installation, otherwise the simplest Linux environment will be deployed, click Next, and then select the GUI option in the basic environment.