1. Introduction to ceedling
In the field of software development, the quality of software is related to user experience and is crucial to the success or failure of projects. As an important part of software development, software testing plays a very important role. Embedded software is significantly different from traditional application software testing because it deals with hardware. Ceedling is an embedded software testing framework. Ceedling provides a simple interface for configuring basic to complex project structures. Therefore, you can use ceedling to build test codes for simple projects, projects with multiple dependencies on libraries, and projects with multiple dependencies on tools and tools; Ceedling is a framework based on unity, which is a core test framework for C language, dedicated to embedded Ceedling is an extension of Ruby's Rake (make-ish) build system. Ceedling is mainly aimed at Test-Driven Development in C language, aiming to integrate CMock (generate mock interface), unity ( unit test framework ) and CException (Exception Handling Framework) are three great open source projects.
In the entire ceedling framework, use unity for code testing, use CMock to generate simulation simulations (this part will be introduced later), and use CException for exception handling. Ceedling itself can be understood as the integration of these three frameworks, providing automatic configuration, operation, etc. , to simplify development.
Ceedling's official website: Ceedling — Throw The Switch
Ceedling's github address: https://github.com/ThrowTheSwitch/
2. Installation environment
The environment is installed under win10. Ceedling uses ruby to develop scripts and compiles with the GCC tool chain, so ruby and gcc need to be installed, and they need to be added to the environment variables.
1. Install Ruby
Ceedling uses ruby to develop scripts, so a ruby environment needs to be installed. Download Ruby on the official website, the official website of Ruby is: rubyinstaller.org . After the installation is complete, use the command line to enter the command ruby –version to view, and you can see the following output, indicating that the installation is successful.
 2. Install GCC
Use MinGW to install GCC, all the way to the default, and check it on the command line after installation.

3. Install Ceedling
Enter gem install ceedling on the command line to install ceedling. After installation, enter ceedling version to see the following figure, indicating that the installation is successful.

3. Simple test
Here, for the convenience of demonstration, we create a directory named project, the name of the created ceedling project is called htq, and the tested module is called add. First enter the project directory, which is an empty directory.
Use ceedling new htq to create a test project
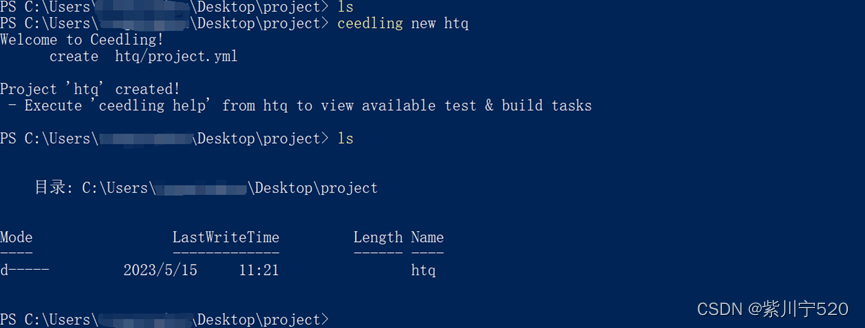
Check out the htq directory.
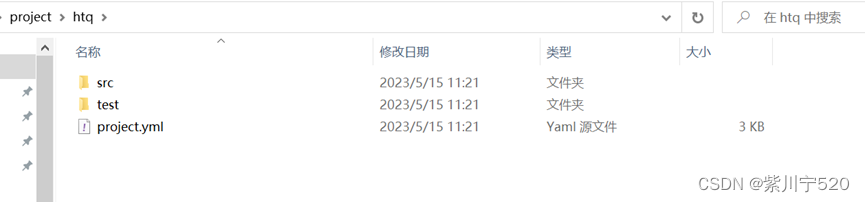
src is to store the source code, and the test directory is to store the code to be tested. project.yml is the configuration file of the entire project (the default name is project, which has nothing to do with the project name project). The content of project.yml is temporarily ignored. Now each directory is basically empty, create a test code.
Use ceedling module: create [add] to create the module to be tested

Ceedling will create three files: add.c, add.h, test_add.c, the first two are the code we wrote, the code to be tested, and test_add.c is the code to test them using the API provided by the ceedling framework. In add.c we add the following code:
int add(int a, int b)
{
    int c = a + b;
    return c;
}
The code is very simple, add a and b and return. Add the following code in test_add.c (you only need to add three lines of code in test_add_NeedToImplement, other ceedling frameworks will be automatically generated in advance)

add() is a function in add.c, TEST_ASSERT_EQUAL_INT(3, ret); is an assertion function provided by the ceedling framework, compares INT-shaped data, 3 is our expected result, r is the actual result, if the two are consistent, ceedling passes Test, otherwise give the corresponding error. Now use ceedling to test, the test command is ceedling test:all.
 As can be seen from the figure, the test is passed, TESTED indicates how many test files there are, and PASSED indicates the passed test files. ceedling test:all means to test all files. If you want to test a certain file (this article is test_add.c), you need to enter ceedling test: test_add.c. Change the code here to see what the test error looks like.

Changed here, the expected result is 4, the actual result is 3.
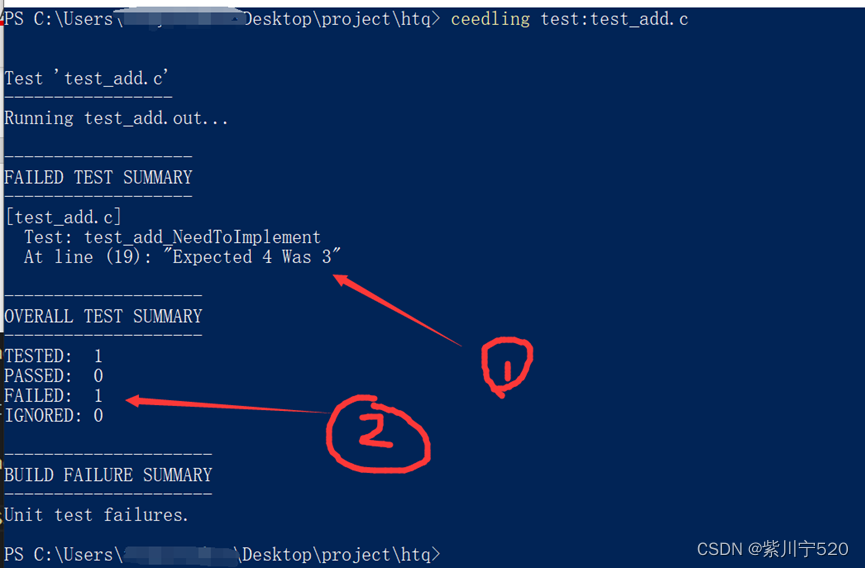
As can be seen from Figure 1, an error occurs on line 19 of the test_add.c code, and the expected value is 4, but it is actually 3. Figure 2 also shows the number of errors. The test command used this time is ceedling test:test_add.c.
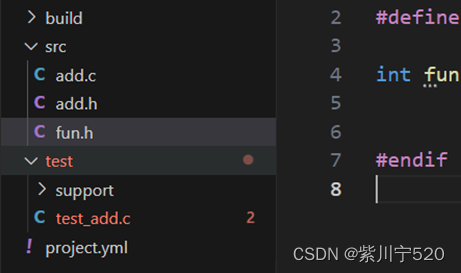
The code of add.c is very simple, and there is no other code interface, if it depends on the code interface, how to deal with it? Here we will introduce the CMokc part, let's look at the simple test code first. Here we add a fun.h file in the src directory, which declares a function interface,

Call the fun function in add.c.

Change the code in test_add.c

Change the code in 4, 17--20, add fun.h in the second line of add.c, indicating the source of the fun function, but add mock_fun.h in test_add.c, because fun. The fun function in h should be simulated using CMock, not a real function (we did not implement the fun function, but just gave an interface, its input is int, and its output is int). The mock_ prefix in mock_fun.h is to tell Ceedling uses CMokc to simulate this function, and its input and output are both int. 17 lines of code fun_ExpectAndReturn (1, 5), fun corresponds to the fun function of fun.h, but fun_ExpectAndReturn is generated by CMock (if there is an abb function declaration, the abb_Expect function will also be generated), indicating that the input of the fun function is 1, The output result is 5. Run the ceedling test.

We didn't implement the fun function, we just used CMock to generate a simulation of the function, and told it that when the input of the fun function is 1, the output is 5, let's change the code, the input of fun is 2, and see the result.


There is an error here,

This shows that the fun function expects 1 as input, but actually accepts 2, so an error is reported. When testing the code, we only need to pay attention to the part of the code to be tested. This part of the code may call other functions. These functions are not the focus of our attention. Therefore, we can use CMock to generate the corresponding interface function and link it to the program. . For these functions generated by CMock, we need to specify the corresponding input and output values, which will be used in the test code later. Using CMock, we can easily change some codes that are not easy to test into codes that are easy to test (such as hardware-related operating functions in embedded systems).
Four. Summary
Ceedling is relatively simple to use and is very suitable for code testing in the embedded domain. This article only demonstrates its basic operations, and the next article will analyze it in depth.