github project address: AUTOMATIC1111/stable-diffusion-webui
premise:
Git has been installed (this is very simple, you can go to other tutorials to see)
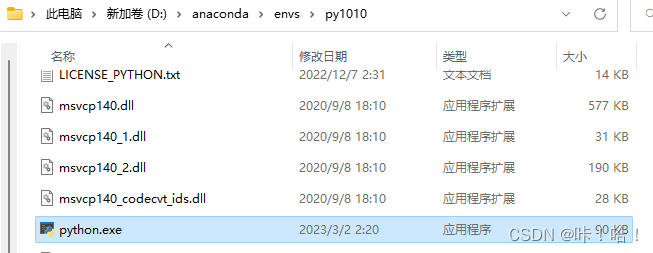
install python 3.10.9, here is a little talk, it is possible to use Anaconda or python official website environment. As long as you can find the location of the following python.exe file.
Use git to download novel AI source code
①Right click on the blank space - "Git Bash Here -" input:
git clone https://ghproxy.com/https://github.com/AUTOMATIC1111/stable-diffusion-webui.git

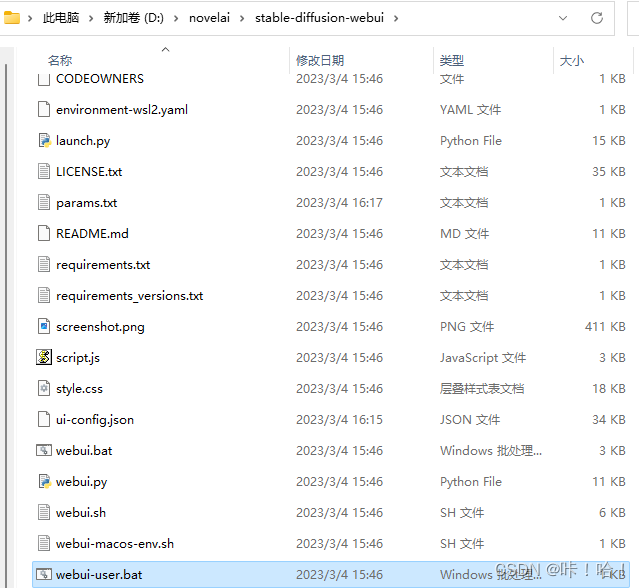
②After success, the following file will appear:

③After entering this folder, you will find the following file webui-user.bat
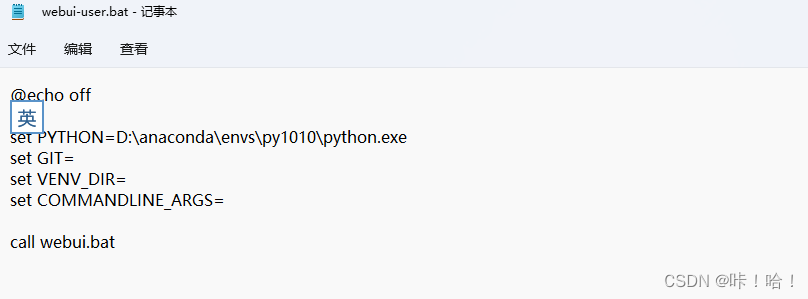
④Use Notepad to open it, put the python.exe file path you just found into it, and save it
⑤Double-click webui -user.bat file
If your network is good enough, it can be downloaded, just wait and go to step ⑦
If your network is not good, follow me to the next step.
Go to torchvision and download torchvision-0.14.1+cpu-cp310-cp310-win_amd64.whl
Go to torch and download torch-1.13.1+cu117-cp310-cp310-win_amd64.whl
Find this python.exe file
Then open cmd and enter the following code
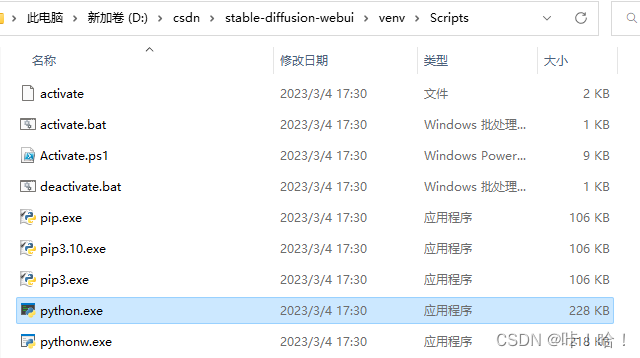
D:\csdn\stable-diffusion-webui\venv\Scripts\python.exe -m pip config set global.index-url https://pypi.douban.com/simple/

⑥Install the two files just downloaded and
enter
D:\csdn\stable-diffusion-webui\venv\Scripts\python.exe -m pip install D:\chromeDownLoad\torch-1.13.1+cu117-cp310-cp310-win_amd64.whl
Wait for the installation to complete, then enter
D:\csdn\stable-diffusion-webui\venv\Scripts\python.exe -m pip install D:\chromeDownLoad\torchvision-0.14.1+cu117-cp310-cp310-win_amd64.whl
⑦After double-clicking webui-user.bat, you will find that you don’t need to install torch and torchvision. Then it will be stuck at Installing gfpgan. We close this window.

Open cmd and enter again
D:\csdn\stable-diffusion-webui\venv\Scripts\python.exe -m pip config set global.index-url https://pypi.douban.com/simple/
enter
D:\csdn\stable-diffusion-webui\venv\Scripts\python.exe -m pip install gfpgan
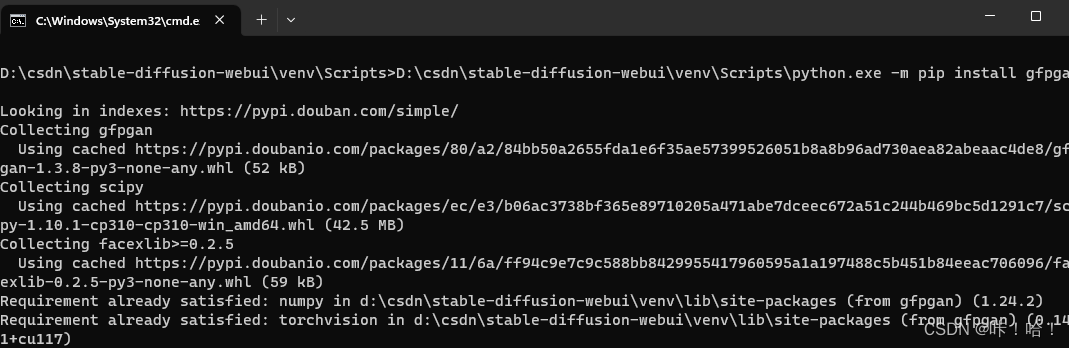
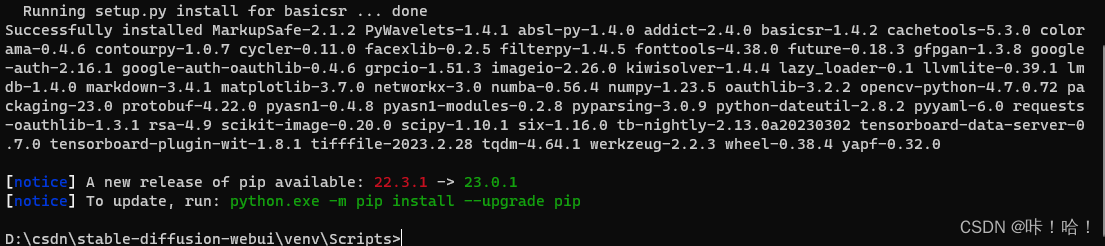
Wait for the installation to complete.
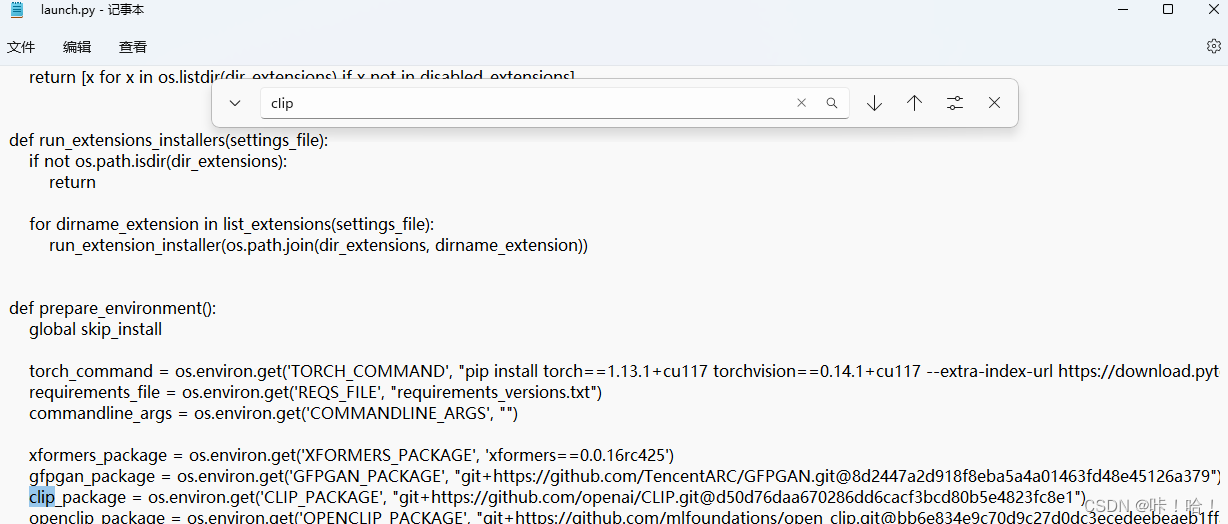
⑧Double-click the webui-user.bat file, and the Installing clip will be displayed at this time. At this time,

we should not use pip to install it directly.
We use Notepad to open the launch.py file in the same directory as webui-user.bat, and ctrl+f to search clip, find the following code, there is an address on the right https://github.com/openai/CLIP.git
Let’s find a place and right click - "git bash here
input
git clone https://ghproxy.com/https://github.com/openai/CLIP.git

cmd cut into this newly downloaded directory, enter
D:\csdn\stable-diffusion-webui\venv\Scripts\python.exe setup.py install

⑨Double-click the webui-user.bat file, and it will display that Installing open_clip

is similar to clip. Install it in the same way, so I won’t write it.
⑩Installation
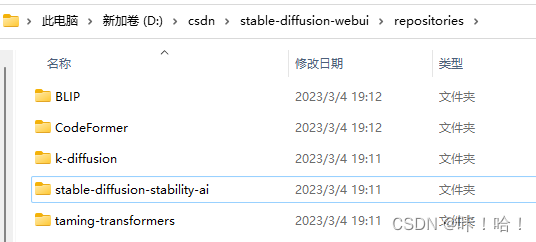
We open the repositories directory in the same directory as webui-user.bat, and use it in this directory
git clone https://ghproxy.com/https://github.com/Stability-AI/stablediffusion.git
git clone https://ghproxy.com/https://github.com/CompVis/taming-transformers.git
git clone https://ghproxy.com/https://github.com/crowsonkb/k-diffusion.git
git clone https://ghproxy.com/https://github.com/salesforce/BLIP.git
git clone https://ghproxy.com/https://github.com/sczhou/CodeFormer.git
One thing to note is that the directory name after the first command is downloaded is 
We need to change it to the file name written in launch.py

Finally, the file obtained in repositories is as follows
11. Double-click the webui-user.bat file and wait After a while, it will show that there is a missing ftfy file.

We use the command
D:\csdn\stable-diffusion-webui\venv\Scripts\python.exe -m pip install ftfy
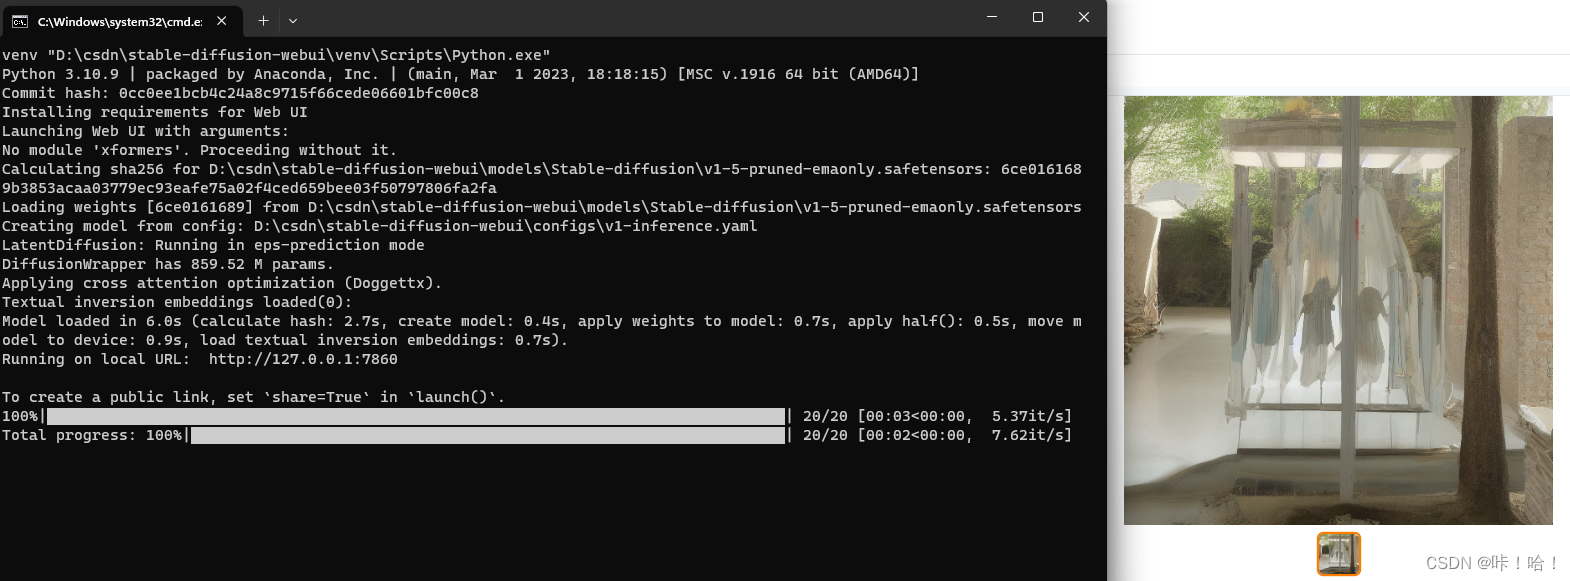
12. Double-click the webui-user.bat file to start downloading the model.
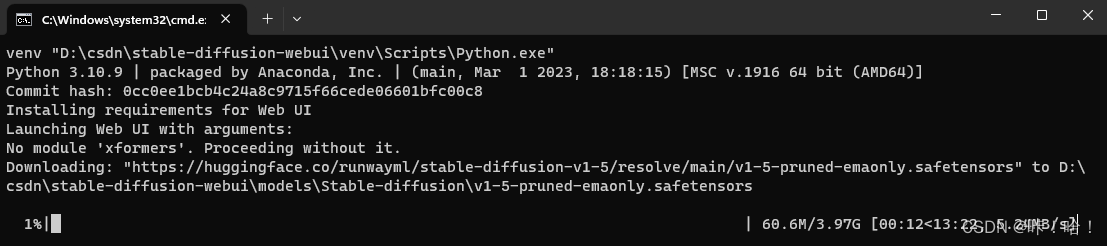
After the download is complete, it can be run.
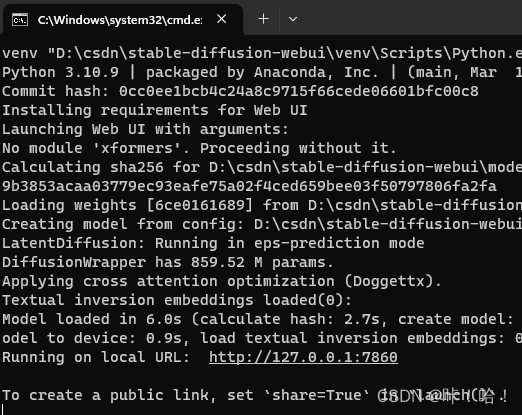
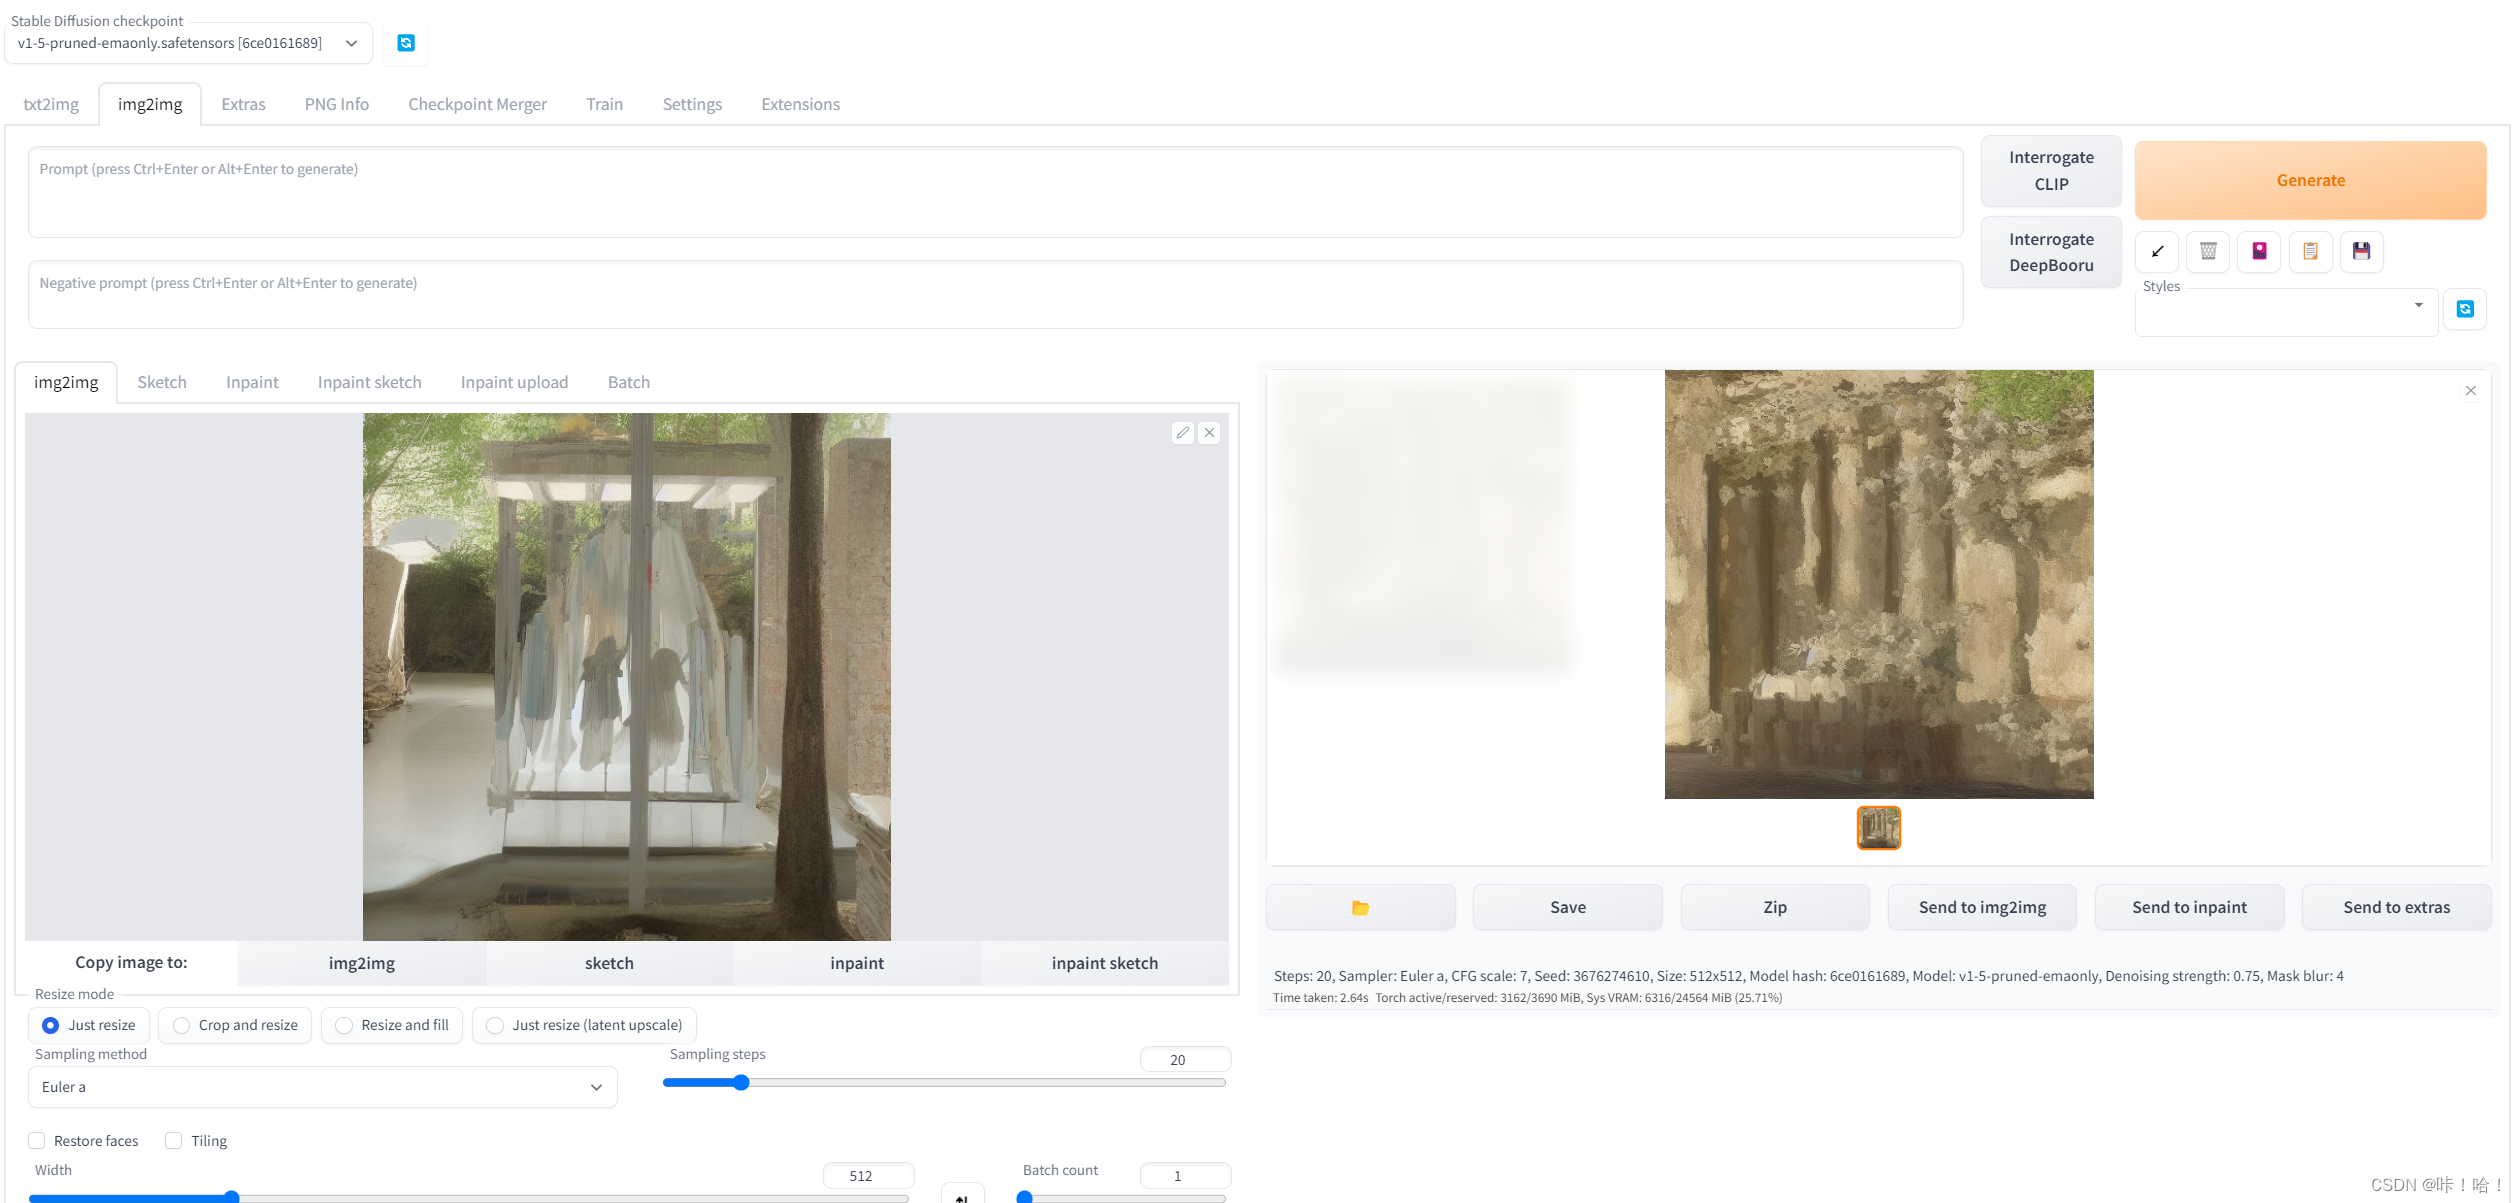
Enter http://127.0.0.1:7860 in the browser and you're
done
[Supplement: No module 'xformers'. Proceeding without will appear at the end it. Problem, it doesn’t matter if this problem is added. Adding this package will save a little video memory and increase speed.
If you want to solve this problem, you can refer to this link: https://www.bilibili.com/read/cv20259334 . However, after I configured it according to his method, an error was reported when it was running. If someone knows what the problem is, you can tell it in the comment area. ]