Article directory
Reprinted from the article of remote intranet penetration: [Zblog website building] build your own blog website, and intranet penetration to achieve public network access
1 Introduction
If you want to become a qualified technical geek or programmer, building your own website and making web pages is an unavoidable project. As far as the author's own experience is concerned, I have been stuck for a long time by self-made web sites. However, with the development of computer technology, there have been many tools and software for convenient and fast website building. Today, the author will show you how to quickly get started with Z-blog, build your own personal blog site, and publish this personal blog software to the public Internet through the intranet penetration data tunnel established by cpolar.
2. Z-blog website construction
Z-blog is an open source program based on Asp and PHP platforms. Its functions are similar to Wordpress. It also supports a variety of templates and plug-ins, and can also support dual databases. If users know a little more about HTML+CSS+JS, they can easily Make your own templates. Of course, these are not our topics today. What we are going to do today is to show you how to use cpolar to publish your Z-blog website to the public Internet.
2.1 XAMPP environment settings
Like other website construction tools, to install Z-blog locally, you also need to build the necessary website operating environment. Here we use XAMPP to build the website operating environment. We can find the version of the corresponding operating system on the official website of XAMPP (www.apachefriends.org).

The author is installing Z-blog on the Windows operating system, so I choose the Windows version of XAMPP.

After the installer is downloaded, just double-click to start the installation

After the installation is complete, we open the main program of XAMPP, open Apacheand MySQL.

2.2 Z-blog installation
After opening the operating environment required by Z-blog, we go to the official website of Z-blog ( https://www.zblogcn.com/ ) to download the installation package of Z-blog.

Then unzip the installation package and paste all the files in it to the htdocs folder in the xampp installation directory


It should be noted that there are usually some xampp web page display files in the htdocs folder, and these files must be deleted to display the Z-blog installation page correctly.
2.3 Z-blog web page test
Since Z-blog is a web program, we open the browser and enter the XAMPP web page output port of the local address in the address bar, which is the output port of Apache (usually the output port number of Apache is 80, but since the author's port 80 has been is occupied, so change the apache output port to 82).

As long as the previous settings are correct, you can see the installation interface of the Z-blog web page. First check the same protocol box at the bottom of the page, and click next to it 下一步to enter the webpage installation environment check.

Only when all the self-tests are passed can the webpage installation program continue.

The next step is to set the database, website administrator and other information. After the settings are completed, you can click "Next" on the bottom right to complete the installation of the Z-blog website.

2.4 Cpolar installation and registration
After completing the construction of the Z-blog website, you can install cpolar intranet penetration. The installation and registration of cpolar is also very simple. You can find the button directly on the official website of cpolar ( https://www.cpolar.com/ ) 下载.

The author built the Z-blog website on the Windows platform, so choose the Windows version to download.

After the download of Cpolar is complete, decompress the downloaded file, double-click the decompressed .msifile, and the installation program can be executed automatically. Then just go all the way Nextto complete the installation.


cpolar will create an independent data tunnel for each user, supplemented by user password and token code, to ensure the data security of each user, so we need to register the user before using cpolar. The registration process is very simple, just click on the upper right corner of the cpolar homepage 用户注册, fill in the necessary information on the registration page, and the registration can be completed.


3. Local web publishing
After completing the construction of the Z-blog website and the installation of the cpolar intranet penetration software, we can then use the cpolar intranet penetration to establish an intranet penetration data tunnel and publish the Z-blog website on the local computer to on the public Internet. Since the Z-blog website will exist for a long time, the data tunnel of the free version of cpolar is reset every 24 hours. The author does not want to reset the Z-blog URL every day, so I upgraded cpolar to the VIP version to obtain a long-term stable intranet penetration data tunnel.
3.1. Cpolar cloud settings
To establish a long-term stable data tunnel, we need to have a stable public Internet address first, and this Internet address must be connected to the output port of the local webpage (software) to form a complete and stable data tunnel. Therefore, we need to click to enter the data tunnel reservation page of cpolar first. A public Internet address is generated here (it can also be regarded as the entrance of the data tunnel). Since this address is not connected to the local software output port at this time, it can also be regarded as a blank data tunnel.

On 预留the page, we can see that Cpolar supports data tunnels of many protocols, here we select 保留二级子域名the field.

In the field of "reserved second-level subdomain name", we need to enter a few simple information to set up the data tunnel reserved by cpolar, these pieces of information are:
地区: The area where the server is located, just select the nearest one二级域名: Will eventually appear in the generated public Internet address as one of the identifiers of the network address描述: It can be regarded as the description of this data tunnel, which can be distinguished from other tunnels

After completing these settings, you can click 保留the button on the right to keep this data tunnel.

Of course, if this data tunnel is no longer intended to be used, you can also click on the right xto delete it easily, saving valuable tunnel quota.
3.2 Cpolar Local Settings
After completing the setting of cpolar cloud and keeping the blank data tunnel, we go back to the local cpolar client and connect the blank data tunnel generated by the cloud with the local Z-blog page.
Open and log in the cpolar client locally (you can enter direct access in the browser localhost:9200, or click the shortcut of the cpolar client in the start menu), click the button on the left side of the main interface of the client 隧道管理to 创建隧道enter the local tunnel creation page (if To create a temporary data tunnel without a 24-hour reset address, you can directly set it here instead of setting a blank data tunnel on the cpolar official website).
On this page, several information settings also need to be made, including:
1.
隧道名称: It can be regarded as cpolar’s local tunnel information comment, as long as it is convenient for us to distinguish;
2.协议– Since Alipay’s test page is a web page, the http protocol is selected;
3.本地地址: The local address is the output port number of the local website. The output port of Z-blog is 80, so it is also filled here80;
4.域名类型: Since we have reserved the data tunnel of the second-level subdomain name in the cpolar cloud, check it二级子域名(if the reserved domain name is a custom domain name, check it Select a custom domain name), andSub Domainfill in the reserved second-level subdomain name in the next row, which is "alipaytest" in this example. If you plan to create a temporary data tunnel, just check "Random domain name" directly, and the cpolar client will generate the network address by itself;
5.地区: This field setting is the same as the cpolar cloud, which is the server address. We choose the one that is closer to the actual use server;

After completing these settings, you can click 创建the button at the bottom of the page to connect the blank data tunnel on the cpolar cloud with the local payment test page, which provides us with a data tunnel that can access the local payment test page on the public Internet. We can manage this data tunnel on the 隧道管理- 隧道列表page, including opening, closing or deleting this tunnel, and we can also click 编辑the button to modify the information of this data tunnel.

4. Public network access test
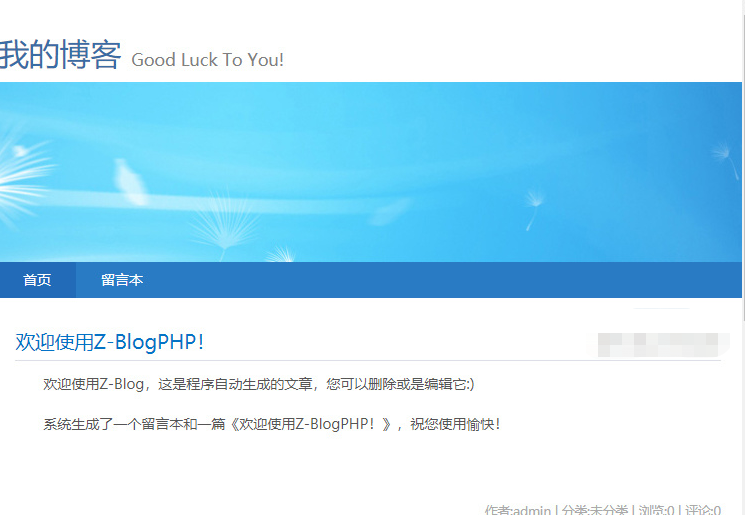
In the last step, we click on 状态——the list of online tunnels on the left to find the public Internet address of Z-blog personal blog site. We have been able to access the local Z-blog personal blog page through this address, and have achieved the purpose of publishing the local Z-blog personal blog site to the public Internet.

5 Conclusion
From the steps introduced above, we can see that in order to quickly publish a website, it is necessary to choose some simple and handy auxiliary tools. Although the website built by Z-blog is very simple, it is a good example for us to be familiar with cpolar to publish local websites . If you want to build a large and complex website on a local computer, you can also use cpolar's intranet penetration function to test and publish this website, thereby saving unnecessary resources and energy expenditure.