Article directory
Preface
Blogs are the most widely used website for individuals to express their opinions on the Internet. For a long time, they have been regarded as one of the main channels for people to express their opinions on the Internet. Although the rise of instant messaging tools and friend circles that emerged later took away the space of many blogs, they still occupy a considerable market share. It is precisely because blogs are so important that they have attracted many developers to produce a variety of personal blogging software. Today, the author will introduce to you how to build an Emlog personal blog website on the local Ubuntu system, and use the intranet penetration data tunnel created by cpolar to publish it to the public Internet.
1. Website construction
Emlog's full name is "Every Memory Log", which means "bits and pieces of memory", which is very suitable for the usage scenarios of personal blogs. Emlog runs based on PHP and MySQL and adopts a lightweight mode design. It can use various plug-ins and templates to bring more functions and appearance to emolog, allowing users to have more flexible choices. Moreover, emlog can also be found in the one-click deployment of the Pagoda panel, which undoubtedly saves a lot of trouble. Now, let's get started.
1.1 Emolog web page download and installation
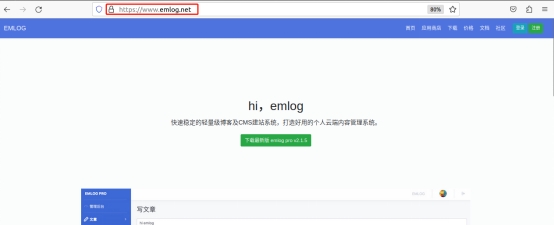
Almost all software now has its own software homepage, and Emlog is no exception (www.emlog.net). We can find the download of the source code on the homepage of the Emlog software (since the author uses the one-click deployment method of the Pagoda panel, there is no need to download the source code of the emlog blog here). You can also find the installation guide and questions and answers of emlog here.
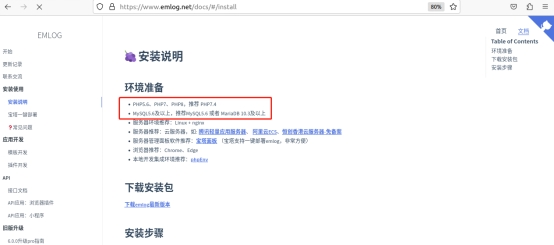
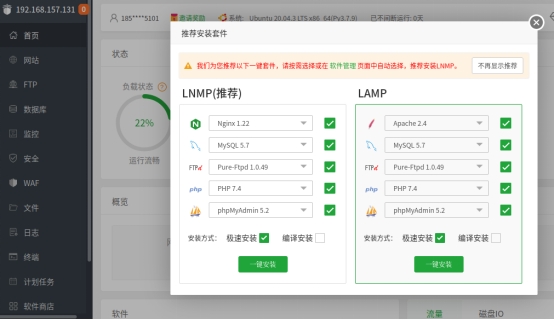
As you can see from Emlog's official website, Emlog supports multiple versions of PHP and requires the support of database software. Therefore, we need to install Apache, MySQL, and PHP (the so-called LAMP) on the Pagoda panel first. If you are installing Nginx under Linux , MySQL, PHP, it is called LNMP). Usually when you log in to the Pagoda Panel for the first time, as long as Apache, MySQL, and PHP are not installed on the local hardware device, the Pagoda Panel will automatically pop up asking you to choose which web page running programs to install.
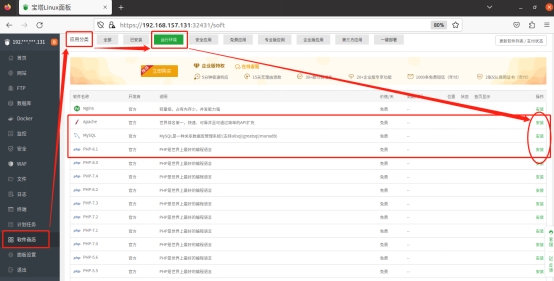
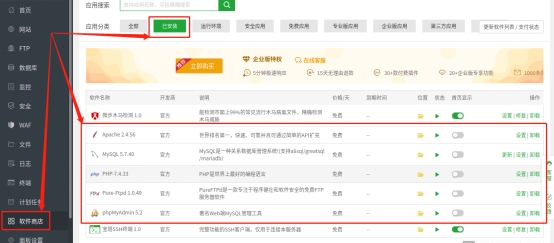
We can also find the "Software Store" button on the left side of the Pagoda Panel's homepage (you can enter the local address in the browser: Pagoda Panel output port number) and click to enter the Software Store page. On this page, we can find commonly used website running support programs, including Nginx, Apache, MySQL, PHP, phpMyadmin, Tomcat, Docker manager, Redis, etc. We find the required software and click "Install" on the right side of the software entry to install it on the Ubuntu system.
After the above software is installed, you can click the "Installed" button at the top of the software store page to view the installed supporting software. At the same time, we can also switch the version of each software here.
After completing the installation of the supported software, click "Software Store" on the left side of the main interface of the Pagoda panel. After entering the software store, find the "One-click deployment" button at the top of the page, enter the website page that can be deployed with one click, select the "emlog" entry, and click the "One-click deployment" button on the right side of the entry.
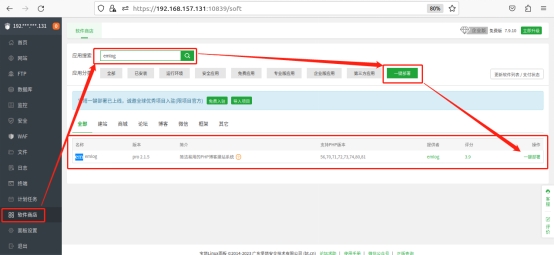
Usually, to deploy a website in the Pagoda Panel, you need to download the website source code first and place it in the wwwroot folder of the Pagoda Panel. However, in the "one-click deployment" mode, the pagoda panel can automatically download the website source code and store it in the relevant folder, which saves the author a lot of trouble.
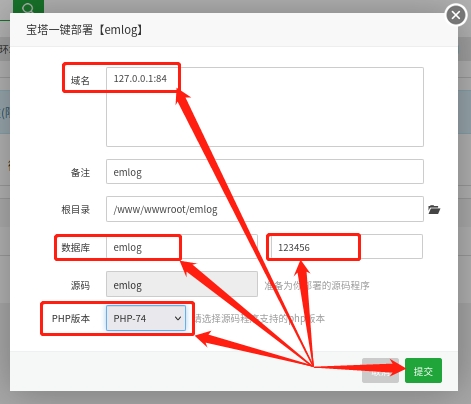
The next step is to make basic settings for the emlog website. In the window that pops up, we can specify the basic information of the website. This information includes:
Output port number - In the "Domain name" field, set it in the form of "Domain name to be set: Port to be used", here I set it to 127.0.0.1:84
Root Directory – This field can be changed or not, but the content of this root directory will be linked to the “Domain Name” field. To prevent confusion, the author still changed it to emlog.
Database – just fill in the database information we set up before;
PHP version – Some websites may require the use of a specific version of PHP, and we can modify it in the PHP version field (provided that the corresponding version of PHP software has been installed). To ensure compatibility, I chose php7.2.
After completing these settings, you can click the "Submit" button at the bottom of the window to create the hadsky website.
It only takes a short time for the emlog website to be created. After the website is created, the Pagoda panel will pop up the address of the created website and an important website information window (this information may be database information or website background login information).
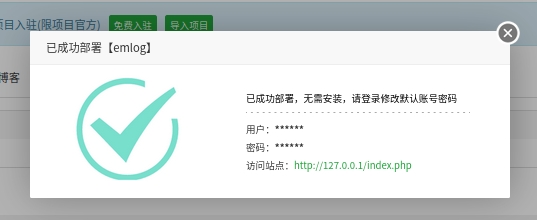
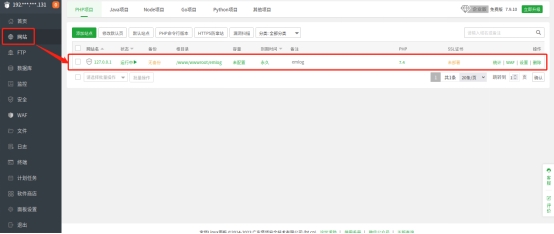
Next, open Ubuntu's Pagoda panel, click the "Website" button on the left side of the software's main interface, enter the website list page, and you will see the emlog website that was just installed and online.
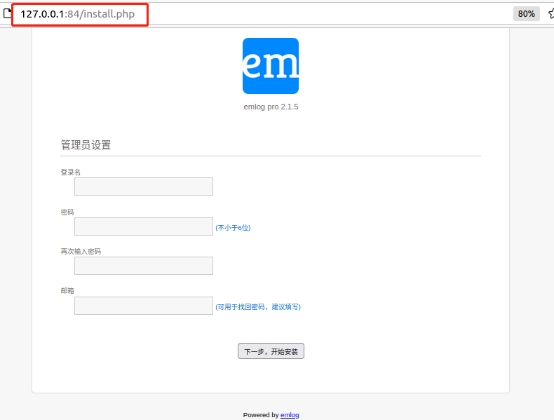
After the website is created, we enter the set emlog website address in the Ubuntu browser address bar and we can see the website settings page. At this time, you only need to perform specific website settings according to the prompts on the website display page.
1.2 Web page testing
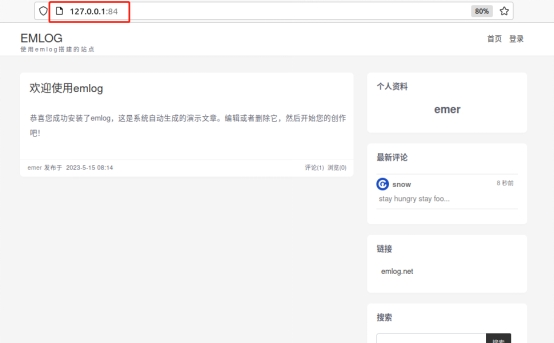
The installation steps of Emlog are very simple. In fact, it means setting an administrator username and password. After completing the settings, we can enter the emlog URL and try to access the local emlog page.
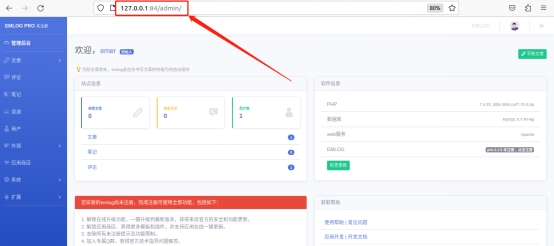
Or add "admin" after the emlog local address to access the emlog backend page to set up the blog website.
1.3 Installation and registration of cpolar
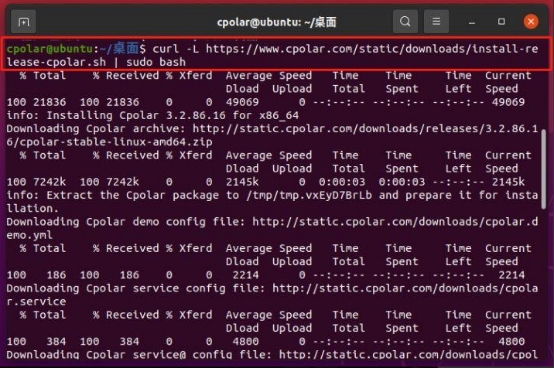
After completing the deployment of the web page, you can move to the installation of cpolar. If you want to install cpolar on an ubuntu system, you can use the simple one-click installation script to install it. As long as you enter the following command on the command line interface of Ubuntu, you can automatically execute the installation program (it should be noted that some Ubuntu versions may not have the curl tool installed, so it is best to execute the command "sudo aptinstall curl" to install the curl tool first).
Cpolar one-click installation script:
“curl -L
https://www.cpolar.com/static/downloads/install-release-cpolar.sh | sudo bash”
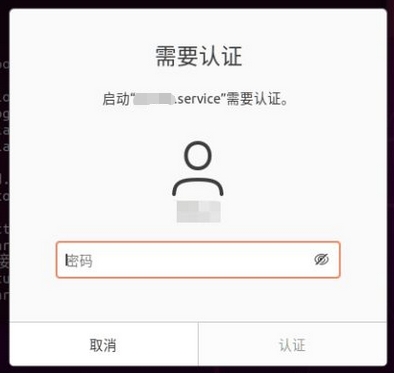
After the Cpolar installation is completed, you can enter the command "systemctl start cpolar" to start cpolar.

At this time, the ubuntu system will pop up the authentication box for starting the service. We can enter the password of the ubuntu system.
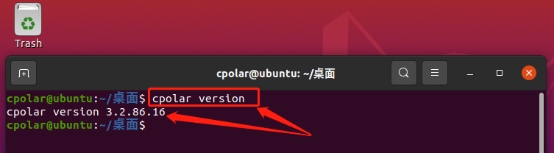
Of course, we can also enter "cpolar version" to query the local cpolar version number instead of using the systemctl level command. As long as the version information can be displayed, the cpolar installation is complete.
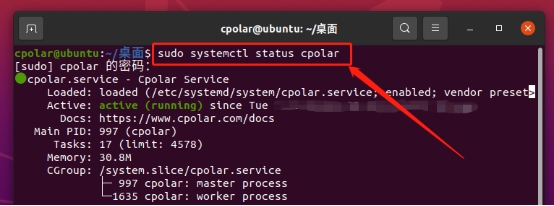
In order to ensure that cpolar can run on the Ubuntu system for a long time and ensure the stable existence of the data tunnel, it is best to add cpolar to the Ubuntu boot auto-start list. As long as you enter the command "sudo systemctl status cpolar" in the Ubuntu command line interface, you can add cpolar to the self-starting list.
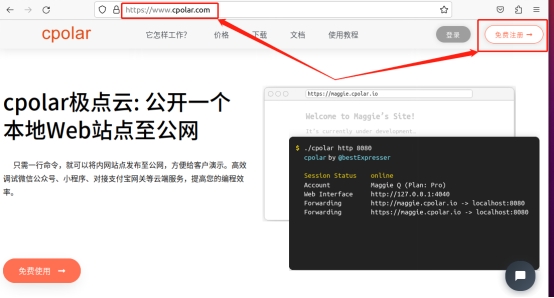
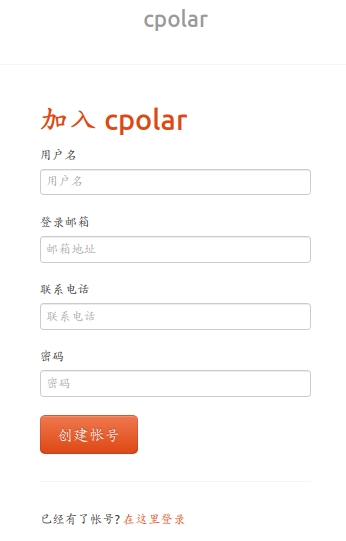
In order to ensure the data security of each user and create a separate data tunnel for each customer, cpolar uses user password and token code for user verification, so we need to register the user before using cpolar. The registration process is very simple. Just click "User Registration" in the upper right corner of the cpolar homepage and fill in the necessary information on the registration page to complete the registration.
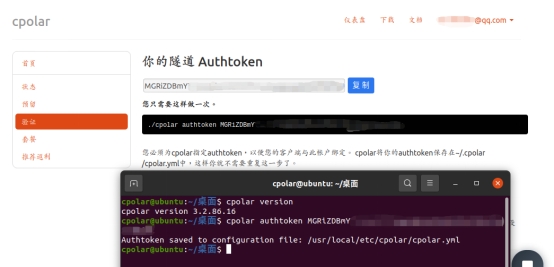
After completing the cpolar user registration, we can use each user's unique token code to activate the cpolar client. As long as you log in to the cpolar official website, you can find the user's unique token code on the "Verification" page (or the "Connect Your Account" window).
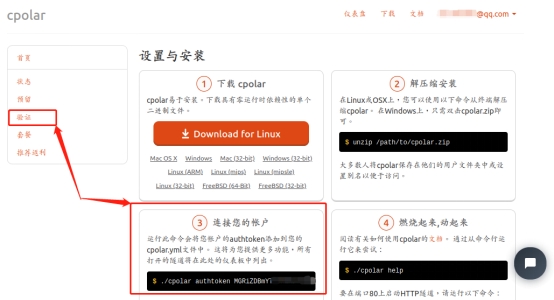
Copy and paste this token code into the Ubuntu command line interface, and the cpolar client will write the token code into the local cpolar.yml file (token code activation only needs to be done once) as a way to identify the user data tunnel. information. The specific command format is "cpolar authtoken user's unique token code".
2. Local web publishing
At this point, we have installed the web page on the local device and also installed the cpolar intranet penetration program. Next, we can use cpolar to create a safe and efficient data tunnel for the local web page, so that our local web page can be accessed on the public Internet. Visited.
2.1 Cpolar temporary data tunnel
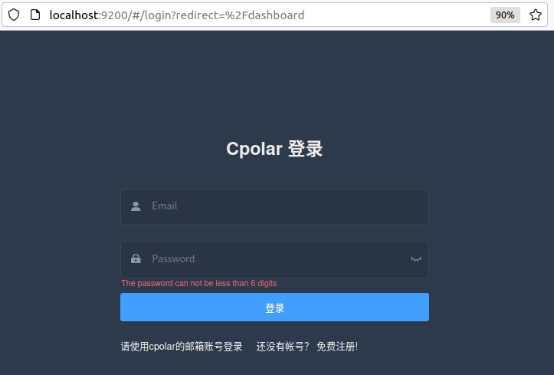
In order to meet the temporary testing function of web pages required by some customers, cpolar can create a temporary data tunnel directly on the cpolar client (the public Internet address is reset every 24 hours). To create a temporary data tunnel, we directly log in to the cpolar client on the local device (enter localhost:9200 in the browser address bar), and click the "Create Tunnel" button under the "Tunnel Management" item on the cpolar client main interface to enter Create tunnel settings page.
On the "Create Tunnel" page, we need to set several information settings, which include:
Tunnel name – can be regarded as the tunnel information comment of the cpolar client, as long as it is convenient for us to distinguish;
Protocol – The emlog blog website is a web page, so choose the http protocol;
Local address – The local address is the output port number of the emlog local website, so we fill in 84 here;
Domain name type – here we can distinguish whether the data tunnel is for temporary use or long-term. Here we are just conducting a connection test first, so we choose "random domain name" (second-level subdomain names and custom domain names are long-term stable tunnels and need to reserve a public Internet address in the cpolar cloud).
Region – This is the location of the server. We can fill it in according to the actual location of use;
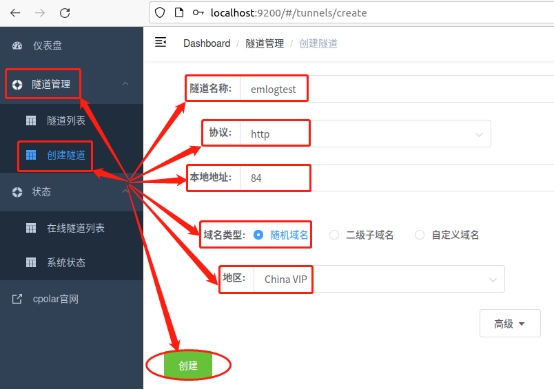
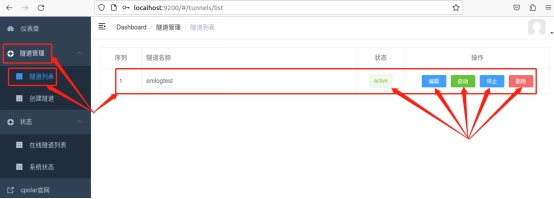
After completing these settings, you can click the "Create" button at the bottom of the page to establish a temporary data tunnel. After the temporary data tunnel is created, the cpolar client will automatically jump to the "Tunnel List" page under the "Tunnel Management" item.
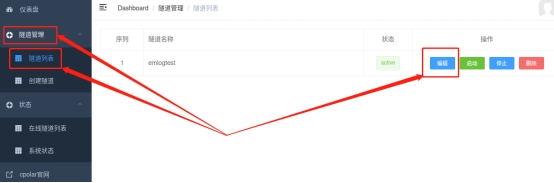
Here we can see all the local data tunnels of cpolar (whether temporary or long-term). We can also manage the data tunnel here, including opening, closing or deleting this tunnel. We can also click the "Edit" button, and finally Modify the information of the data tunnel.
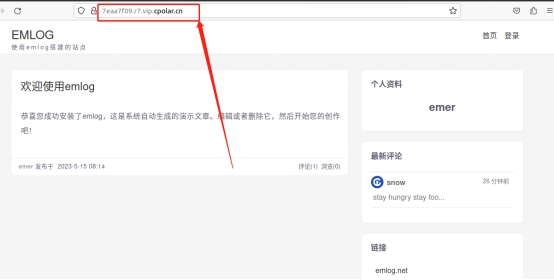
The temporary public Internet address we created that can connect to the local website can be found in the "Online Tunnel List" under the "Status" item.

We paste the displayed emlog public Internet address into the browser address bar of the Ubuntu system, and we can access the page of the local emlog blog.
However, the data tunnel at this time is only a temporary data tunnel and will be reset every 24 hours. After the data tunnel is reset, the public Internet address generated by cpolar will change. If you plan to visit this web page again, you need to use the newly generated address.
2.2.Cpolar stable tunnel (cloud settings)
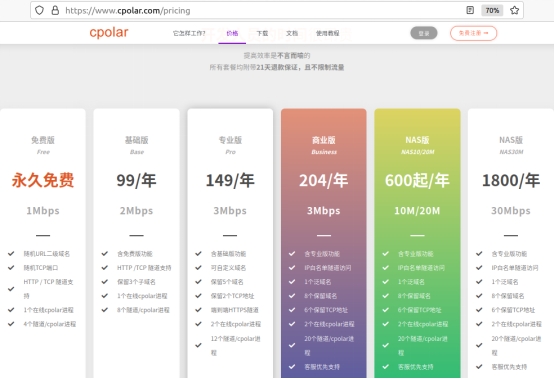
If we want to set up a long-term stable data tunnel for the local website, we need to upgrade cpolar to the VIP version first.
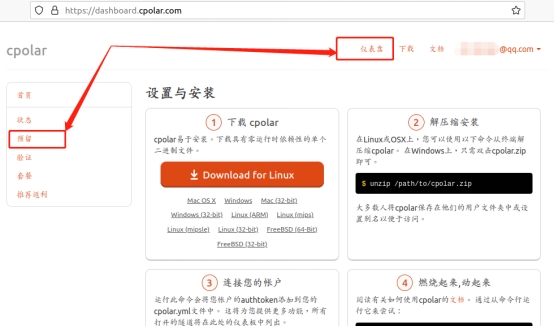
After Cpolar is upgraded to the paid version, you can log in to cpolar's official website, find the "Reserve" button on the left side of the user's homepage, click to enter cpolar's data tunnel reservation page, and generate a public Internet address (or data tunnel entrance). At this time, this address is not connected to the local software output port, so it can be regarded as a blank data tunnel.
On the reservation page, we can reserve data tunnels using multiple protocols. Here we select the "Reserve second-level subdomain name" field.
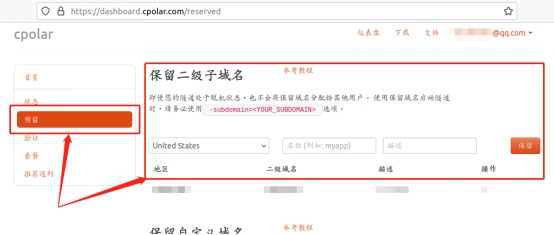
In the "Reserved second-level subdomain name" field, you need to make several simple settings of information, namely:
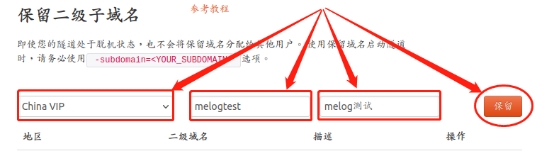
Region - the region where the server is located, just select the nearest one;
Second-level domain name - (will eventually appear in the generated public Internet address as one of the identifiers of the network address;
Description - can be seen as a description of this data tunnel, as long as it can be distinguished from other tunnels). After completing these settings, you can click the "Reserve" button on the right to retain this data tunnel.
Of course, if you no longer plan to use this data tunnel, you can click the "x" on the right to easily delete it and save valuable tunnel quota.
2.3.Cpolar stable tunnel (local settings)
After completing the settings of the cpolar cloud and retaining the blank data tunnel, we returned to the local cpolar client and connected the blank data tunnel generated by the cloud with the local test page.
Open and log in to the cpolar client on the local device (you can enter localhost:9200 in the browser to access directly).
After entering the cpolar client, click the "Tunnel List" button under the "Tunnel Management" item on the left side of the client's main interface to enter the local tunnel page, and then click the "Edit" button of the corresponding tunnel.
On the "Edit" page of the local tunnel (the same as the page for creating a local temporary tunnel), we only need to modify the "Domain Name Type" to connect the public Internet address reserved by cpolar cloud to the Imagewheel data tunnel created by local cpolar. stand up.
We have reserved the data tunnel of the second-level subdomain name in the cpolar cloud, so we changed it to "Second-level subdomain name" (if you reserved a custom domain name, check the custom domain name), and in the next line "Sub Domain" Fill in the reserved second-level subdomain name in the column, which is "emlogtest".
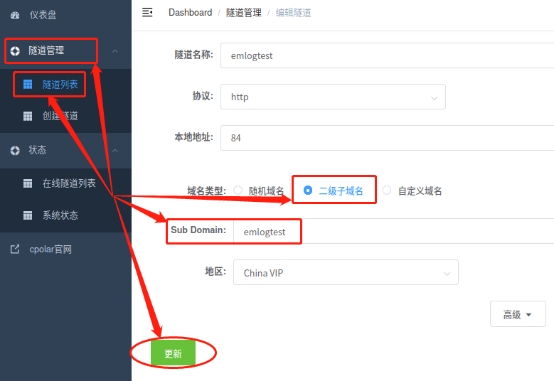
After completing the change of "Domain Name Type", you can click the "Update" button at the bottom of the page to connect the blank data tunnel on the cpolar cloud with the local emlog blog website to establish an intranet penetration data tunnel that can survive long-term and stably.
3. Public network access test
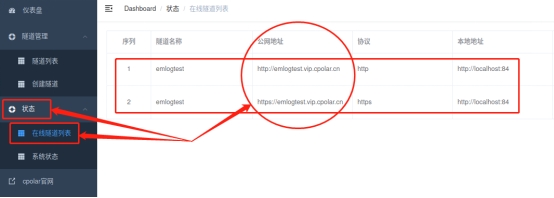
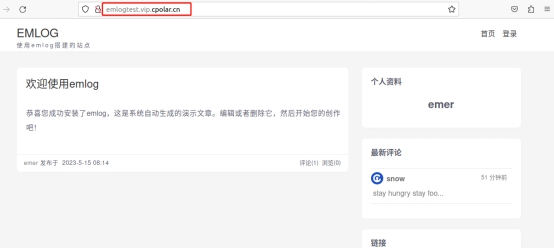
Finally, when we enter the "Online Tunnel List" page again, we can find that the public Internet address of emlog has changed. We paste the updated public Internet address of the emlog website into the Ubuntu browser and we can see the use The new address accesses the local emlog website.
Summarize
emlog is just one of many personal blog websites. There are many personal blog websites like emlog. We can also install them on local devices with the same idea, and then create an intranet penetration data tunnel through cpolar to connect the local The website on the computer is published to the public Internet, allowing us to have a blog website that is completely our own.