I believe that many students who are new to the macbook, get the mac and want to telnet the server port to see if it is connected. The result is that there is no command to telnet. Today, I will record the process of my installation for reference.
Problem: sh: telnet: command not found
(Ordinary users are required to log in to the terminal. Do not use the root user of mac. It is better to have too many permissions to execute later.)
1. It is recommended to use brew to install telnet
brew install telnet2. If an error is reported: sh: brew: command not found, you need to install brew first

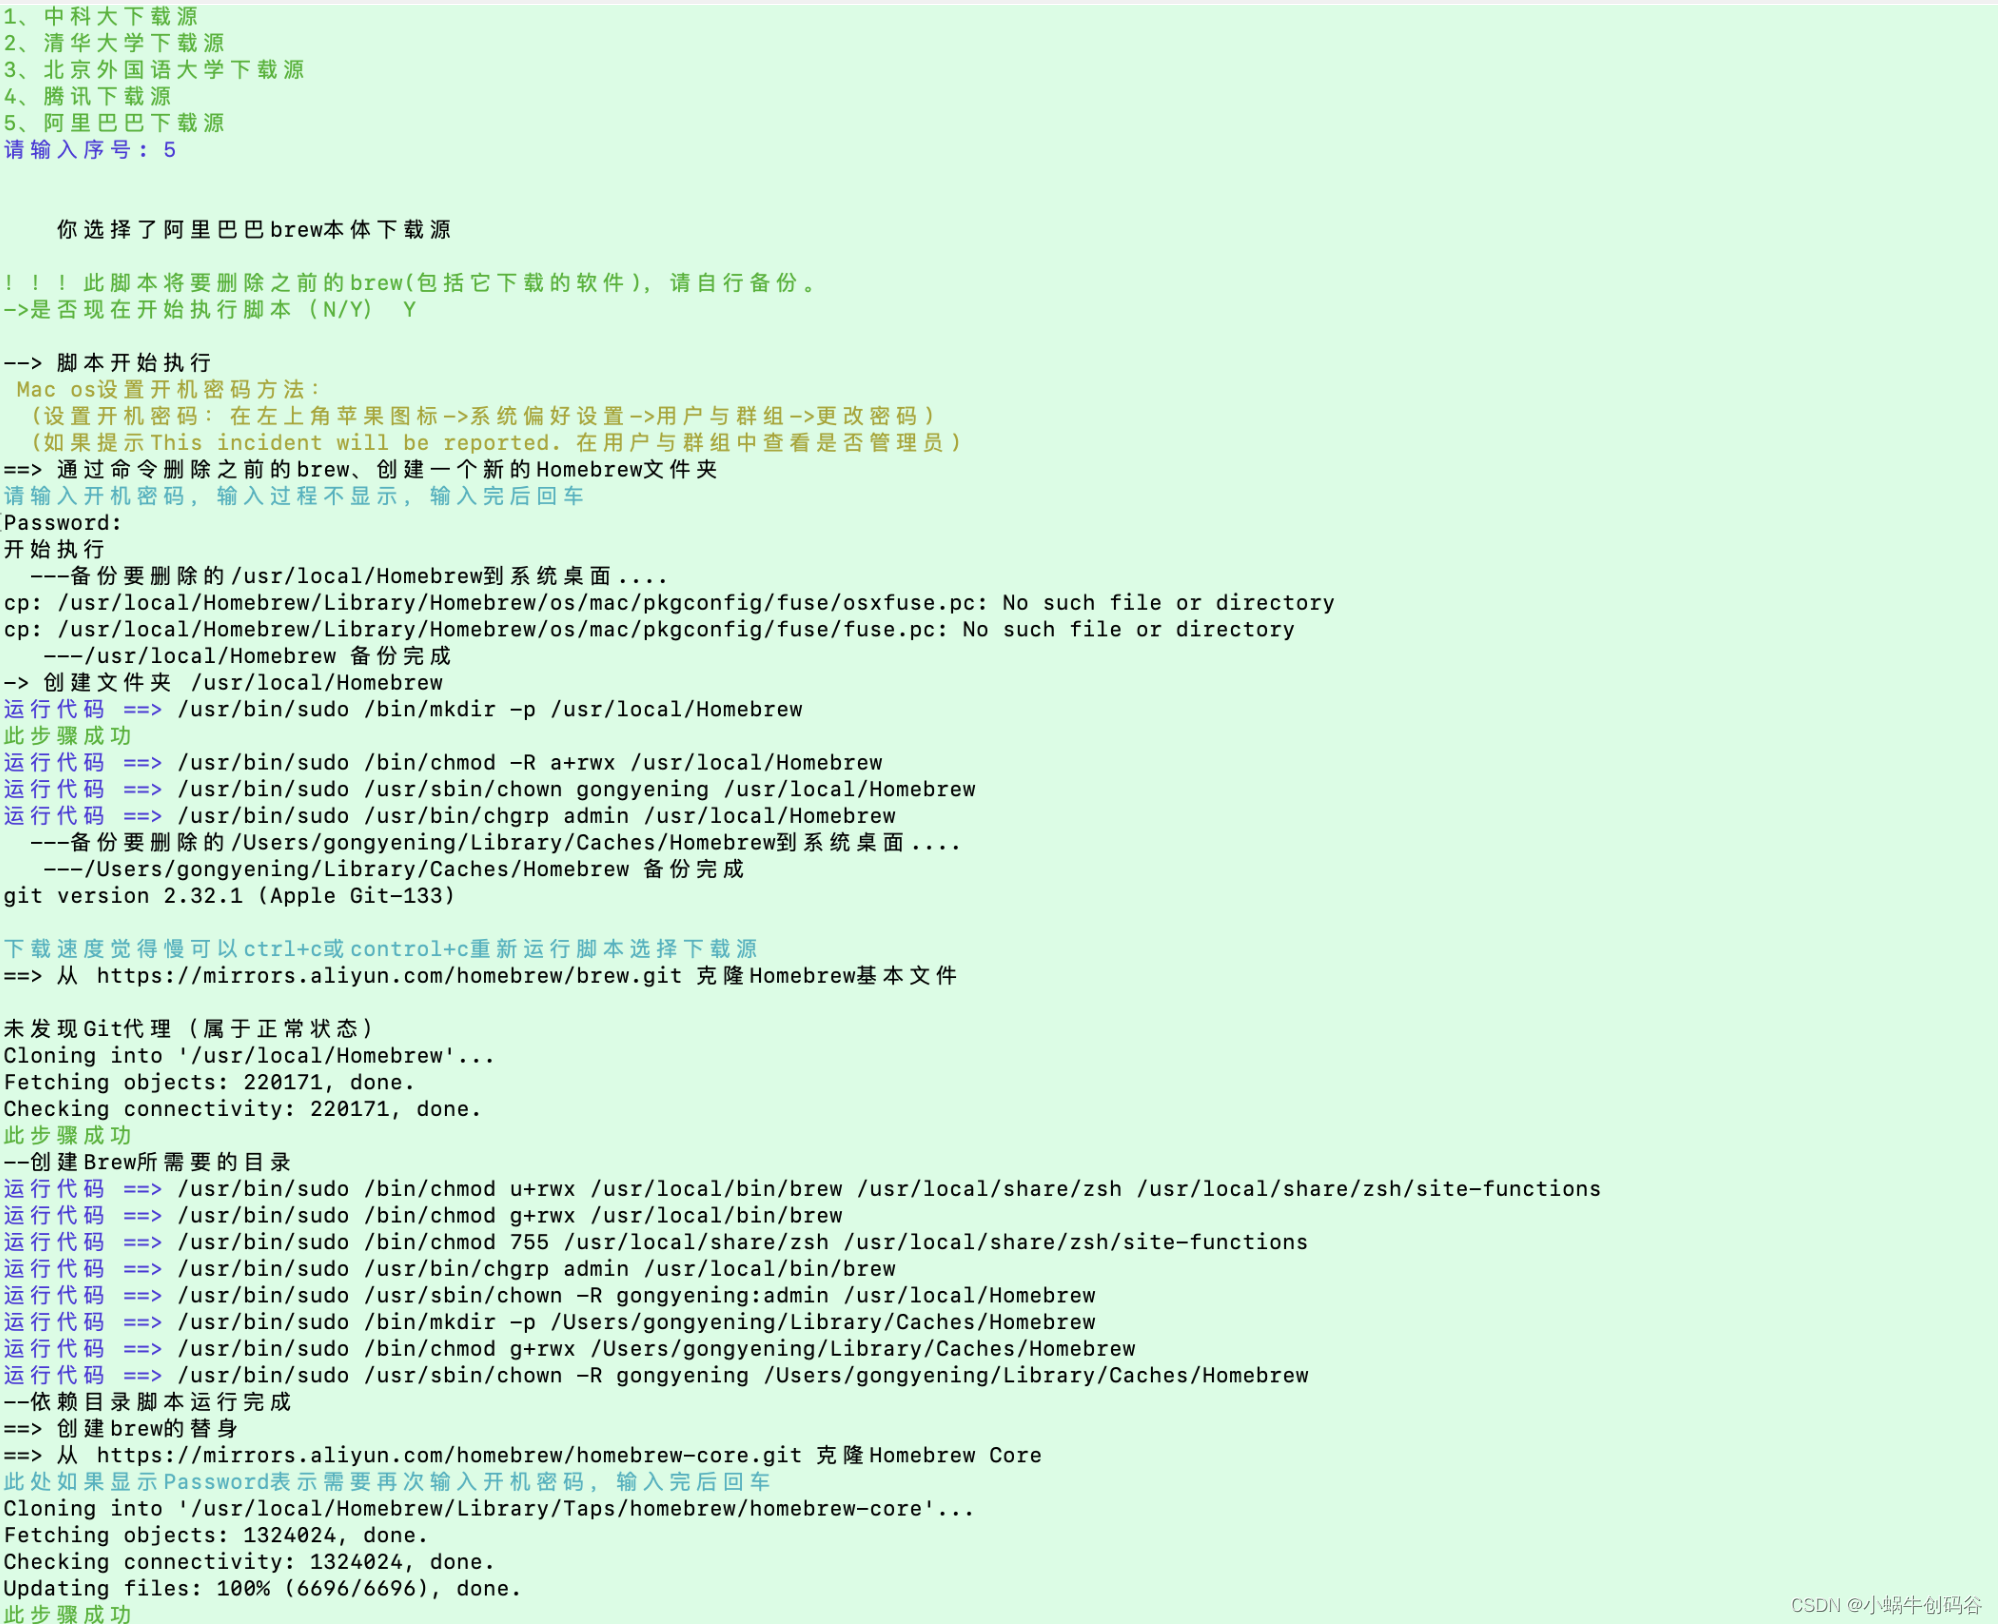
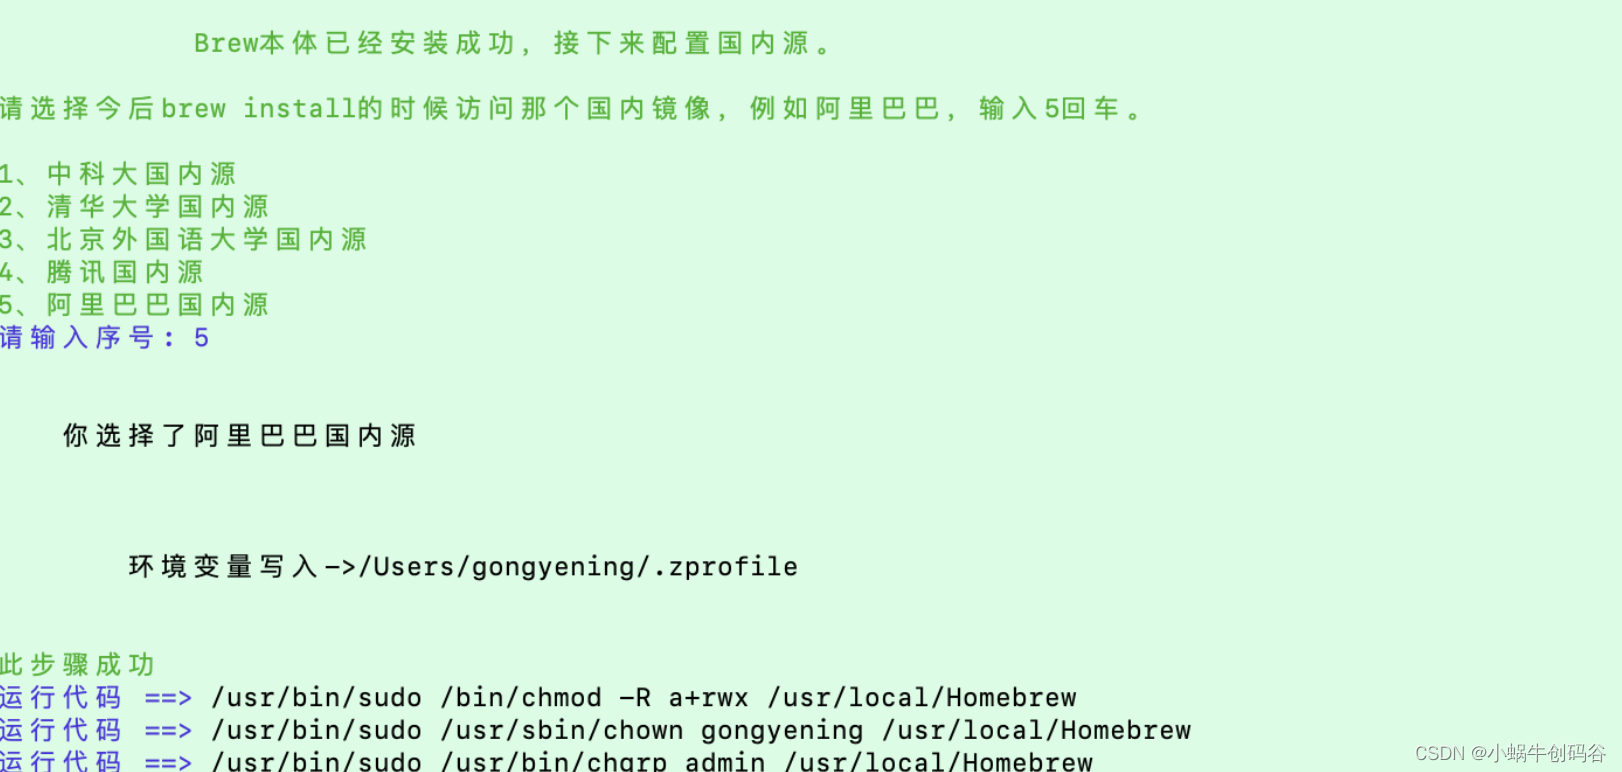
3. Install brew, execute it in the terminal, select the download source, and press Enter. I chose 5.
/bin/zsh -c "$(curl -fsSL https://gitee.com/cunkai/HomebrewCN/raw/master/Homebrew.sh)"Wait for the execution to complete ✅, then OK, but if you are prompted to enter the power-on password in the middle, enter the password and press Enter to OK.
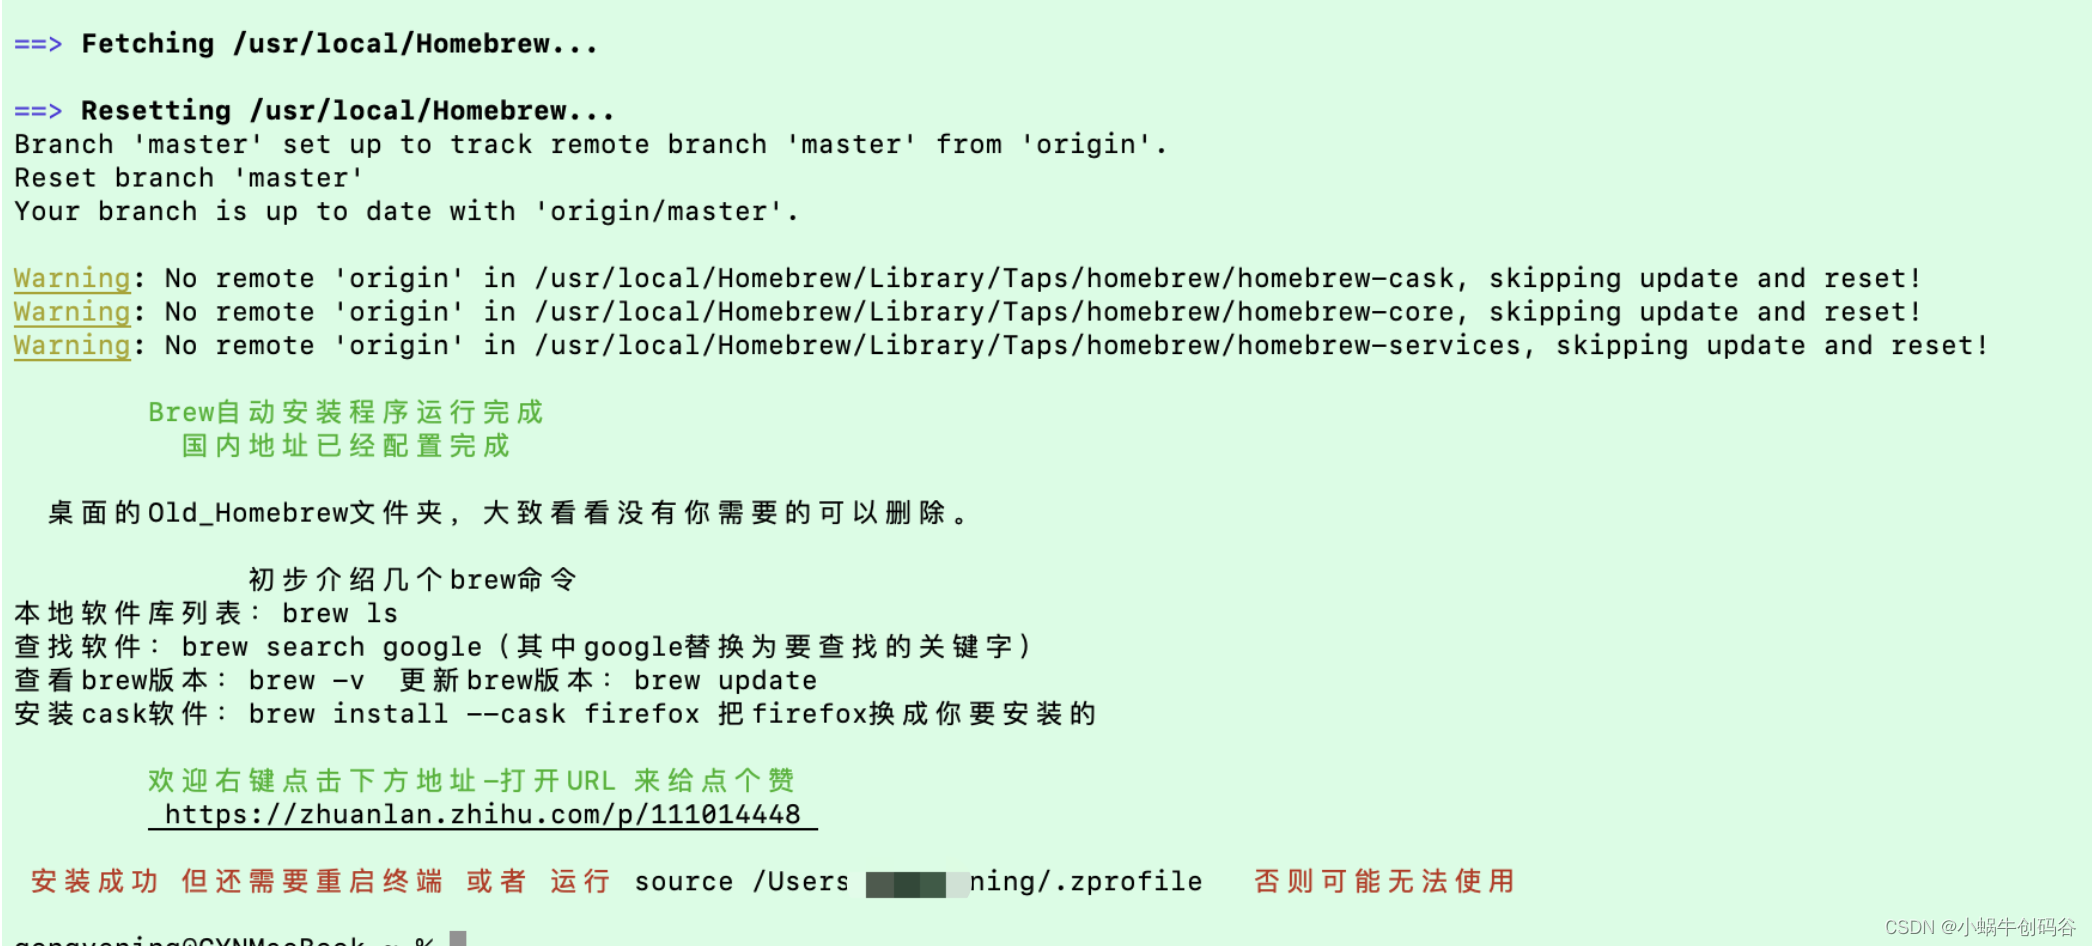
(Restart the terminal or run source /Users/your computer user name/.zprofile)
4. At this point, brew is successfully installed. Execute brew install telnet, but an error is still reported.
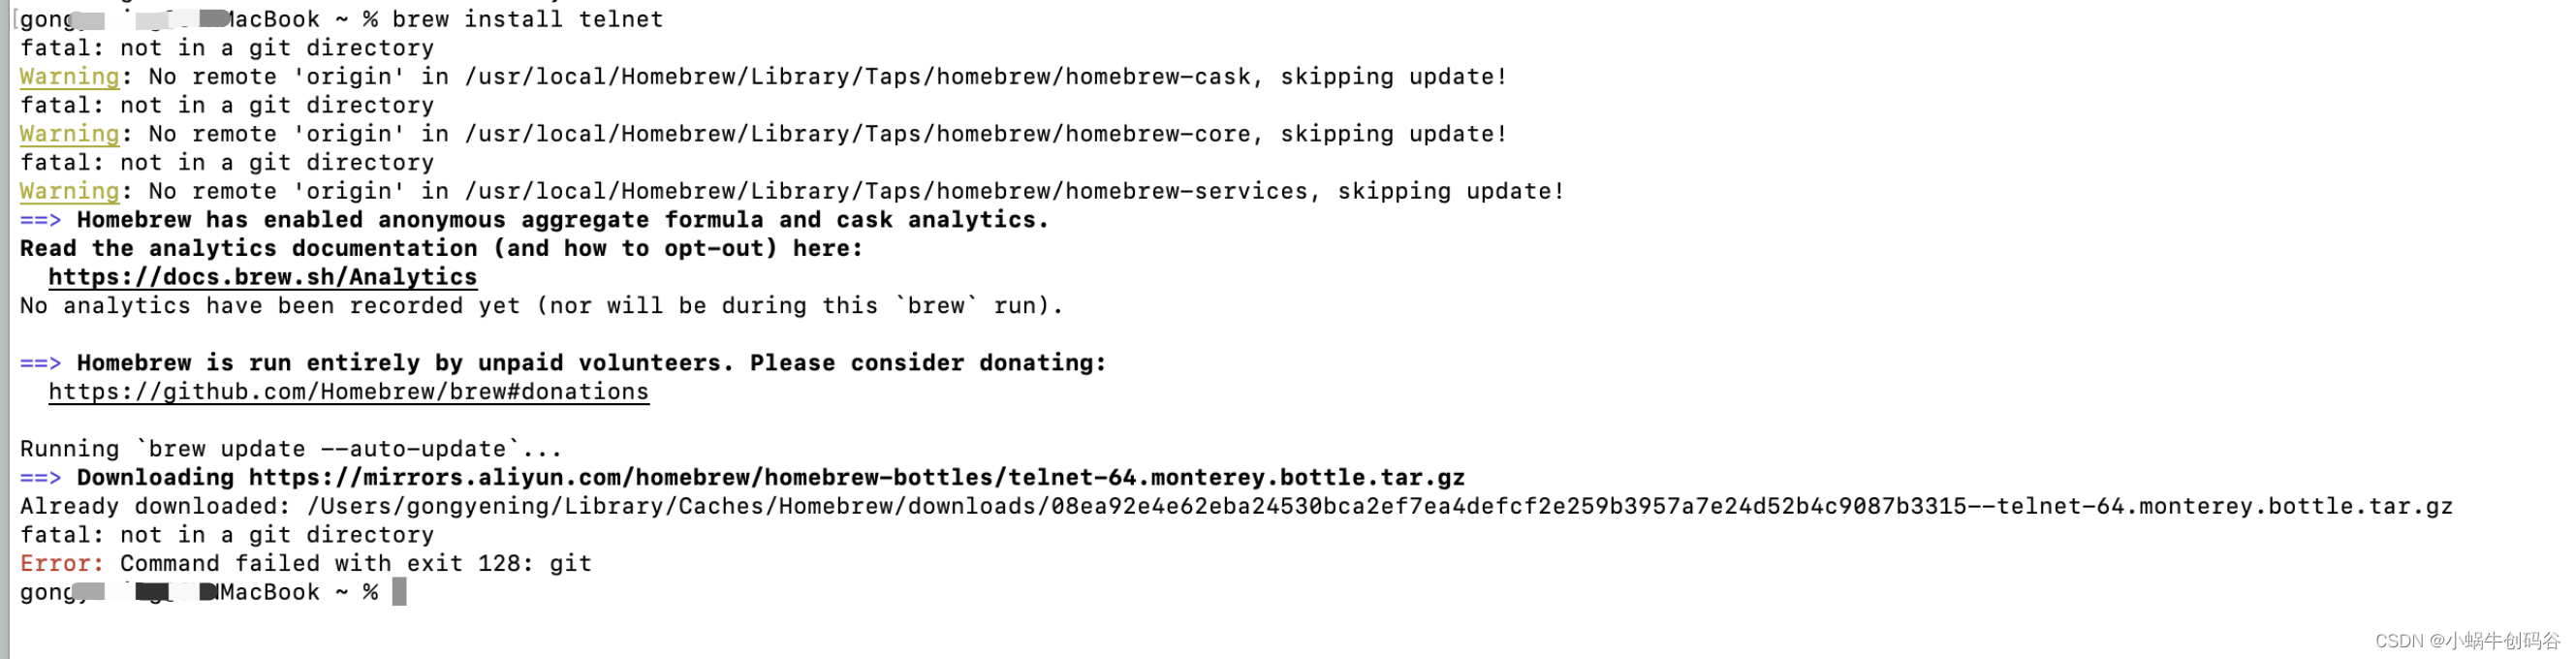
5. Many people here are very confused. I don’t know why. Just brew -v to check the help. You need to execute two lines of commands separately .
brew -v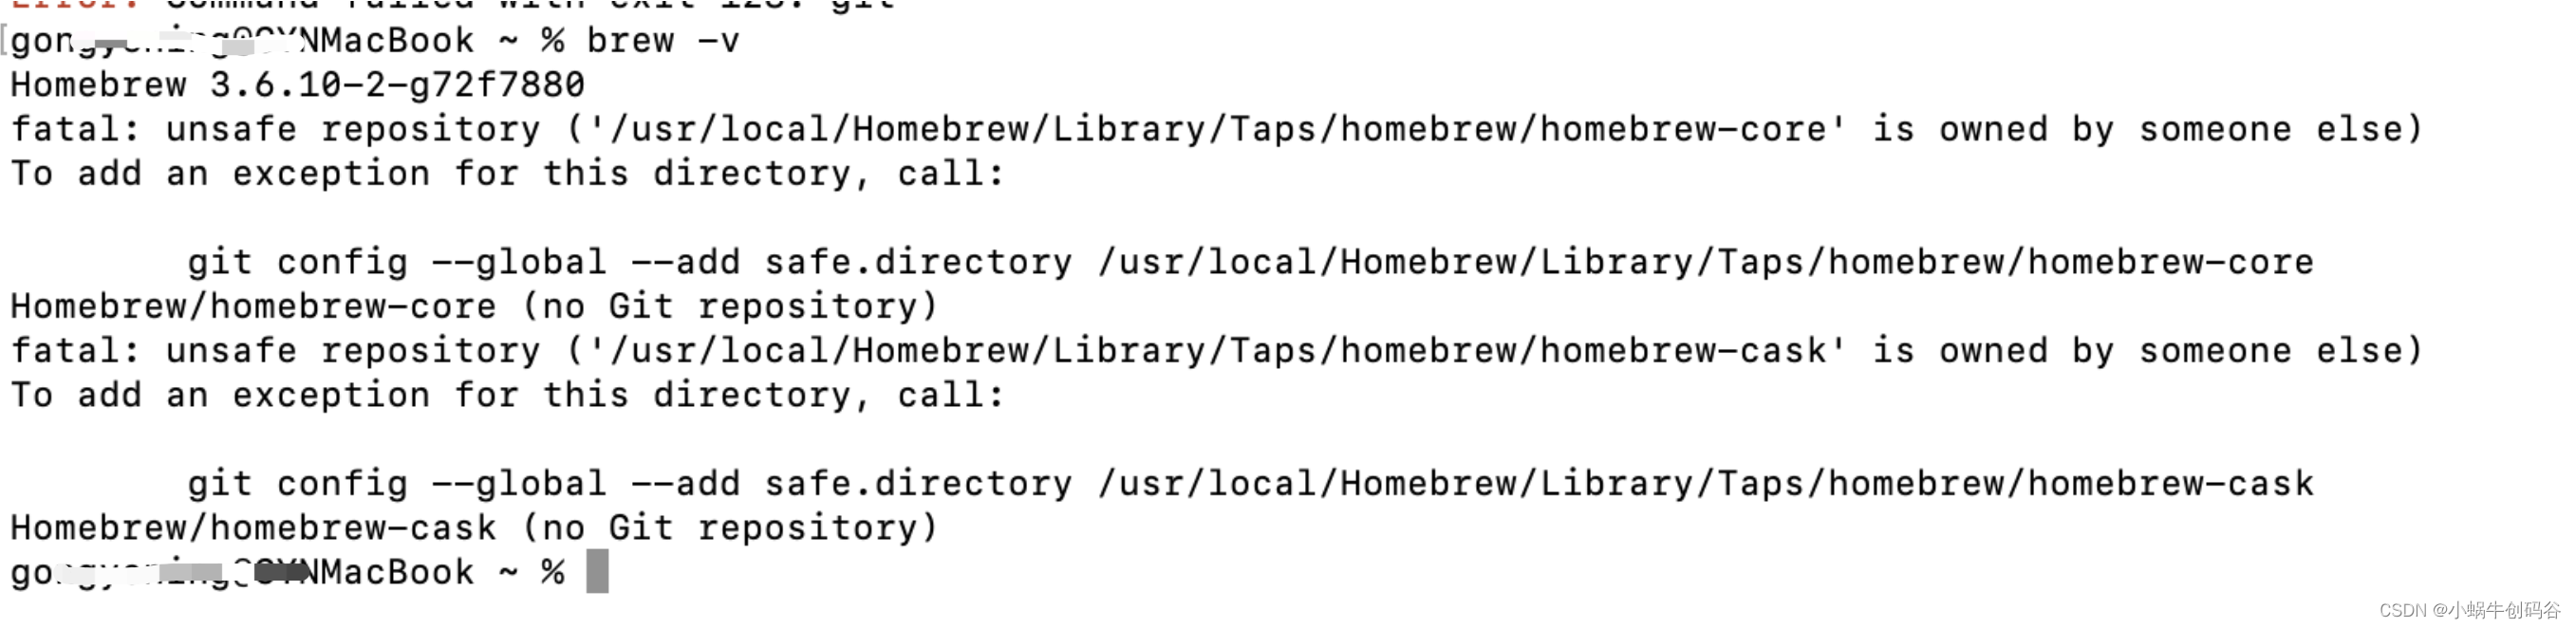
 git config --global --add safe.directory /usr/local/Homebrew/Library/Taps/homebrew/homebrew-core
 git config --global --add safe.directory /usr/local/Homebrew/Library/Taps/homebrew/homebrew-cask
6. Now we can install telnet, which shows that it has been successfully installed.
brew install telnet 
7. Test it again, it has been successful, and there is no report that the command does not exist anymore.
