The blogger has experienced the installation and uninstallation of dual systems for many times, so this installation records the whole process, so that the following students can avoid detours. This tutorial is common to laptops with single and dual hard drives.
installation manual
1. View computer information
1. BIOS mode
Win+R, enter msinfo32 and press Enter, the system interface appears, and you can view the BIOS mode:
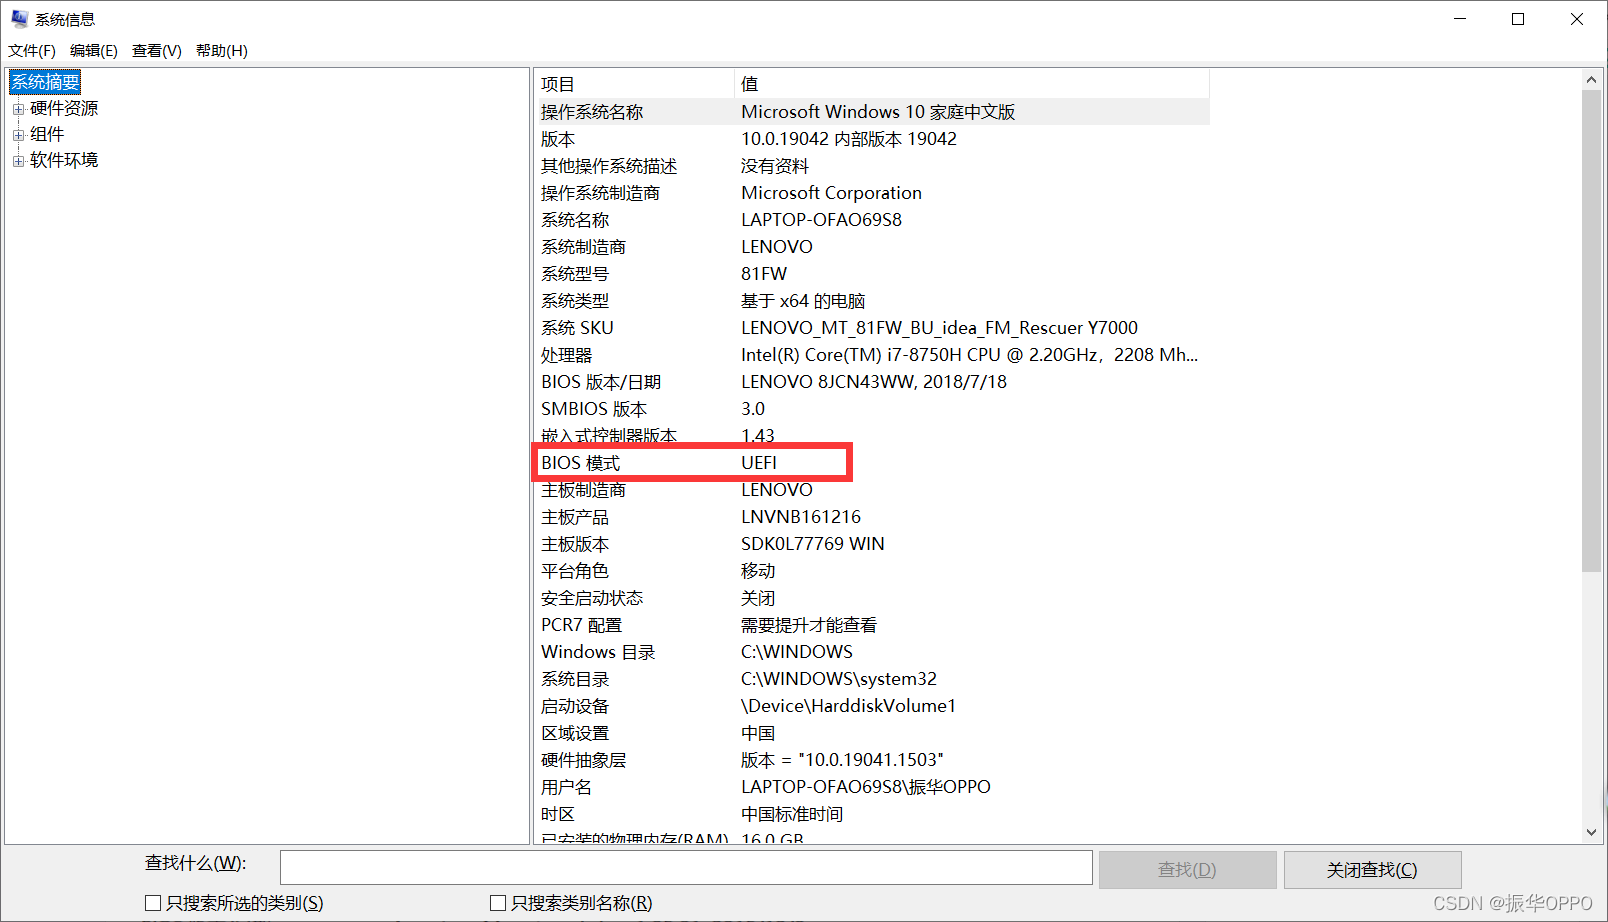
This tutorial is only suitable for computers whose BIOS mode is UEFI. If the BIOS mode is traditional, please check other corresponding tutorials.
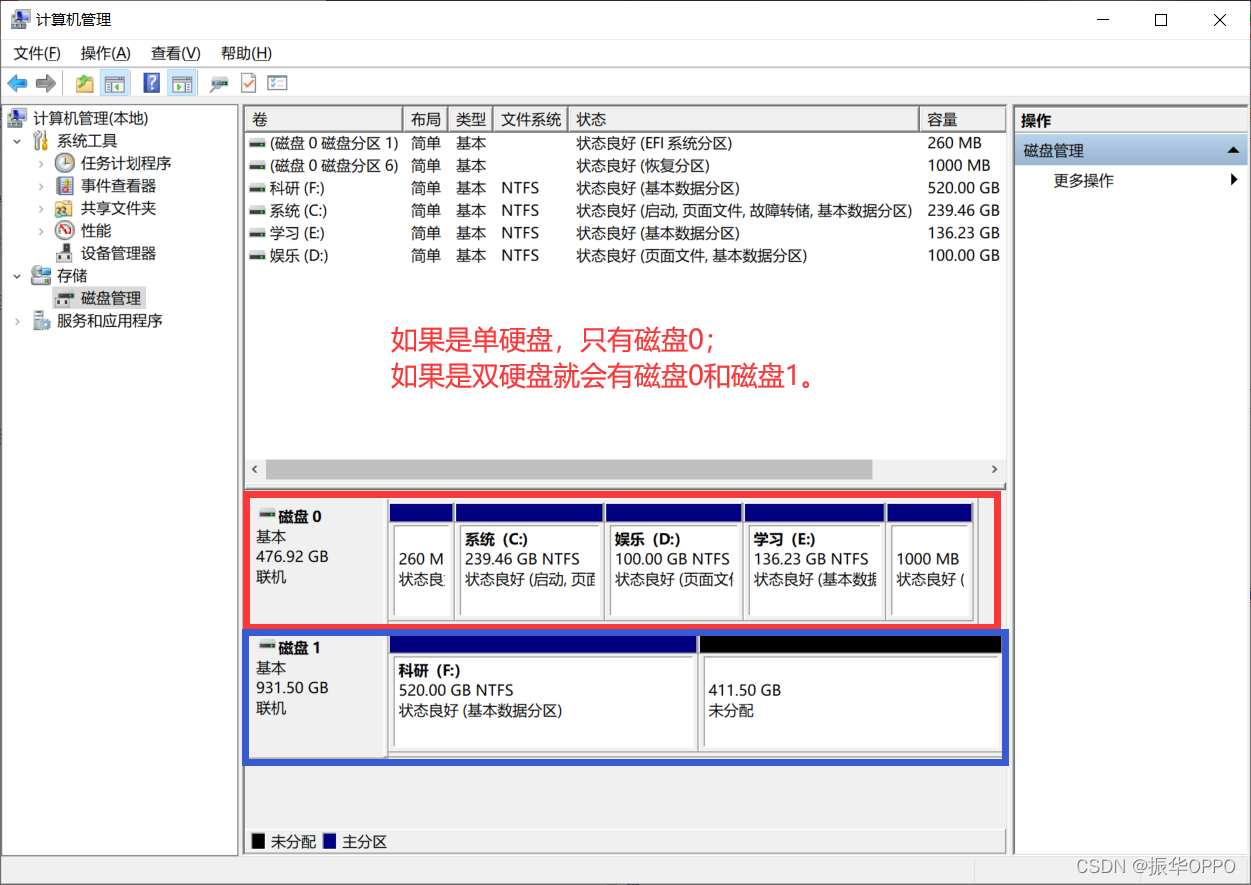
2. Check the number of hard drives
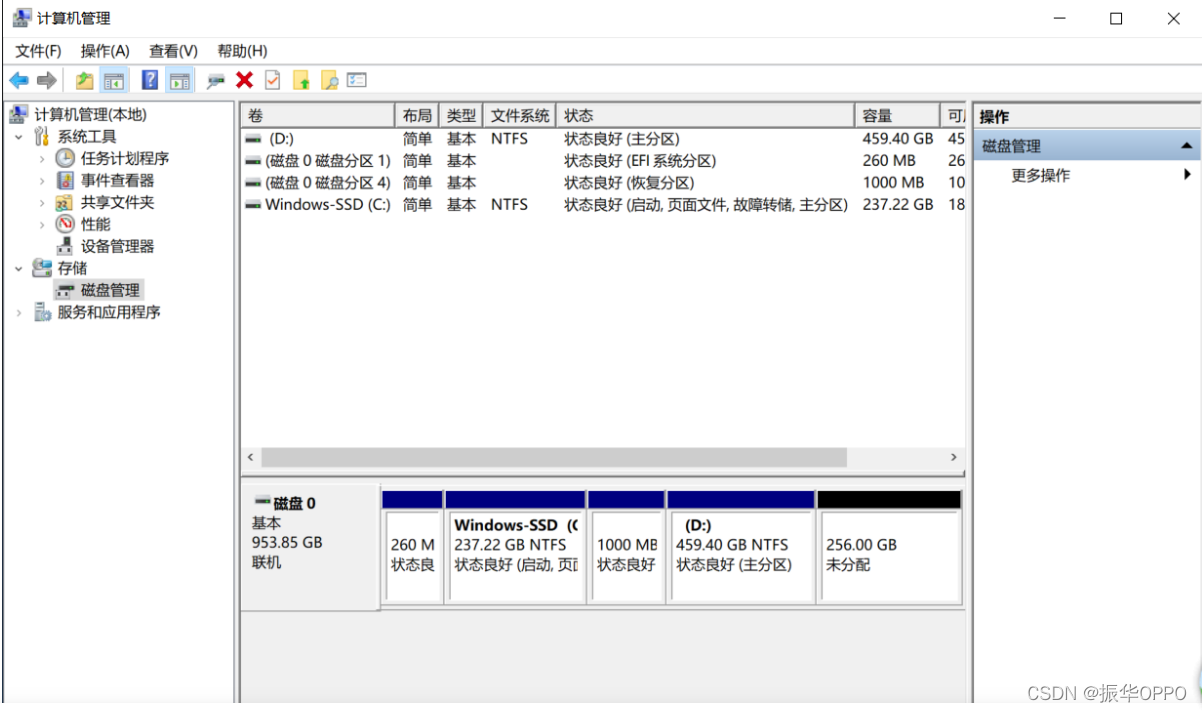
This computer -> Disk Management, you can know whether it is a single hard disk or a dual hard disk, the installation of single and dual hard disks is a little different.
2. Make a system disk
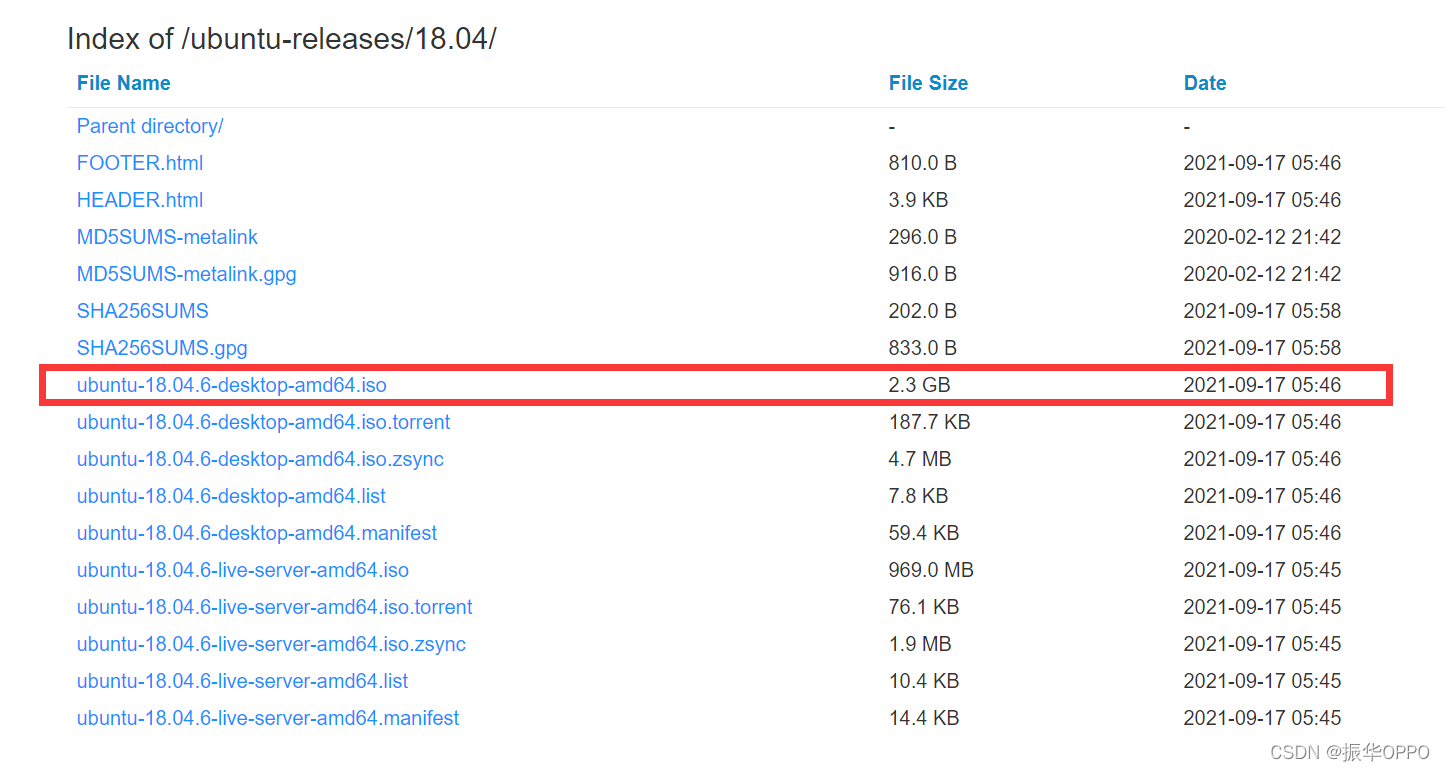
1. Download the mirror source
Click to download Ubuntu18.04.6 mirror source
2. Make a U disk boot disk
1. Install the burning software floppy disk: UltralSO , and complete the installation until the next step.
2. Insert the U disk (above 16G) used as a boot disk, because the U disk will be formatted later, so back up the files in it first
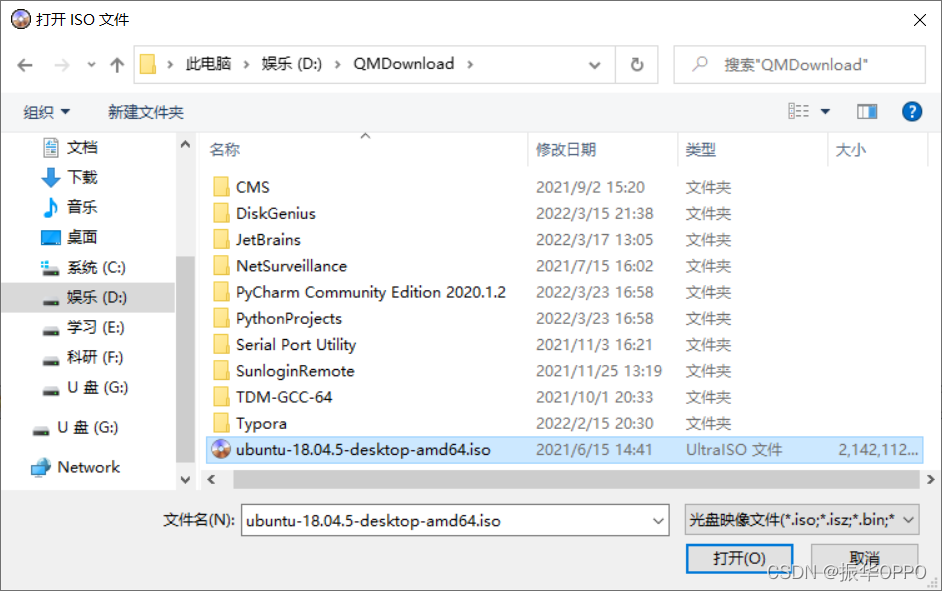
3. Open the installed UltraISO as an administrator, click the Continue Trial button to enter the interface

4. File -> Open, find the downloaded Ubuntu18.04 image file in the pop-up file selection dialog box, and open it.
5. Start - >Write a hard disk image

6. In the new window that pops up,
- Hard Drive: Select the USB drive you just inserted
- Write method: set to USB-HDD+
- image file: the path to your Ubuntu image file
- The rest do not need to be modified, just use the default settings
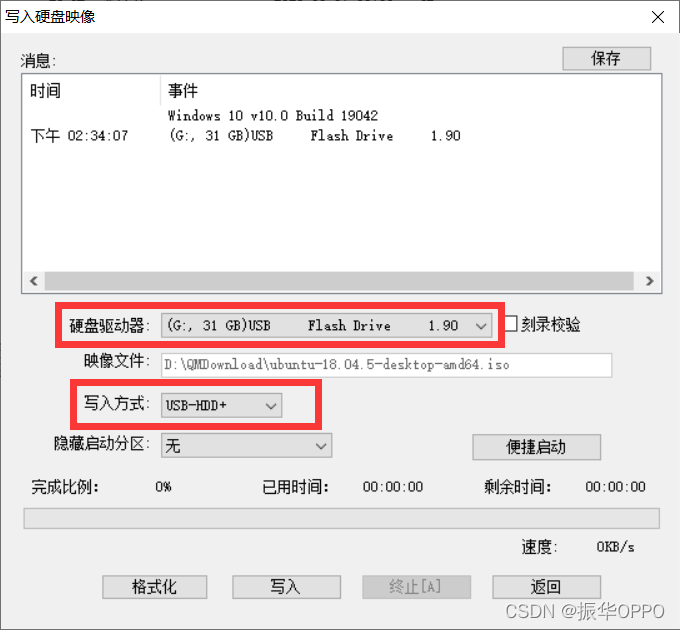
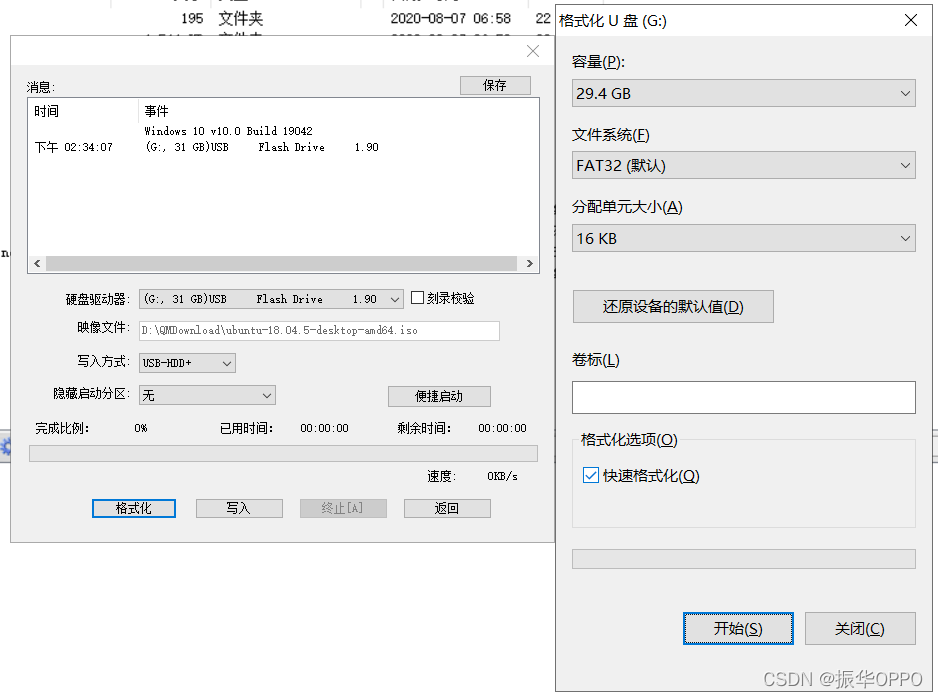
7. Then you can format it, and finally click the write button in the bottom column
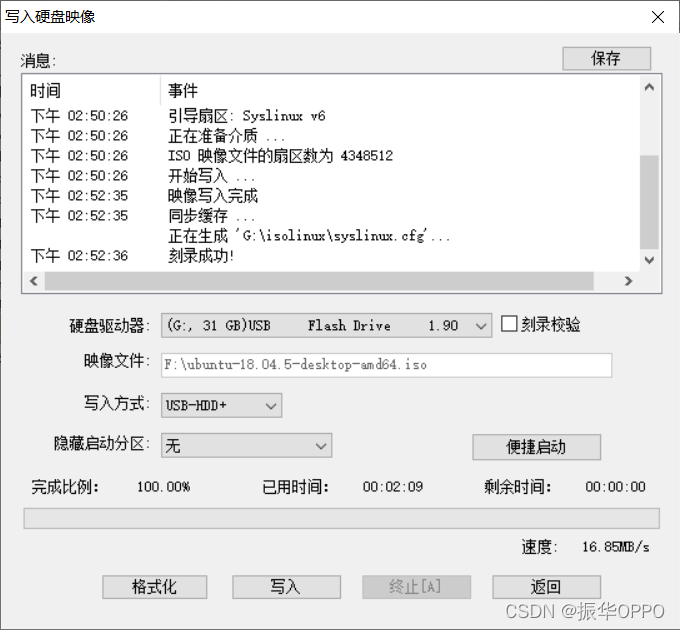
8. If the disk/image capacity is too small for burning, and you ensure that the capacity of the U disk is sufficient and the image is correct, then install the latest version of the floppy disk directly through the

writing process for about 2-4 minutes, and the message "burning successfully" will pop up. , it means the boot disk is ready
3. Allocate hard disk space
此电脑——>管理——>磁盘管理
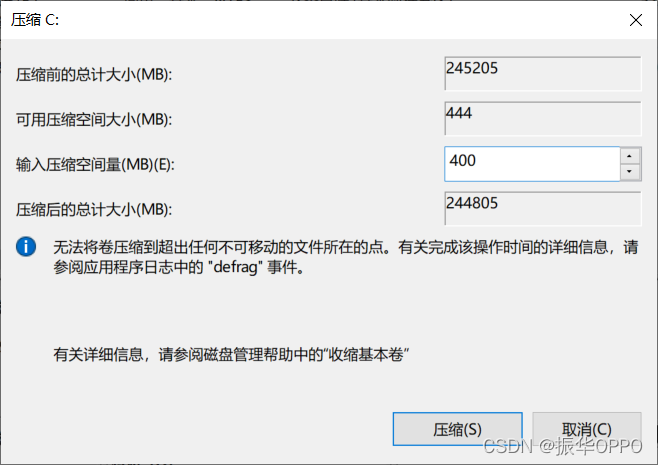
1. If your computer is a single hard disk , give Ubuntu the space allocated from the last disk (CDE, E is the last disk; CDEF, F is the last disk, and so on) 80G左右, of course, if you have enough space, you can Score a little more. Select the disk and right-click, select Compressed Volume, and enter the amount of compressed space, in M, 1G=1024M.
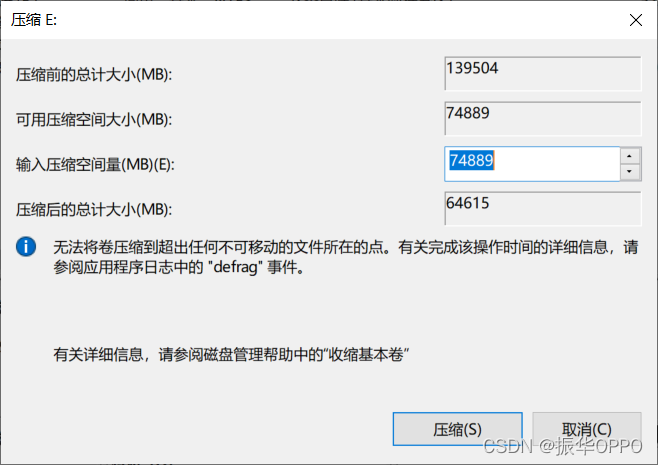
After compression, there should be a black unallocated partition like this, in fact, 80G is enough.
PS: If the capacity of your last disk is too small and it is not enough to separate 80G, then you need to distribute it from other disks. You need to use DiskGenius disk partitioning tool: teach you how to adjust the partition size of the computer disk
2. If your computer has dual hard drives like me
-
就是Windows的系统启动盘,也就是第一块硬盘You need to separate a 400M blank partition on the C drive ( ) to install the ubuntu boot items. -
Then select the last disk on another hard disk (for example, the last disk of CDE disk is disk E, the last disk of CDEF disk is disk F, and so on), right-click the disk, select Compressed Volume, and enter the amount of compressed space in units of M, if the space is sufficient, it is recommended to divide the space of about 100G, and if the space is insufficient, it can also be divided into 80G
1G=1024M.
After compression, it should be as shown in the figure below. Here, I divided the startup item into 400M, and the system directly divided it into 400G.

Fourth, install Ubuntu18.04
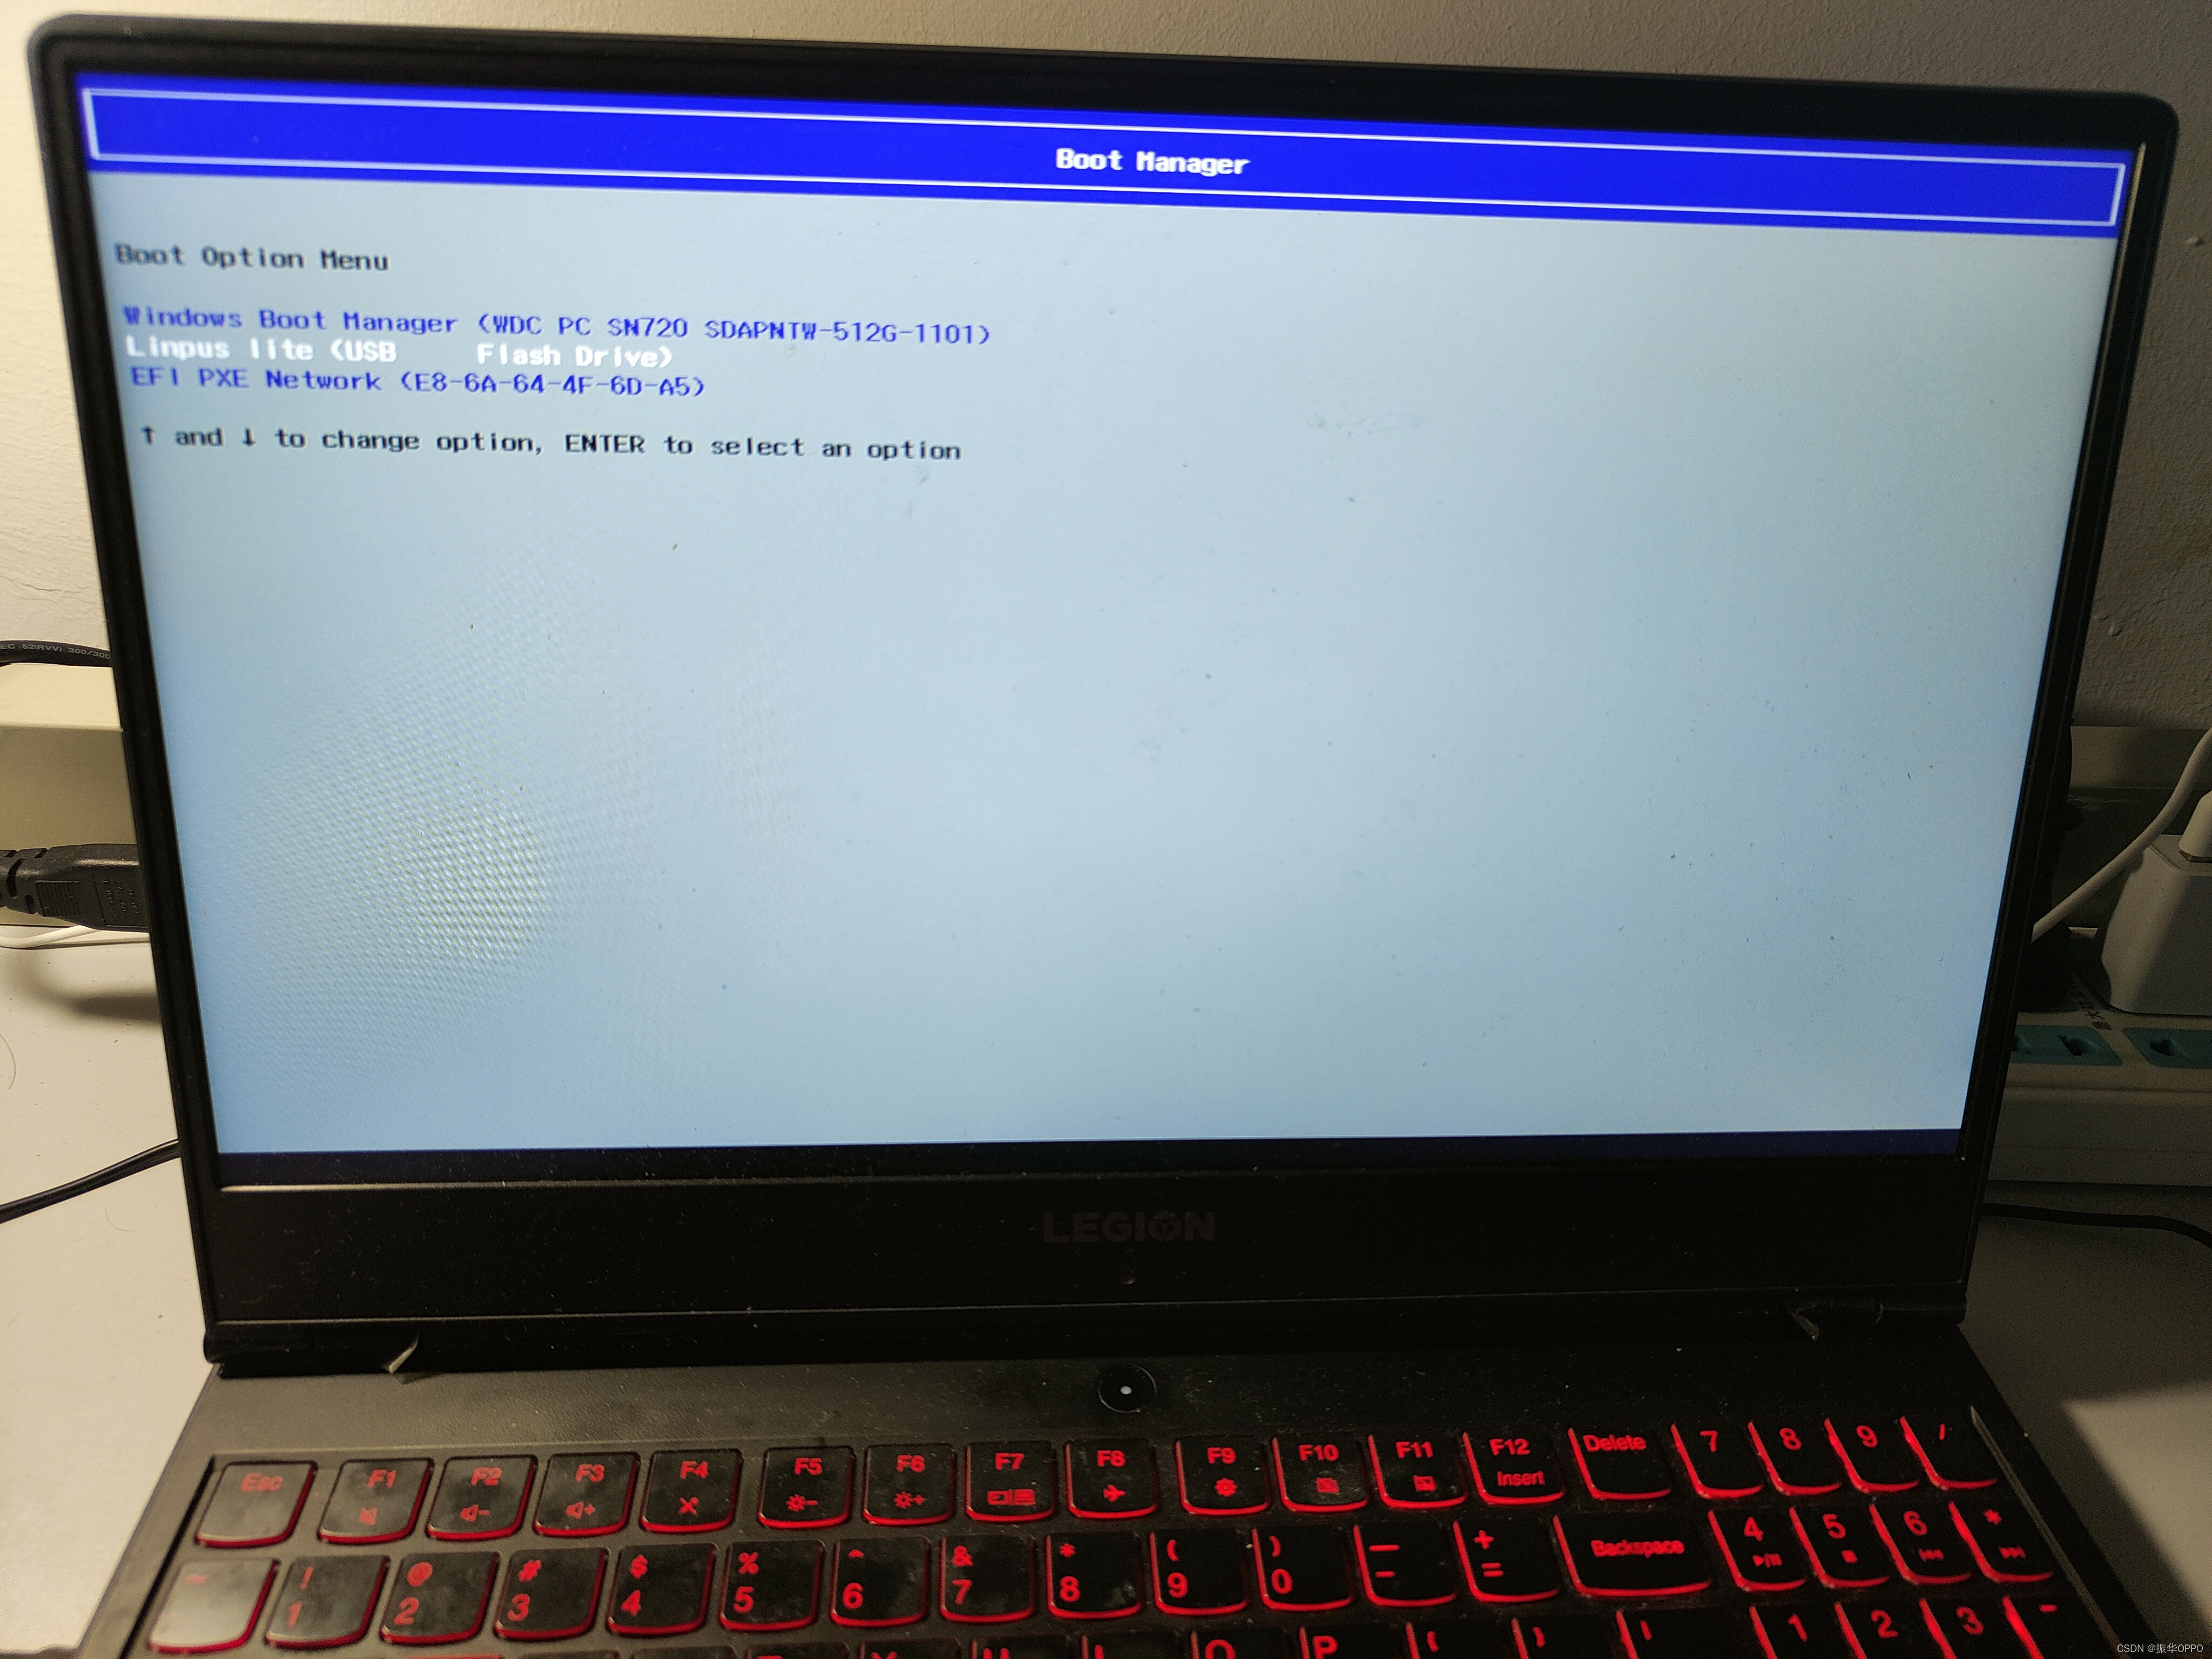
1. Enter the U disk boot item
Because the shortcut keys for entering the computer BIOS and Boot Manager of major computer manufacturers are different, please Baidu how to enter the BIOS and Boot Manager by yourself. For my computer, when I restart, I can always press the F12 key to enter the Boot Manager, and then the U disk startup item appears, directly select Enter.
2. Installation settings
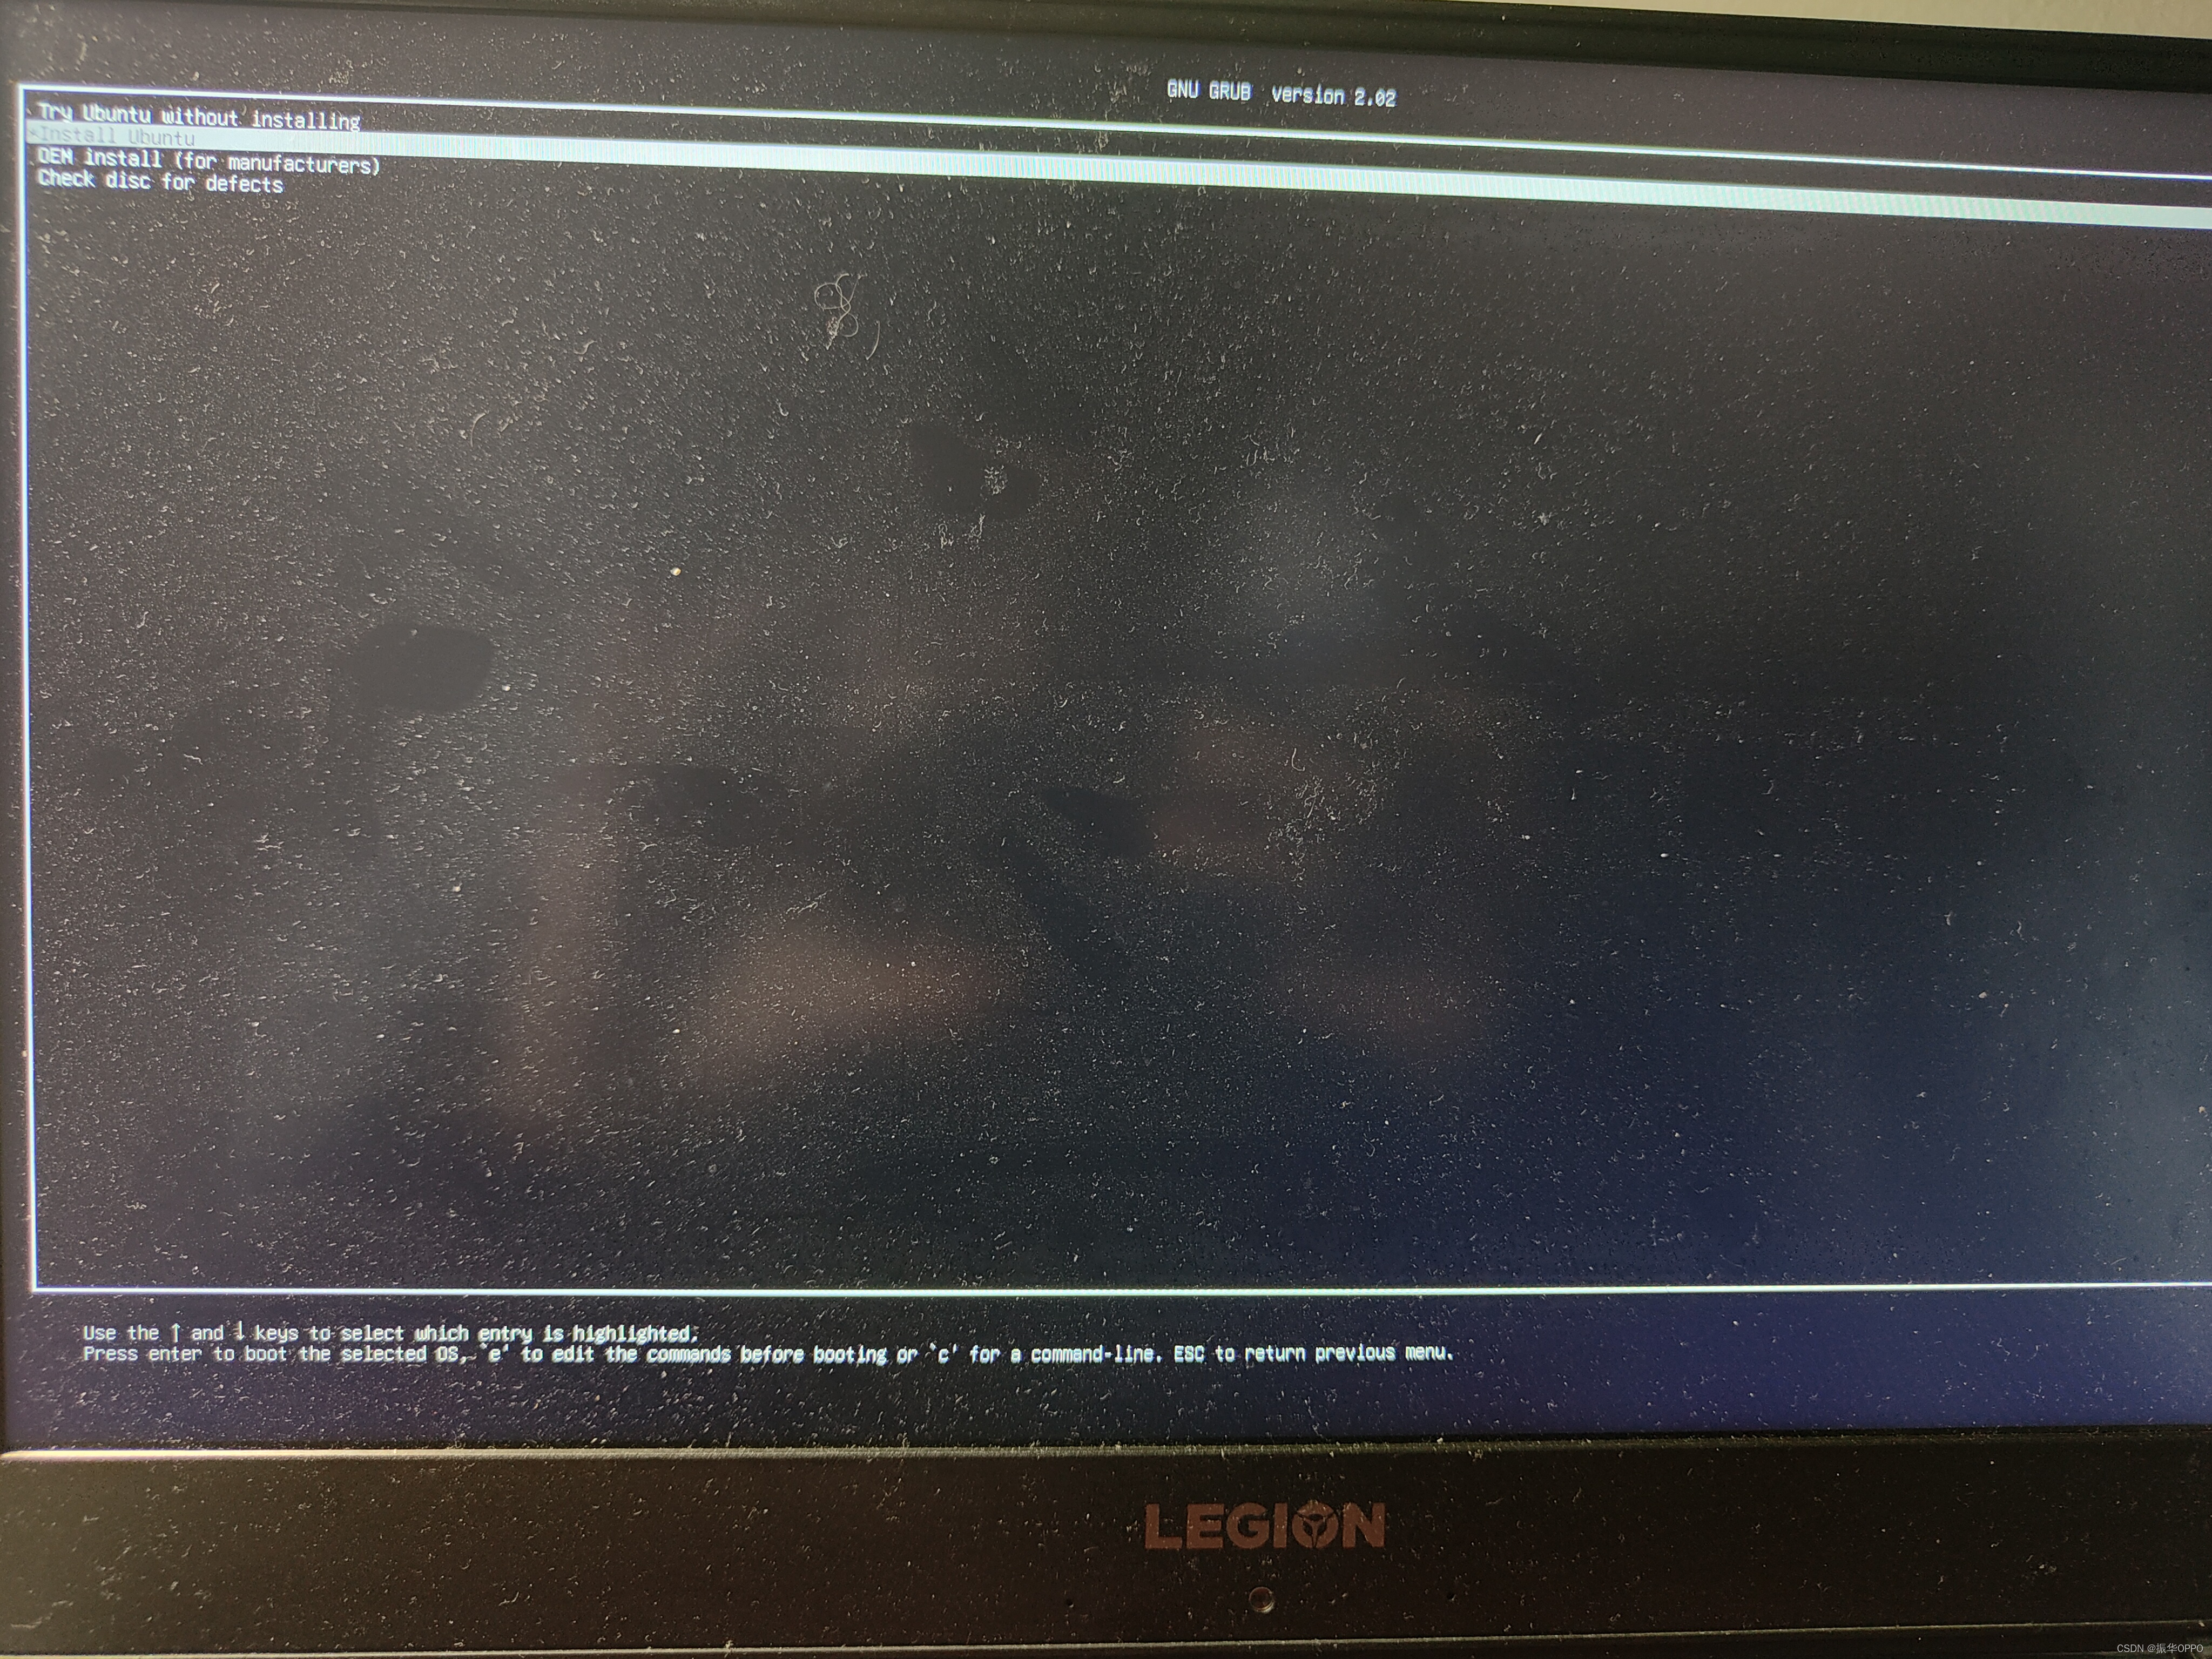
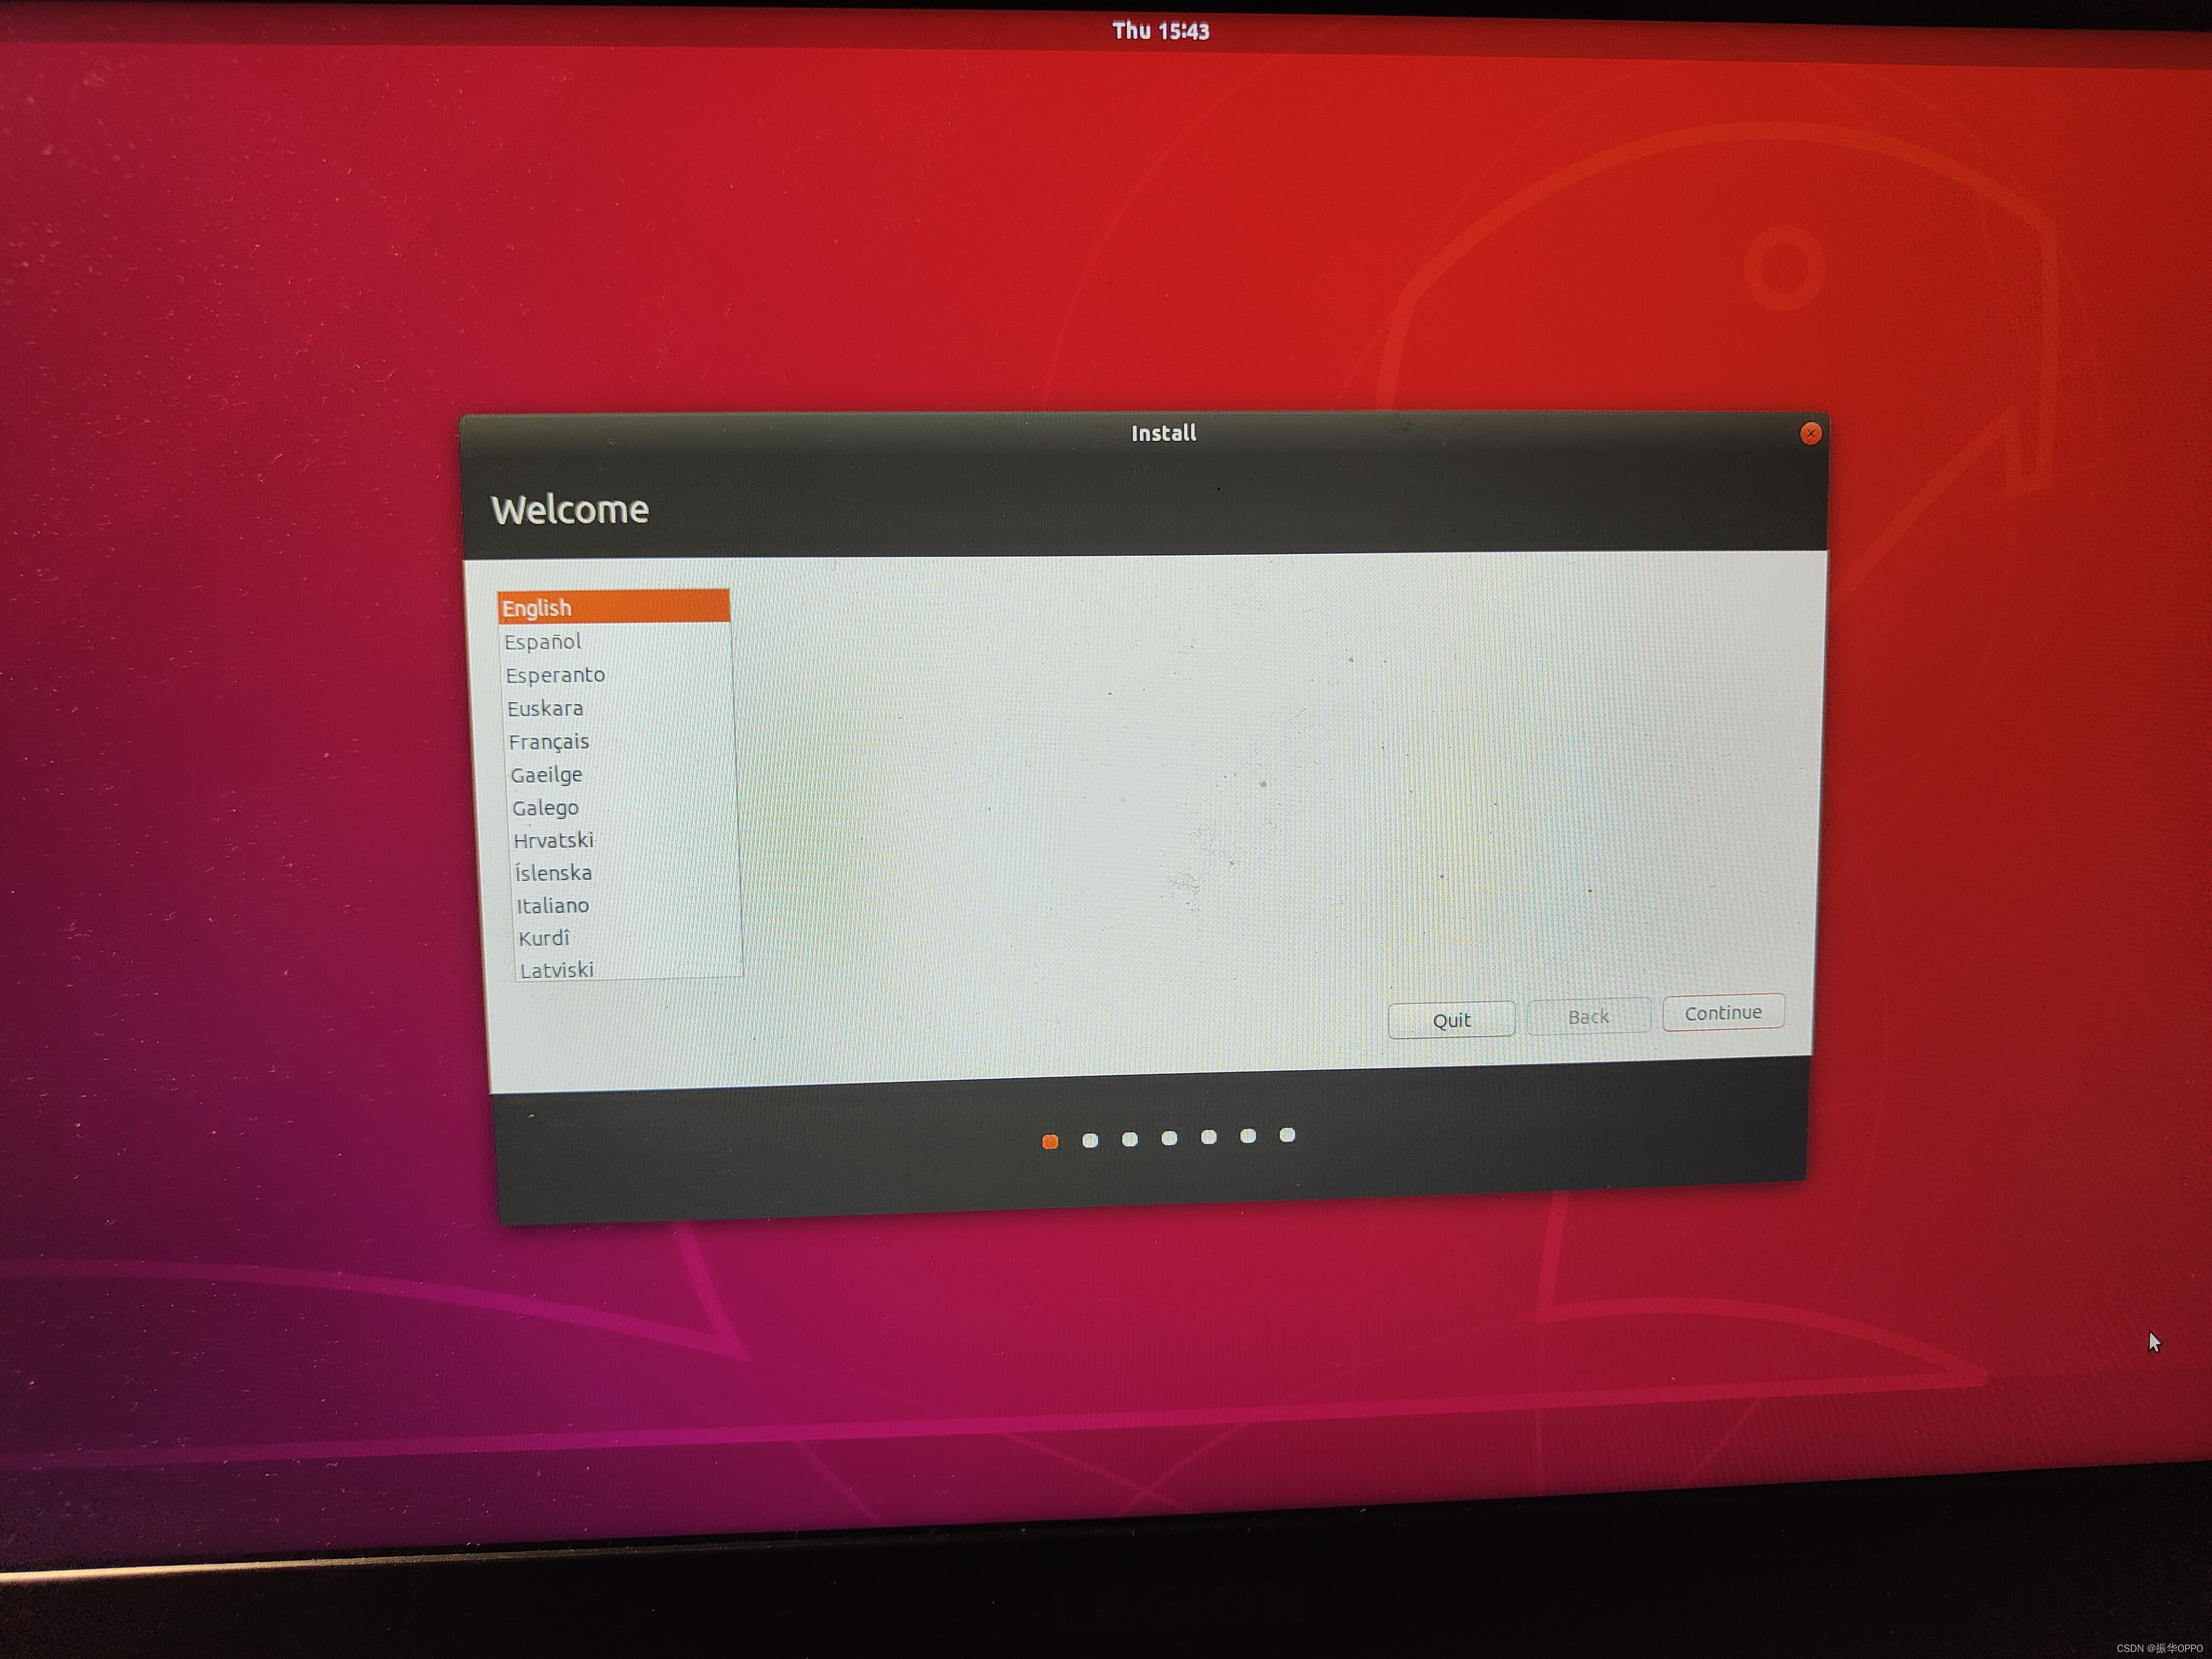
1. After entering this page, select the second item Install Ubuntu and press Enter.
2. Pull down the language bar and select Chinese (Simplified).
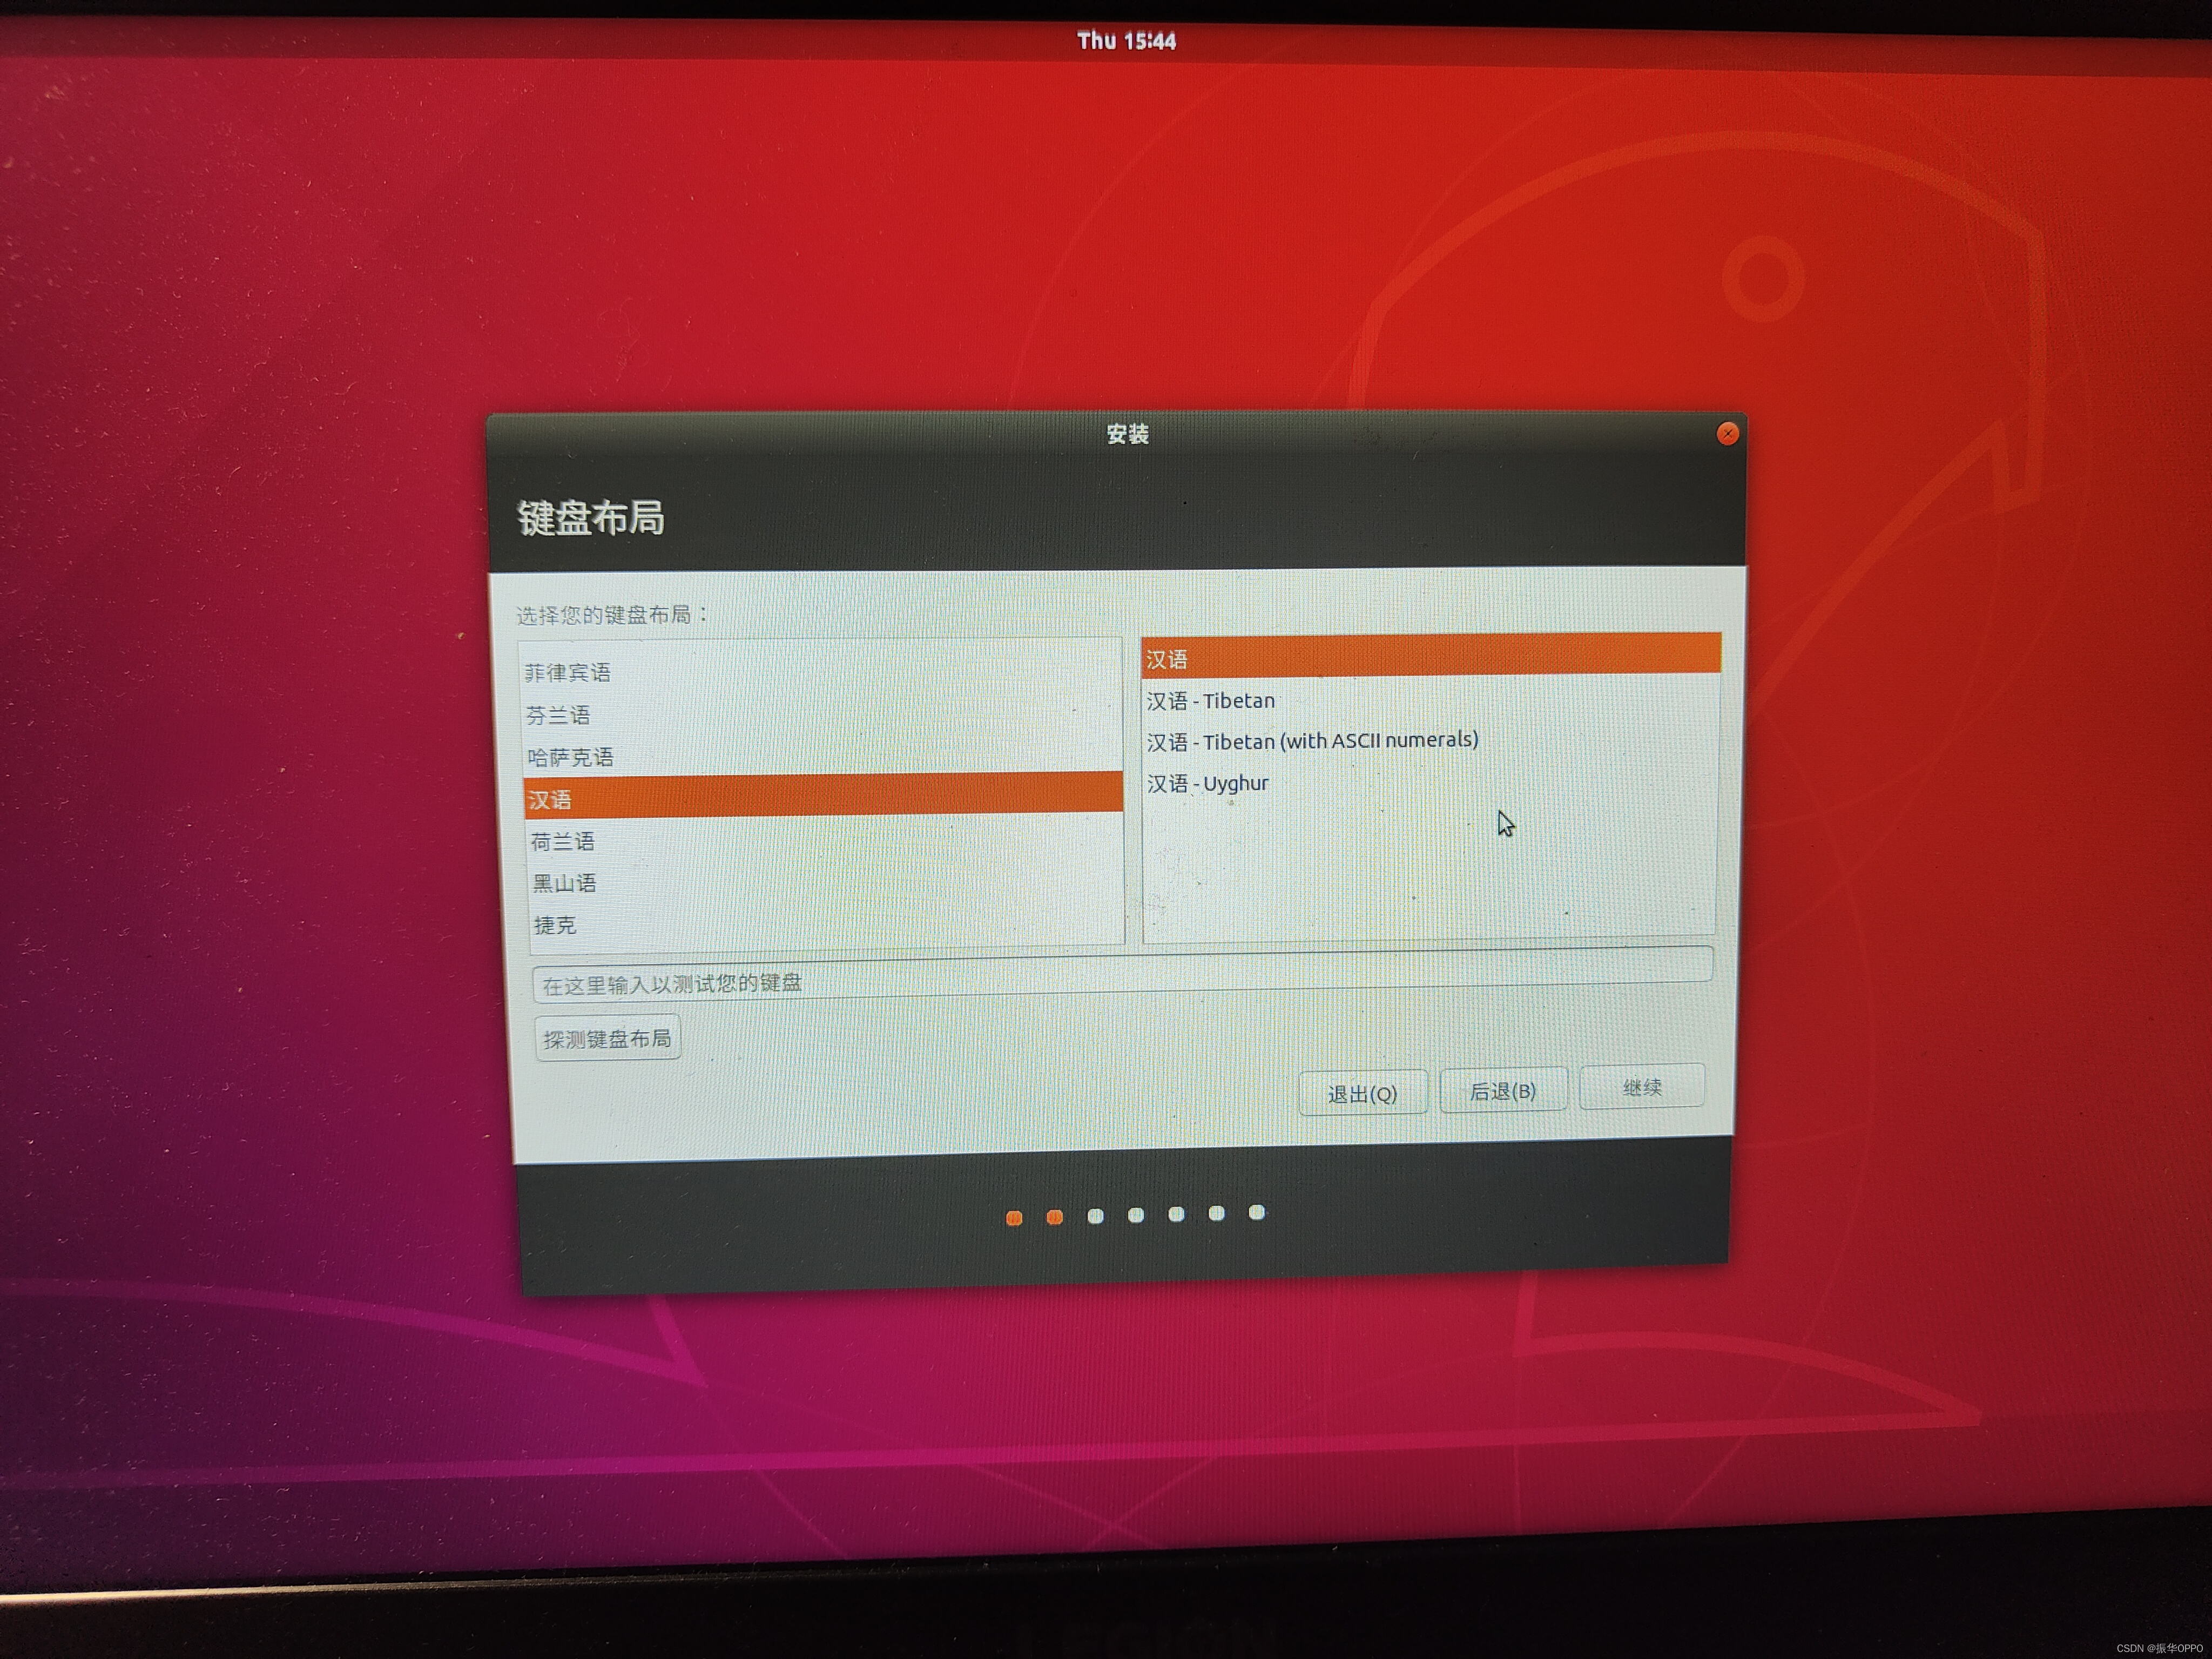
3. The keyboard defaults to Chinese.
4. Connect to the WiFi in the dormitory, this must be connected to the Internet, because the software needs to be downloaded when installing it later.

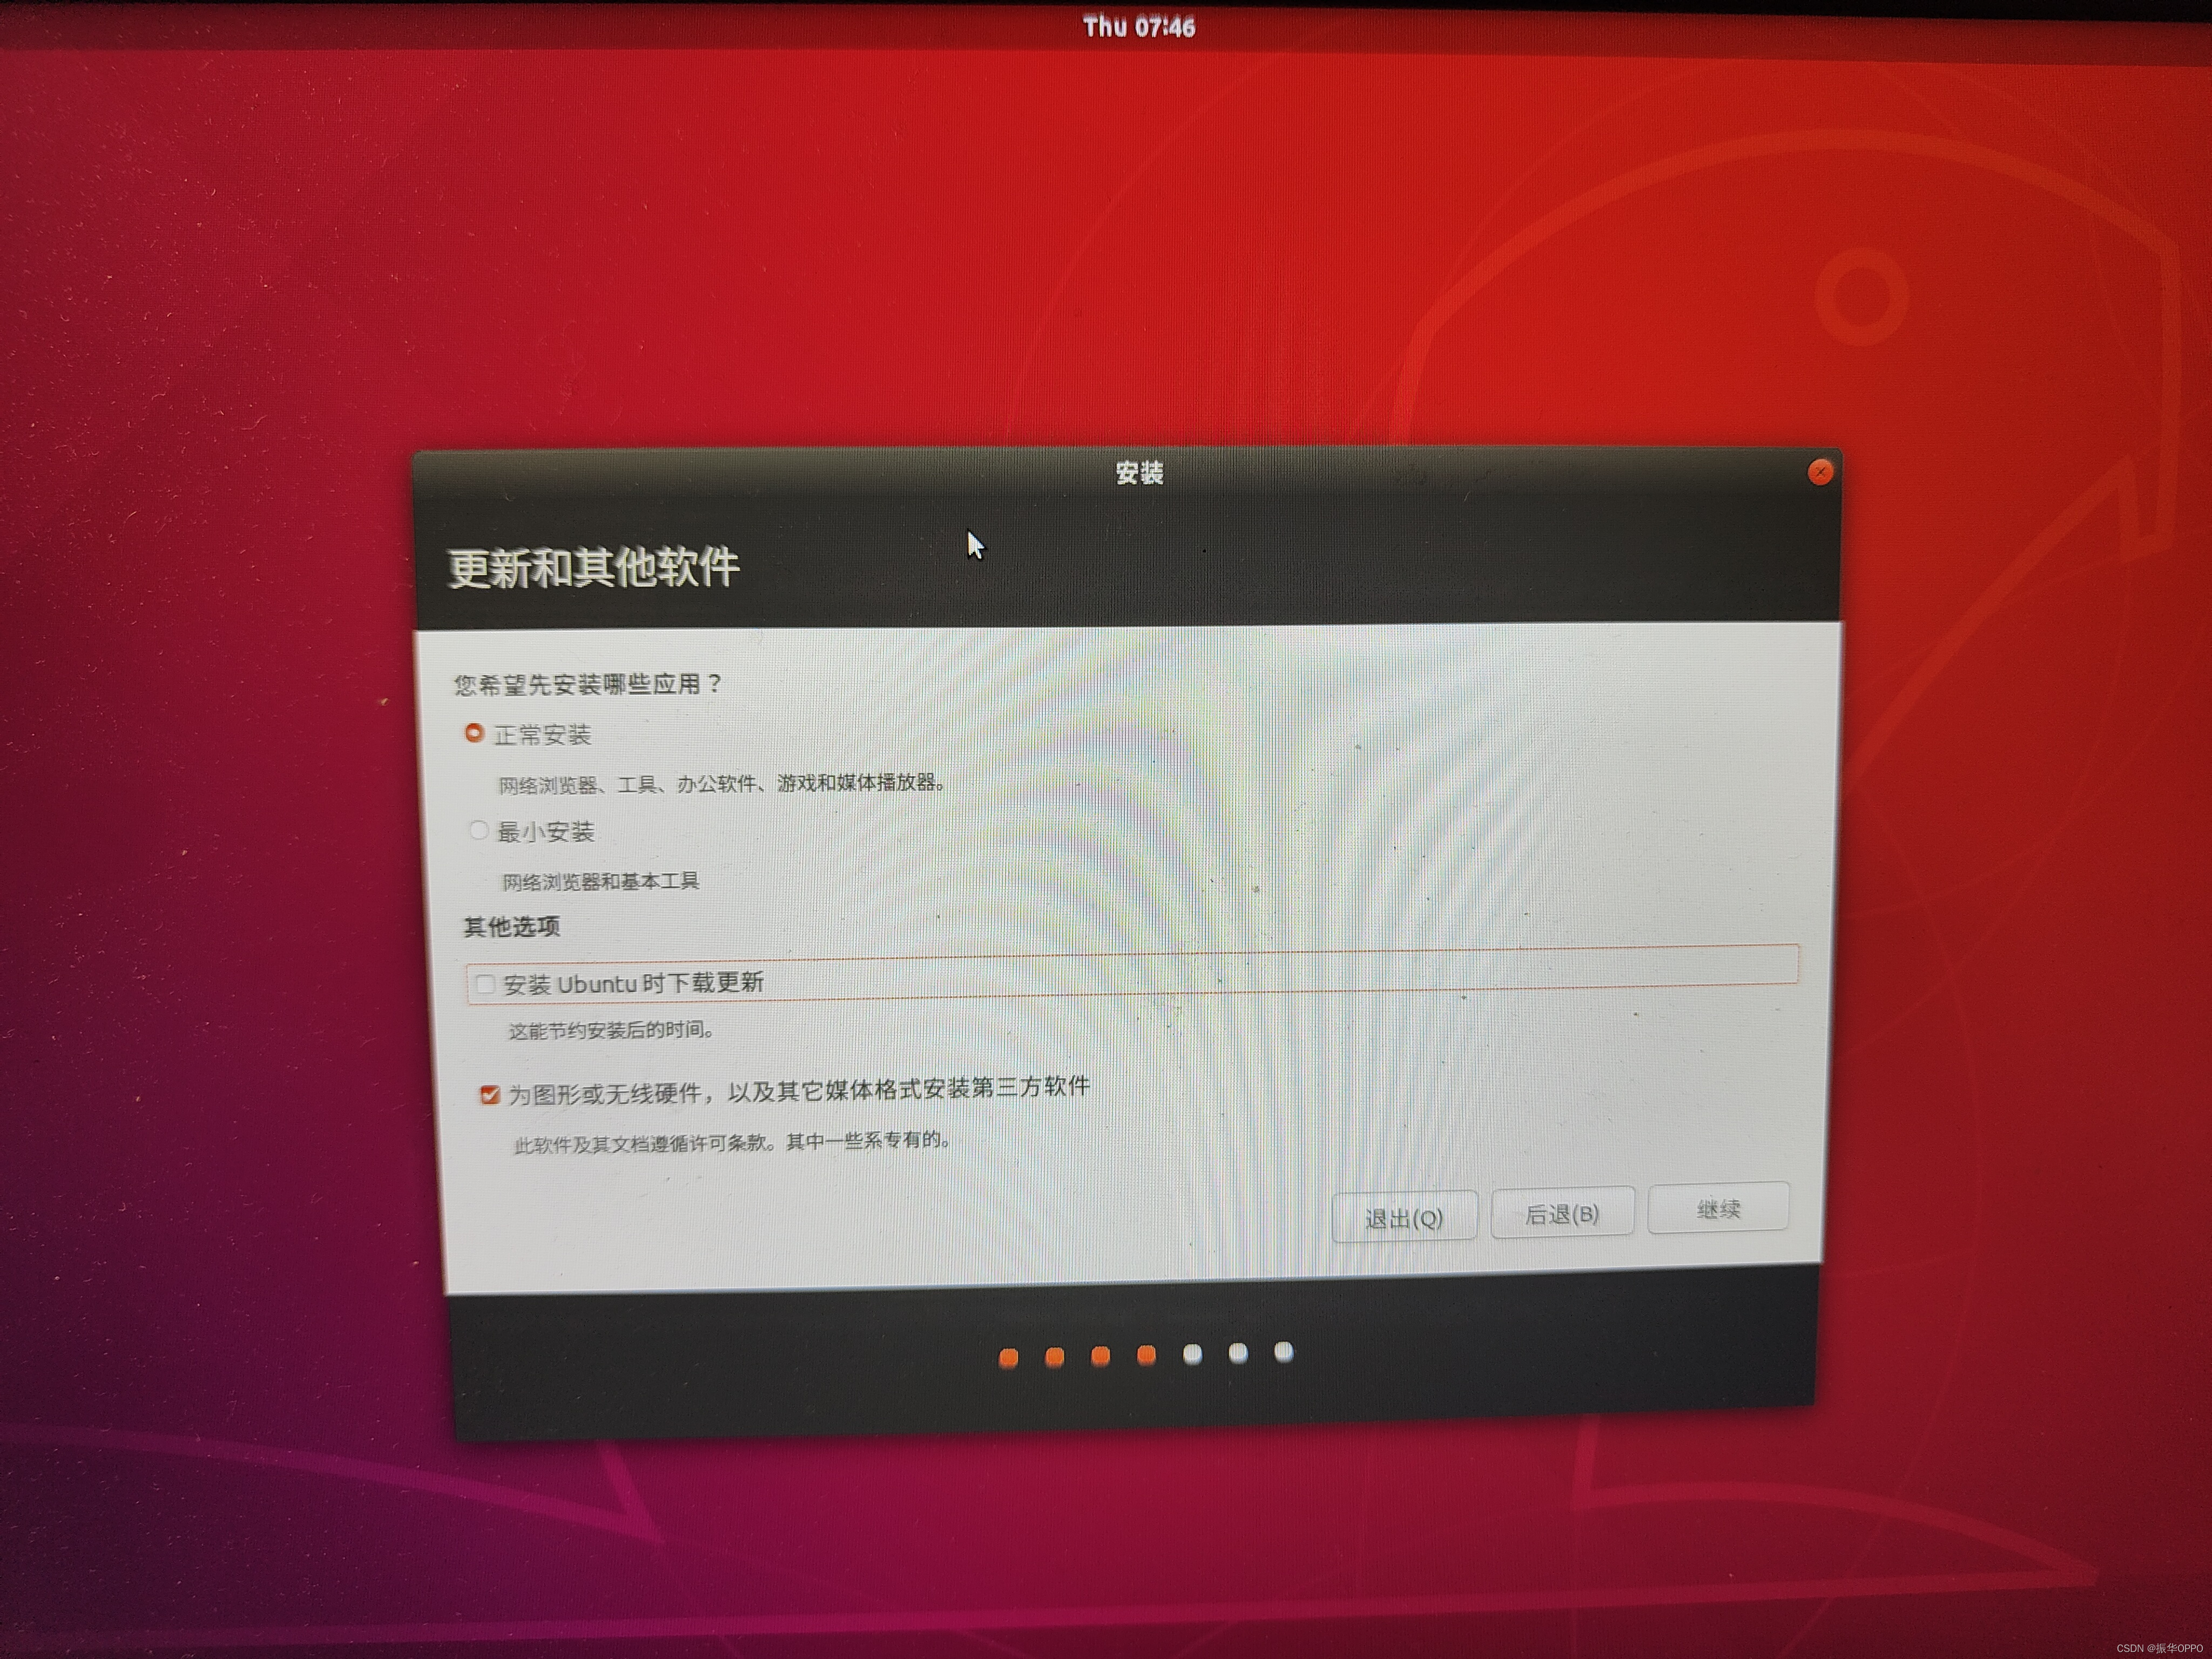
5. Select normal installation, then select [Install third-party software for graphics or wireless hardware, and MP3 and other media], and deselect the first one.
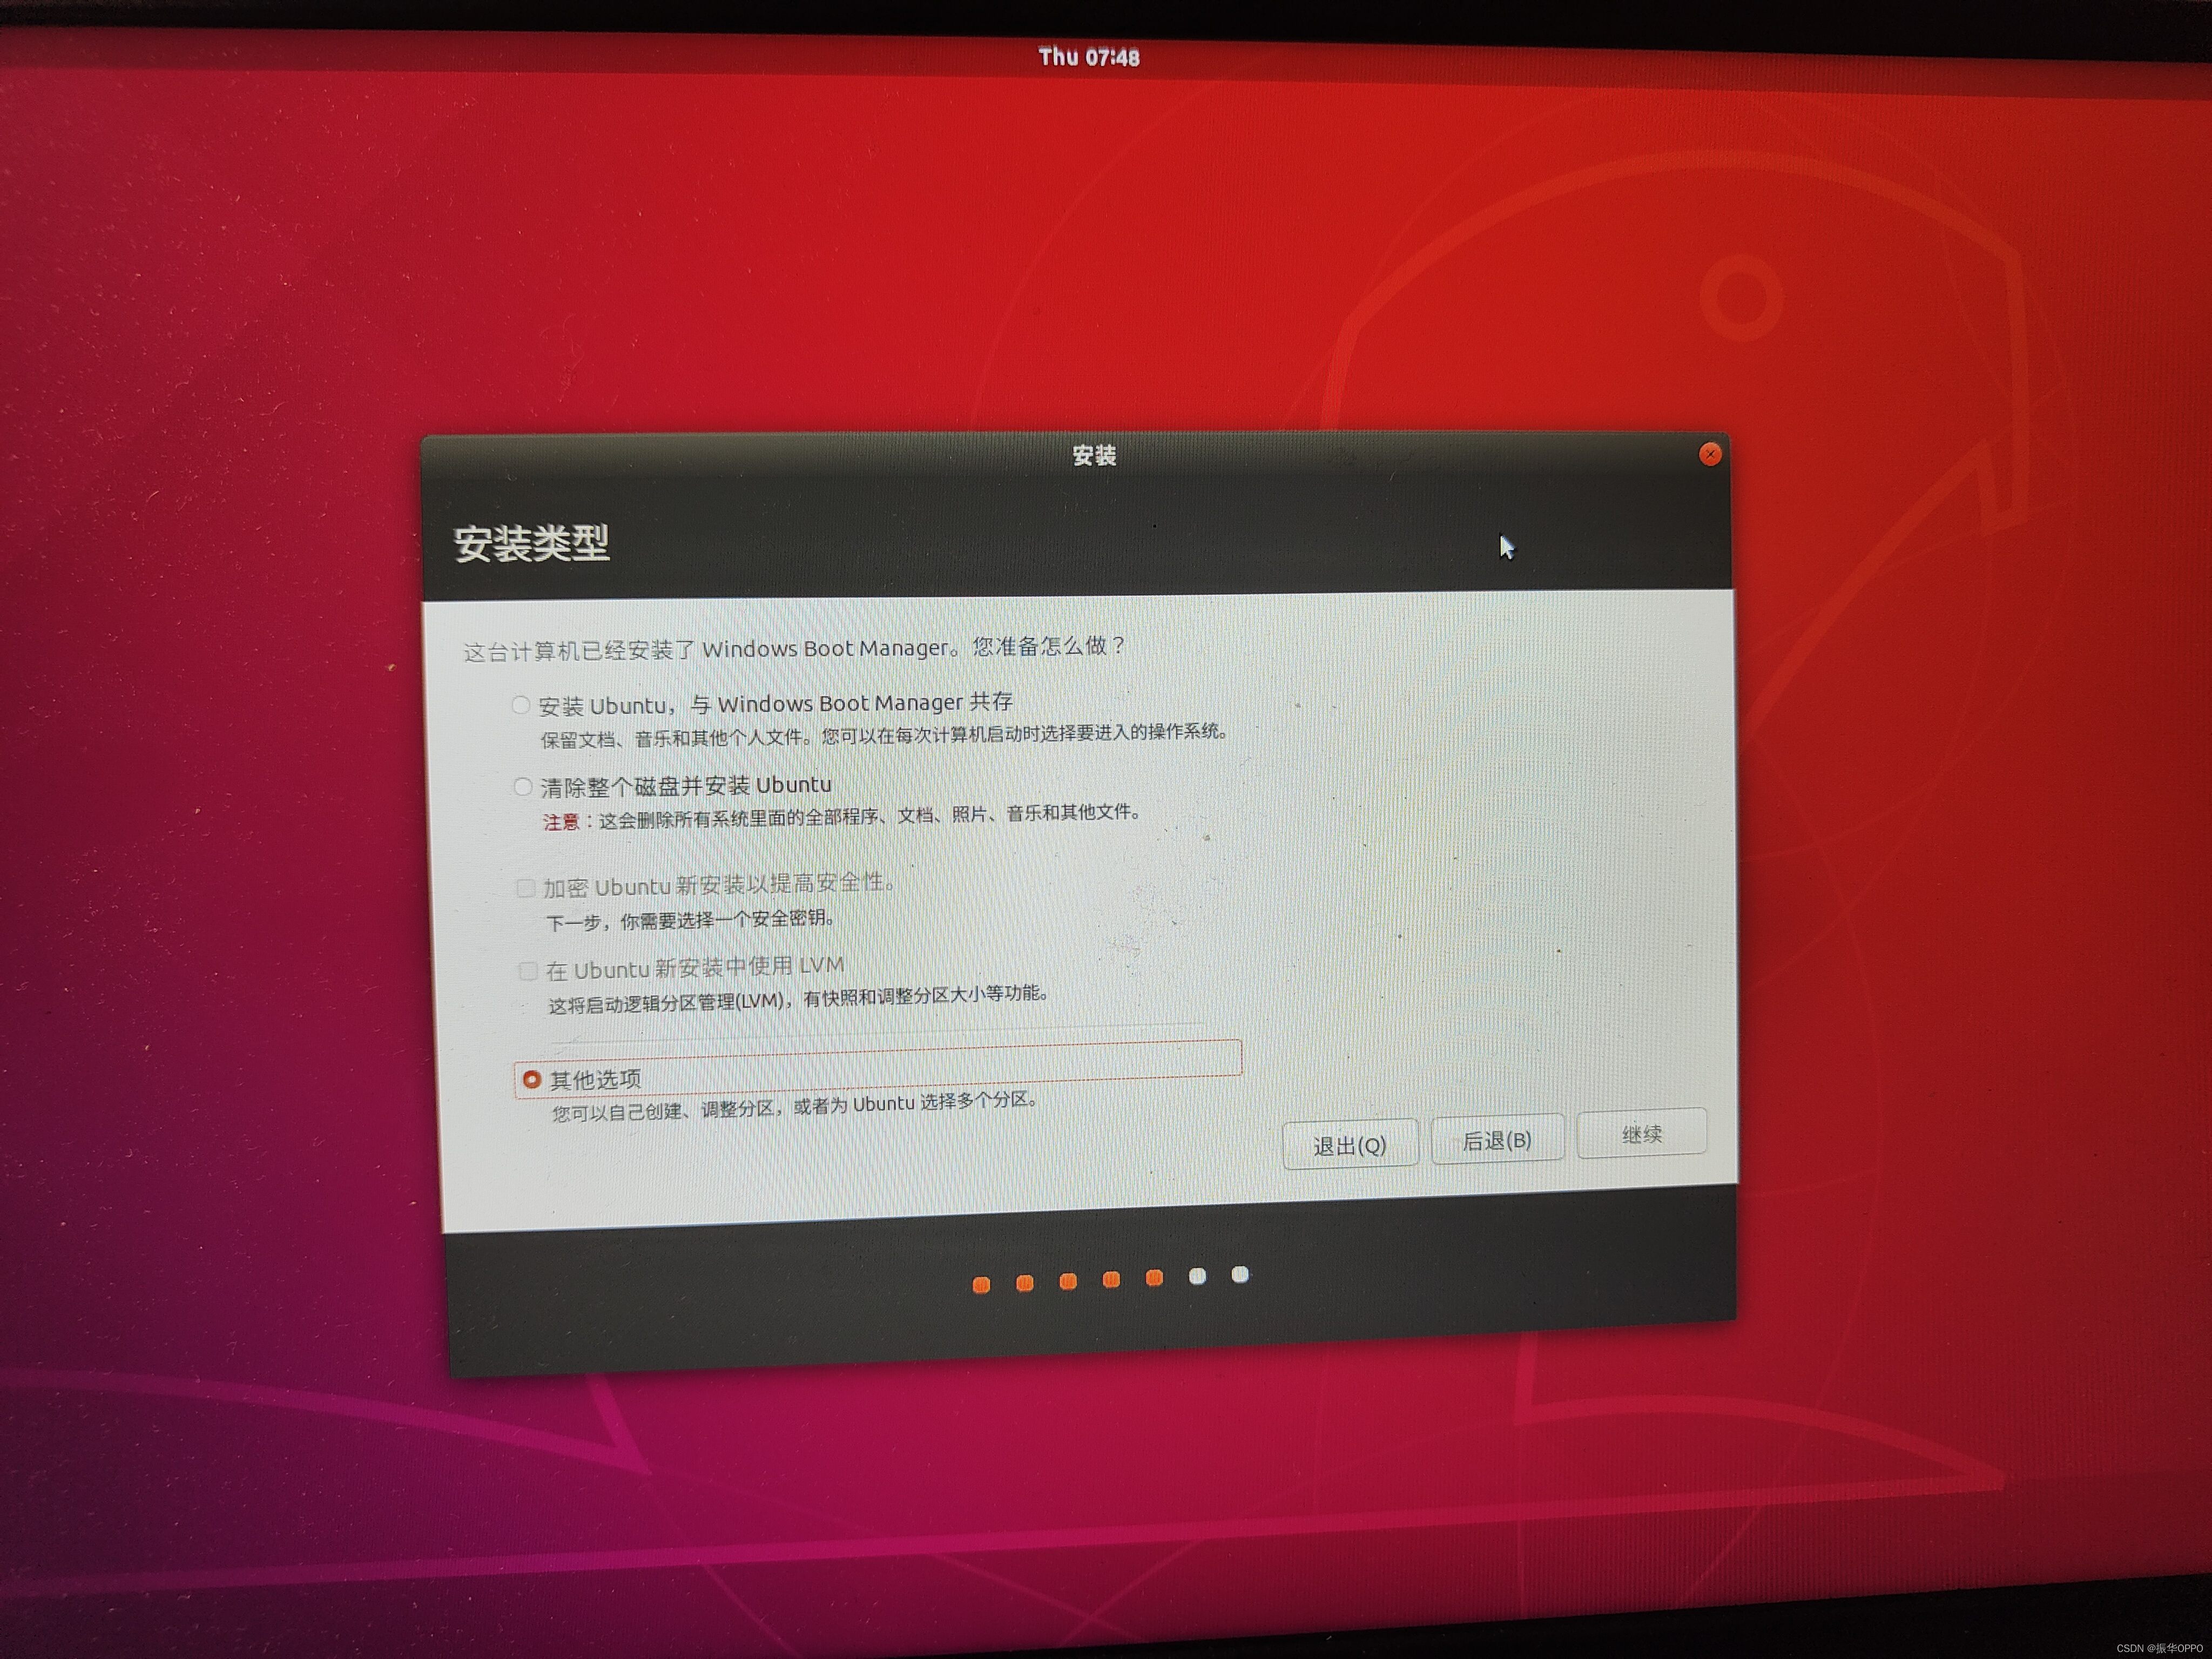
6. Be sure to select [Other Options] here, because manual partitioning is required, and then continue.
7. The partition interface is as follows. Here, you can see the free partitions that have been divided in the previous step. For a single hard disk, there is only one free partition of about 80G, and the size is given when you partition; for dual hard disks, there are two free partitions, one with a size of about 400M, and the other with a size of about 80G. Therefore, there is a slight difference between the single and double hard disks in the following partition operations. (Those 1M free partitions do not care about it, it is set by the system)
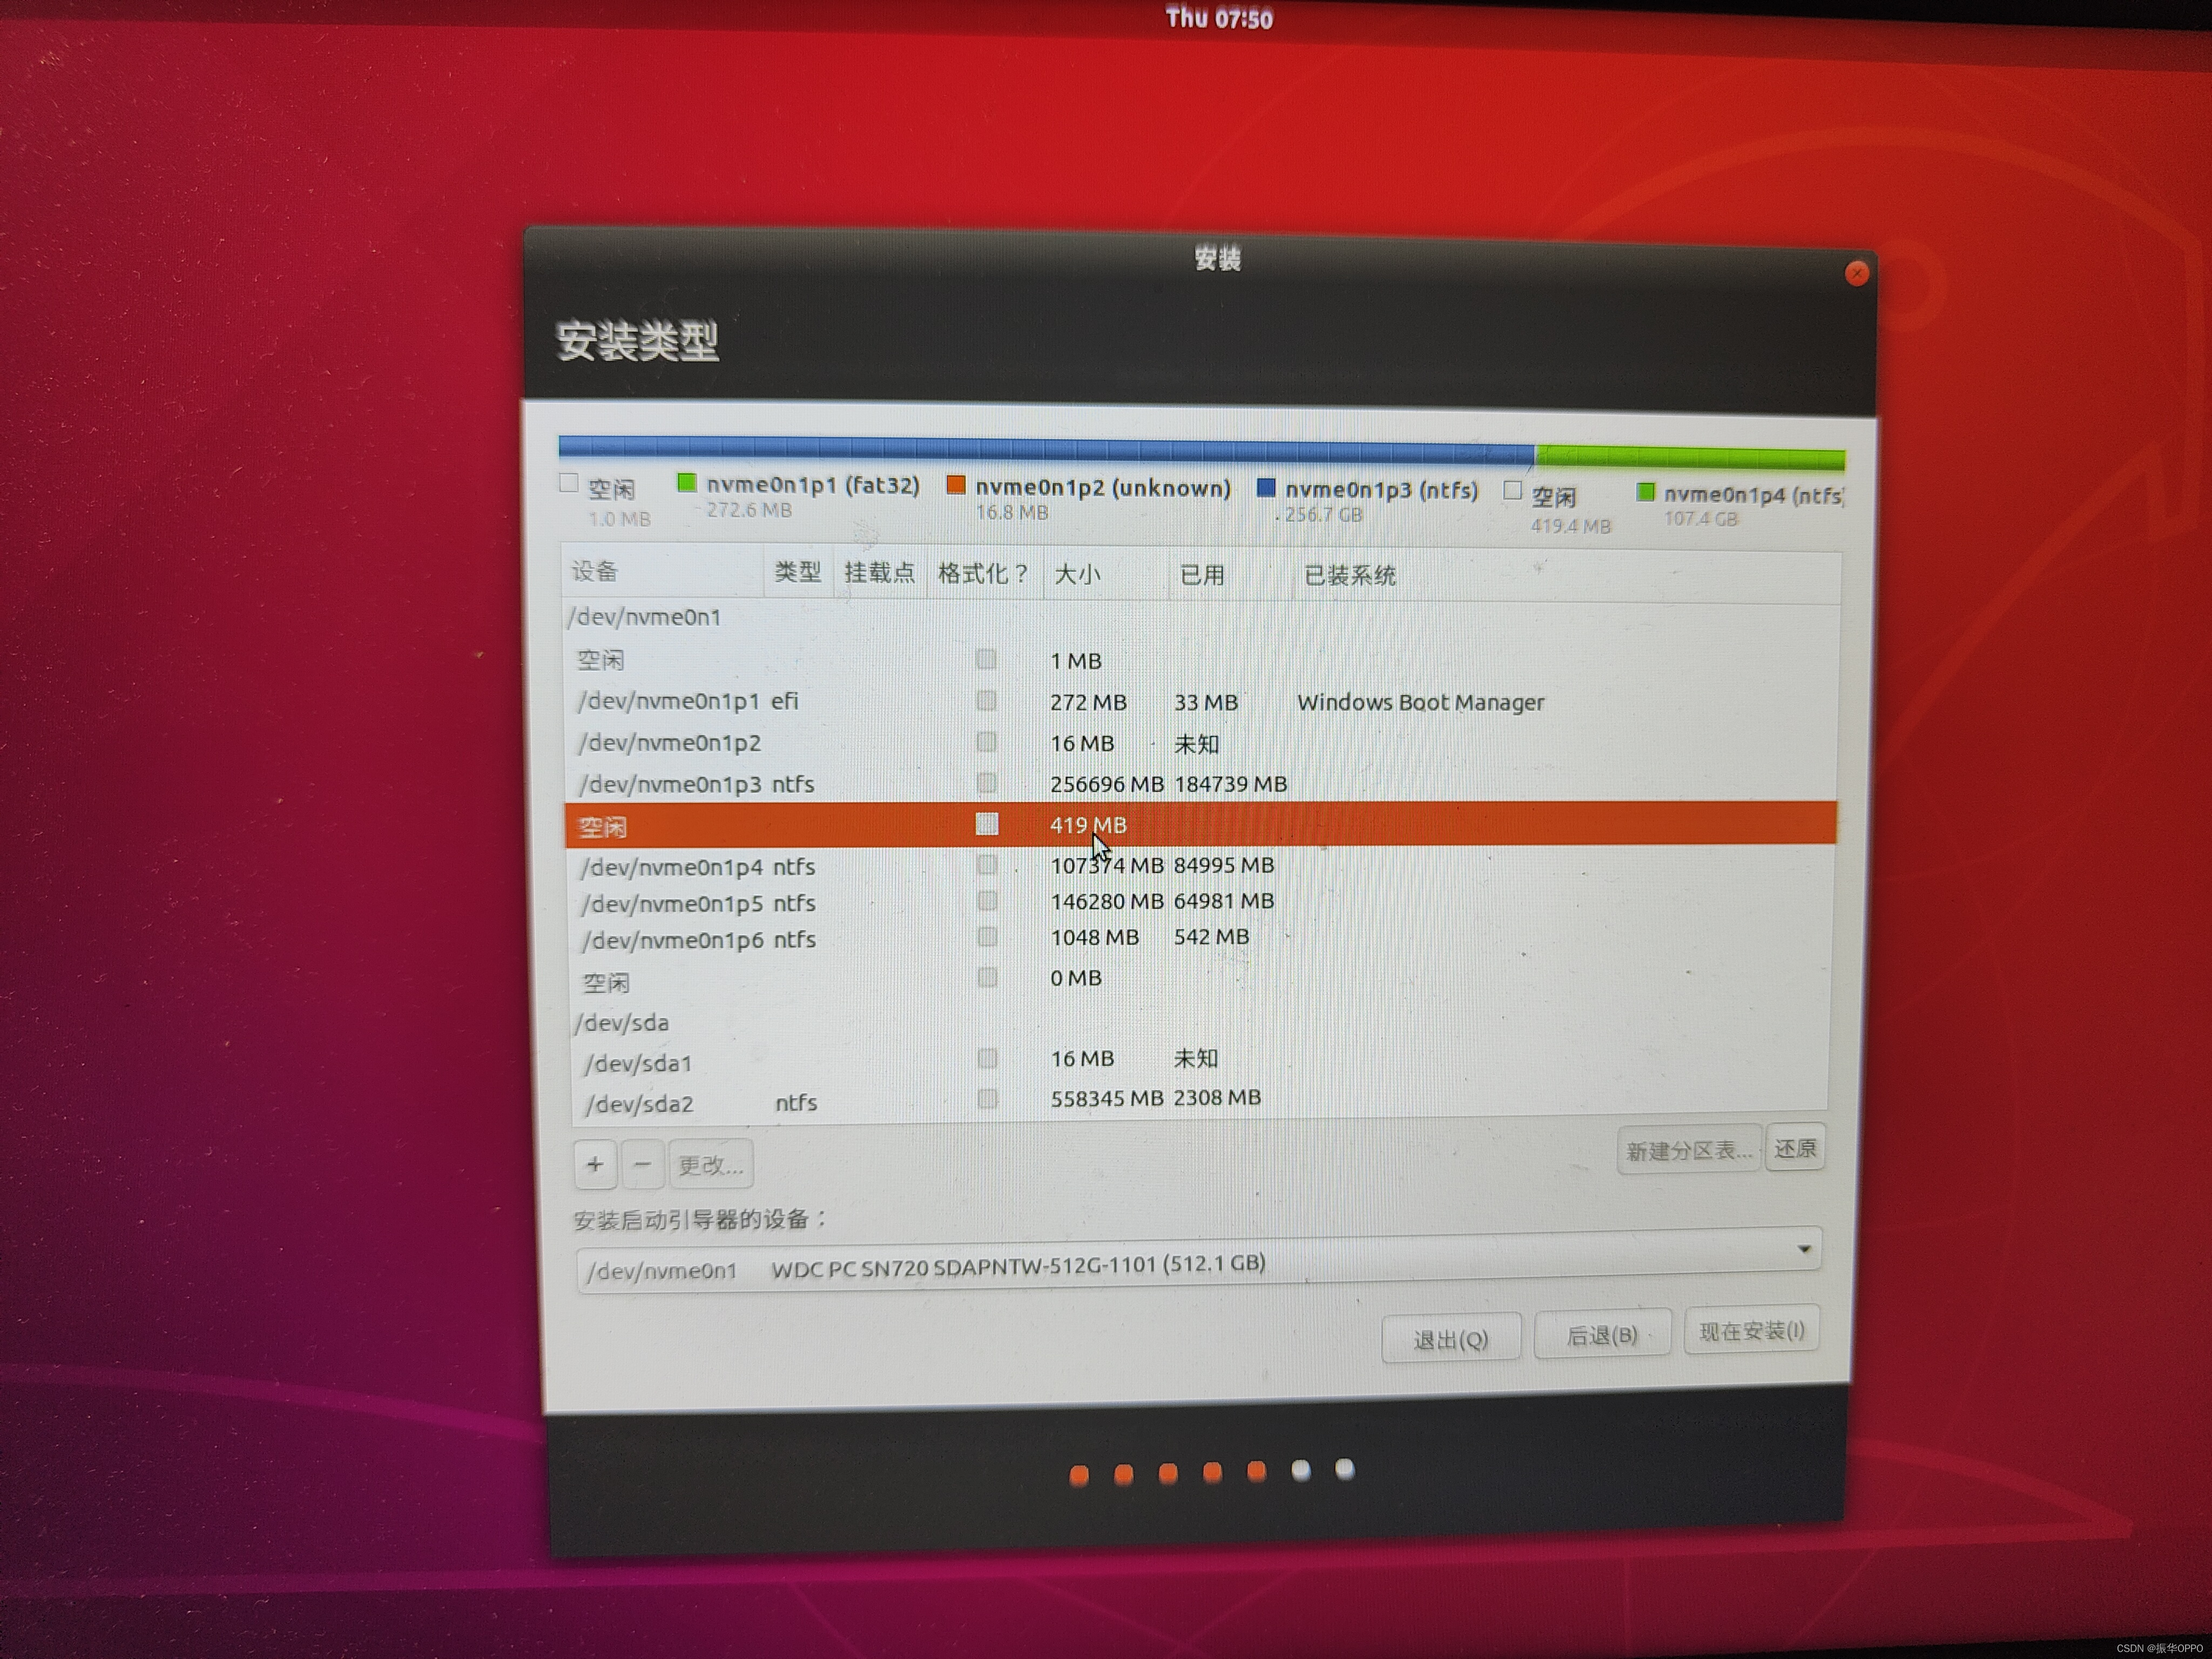
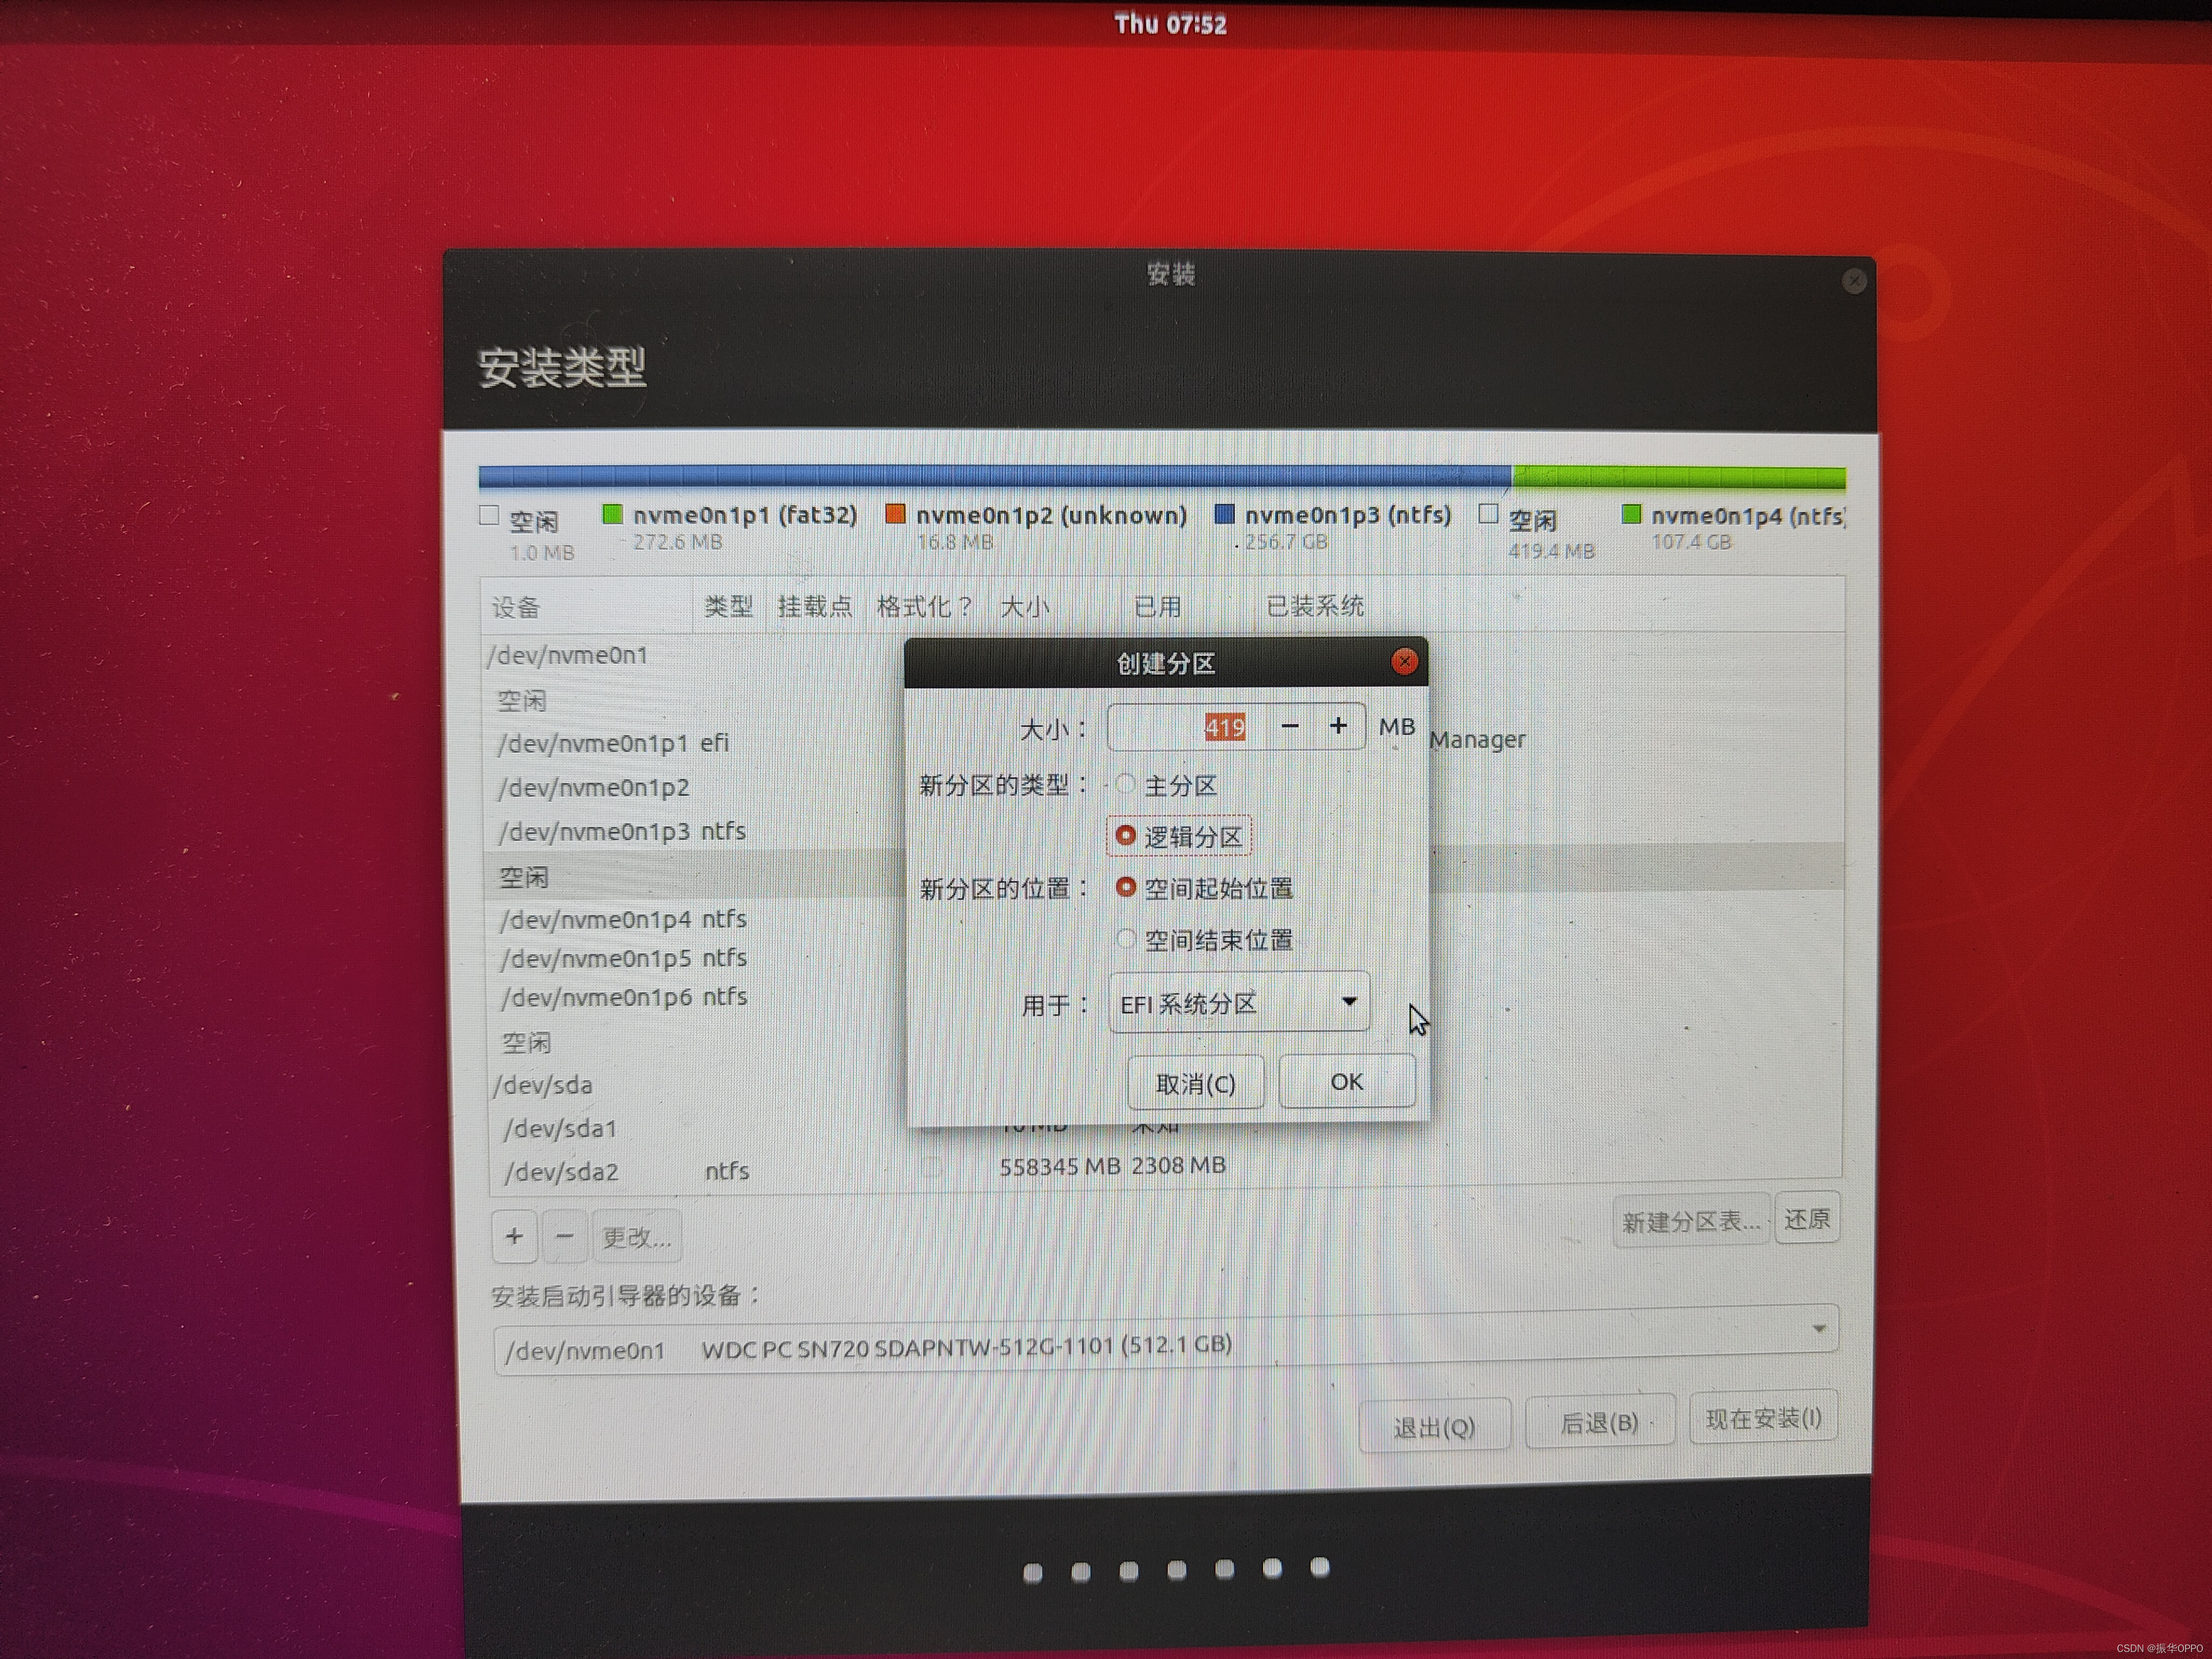
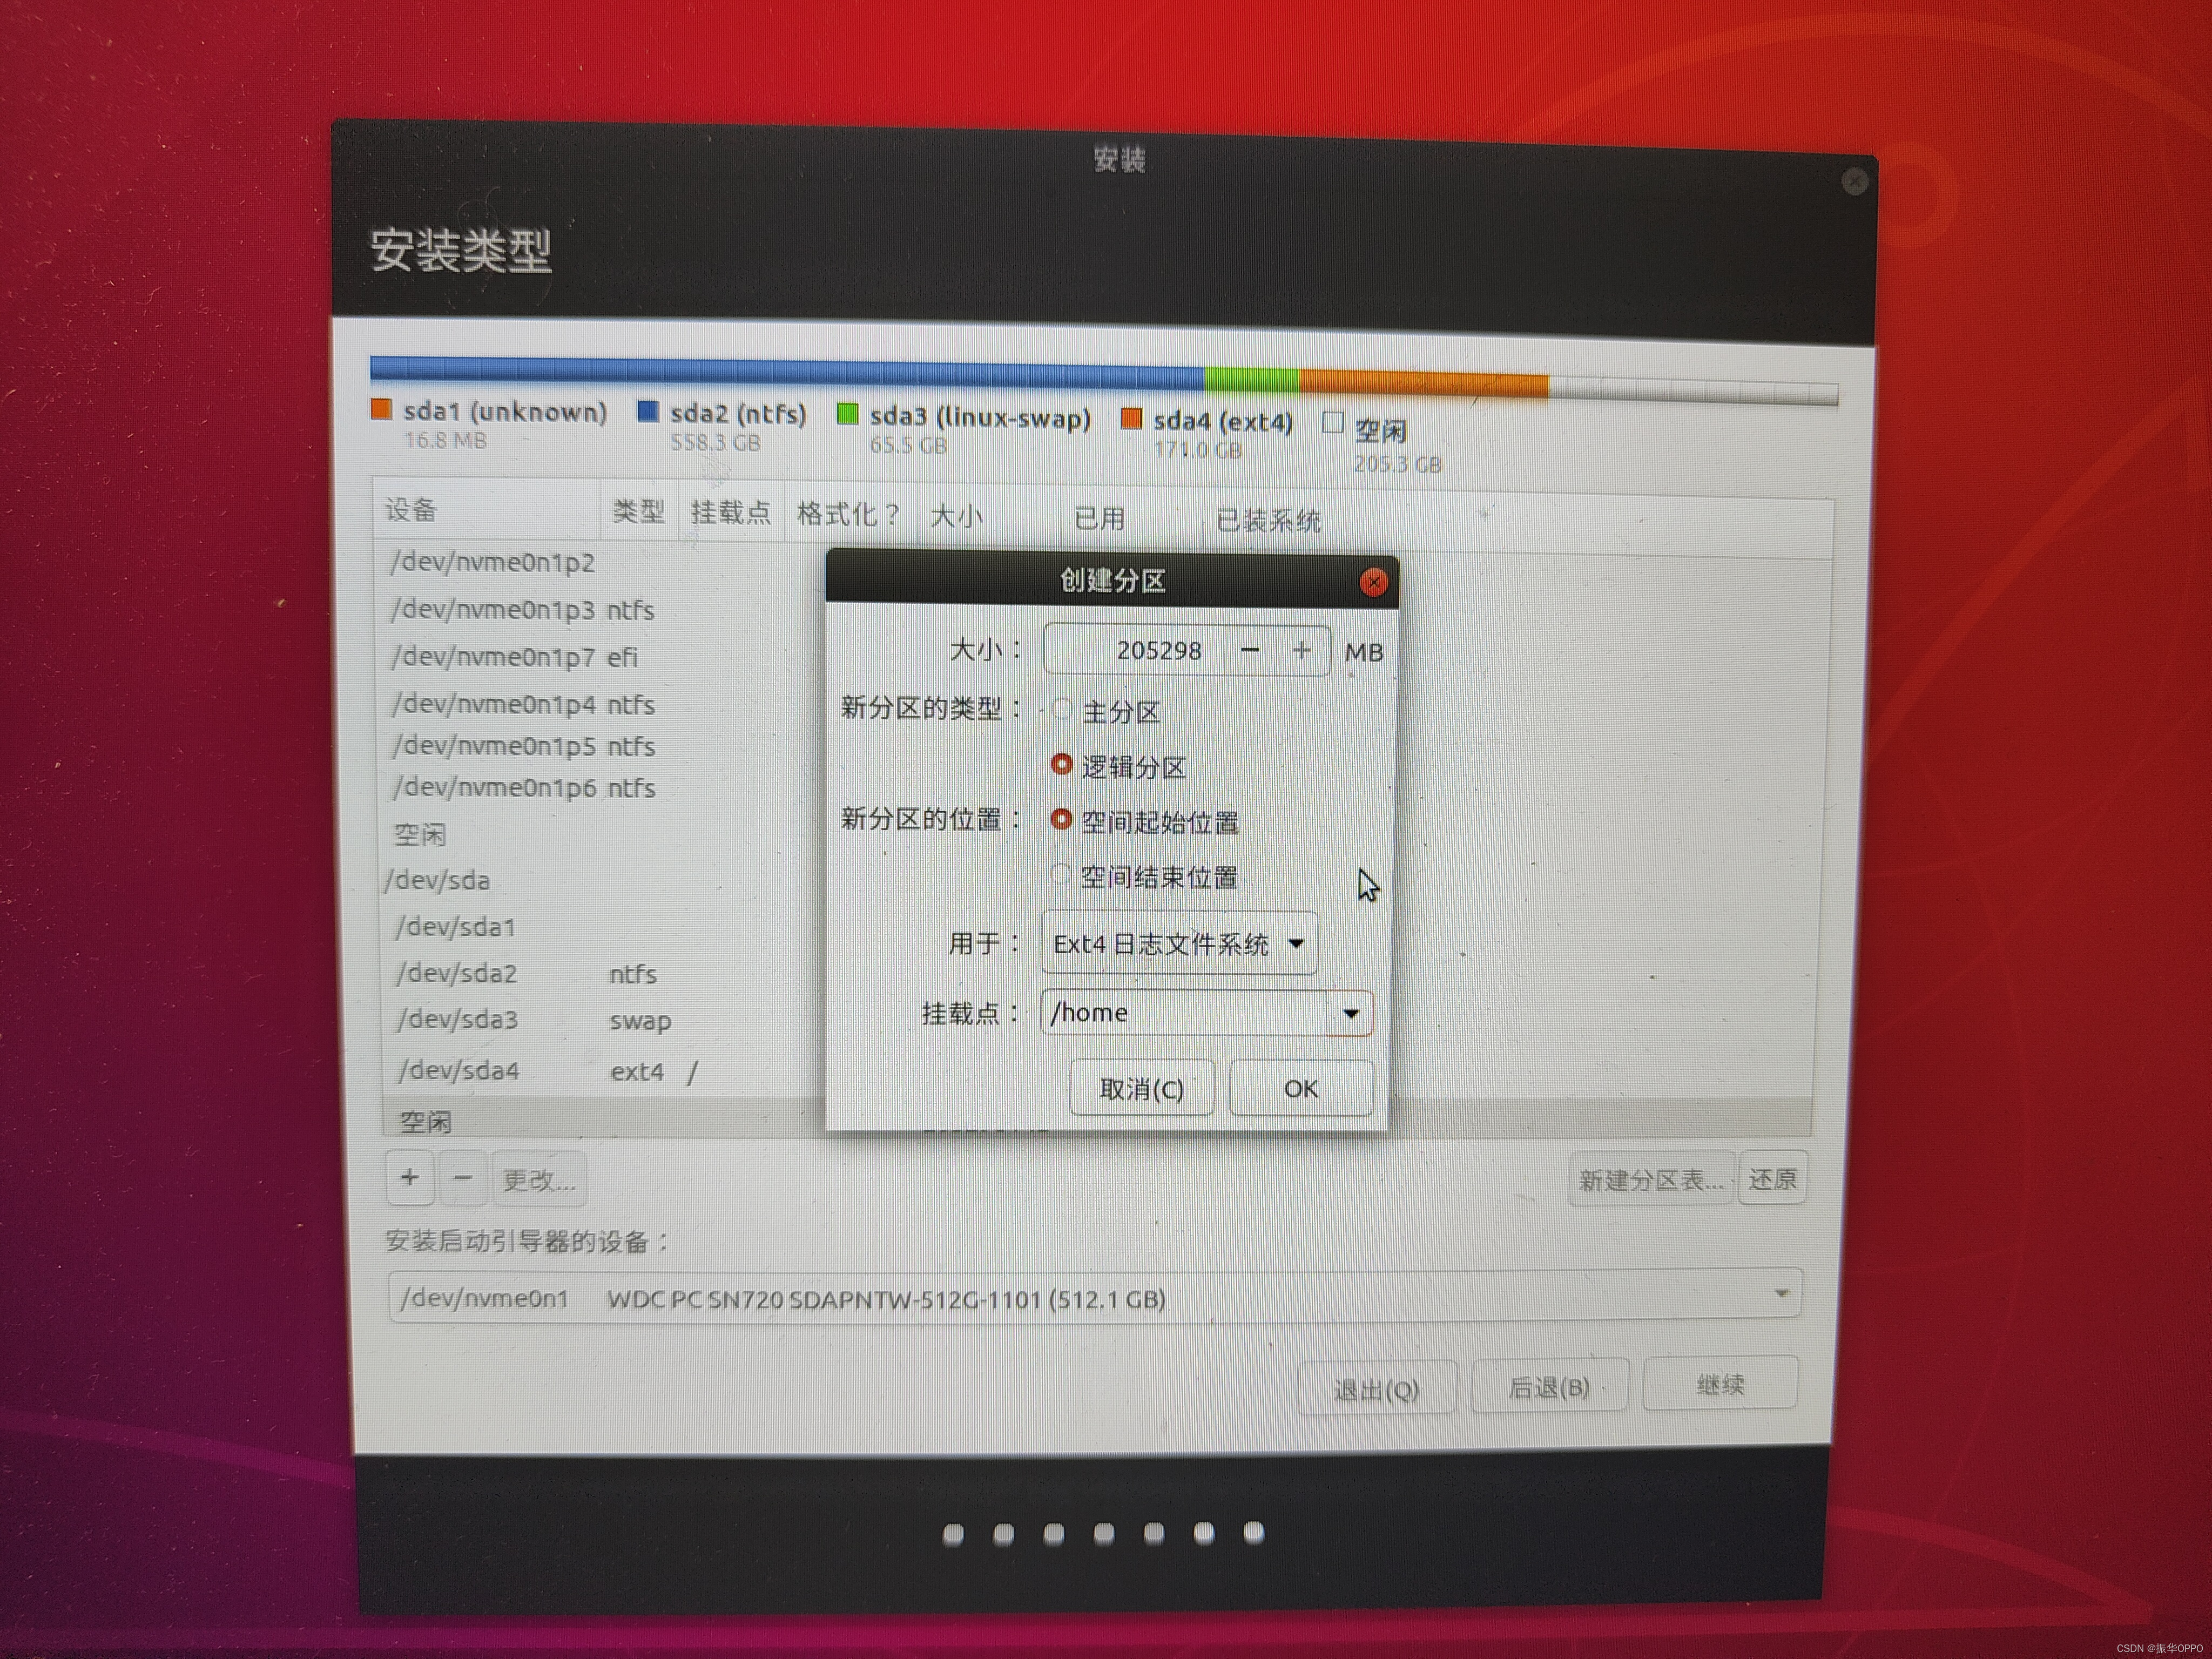
8. If it is a single hard disk, add it to the only 100G free partition, the size is 400M, the logical partition, the starting position of the space, used for efi; if it is dual Hard disk, find the pre-divided 400M free partition to add, logical partition, space starting position, for efi.
This partition is essential and is used to install the boot items of ubuntu. From this step down the single and double hard drives are the same, and they are all added to the 80G free partition.
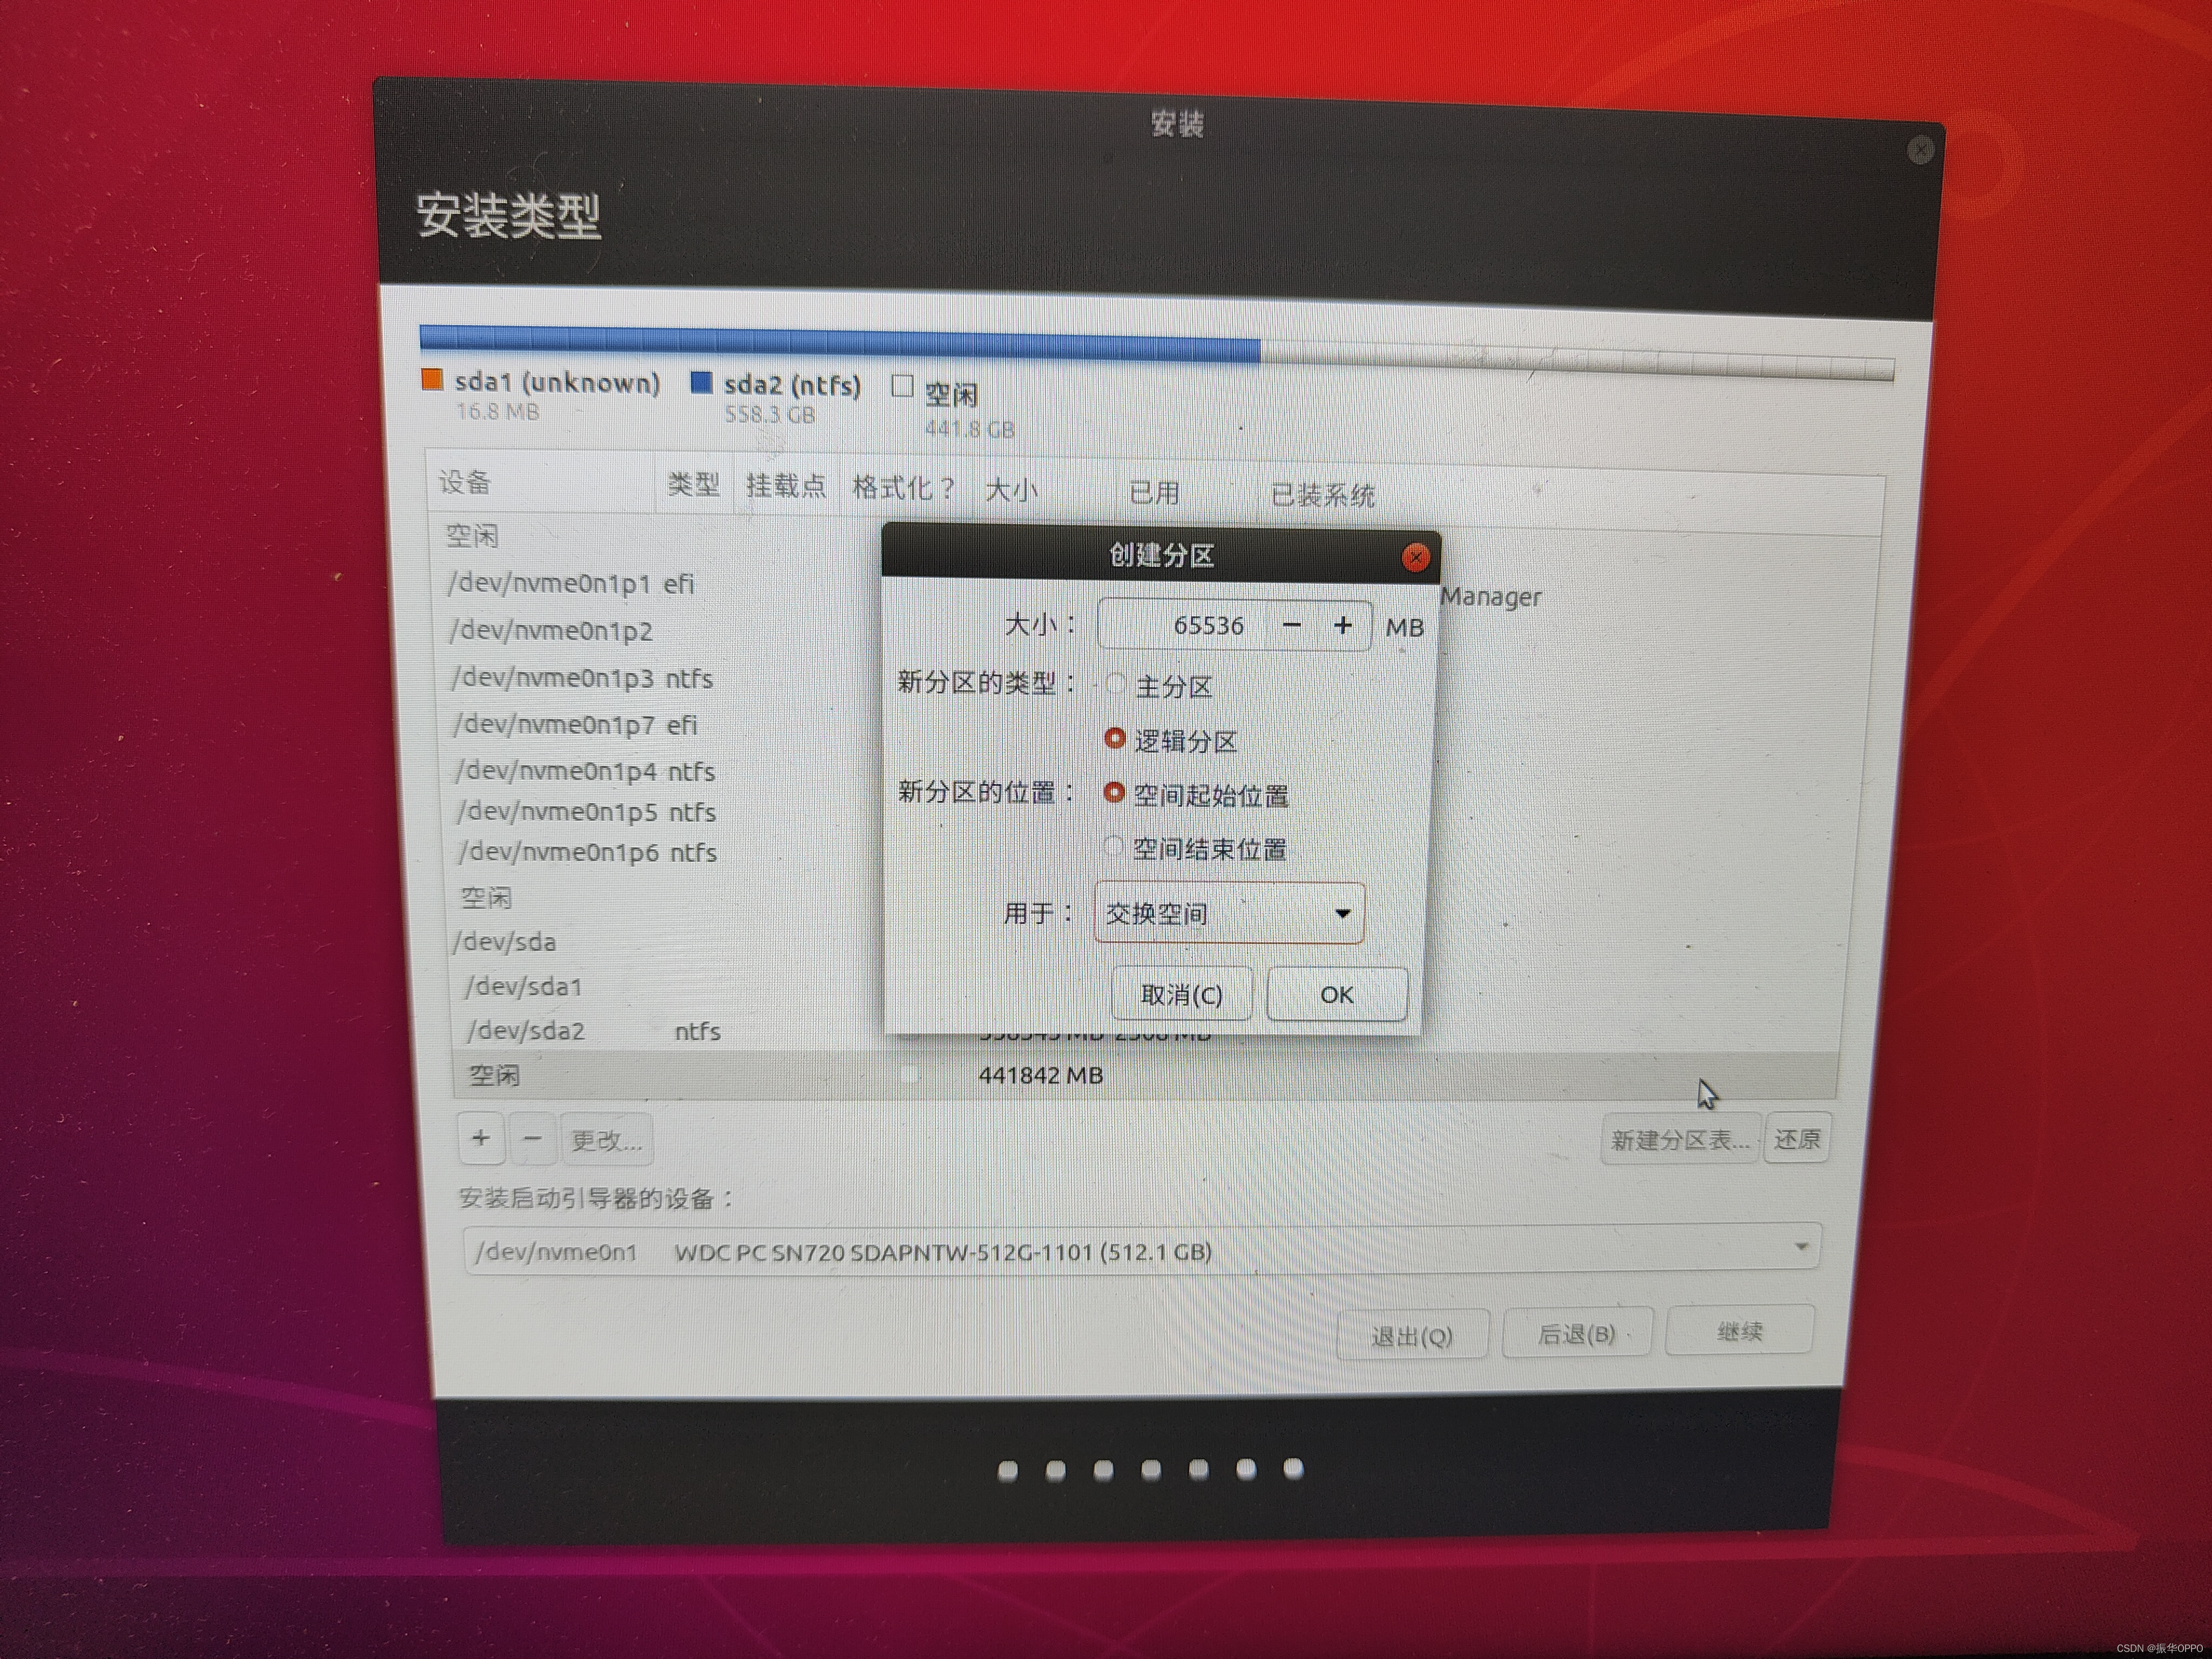
9. swap, Chinese is "swap space" , it acts as the virtual memory of ubuntu, the general size is about 2 times of the physical memory of the computer, it can be divided into 16G, logical partition, space starting position, used for "swap" or "swap space".
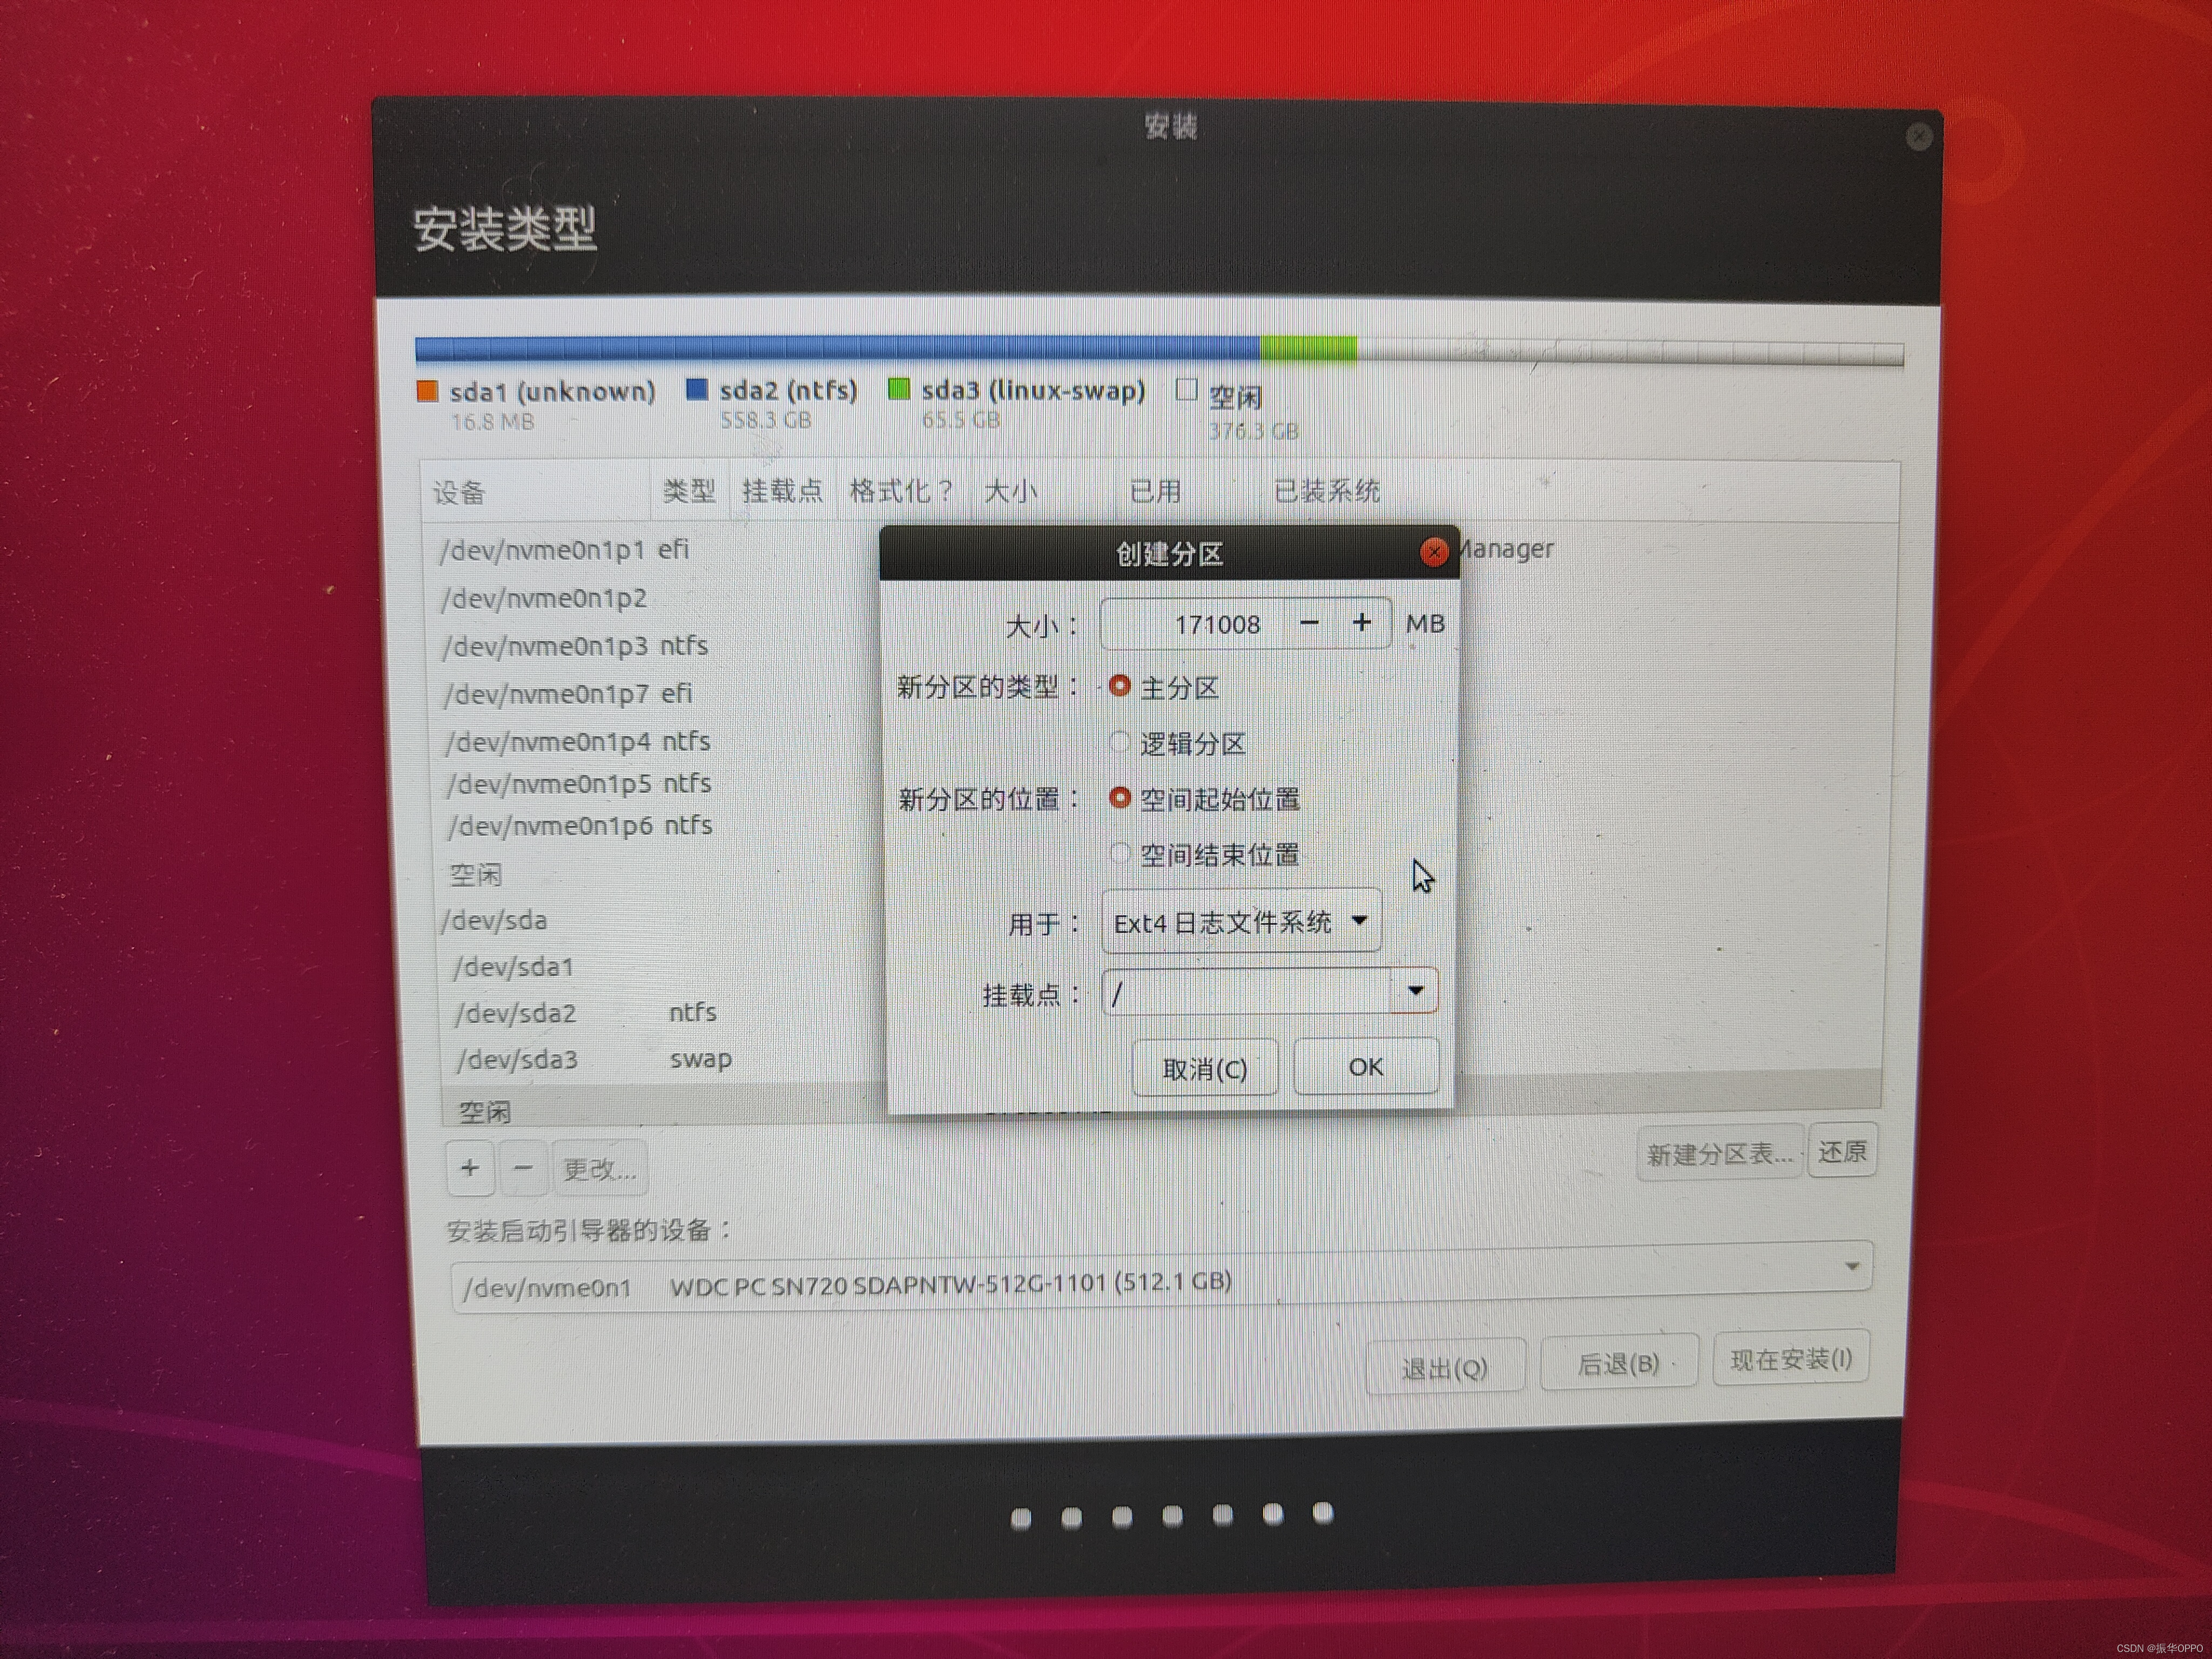
10. /: This is the root directory of ubuntu, used to install the system and software. It is equivalent to the C drive of Windows. We divide it into 30G, the main partition, and the starting position of the space. It is used for the "ext4 journal file system", and the The load point is "/" (adjusted according to your free space, if the space is enough, you can give more, after all, ubuntu software is installed in the root directory by default)
11. /home: Equivalent to other Windows disks, the rest of the space is allocated to it, logical partition, the starting position of the space, used for "ext4 journal file system", the mount point is "/home", I personally recommend The bigger the home directory, the better.
OK, the partitioning is completed, you can partition according to the above description, there will be no problem, because I have always divided it like this.
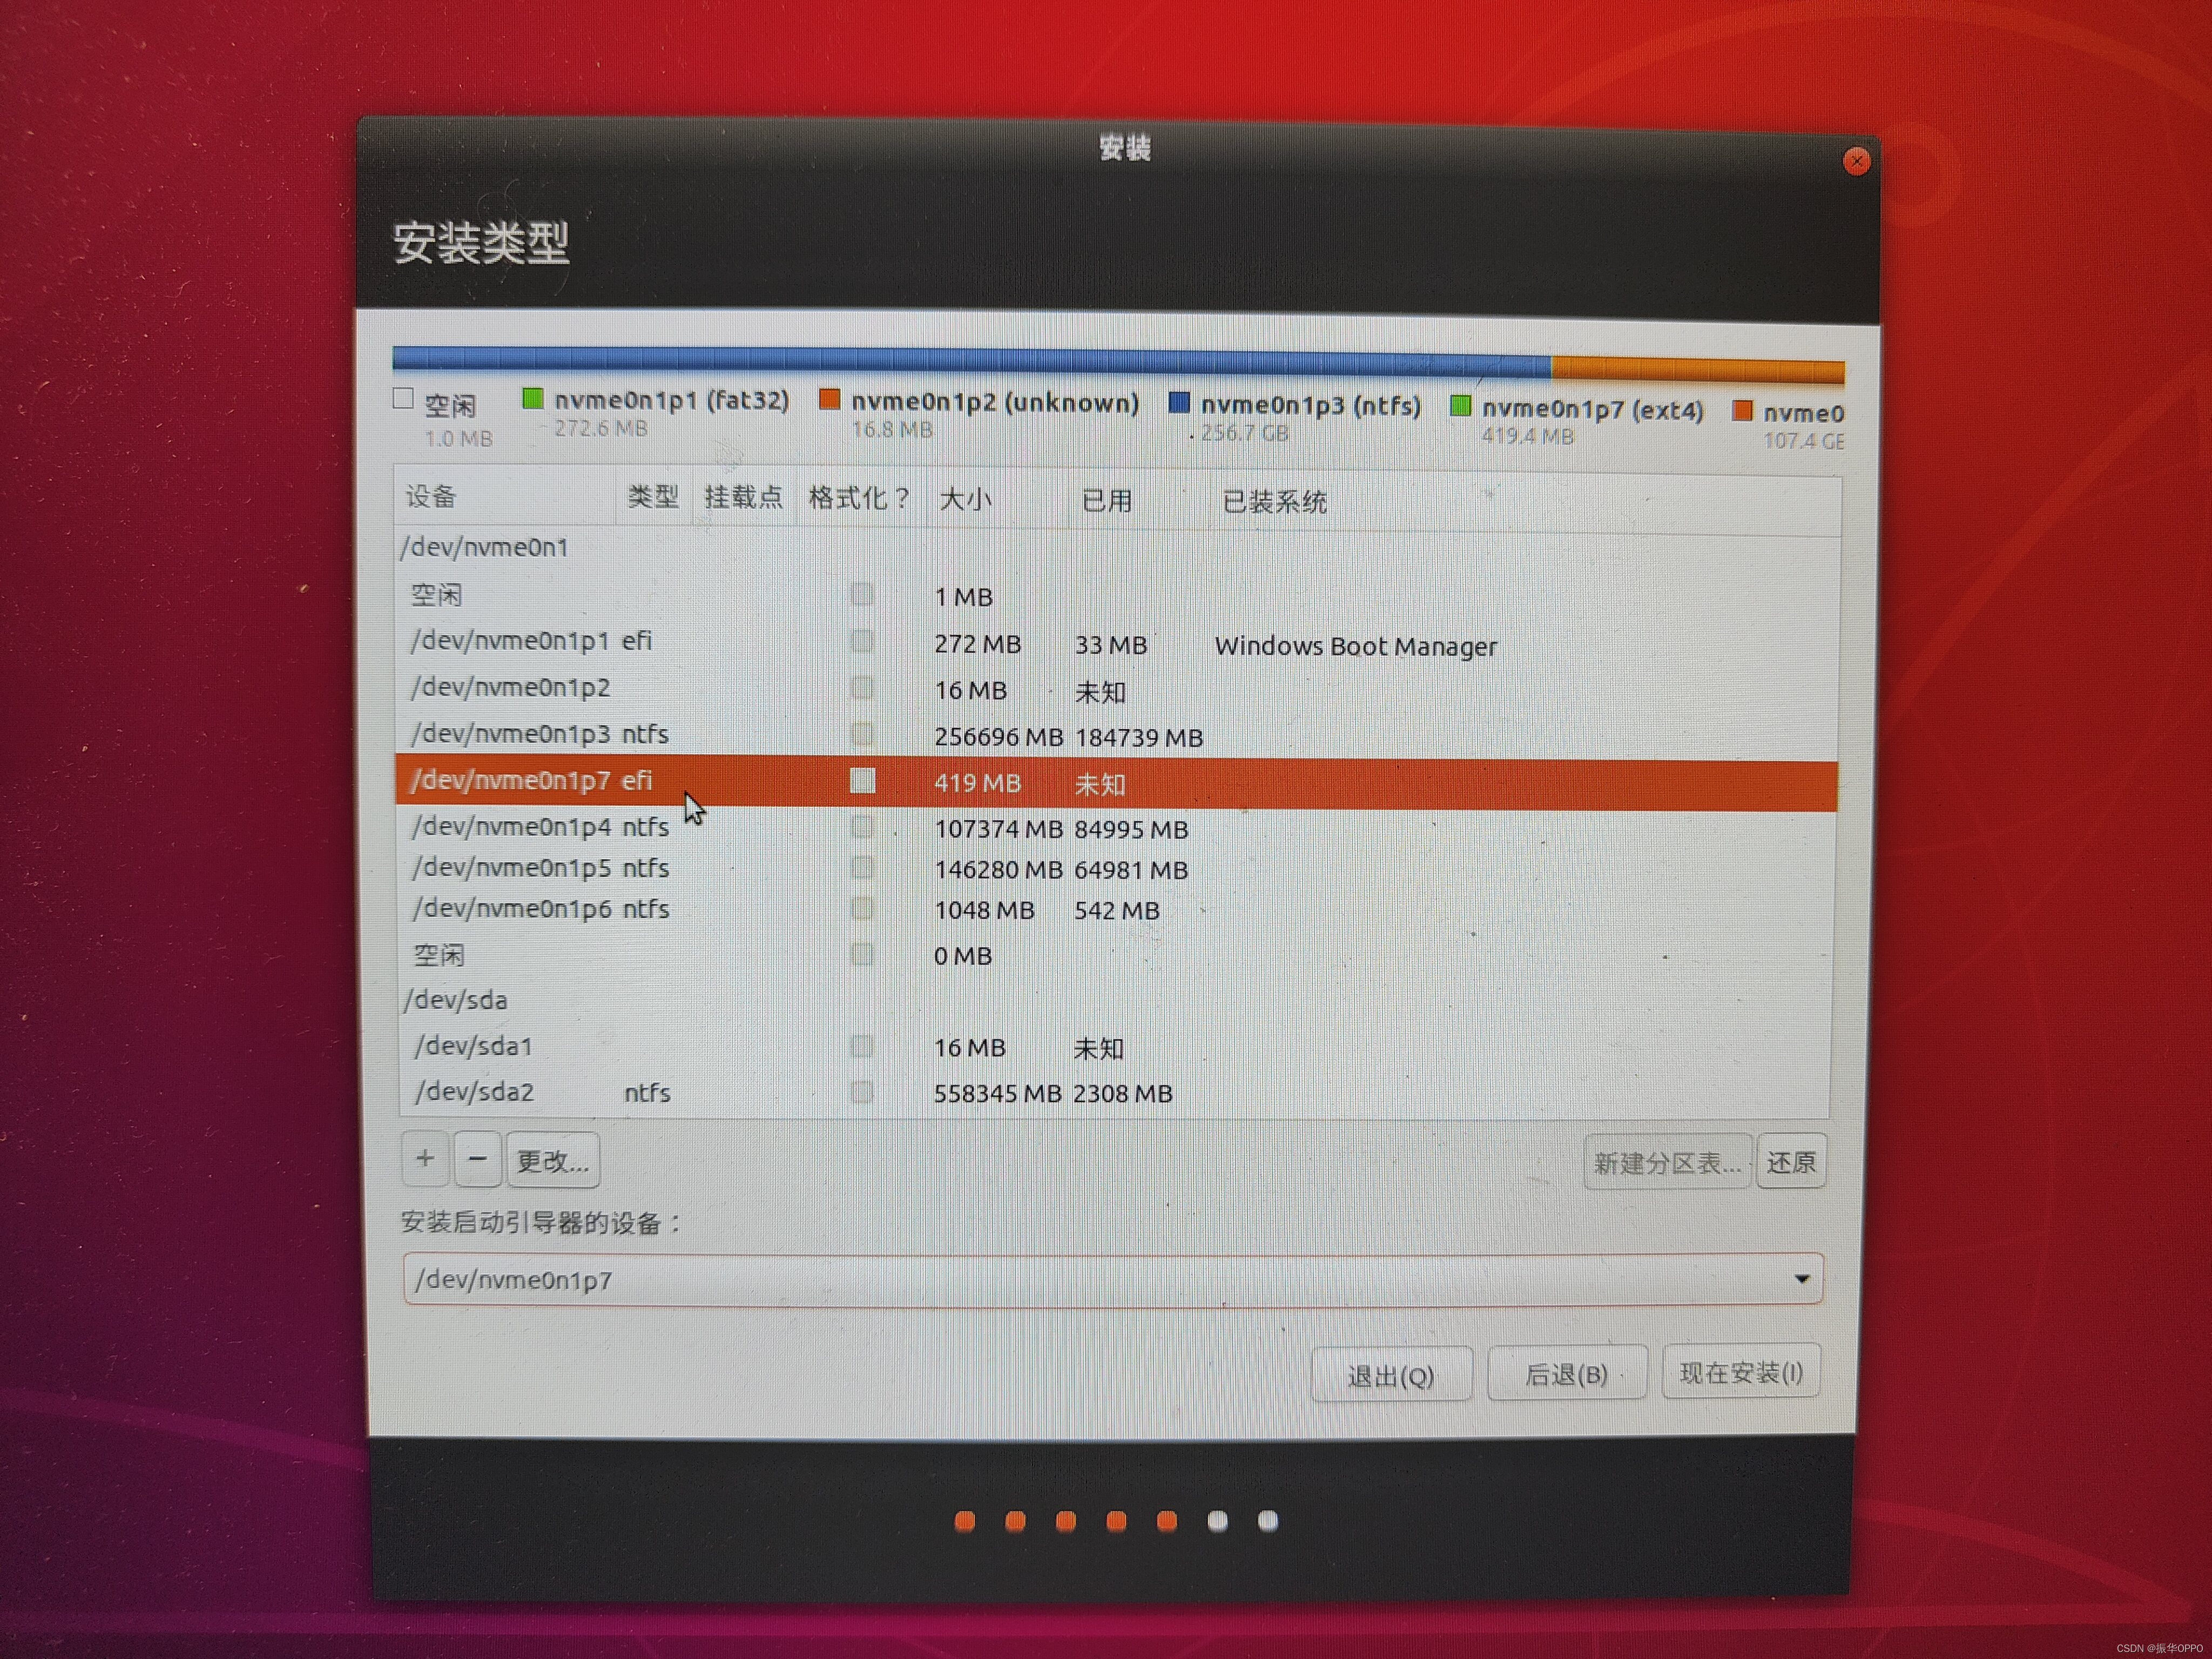
12. This step is very important : at the bottom of the partition interface, select the location to install the boot item. We just created a 400M efi partition. Now you can see what the number in front of this partition is, for example, I am /dev/nvme0n1p7 efi.
Different computers will have different numbers. Select the efi partition number from the drop-down list (it must be noted here that the Windows startup item is also an efi file, the size is about 272M, you must choose the right one), and then choose to install.
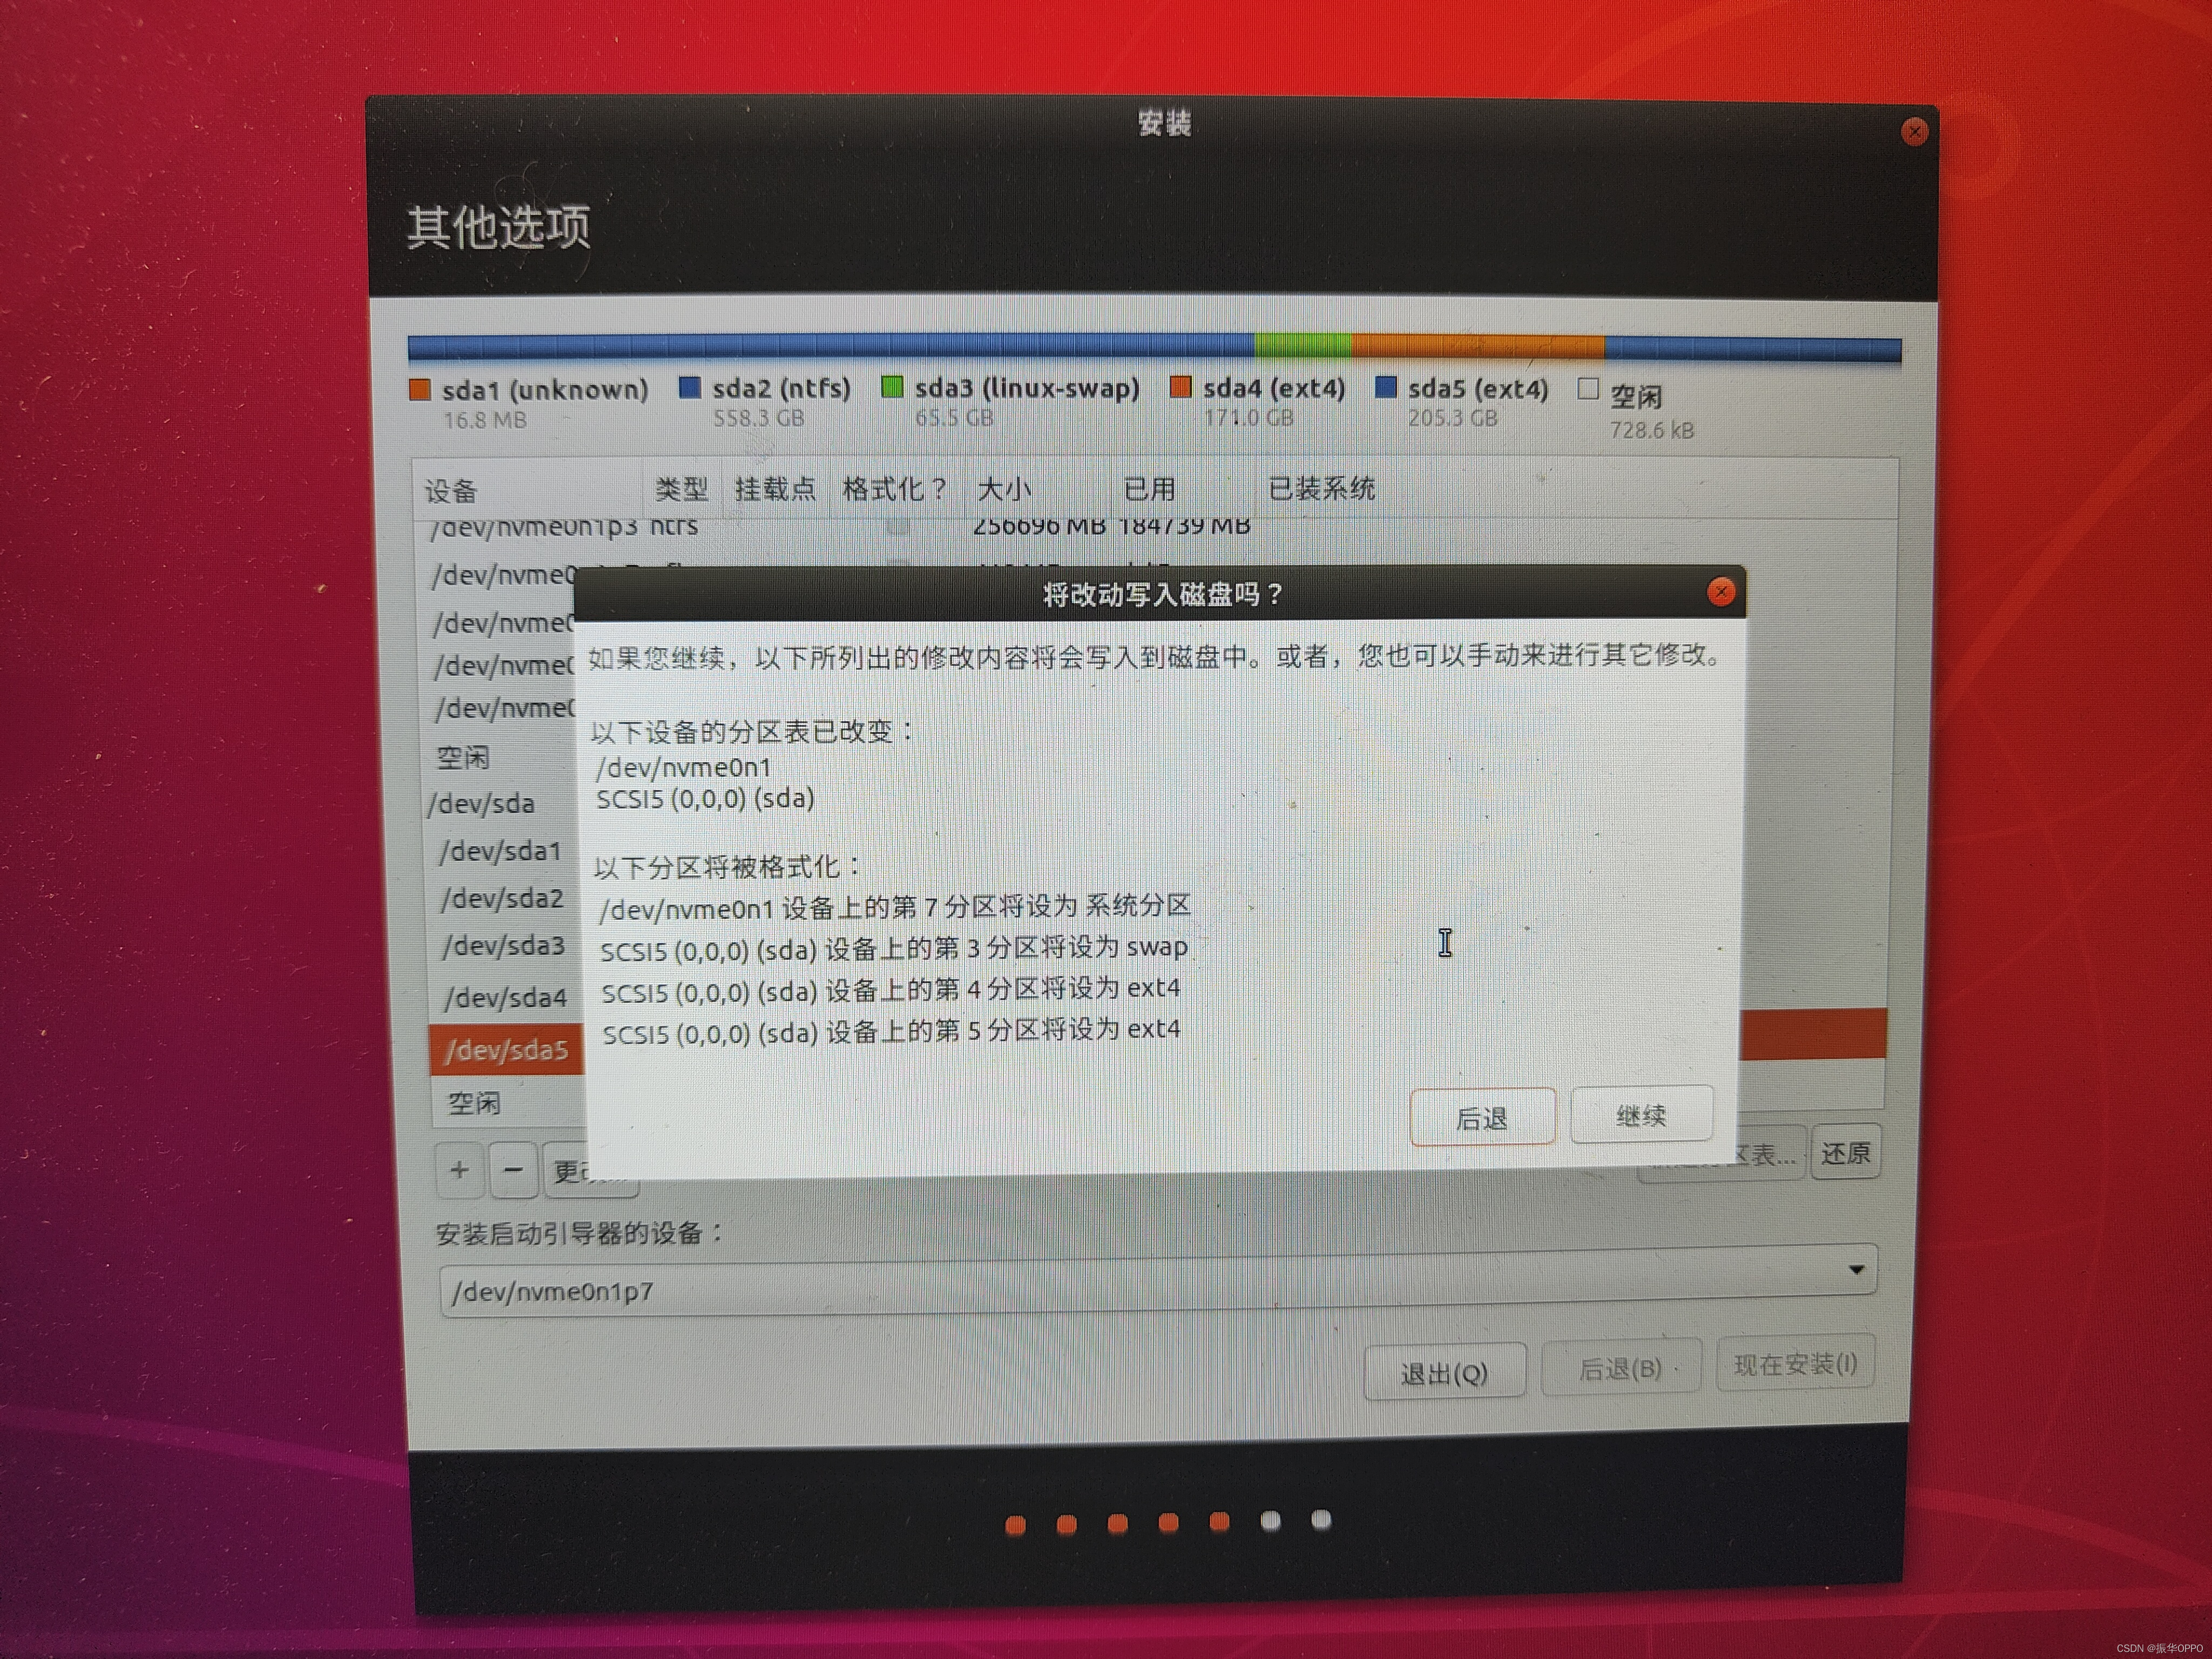
13. The system will prompt you to select the partition just now, check if there is any error. The following figure is a correct example of strictly following the steps.
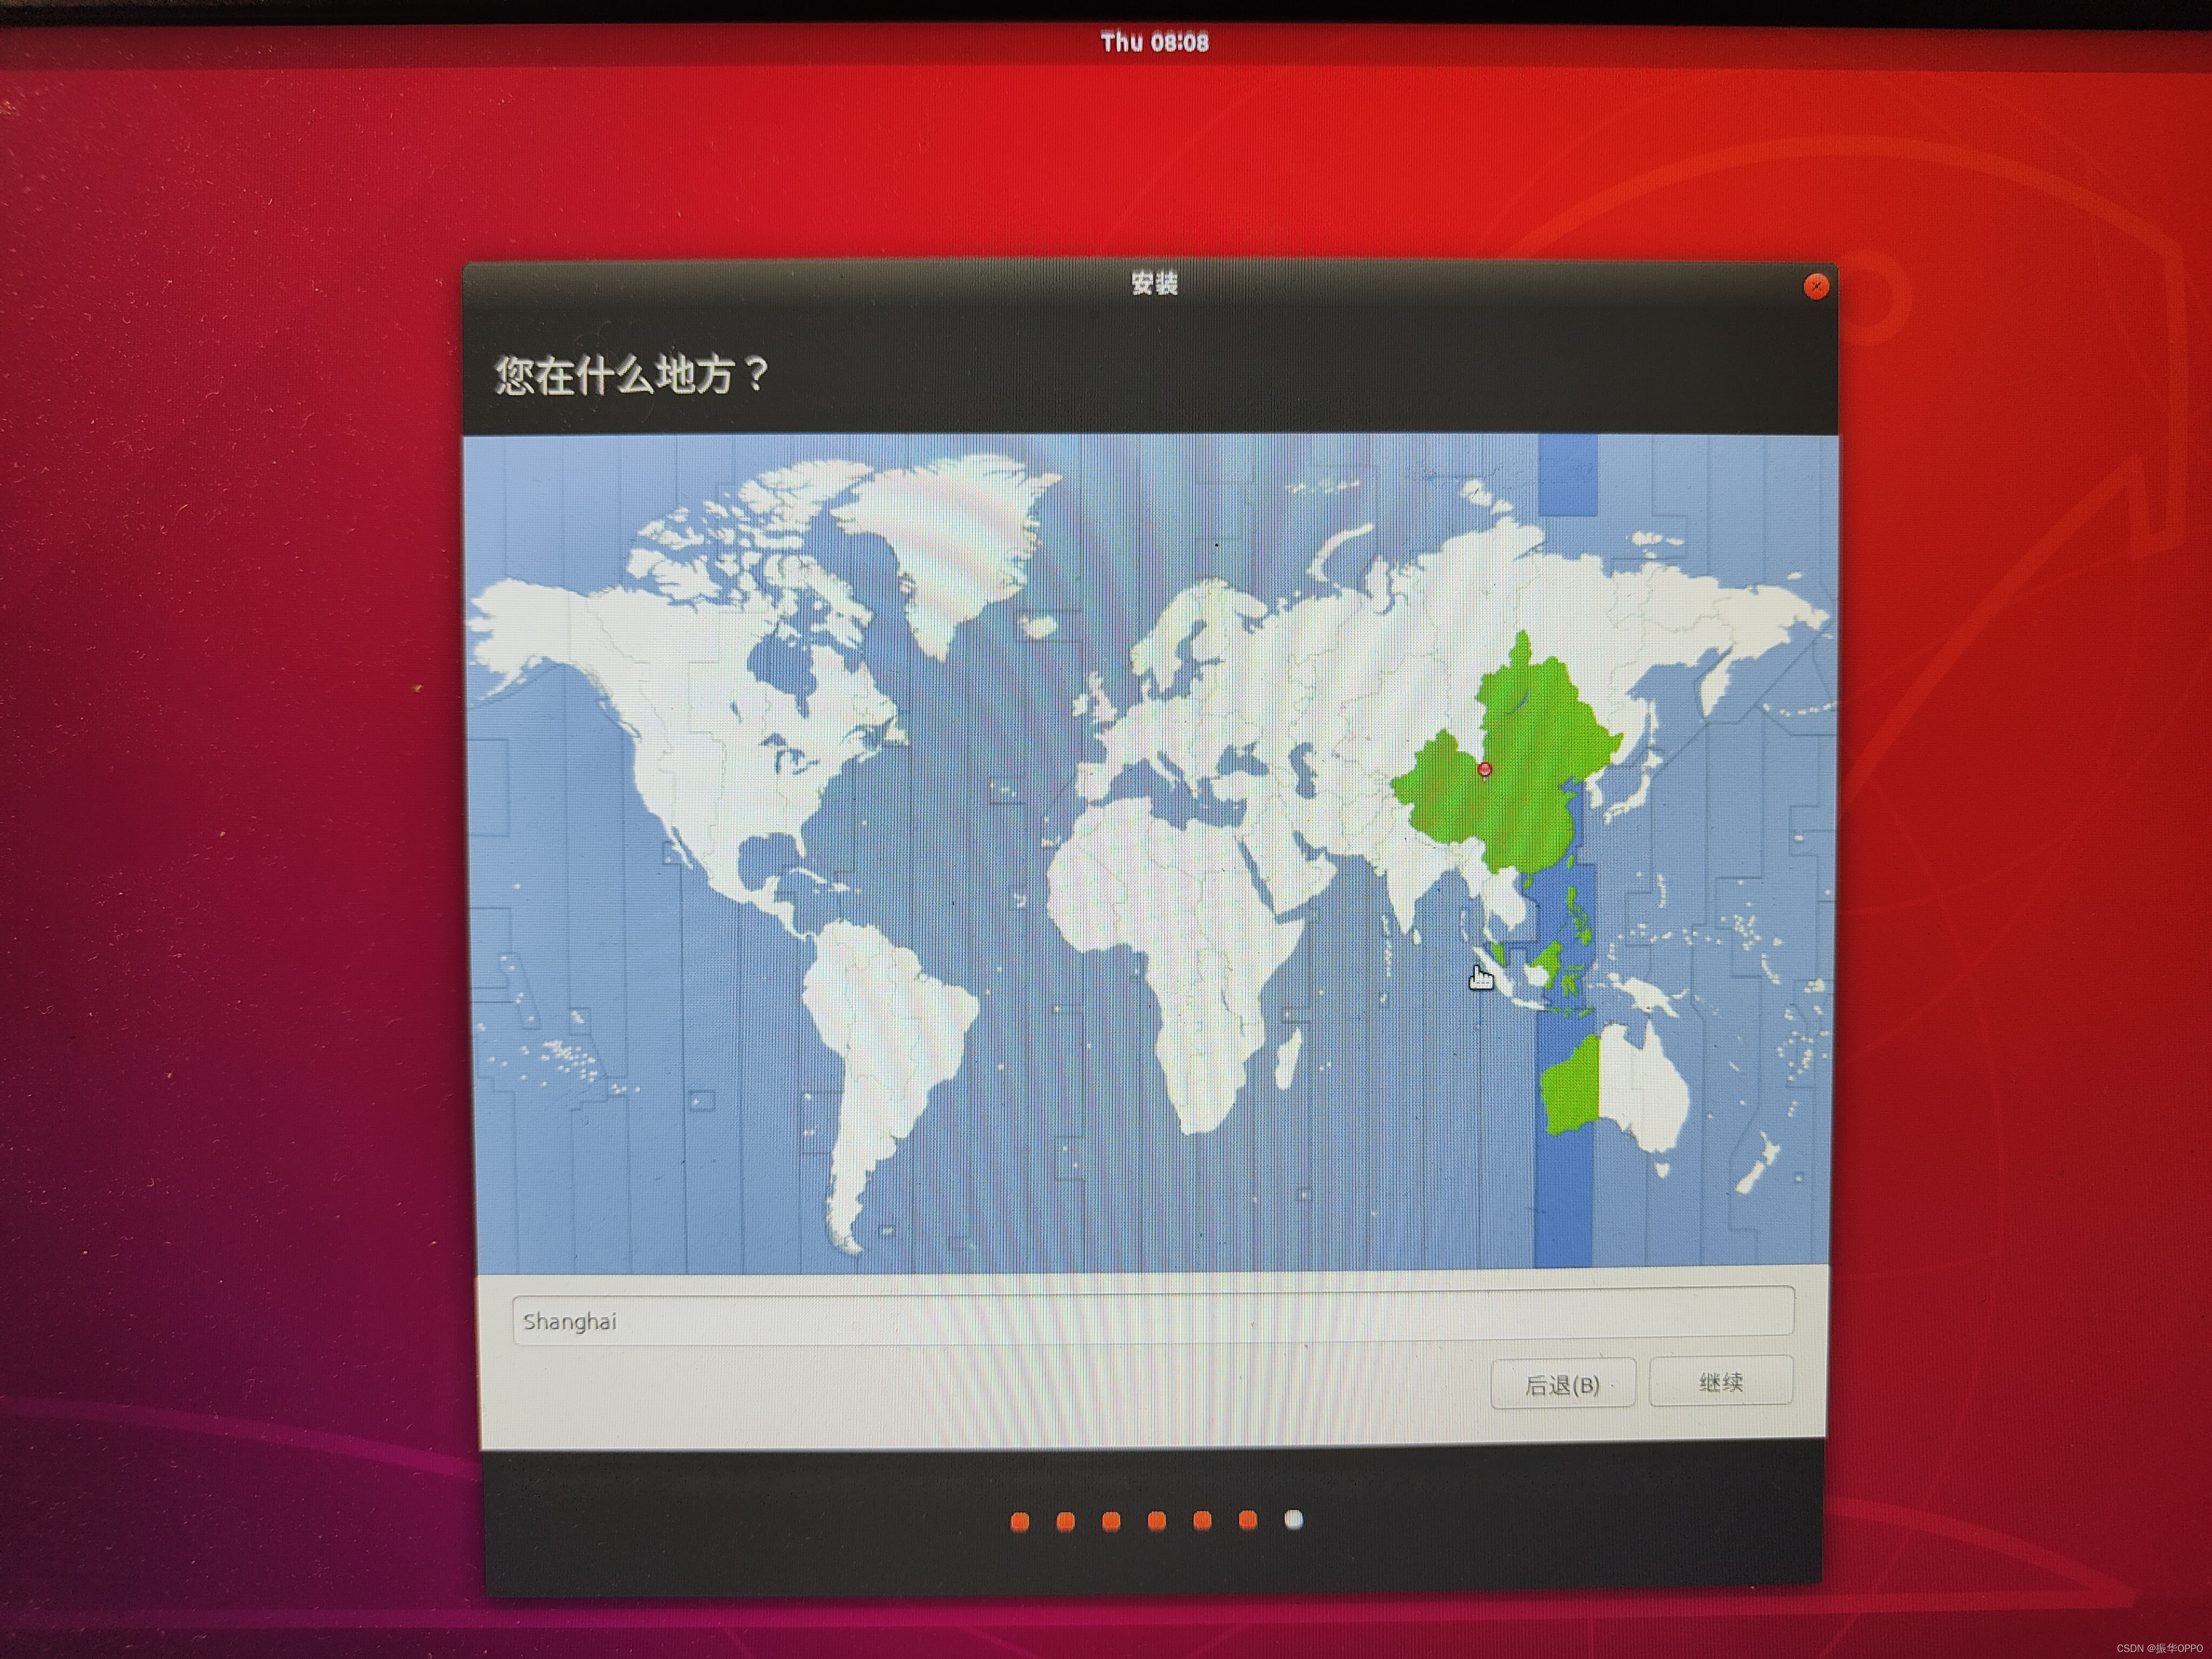
14. The time zone defaults to shanghai, then continue.
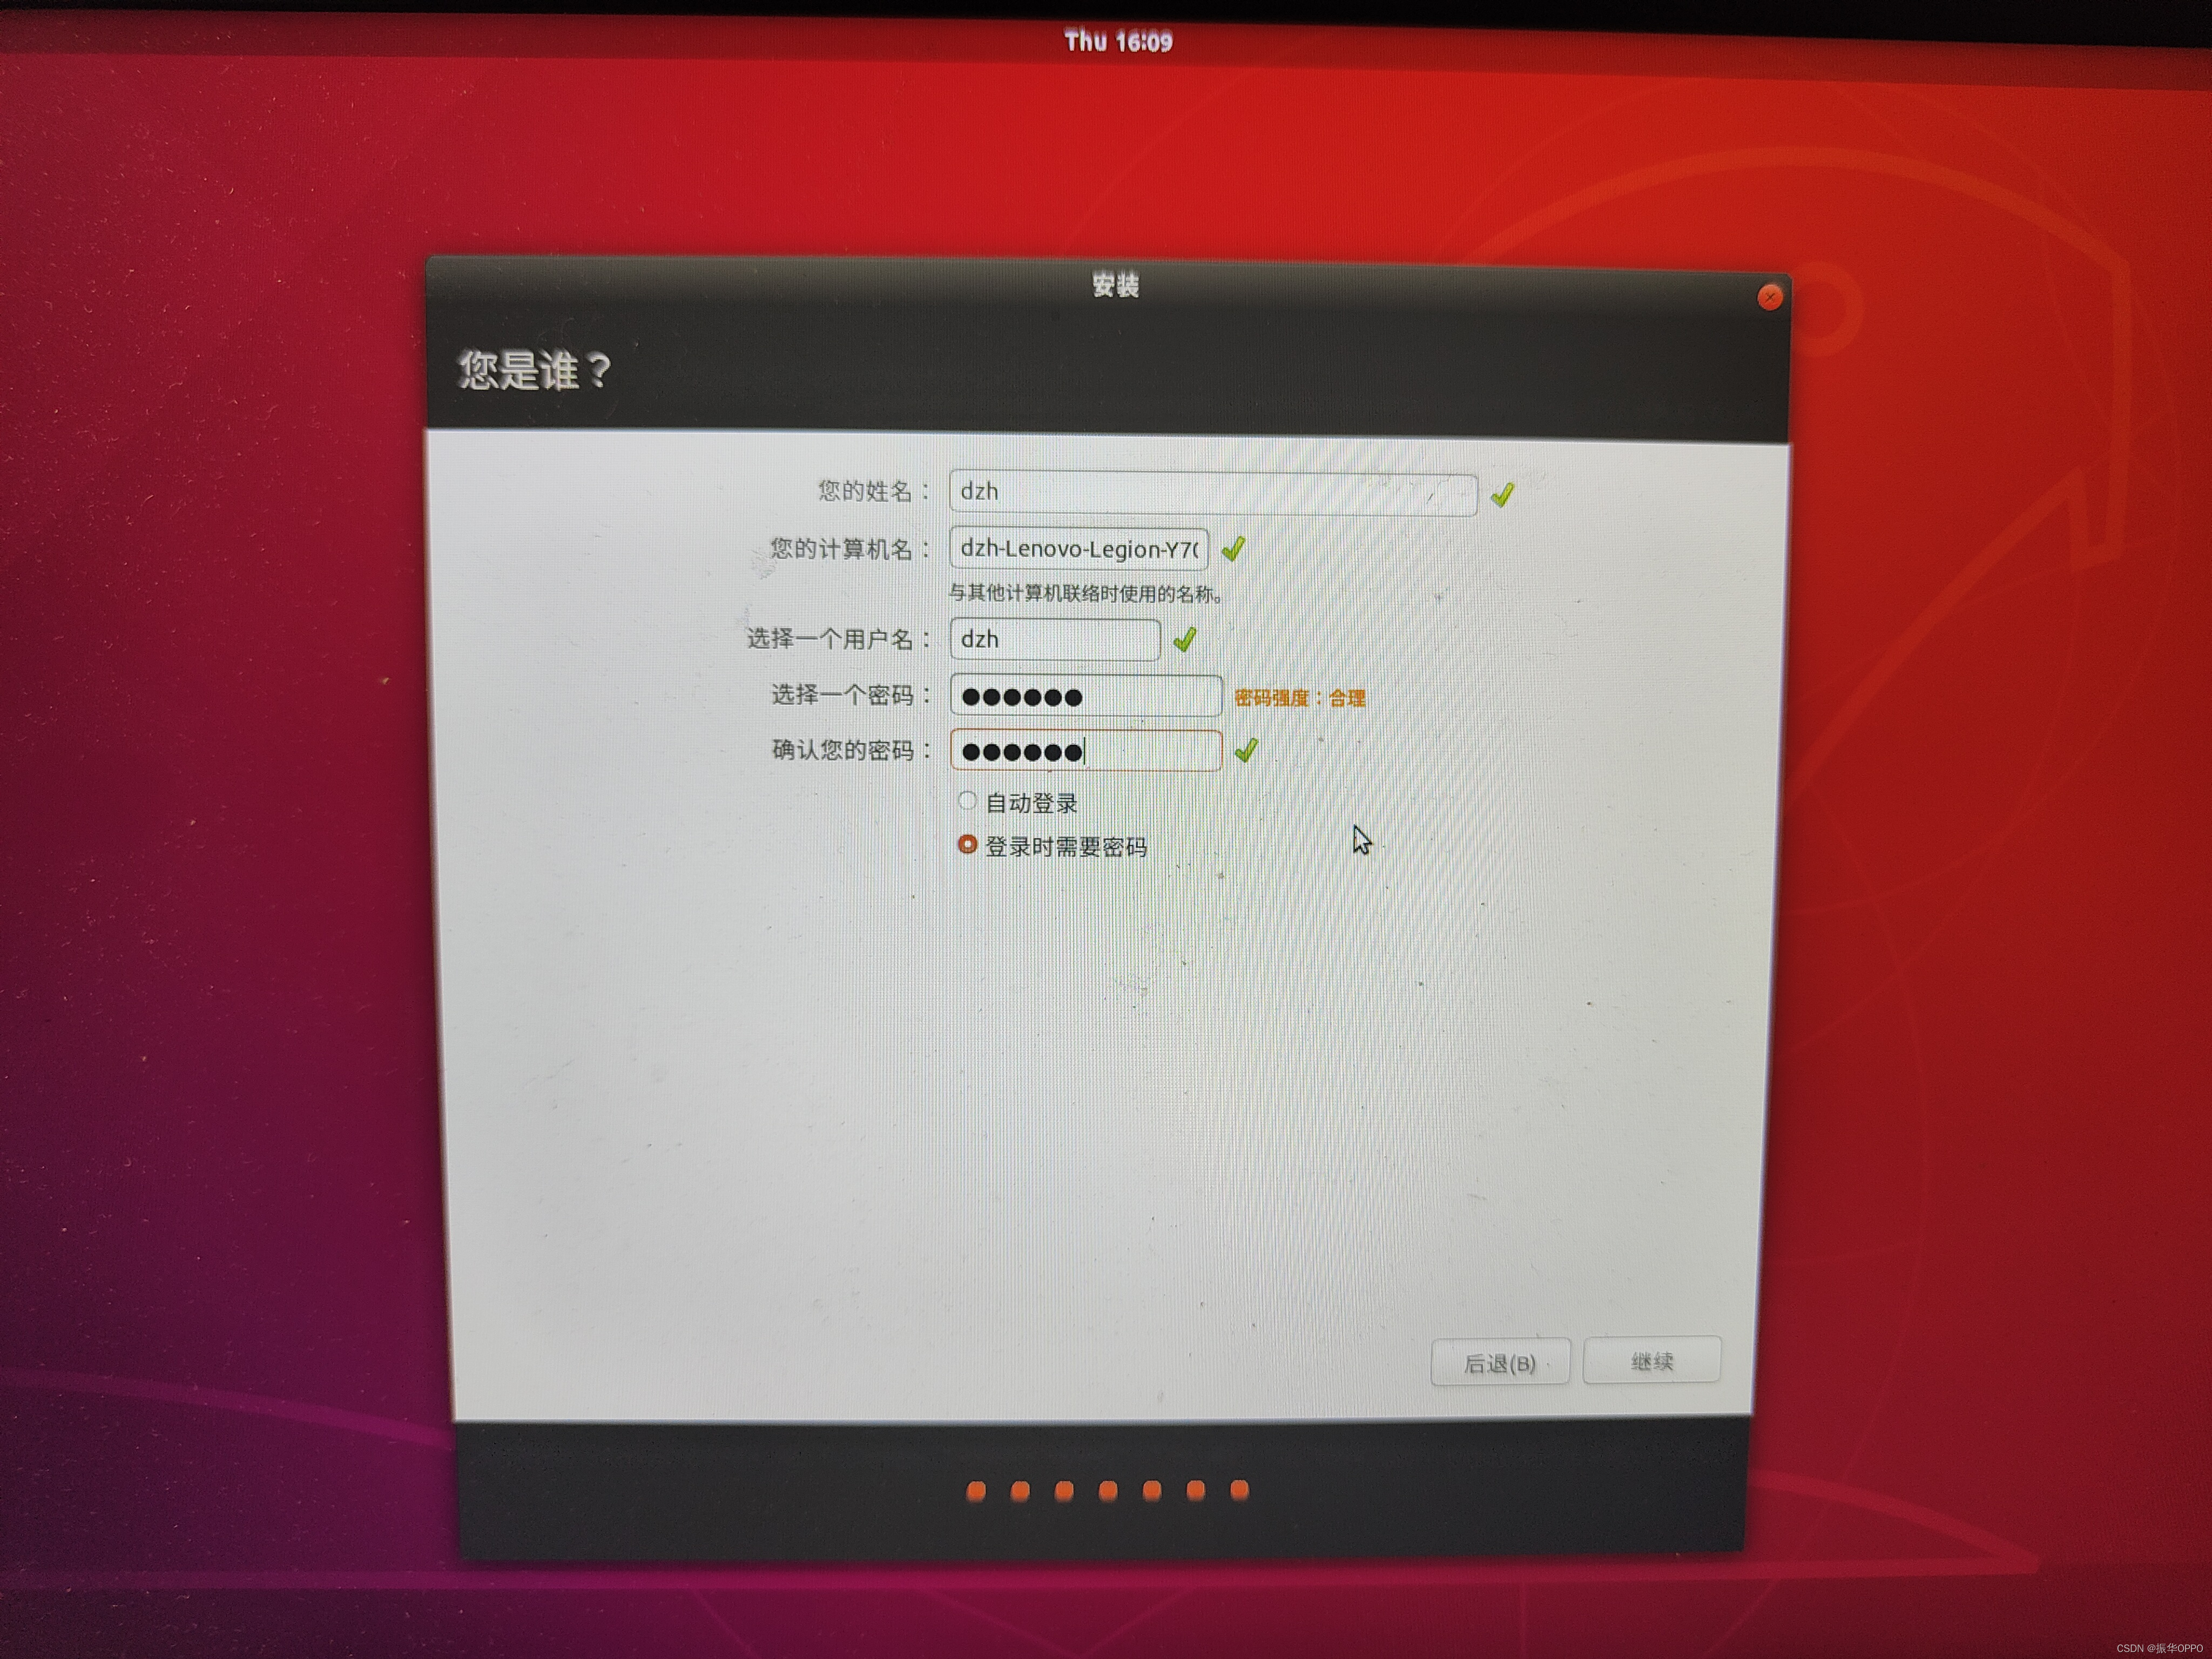
15. Set the user here, just enter the English name abbreviation yourself, and the password is also set simple, easy to remember is the most important.
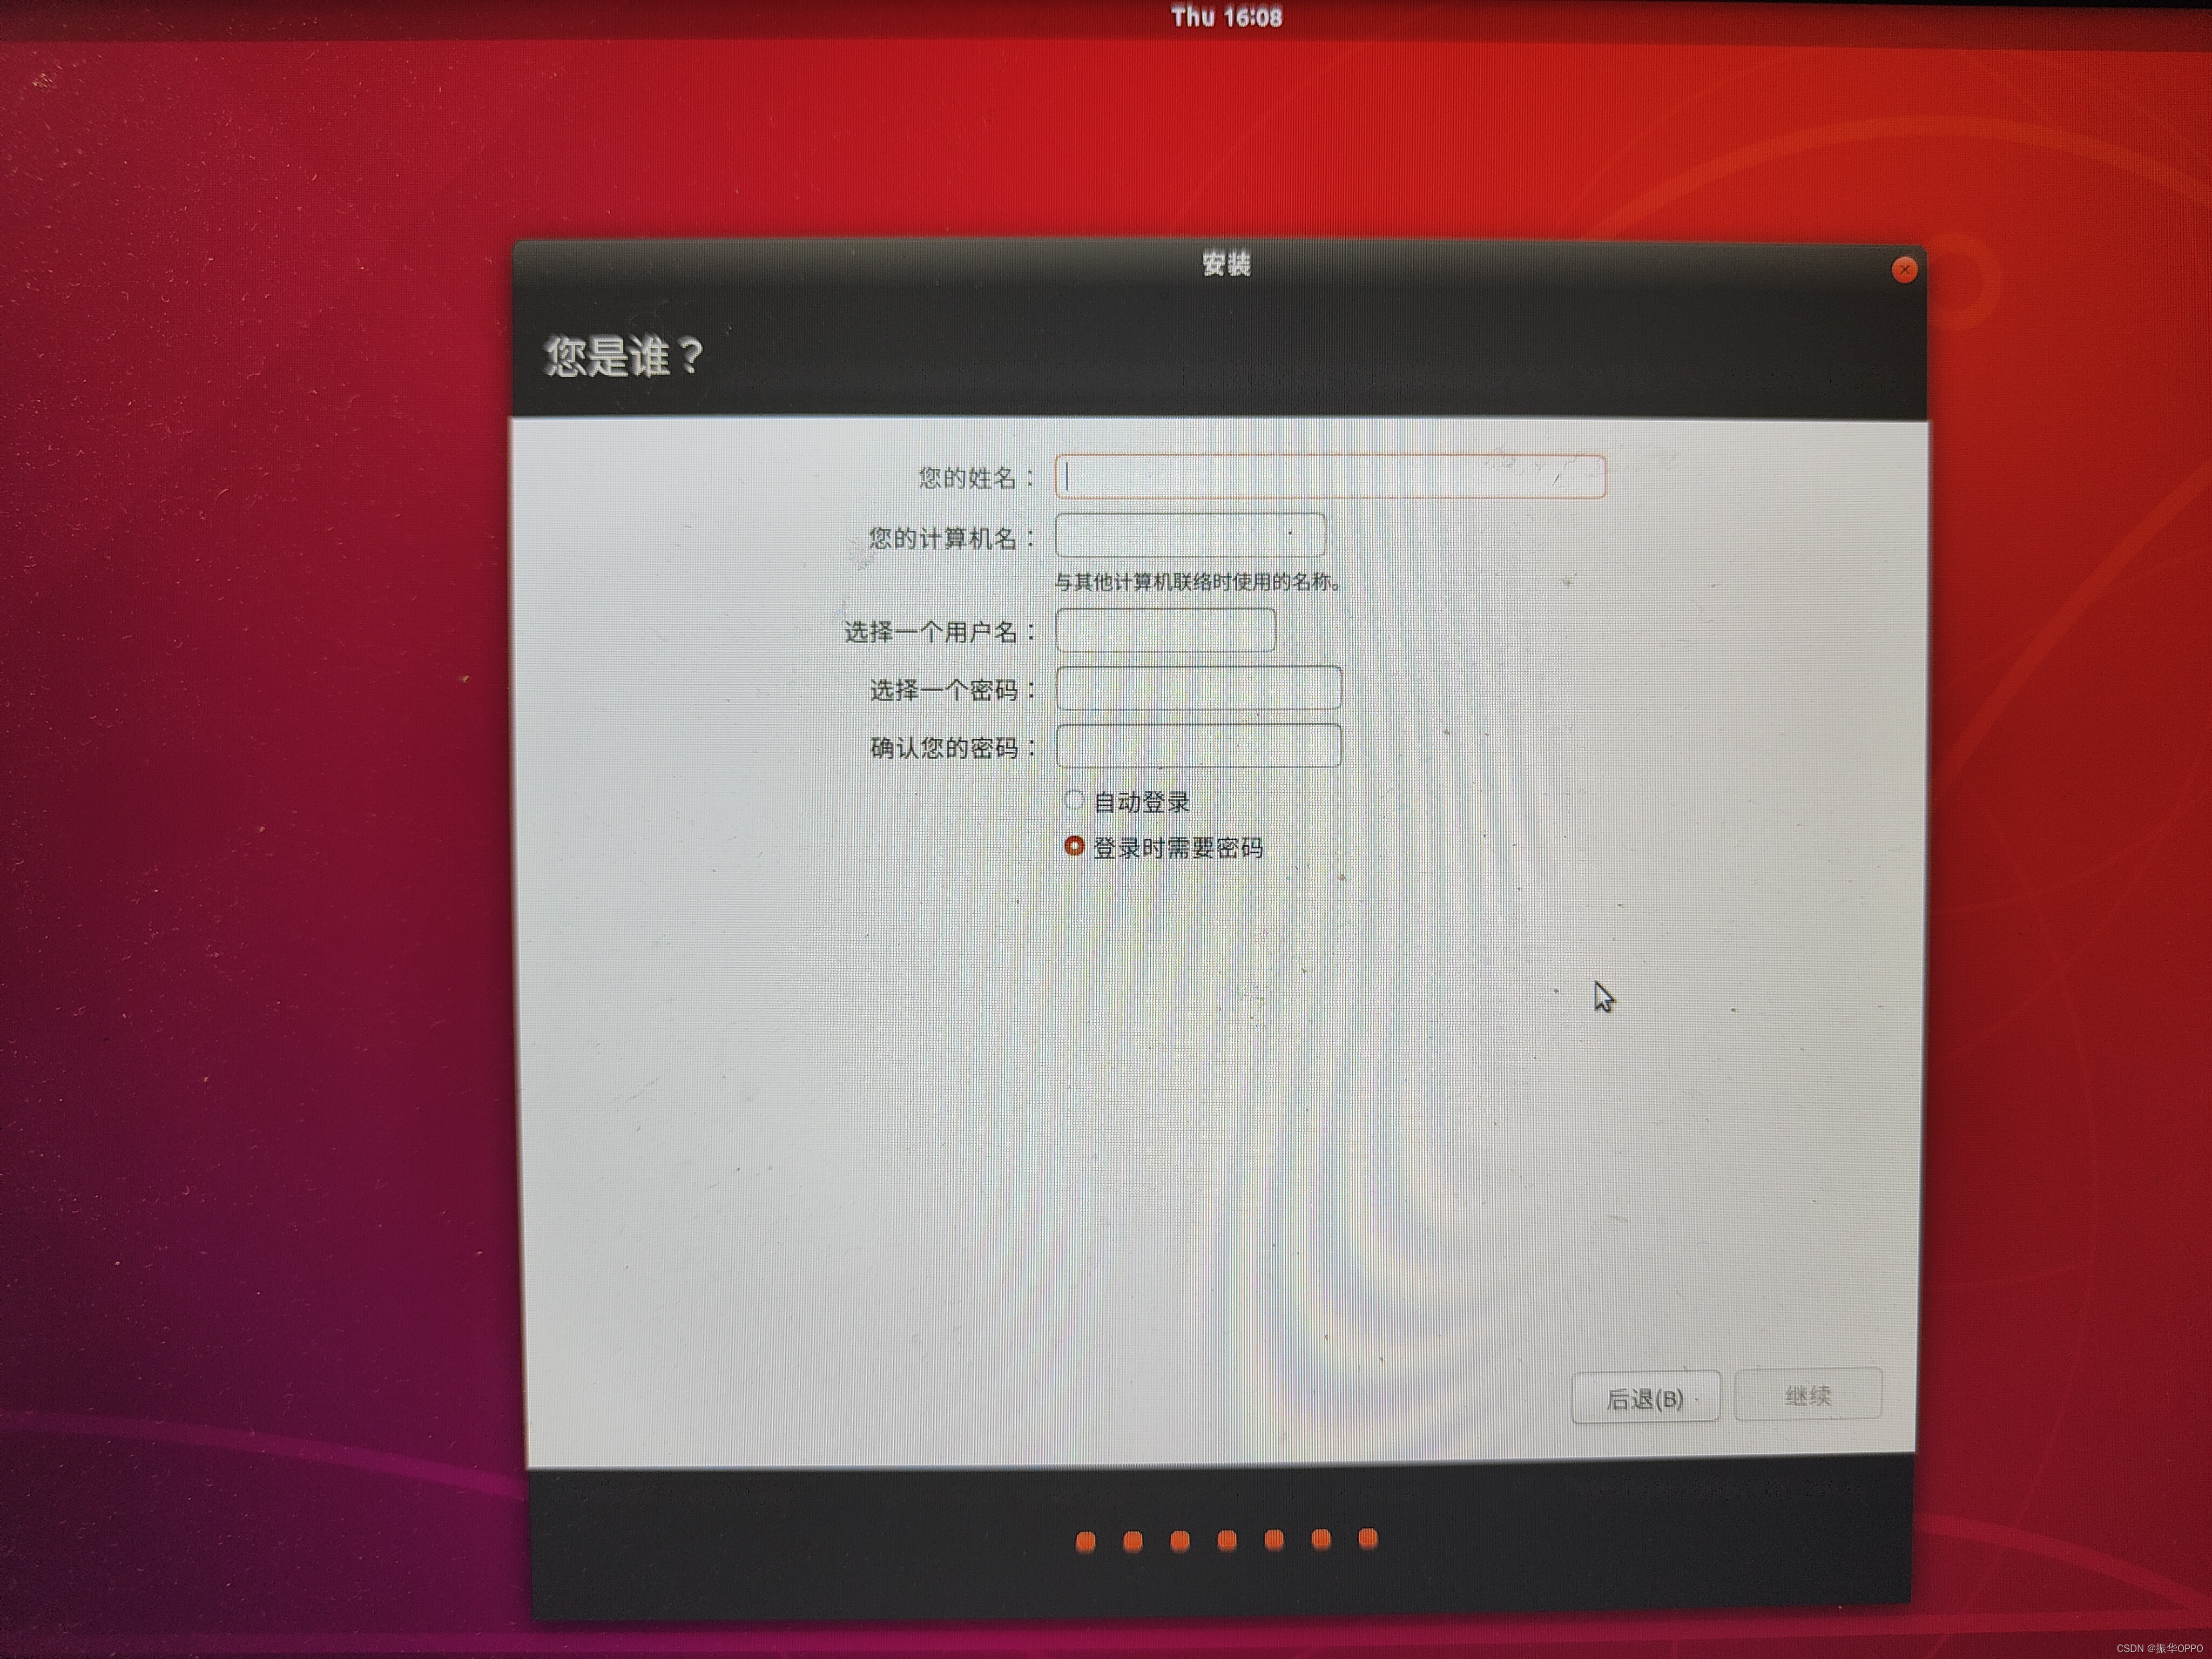
Below are the usernames and passwords I set up for each installation.
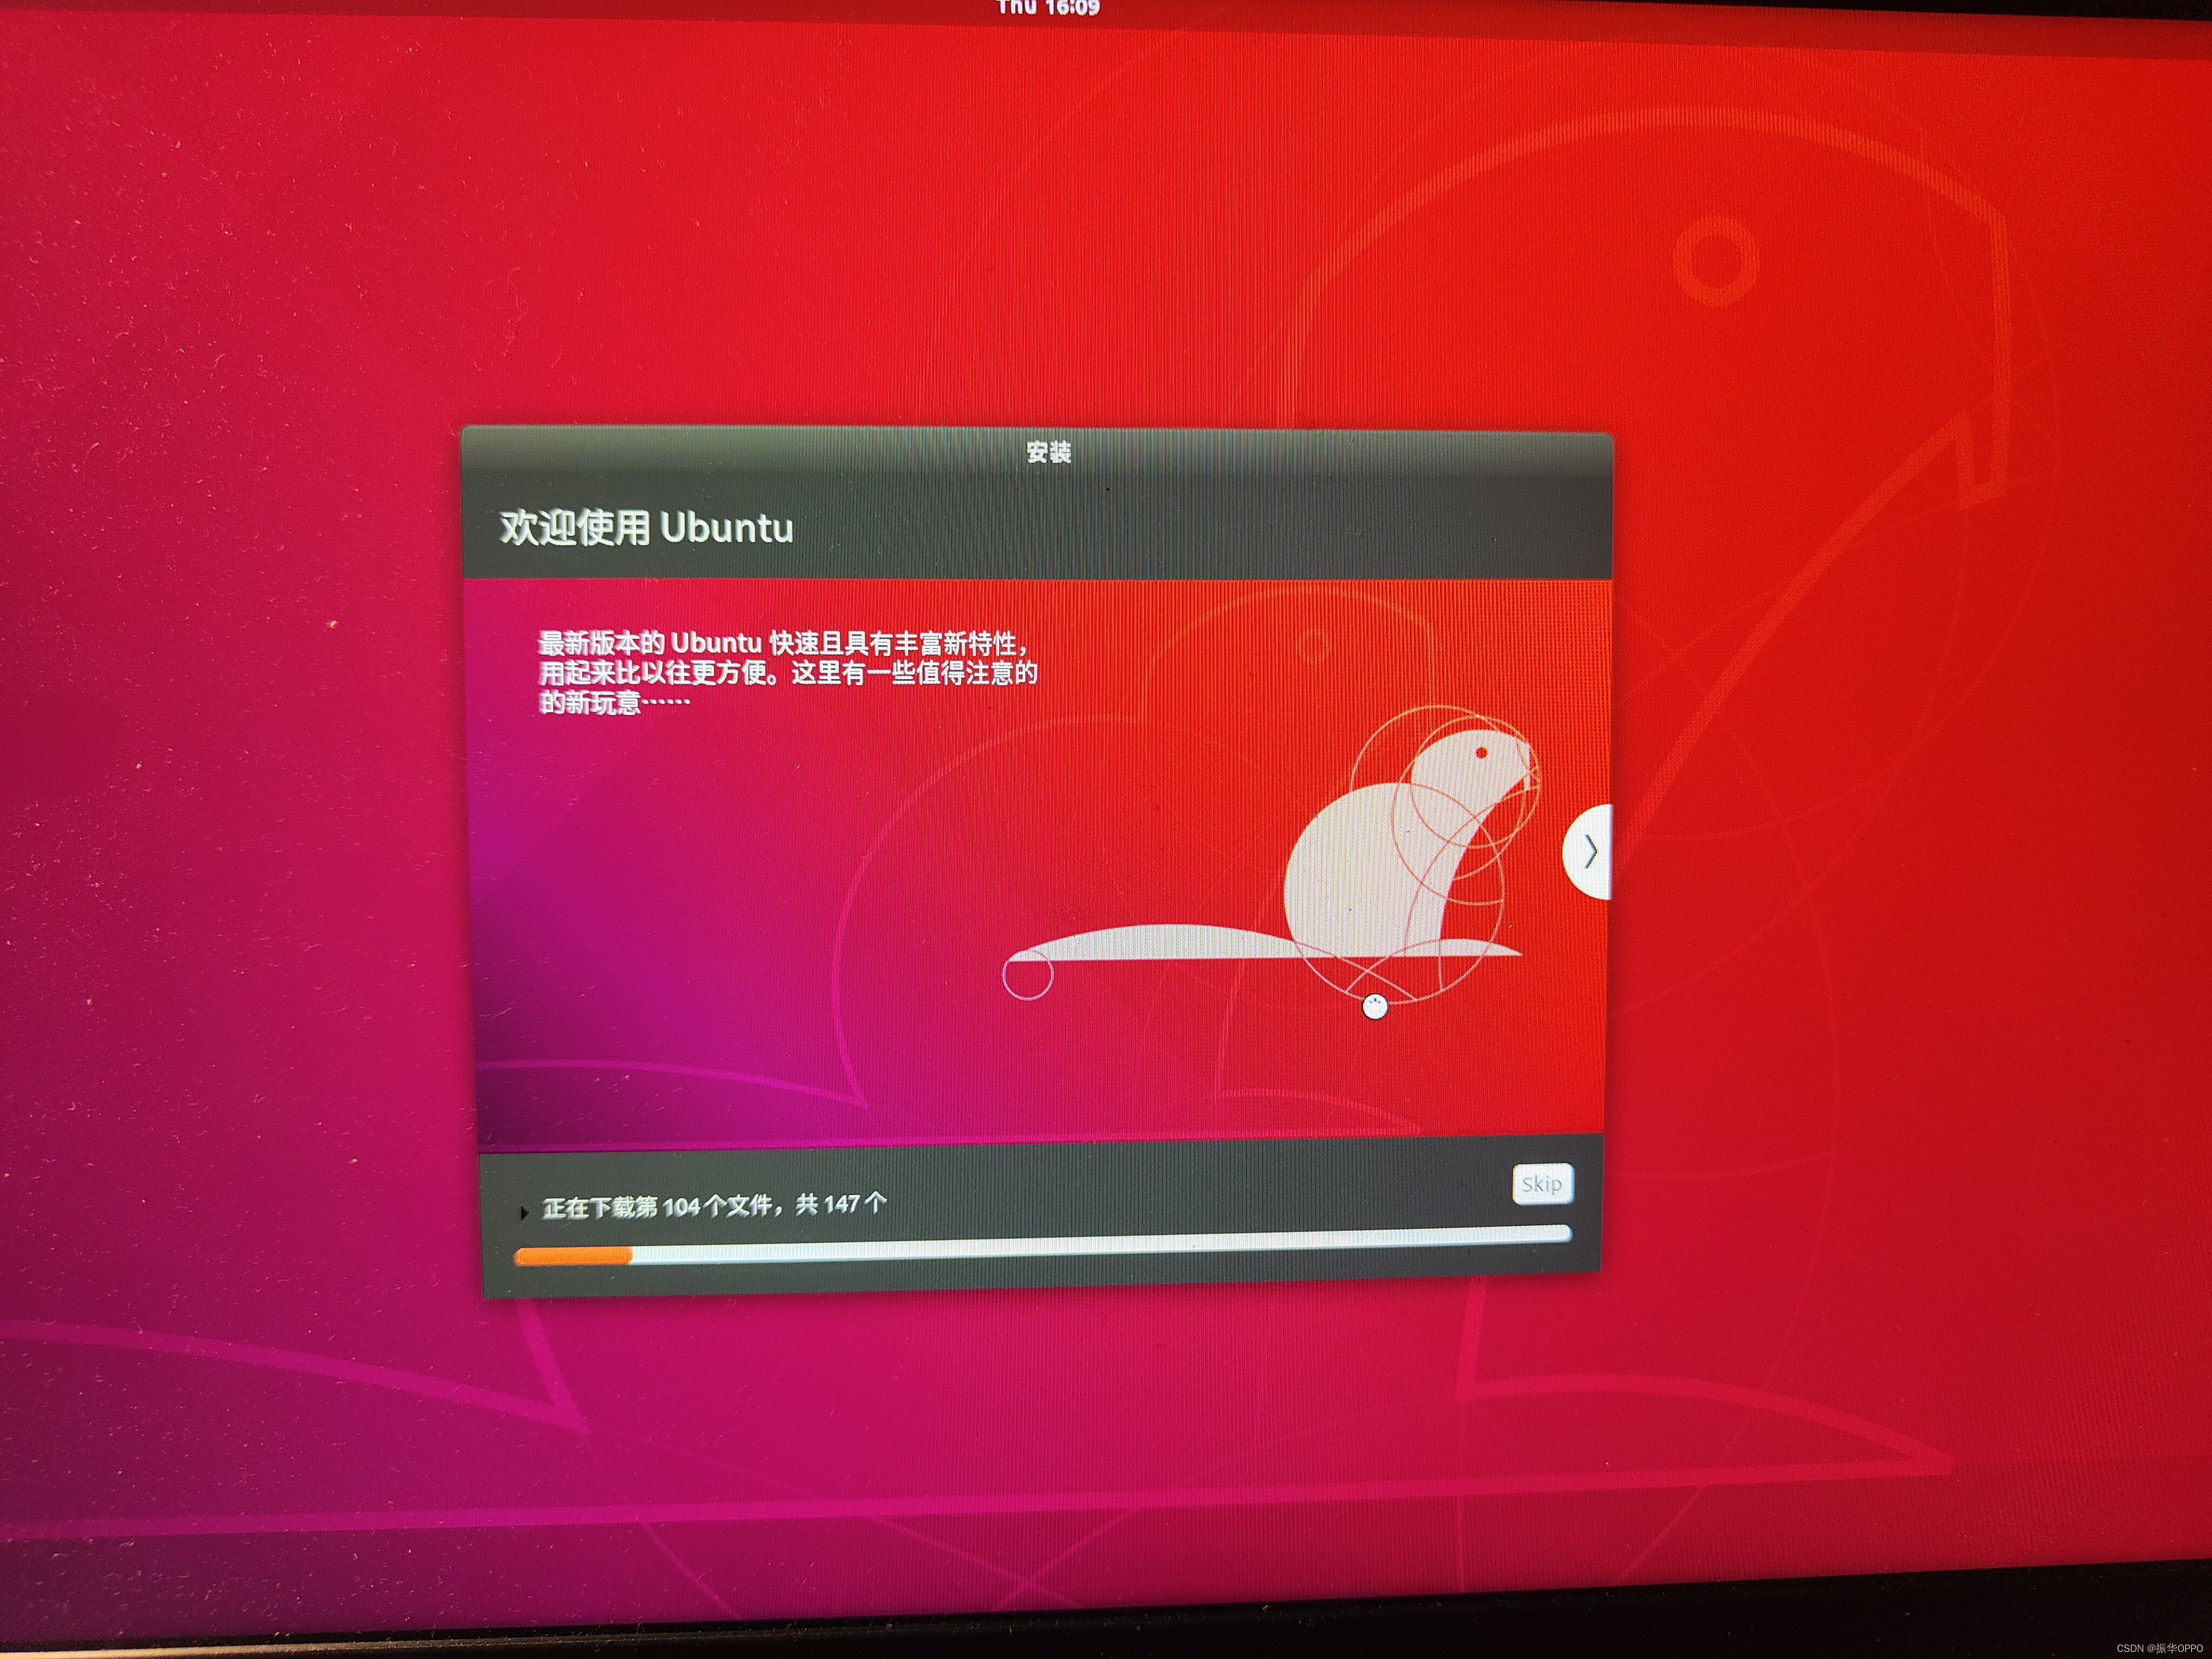
16. Wait patiently for the installation to complete.
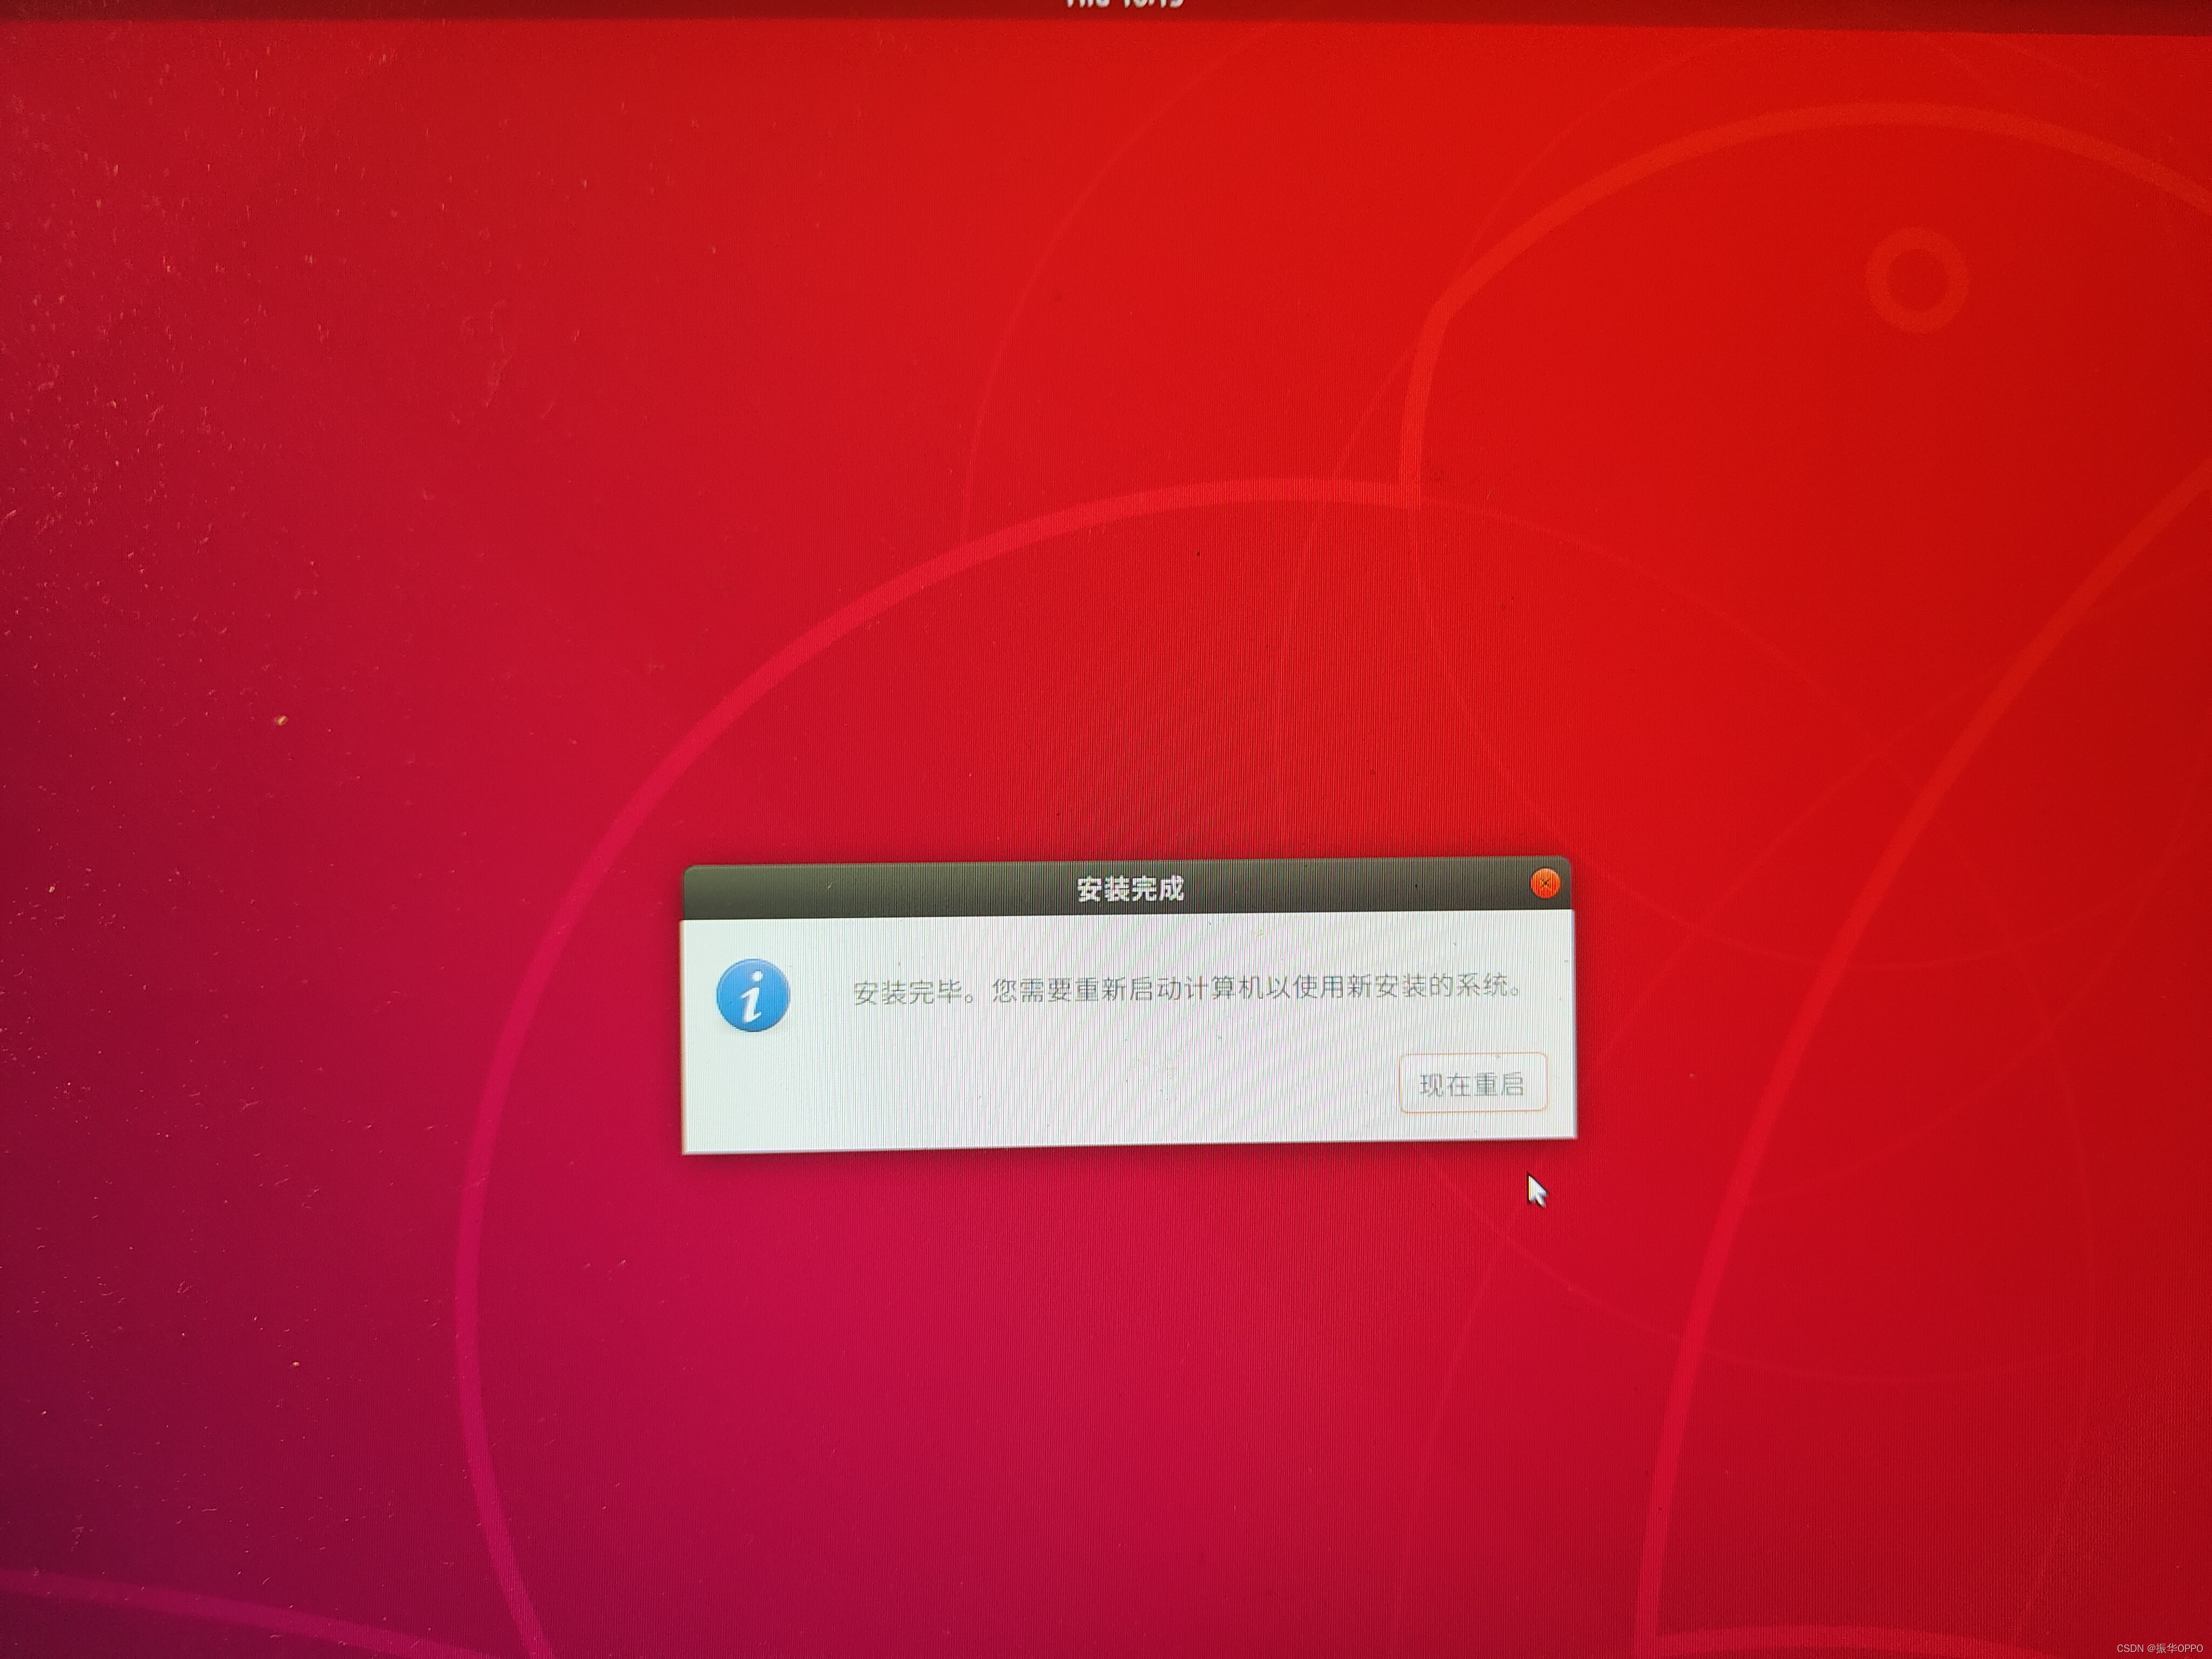
17. After the installation is complete, you will be prompted to restart the computer to use the newly installed system, click restart now.
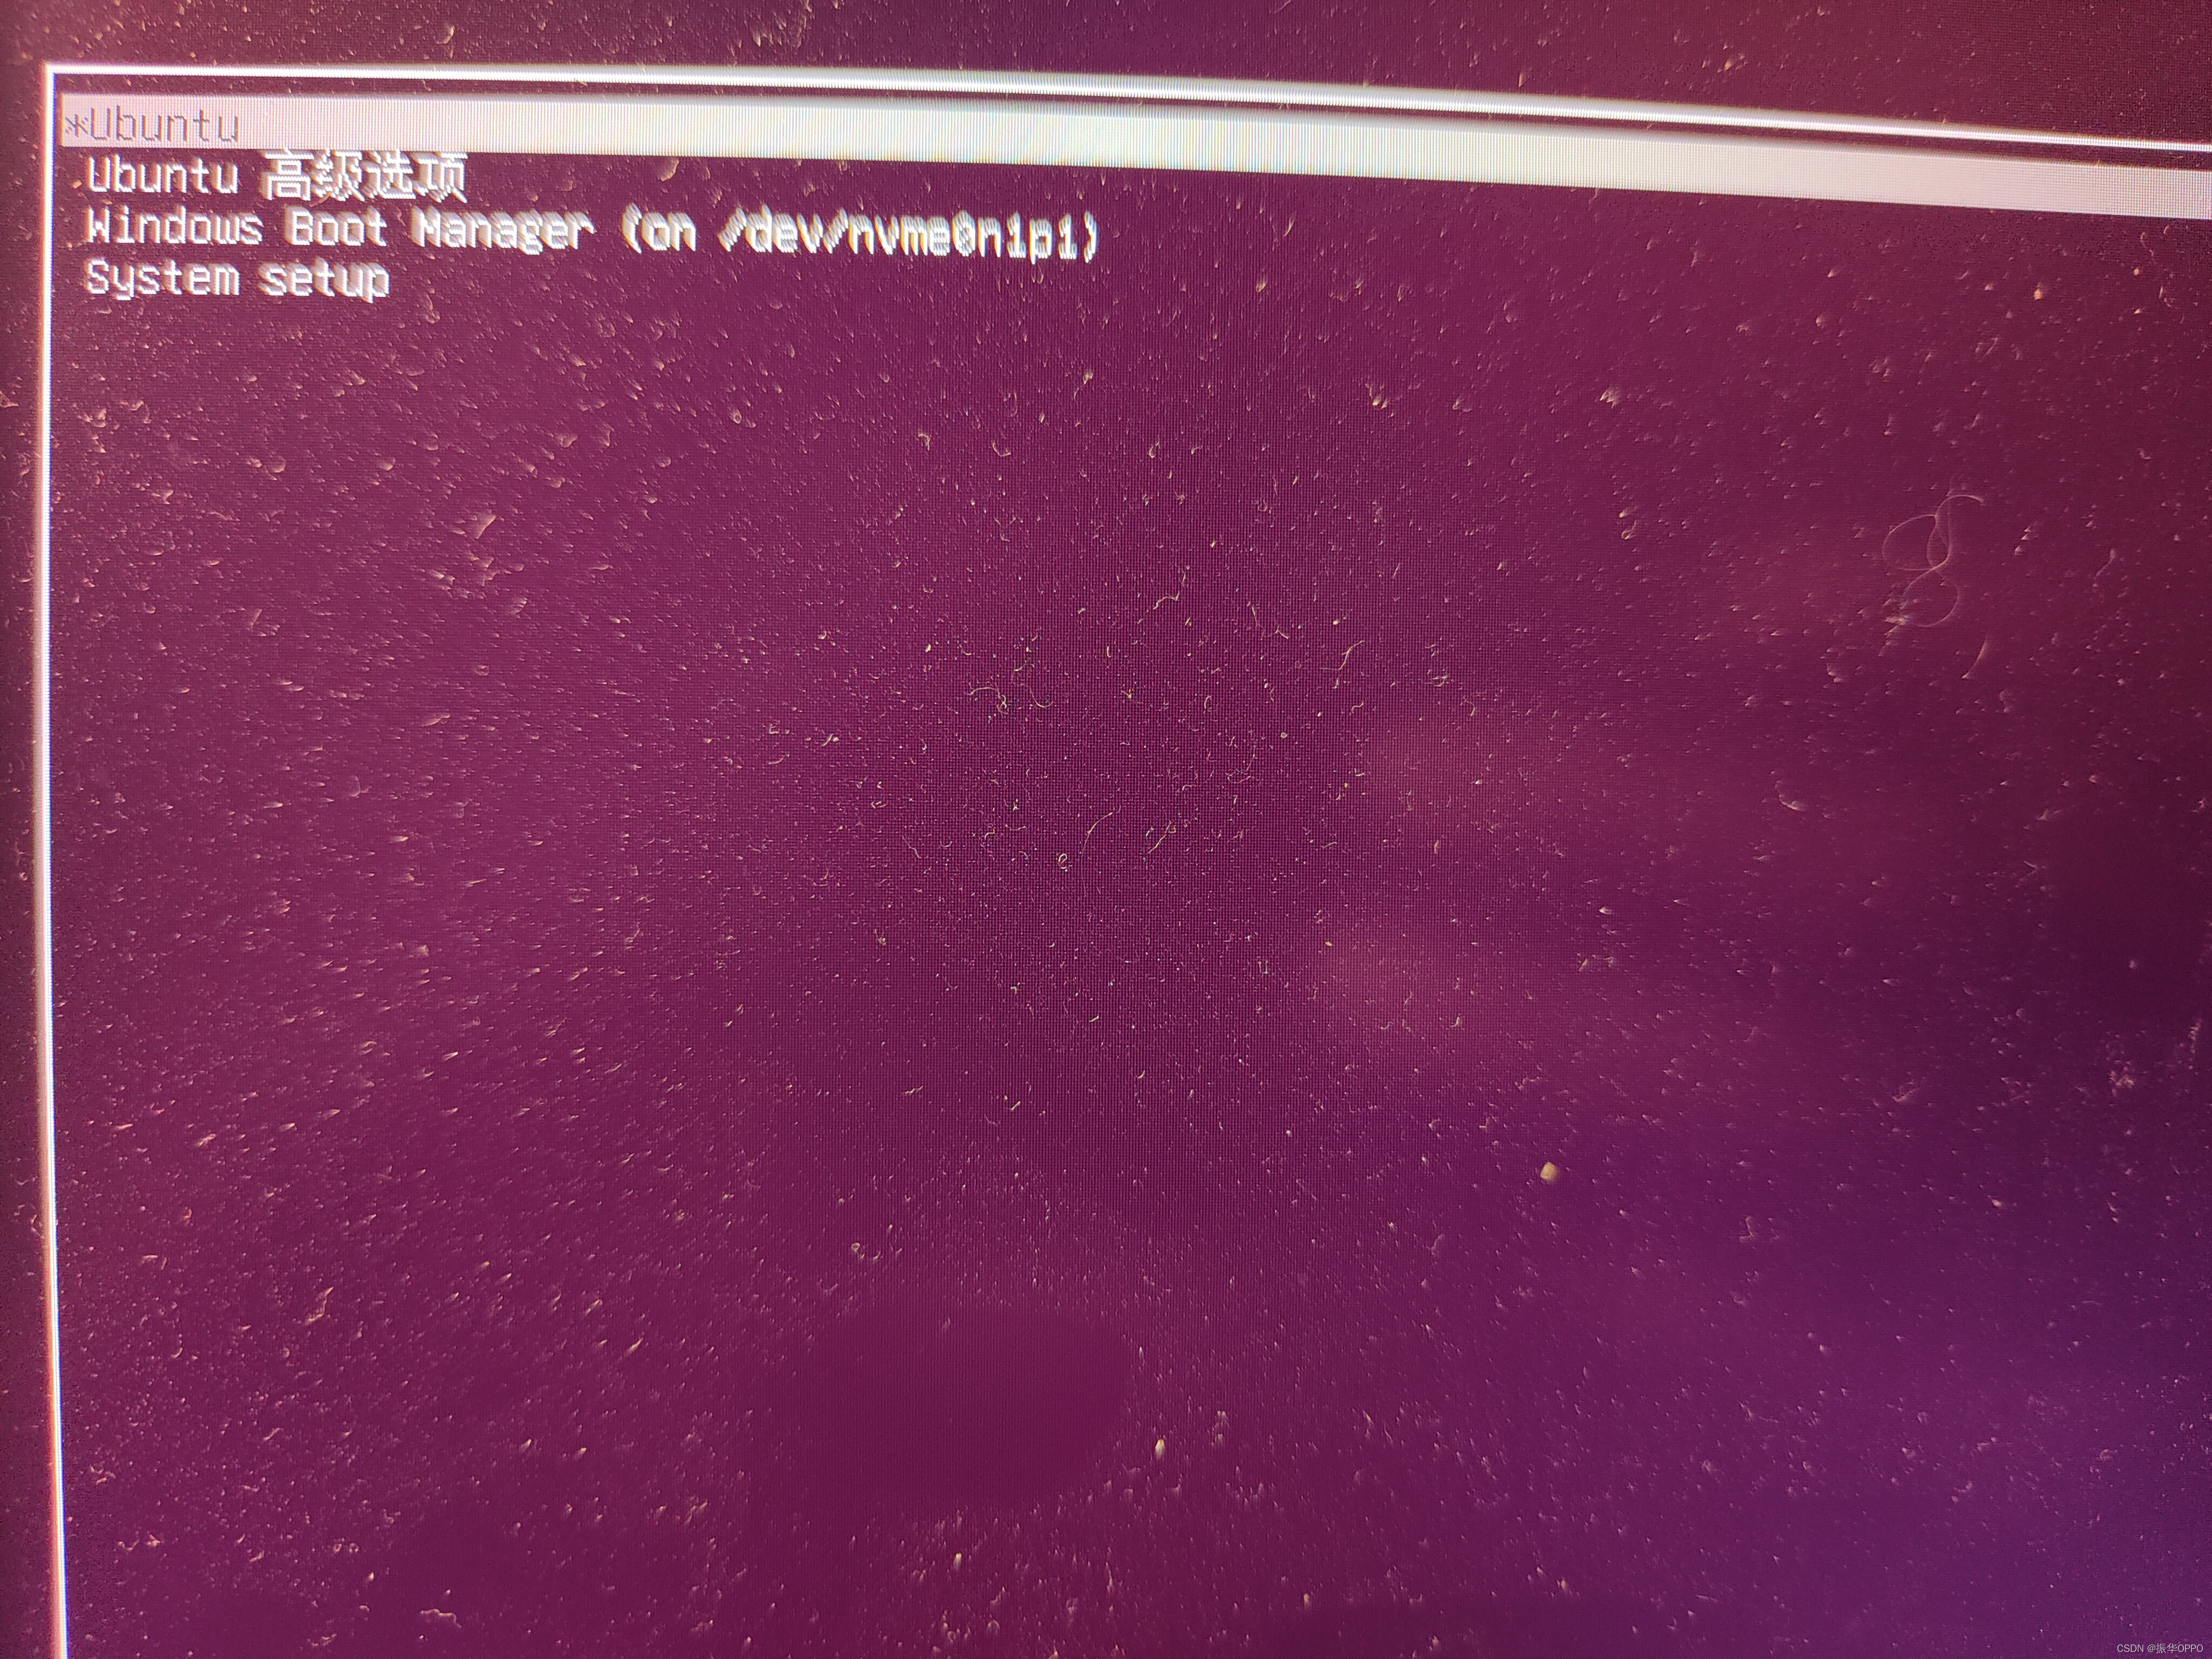
18. Enter the boot item interface after restarting, as shown in the following figure. The first item is the ubuntu startup item, the second item is the ubuntu advanced setting, the third item is the windows startup item, and the fourth item is the system setting.
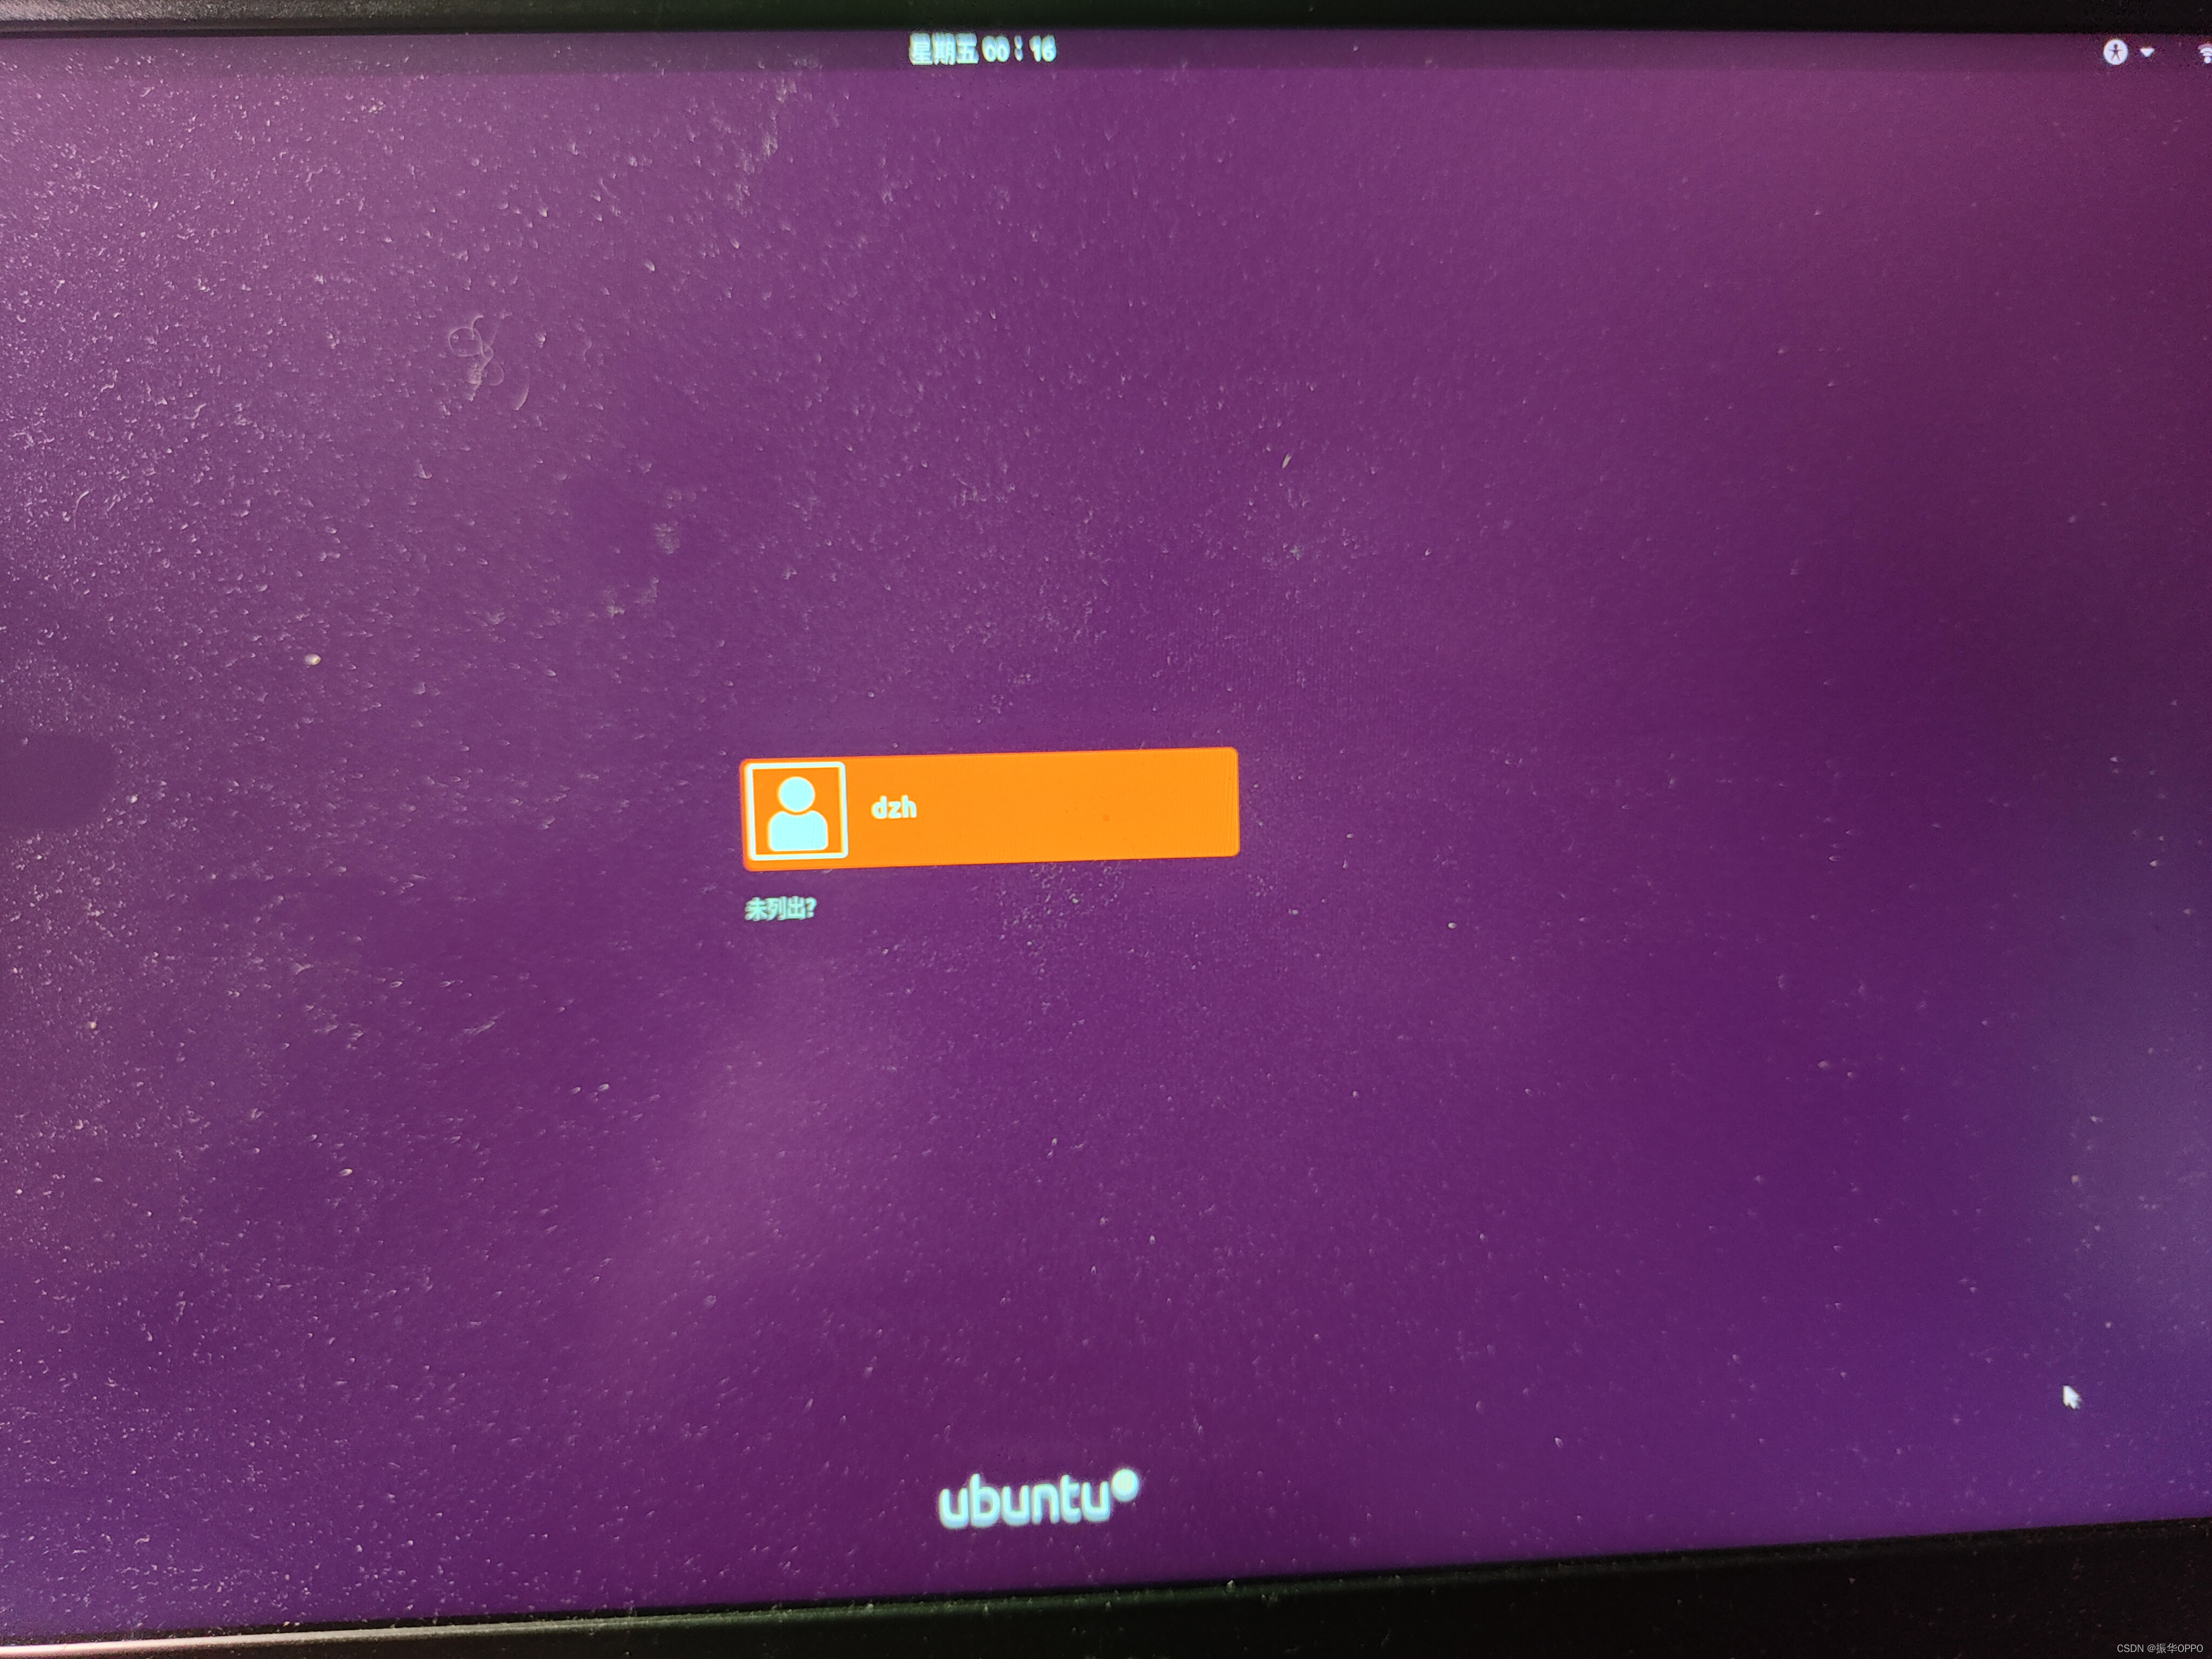
19. Then click the user, enter the password to log in, the login is successful! congratulations! Successful installation!
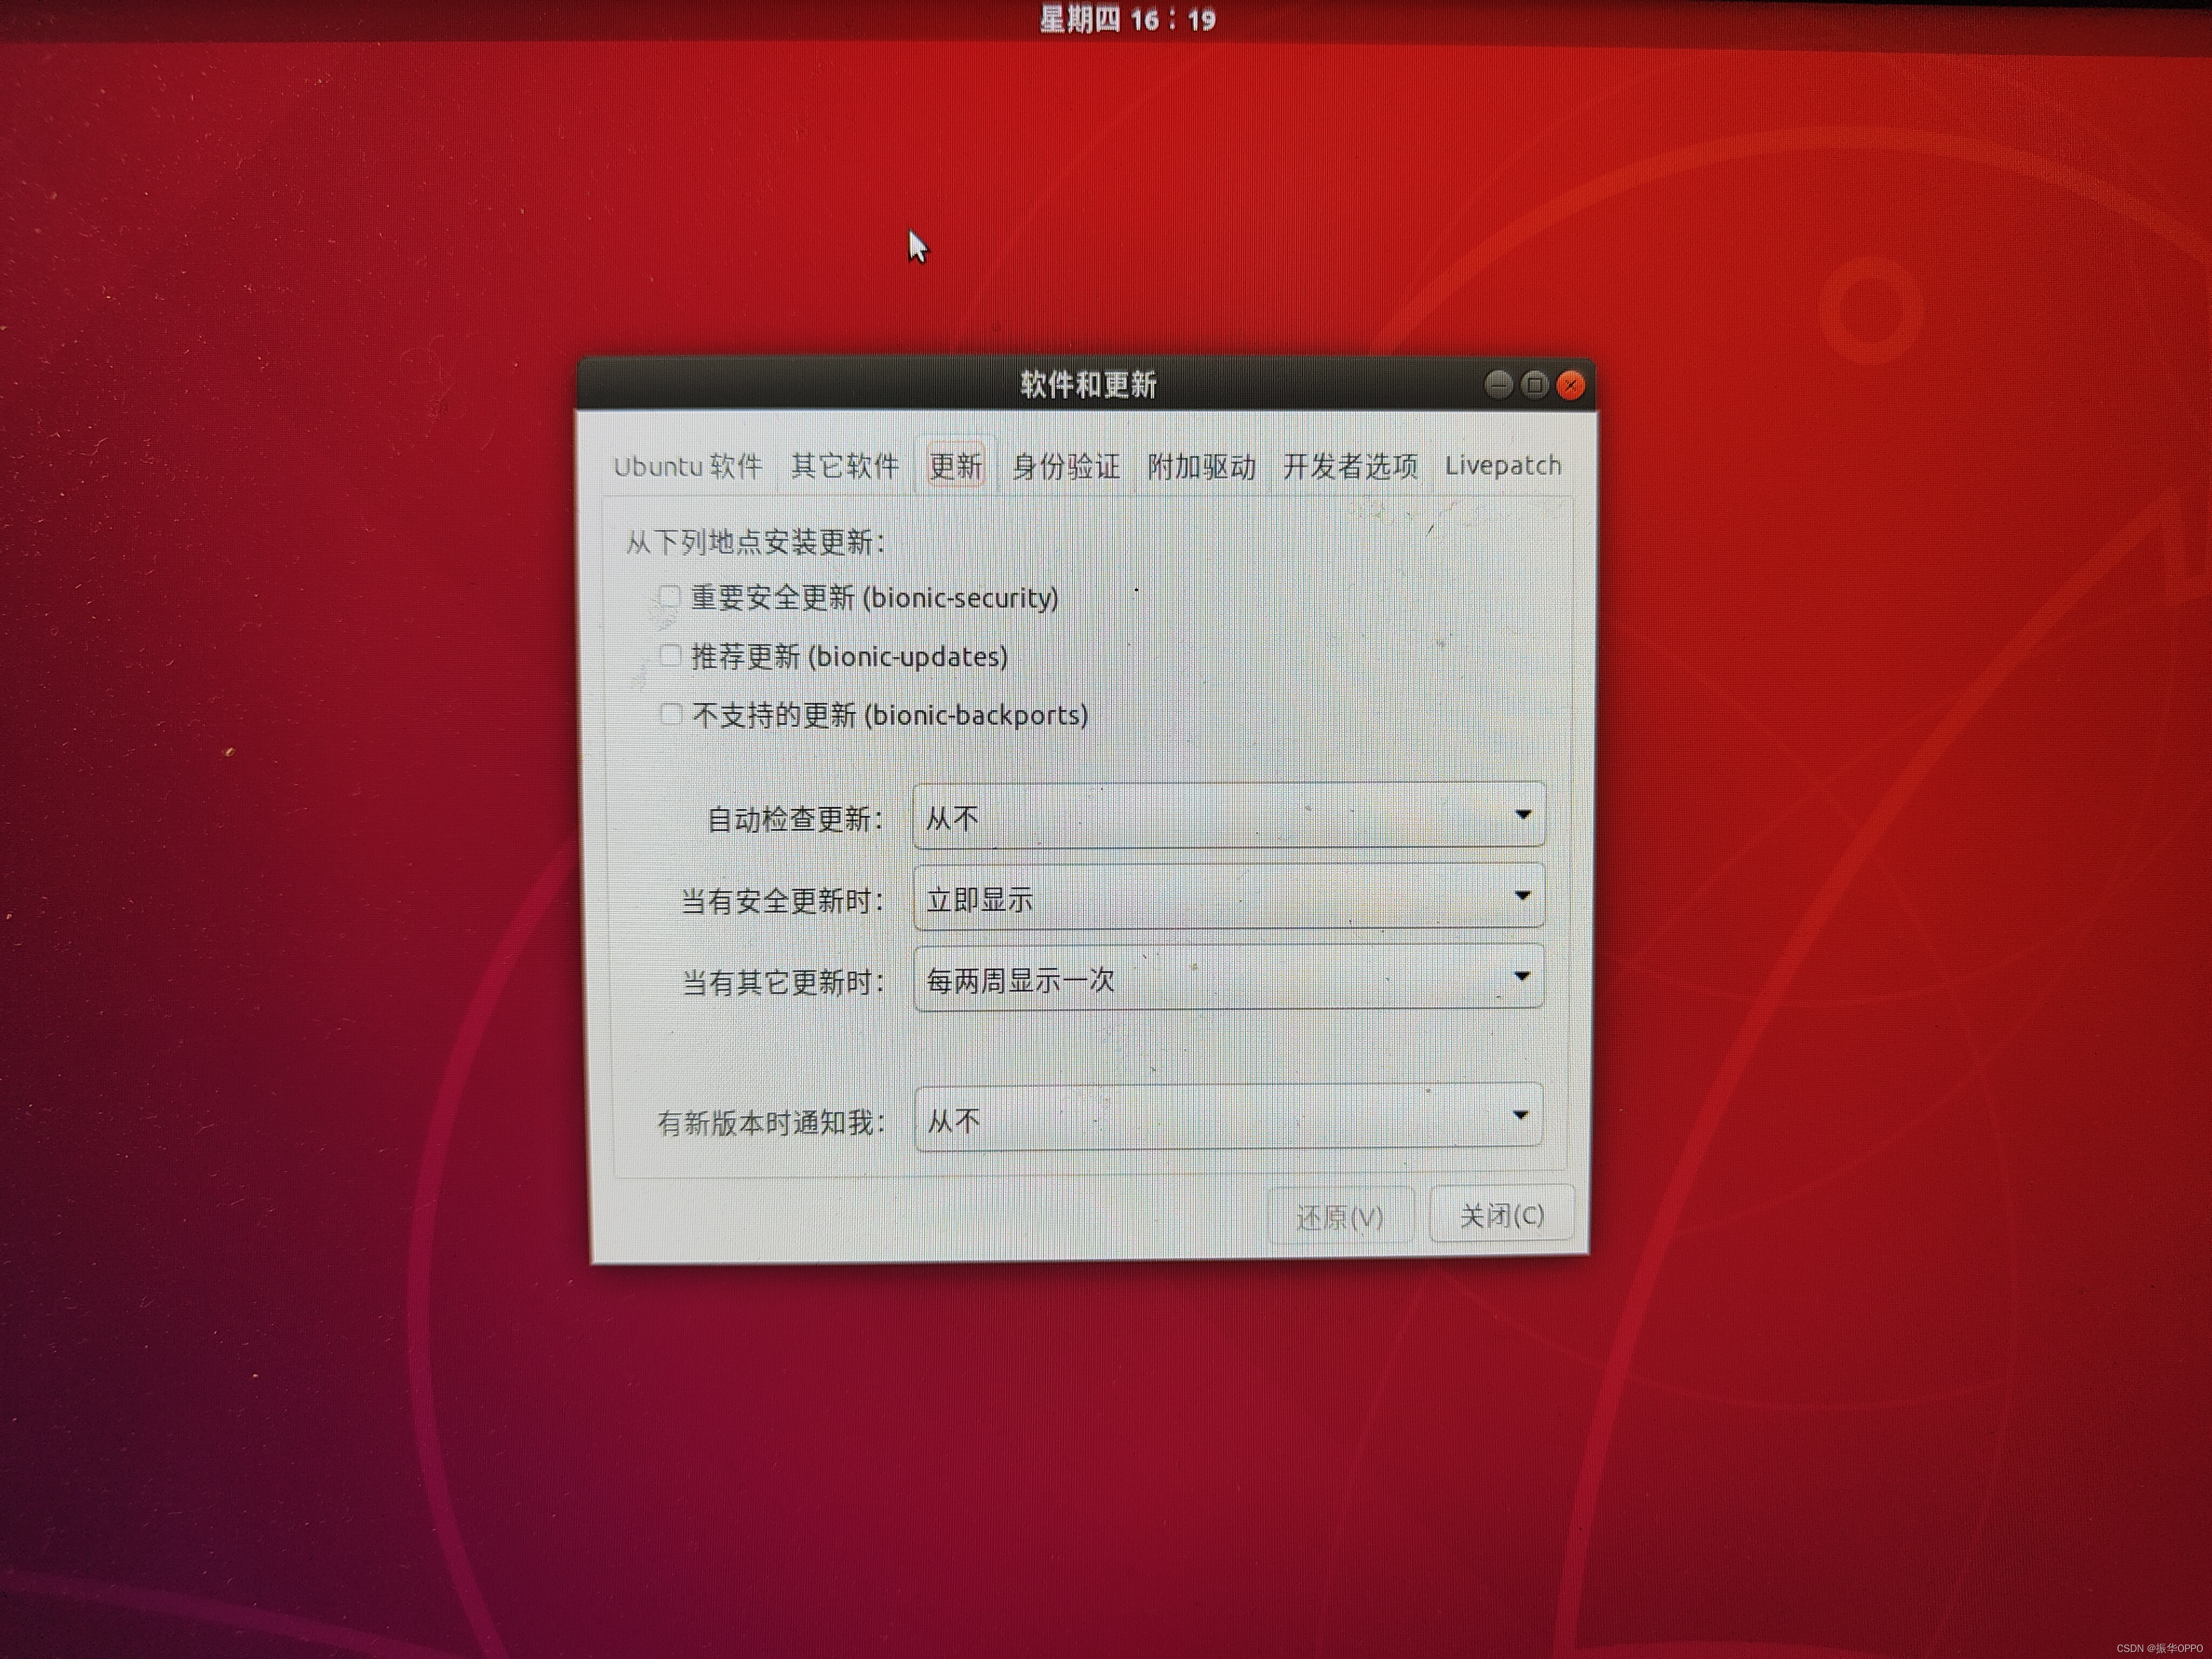
20. One more nagging here, turn off the system update prompt, otherwise it will always remind you to upgrade ubuntu20.04. Sometimes if you click the wrong upgrade, you have to reinstall it. If you set it like the picture below, you will not need to upgrade. Necessary trouble.
The above is the whole process of installing ubuntu. If it helps you, remember to support the blogger for three consecutive times!