ArcGIS configures the PostgreSQl database to create ArcSDE, and uses ArcPy to read the tif file in the sde database
- surroundings
-
- The first step is to install PostgreSQL9.2
- The second step, PostgreSQL9.2 directory file configuration
- The third step is to use ArcGIS to create an SDE database
- The fourth step is to establish an sde connection to the PostgreSQL database in ArcCatalog
- The fifth step, open the PgAdmin III graphical management interface to view the database in PostgreSQL
- The sixth step is to store the tif raster data in the sde database and use ArcPy to read it
surroundings
Windows 7 64-bit operating system, ArcGIS 10.2.2 (32-bit) has been installed, postgresql-9.2.24 (64-bit) needs to be installed

The first step is to install PostgreSQL9.2
By default, ArcGIS 10.2.2 has been installed. First, we need to check the version of PostgreSQL supported by ArcGIS 10.2.2 and find the ArcGIS installation directory: D:\ArcGIS 10.2.2\Desktop10.2\DatabaseSupport\PostgreSQL, as shown in the following figure As shown, it can be seen that ArcGIS 10.2.2 supports PostgreSQL databases of version 9.1 and 9.2. At the same time, this directory contains Windows64 folders. It can be seen that ArcGIS 10.2.2 supports 64-bit databases, so we choose 64-bit PostgreSQL9.2 as the database At

first, we download the 64-bit installation package postgresql-9.2.24-1-windows-x64.exe, and then double-click the exe file to install it.
At the same time, in order to obtain the 32-bit dll file, you can first download the 32-bit PostgreSQl 9.2 software postgresql-9.2.1-1-windows.exe . After installation, find the bin directory, copy the required dll file, and then uninstall it 32-bit PostgreSQL 9.2, and then install the 64-bit PostgreSQL9.2 software postgresql-9.2.24-1-windows-x64.exe
(Note:
postgresql 9.2.24 download address: https://pan.baidu.com/s/ 1wFiyen2AMoDqXes1DHzYsA
extraction code: s6io)
During the installation process, you need to select the installation directory. A super user named postgres will be automatically created. The database super user password needs to be set to 1234. The service listening port defaults to 5432. Select the operating language, which can be the default. It is best to choose C. Finally, the installation is complete. The interface will be checked automatically. If checked, Stack Builder will run after Finish, but here we can uncheck it, because we still need to modify some configuration files.
The 64-bit PostgreSQL 9.2 is installed as shown in the following figure:

The second step, PostgreSQL9.2 directory file configuration
By viewing ArcGIS Desktop help, we found that some dll files need to be configured.

First of all, after we have installed the 64-bit PostgreSQL 9.2, do not open the graphical management tool pgAdmin III to view the PostgreSQL database, but find the installation directory of the PostgreSQL 9.2 database software.
First , install the ArcGIS Desktop installation directory D:\ArcGIS 10.2. 2\Desktop10.2\DatabaseSupport\PostgreSQL\9.2\Windows64 copy the st_geometry.dll file to the PostgreSQL 9.2 installation directory D:\PostgreSQL\lib, as shown in the figure below:


Second , you need to download the library corresponding to the ArcGIS client . For 32-bit ArcGIS applications, you need 32-bit libraries. For 64-bit ArcGIS applications, you need a 64-bit client library. Because ArcGIS 10.2.2 is 32-bit, it needs 32-bit PostgreSQl 9.2 corresponding dll library file

32-bit Postgresql libraray link: https://pan.baidu.com/s/1KSxnus_n7MB7neQrahQPPw Extraction code: m4U9
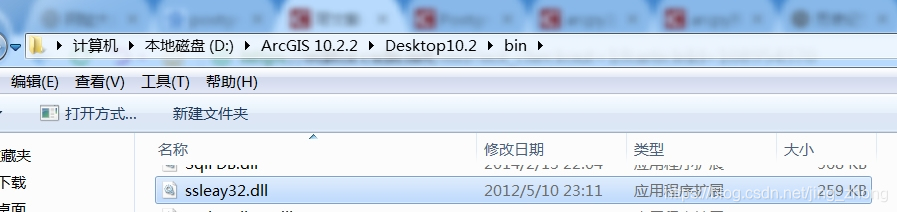
will be 5 shown in the figure above Copy the dll files (libeay32.dll, libiconv.dll, libintl.dll, libpq.dll and ssleay32.dll) to D:\ArcGIS 10.2.2\Desktop10.2\bin in the bin directory of the ArcGIS Desktop installation directory, as shown in the figure below Shown:

The third step is to use ArcGIS to create an SDE database
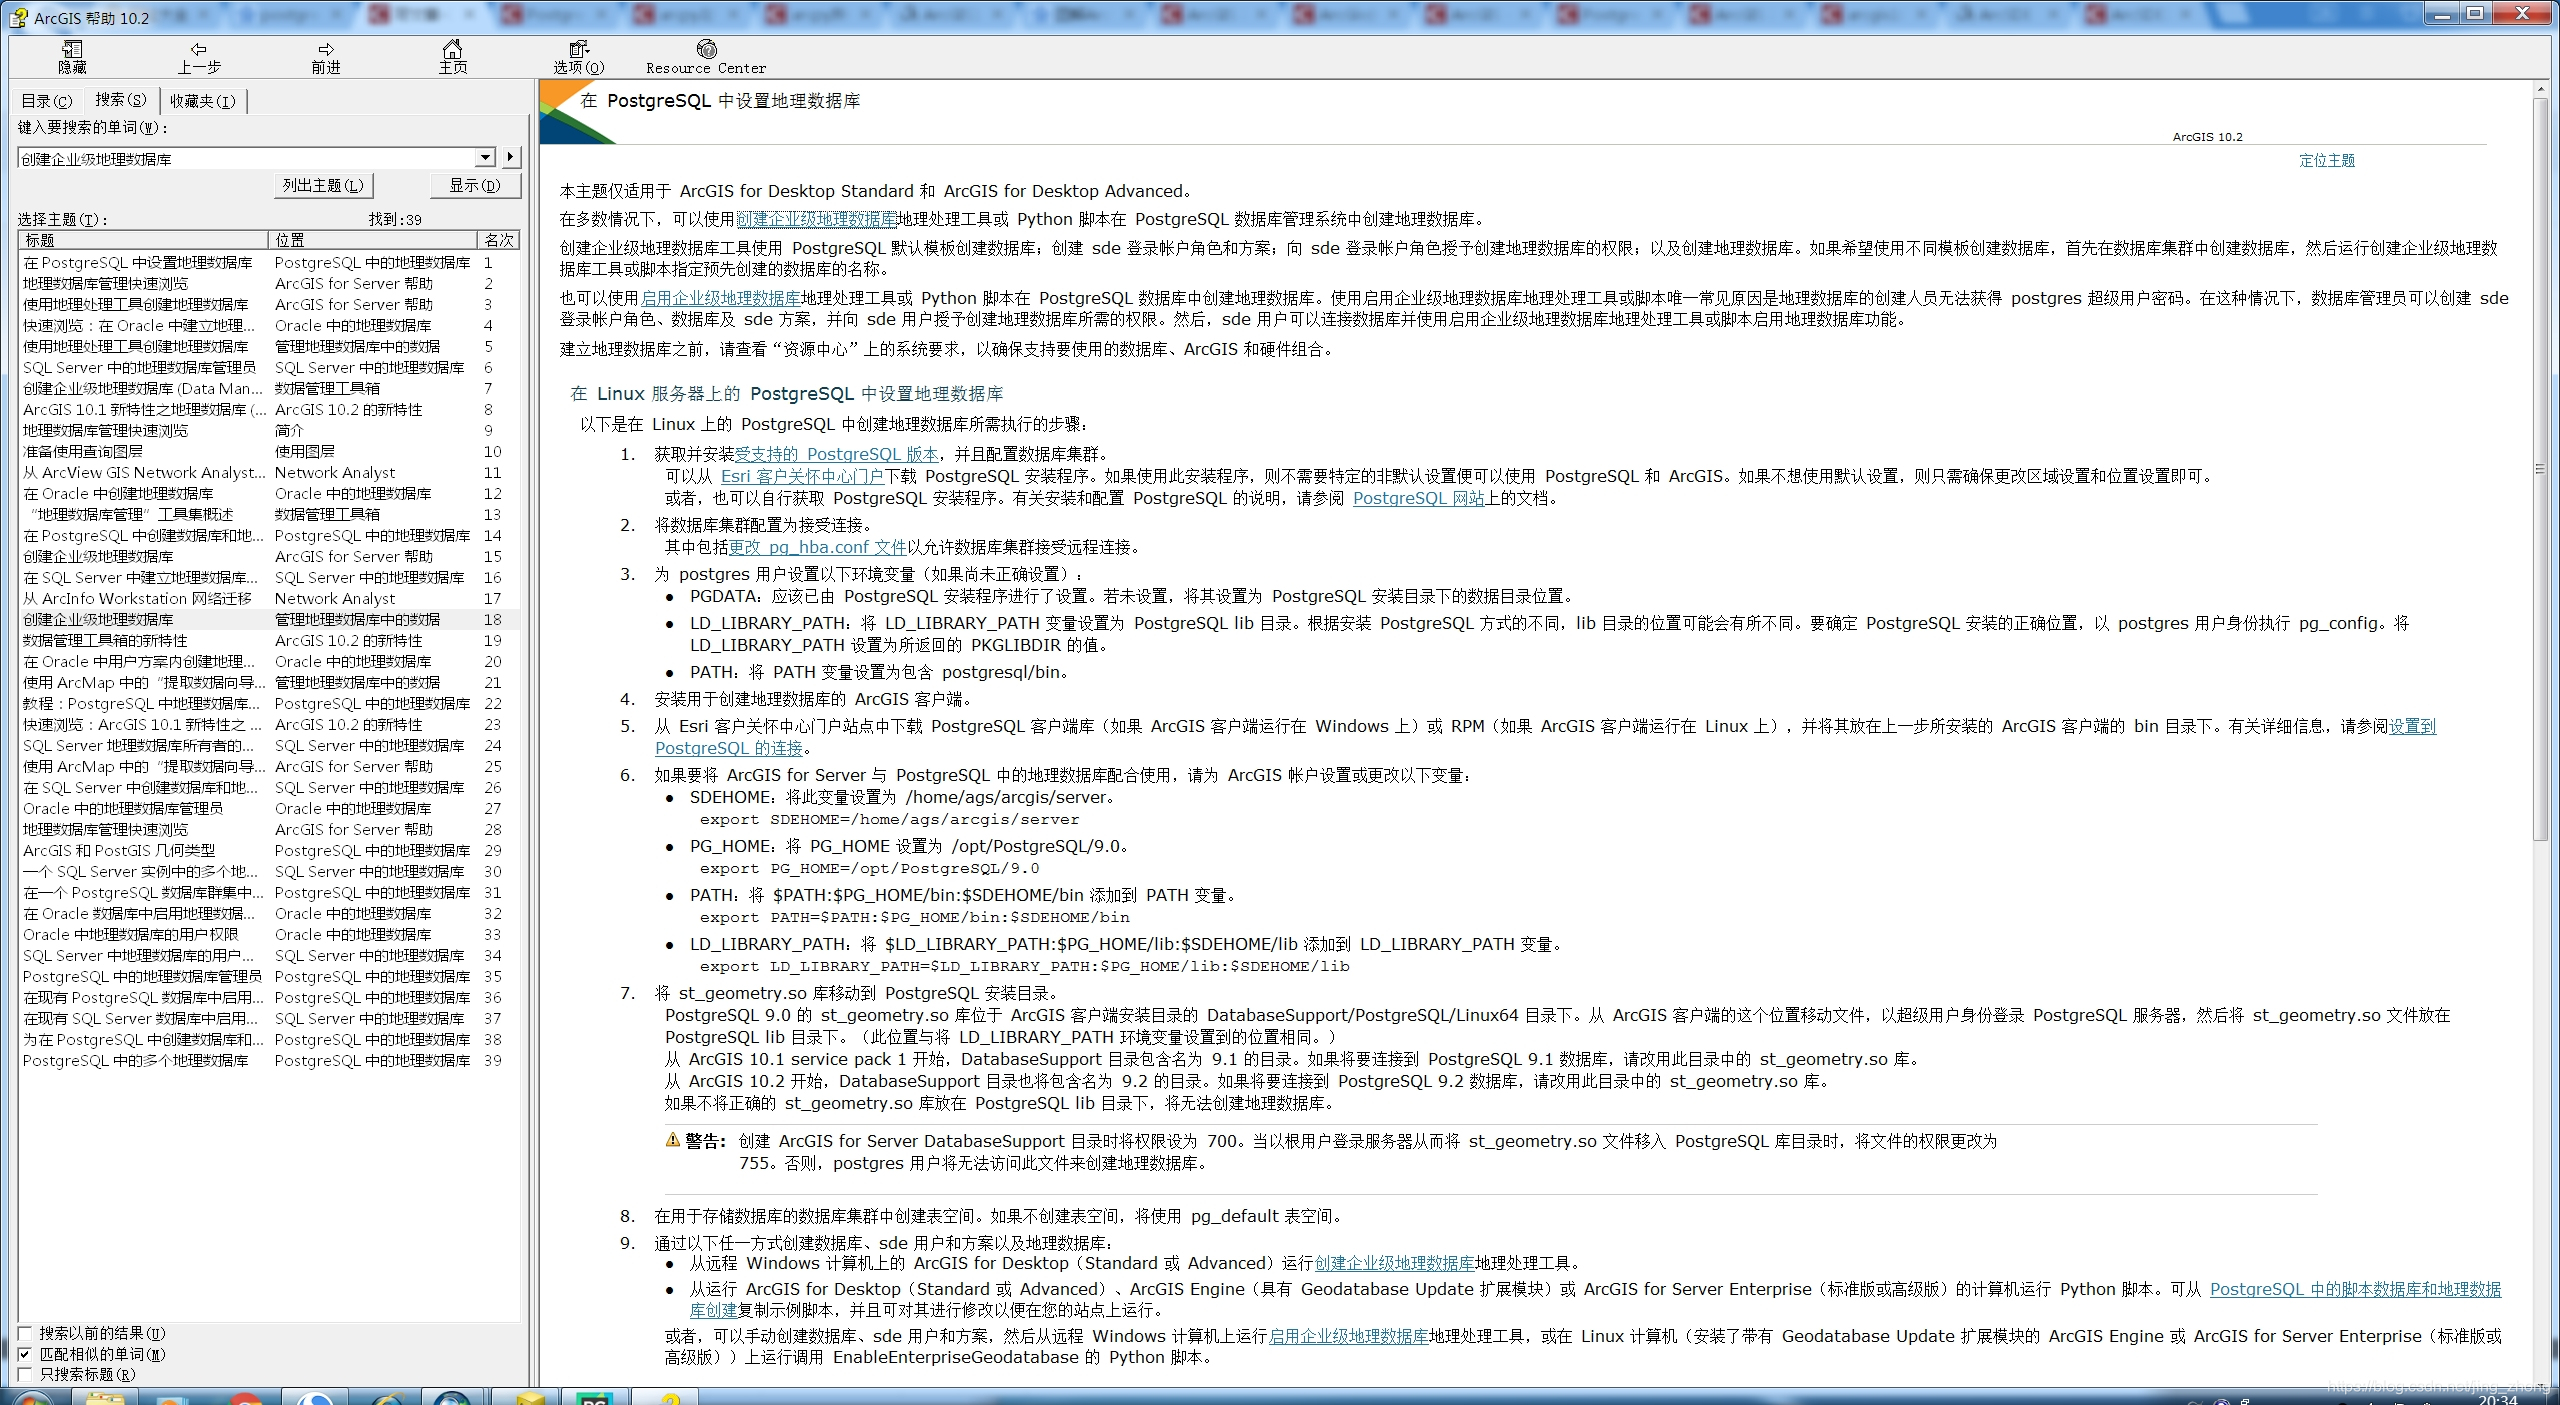
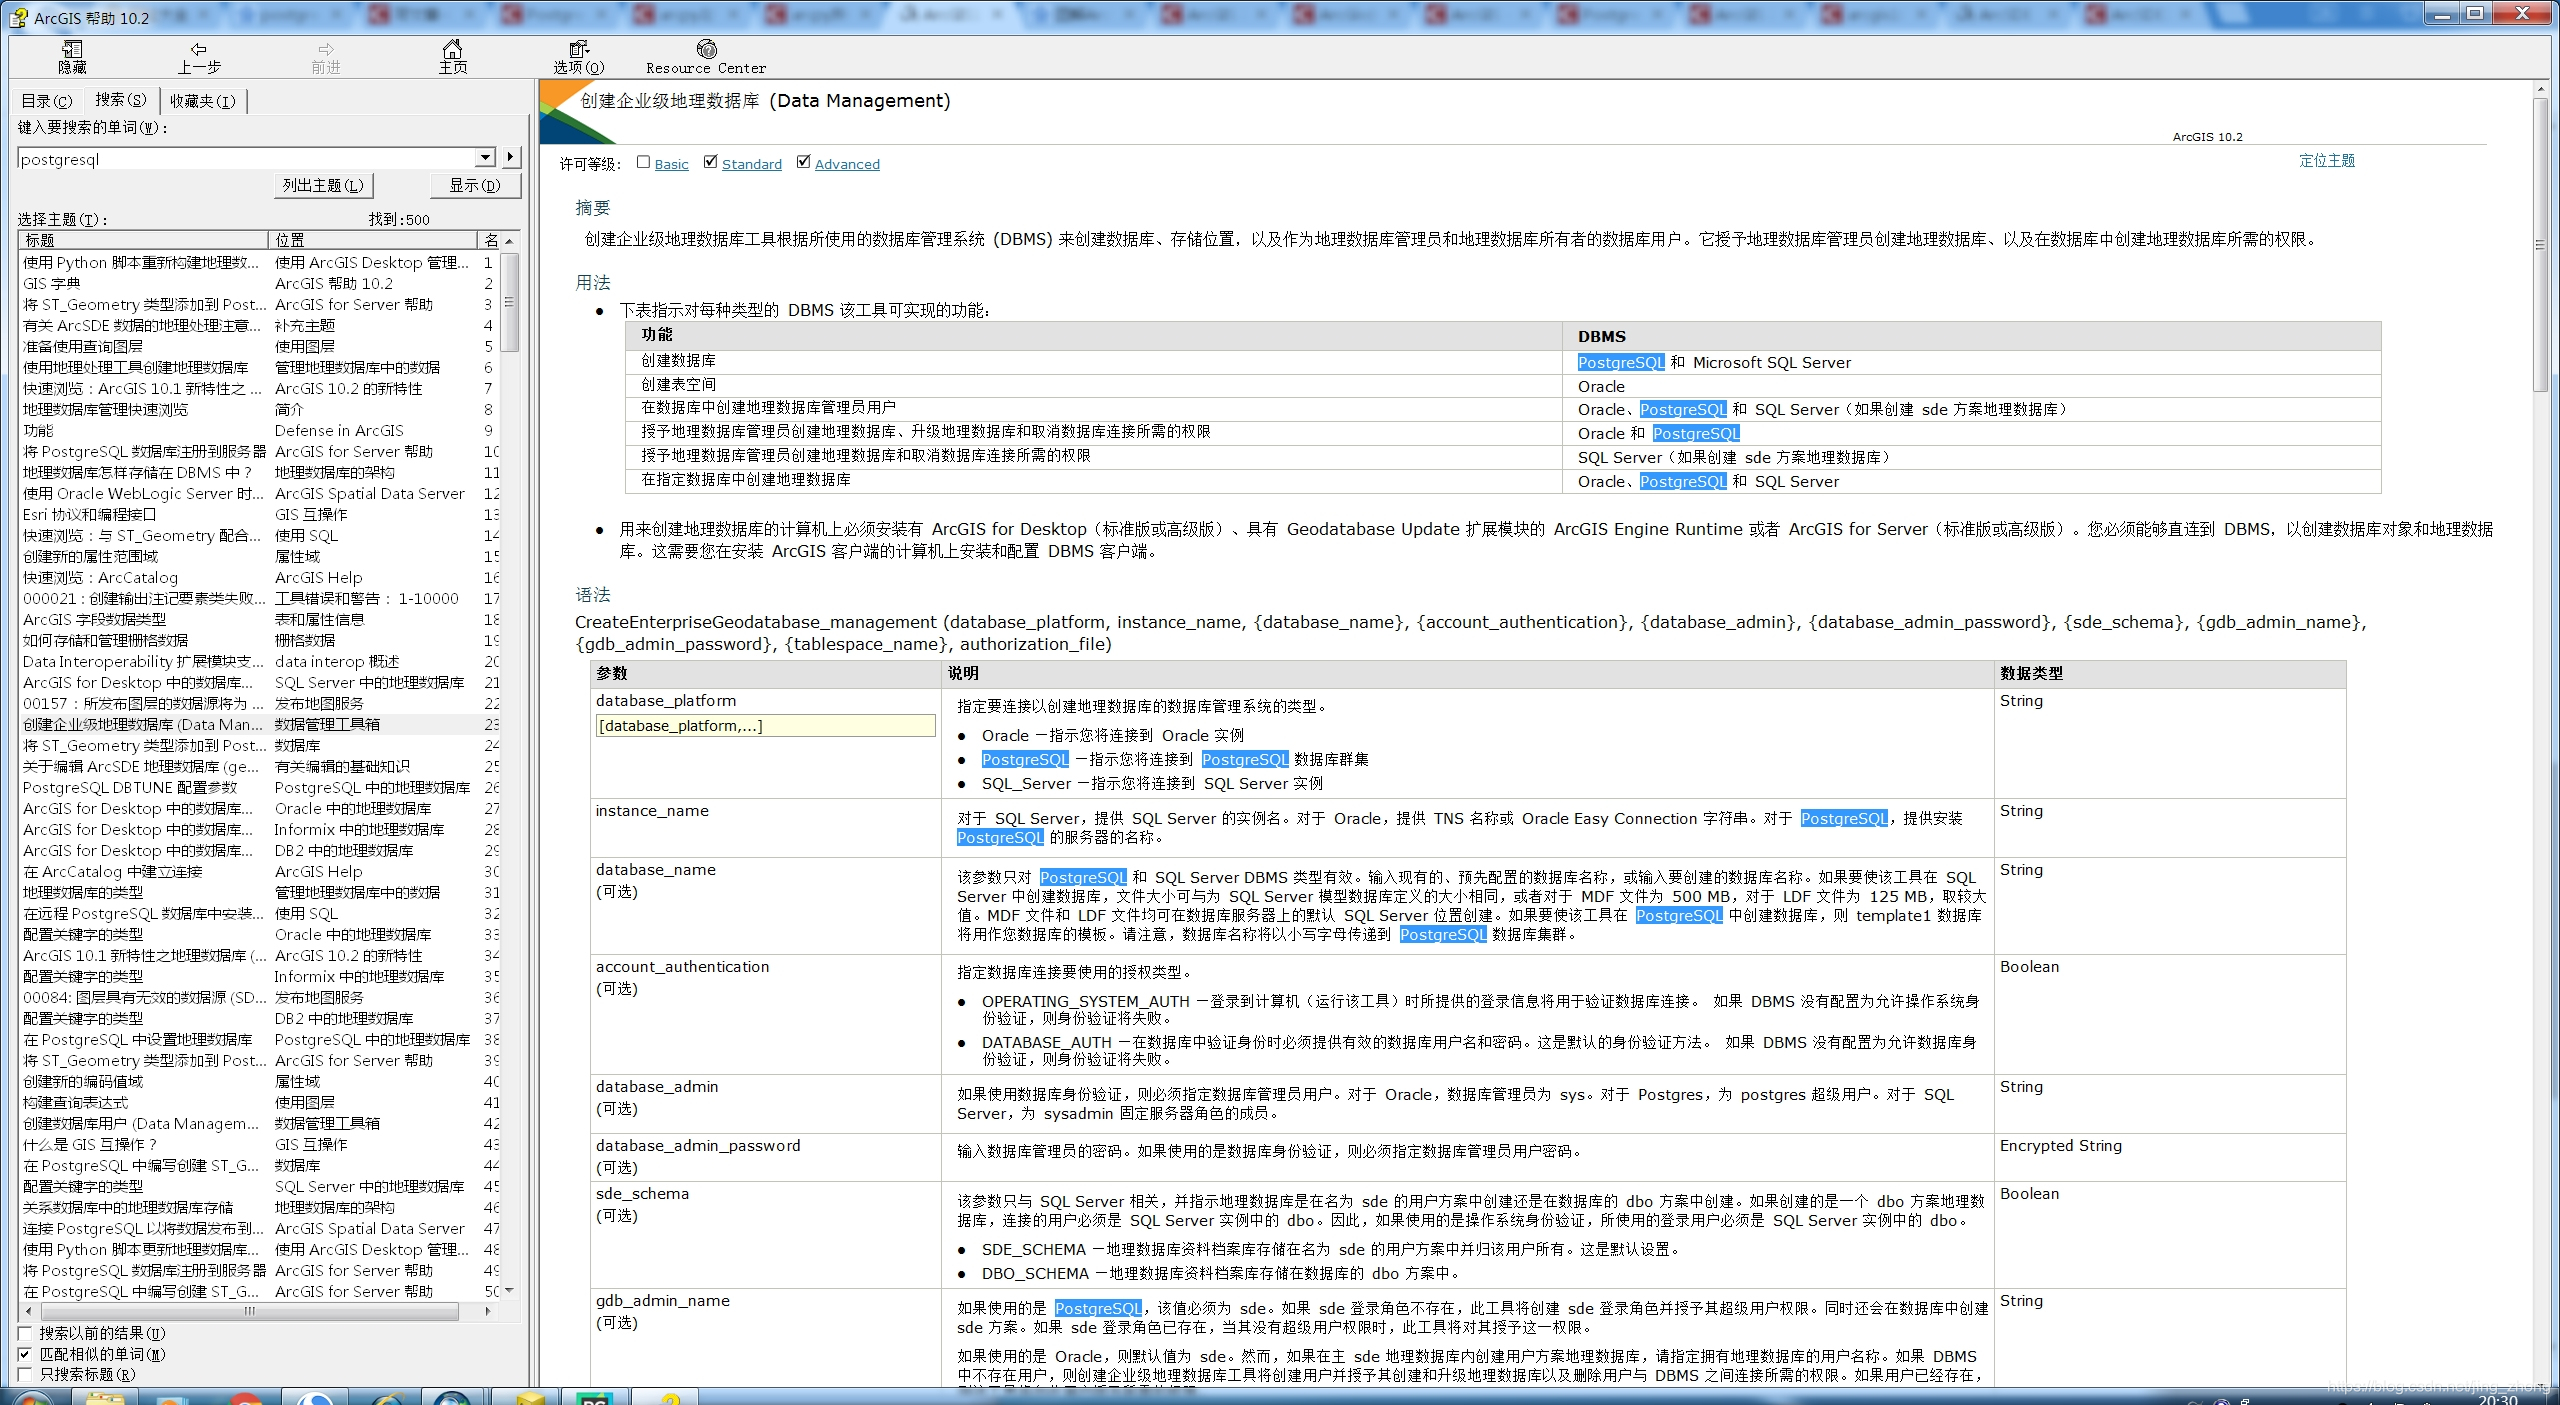
This part mainly refers to the tutorial of creating an enterprise geodatabase and setting up a geodatabase in PostgreSQl in ArcGIS Help

First open ArcMap, and then use ArcGIS toolbox to create an enterprise geodatabase: the

configuration parameters are as shown in the figure below:

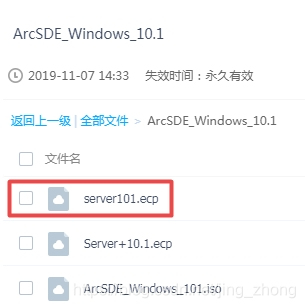
Explain that the database platform is PostgreSQL. For the instance, if it is a local machine, you can enter localhost or 127.0.0.1. If you want to connect remotely, For PostgreSQL, provide the name of the server where PostgreSQL is installed. The password of the database administrator and the password of the geodatabase administrator enter the super user password 1234 that was set when PostgreSQL 9.2 was installed, and finally select the server.ecp authorization file with a size of 3KB.

For those without a server.ecp authorization file, you can go to the following link Download:
Link: https://pan.baidu.com/s/1-IIDUi5frunZzqmuH1HwRA
Extraction code: 1qsk
Click OK, the enterprise-level geographic database is successfully created as shown below.

The fourth step is to establish an sde connection to the PostgreSQL database in ArcCatalog
Open ArcCatalog, click Add database connection in the database connection under the directory tree on the left, and enter the following parameters: select PostgreSQL for the database name, localhost for the instance, select database authentication, username sde, password 1234, and enter sde for the database.
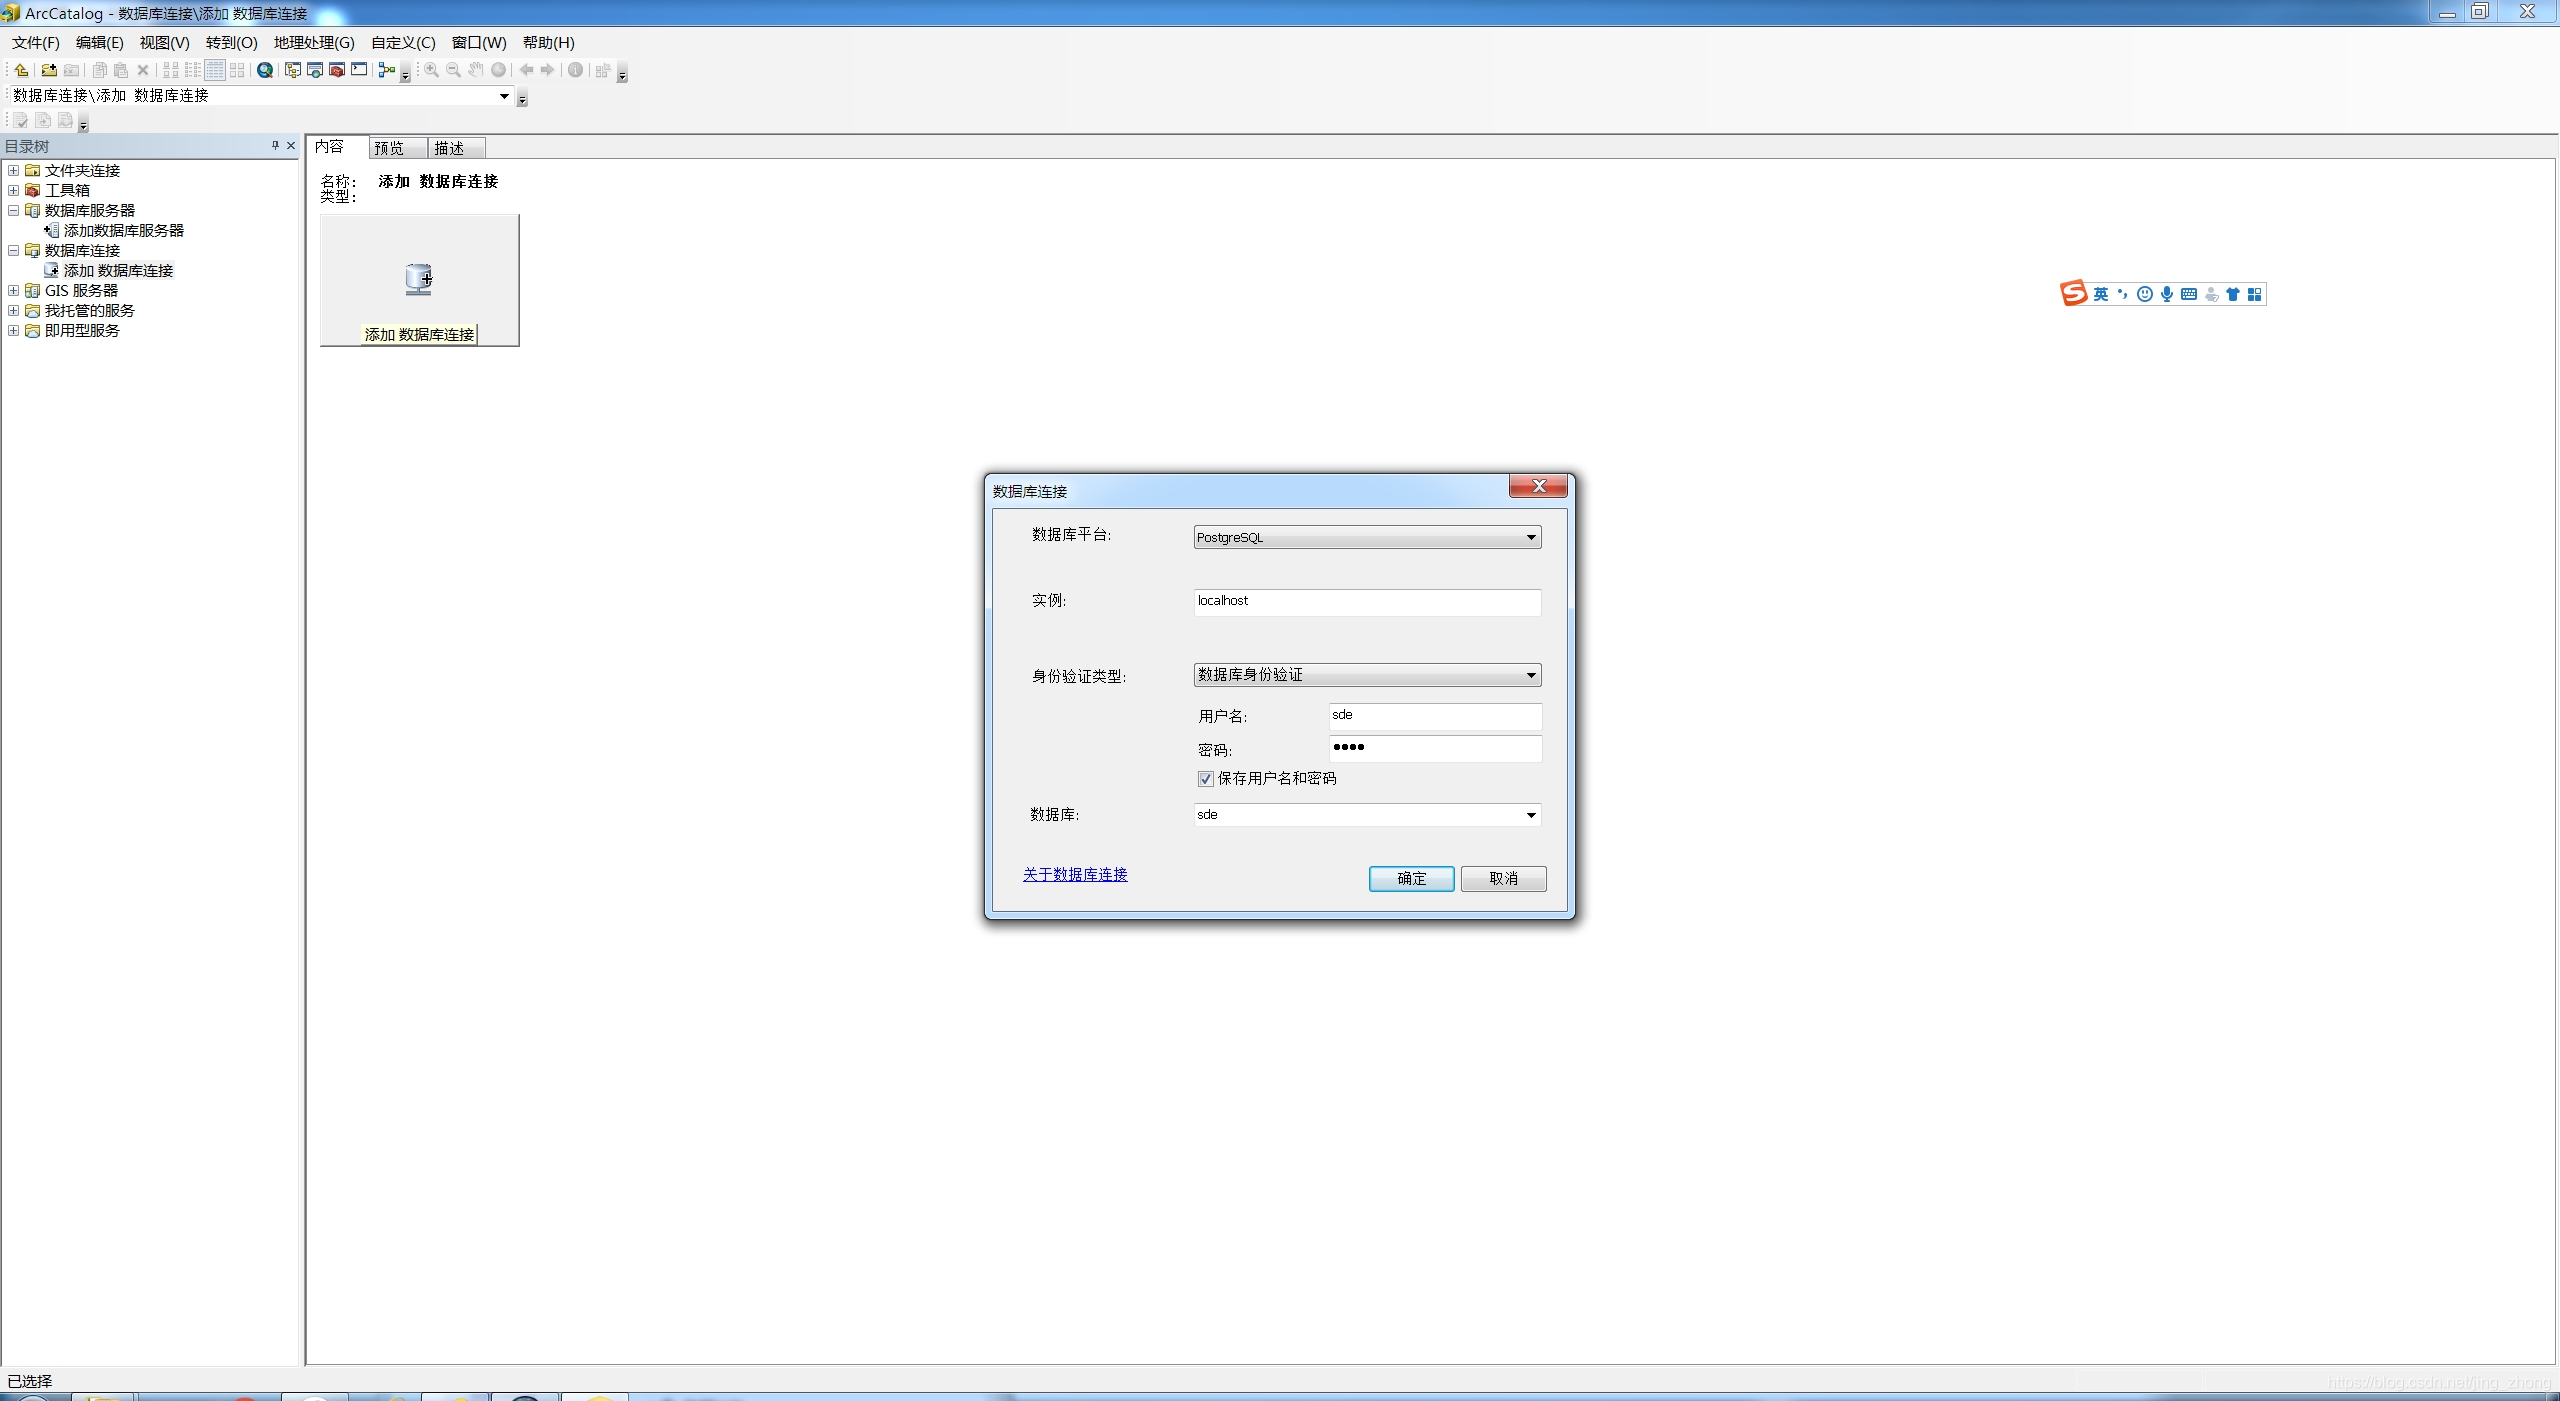
Yes , as shown in the following figure: After clicking OK, you can successfully connect, and a .sde will be generated on the left. This .sde can be renamed, because it is set to the sde connection to the local PostgreSQL database, so rename it to postgresql_localhost.sde. Right-click or double-click on this sde to open the connection.


In addition, right click on this sde -> properties, you can view detailed information, such as the storage path C:\Users\Administrator\AppData\Roaming\ESRI\Desktop10.2\ArcCatalog\postgresql_localhost.sde

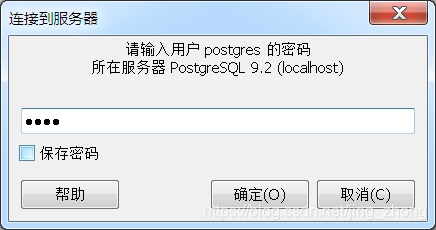
The fifth step, open the PgAdmin III graphical management interface to view the database in PostgreSQL
Find pgAdmin III under the start menu, double-click to

open it, as shown in the figure below, click PostgreSQL 9.2 (localhost:5432), right-click and select connect.

In the pop-up connect to the server window, enter the super user password 1234, and click OK
. It can be seen that all the databases in PostgreSQL are opened, and the sde database and postgres database can be seen. So far, the ArcGIS 10.2.2 installation is completed with the ArcSDE database configuration on the PostgreSQL 9.2-bit database side.

The sixth step is to store the tif raster data in the sde database and use ArcPy to read it
In order to store tif raster data in the sde database, you need to open ArcCatalog, open the connection of postgresql_localhost.sde, and then right-click and select Import -> Raster Data Set.
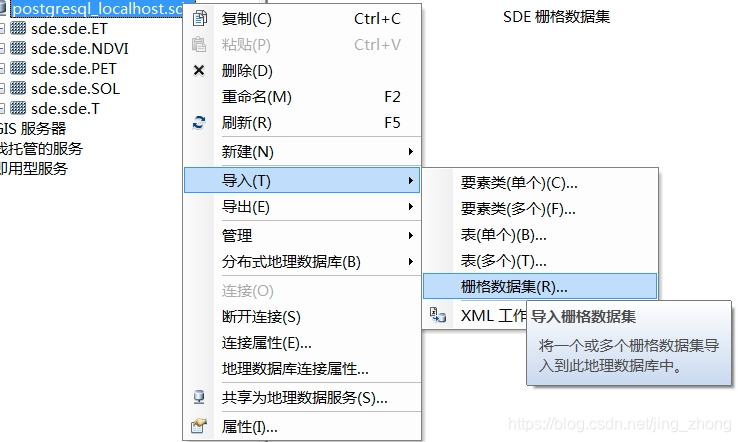
In the pop-up raster data to geodatabase (batch) window, you can choose Multiple tif raster data files, these raster data will be output to the database connection\postgresql_localhost.sde geodatabase, and finally click OK

and then, after refreshing in ArcCatalog, as shown in the figure below, there are several data tables under postgresql_localhost.sde , Right-click on these data tables can modify the name sde.sde.ET, and at the same time, you can view the stored tif data in the PostgreSQL database:


Next, use ArcPy to read the tif file in the sde database in the PostgreSQL database and perform map algebra Operation, the code is shown in the figure below;
// ArcPy读取ArcSDE数据库中存放的tif栅格数据
#-*- coding: UTF-8 -*-
import arcpy
from arcpy import env
import os
from arcpy.sa import *
# Check out the ArcGIS Spatial Analyst extension license
arcpy.CheckOutExtension("Spatial")
#sde库的物理路径, arcgis中sde的连接地址
inputsde = r'C:\Users\Administrator\AppData\Roaming\ESRI\Desktop10.2\ArcCatalog\postgresql_localhost.sde'
env.workspace =inputsde
#读取NPP模型的输入数据
NDVI_Raster = arcpy.Raster("sde.sde.NDVI")#读取tif文件
SOL_Raster = arcpy.Raster("sde.sde.SOL")#读取tif文件
ET_Raster = arcpy.Raster("sde.sde.ET")#读取tif文件
PET_Raster = arcpy.Raster("sde.sde.PET")#读取tif文件
T_Raster = arcpy.Raster("sde.sde.T")#读取tif文件
env.workspace ="H:\\CASA_Model_200101\\NPPResult"
SRmin = 0.5
SRmax = 1.5
FPARmin = 0.001
FPARmax = 0.95
T_opt = 26
e_max = 0.389

SR = (1 + NDVI_Raster) / (1 - NDVI_Raster)
print("SR 计算完成!")
FPAR = FPARmin + (FPARmax - FPARmin) * ((SR - SRmin) / (SRmax - SRmin))
print("FPAR 计算完成!")
APAR = SOL_Raster * FPAR * 0.5
print("APAR 计算完成!")
def func(a):
    if a > -10:
        return 0.8 + 0.02 * a - 0.0005 * a * a
    else:
        return 0

T1 = func(T_opt)
print("T1 计算完成!")
T2 = (1.184/(1+Exp(0.2*(T_opt-10-T_Raster))))*(1/(1+Exp(0.3*(T_Raster -10-T_opt))))
print("T2 计算完成!")
W = 0.5 +0.5* ET_Raster / PET_Raster
print("W 计算完成!")
e = T1 *T2 * W *e_max
print("e 计算完成!")
NPP = APAR * e
NPP.save("H:/CASA_Model_200101/NPPResult/NPP.tif")
print("NPP 计算完成!")
The running result is as follows: the
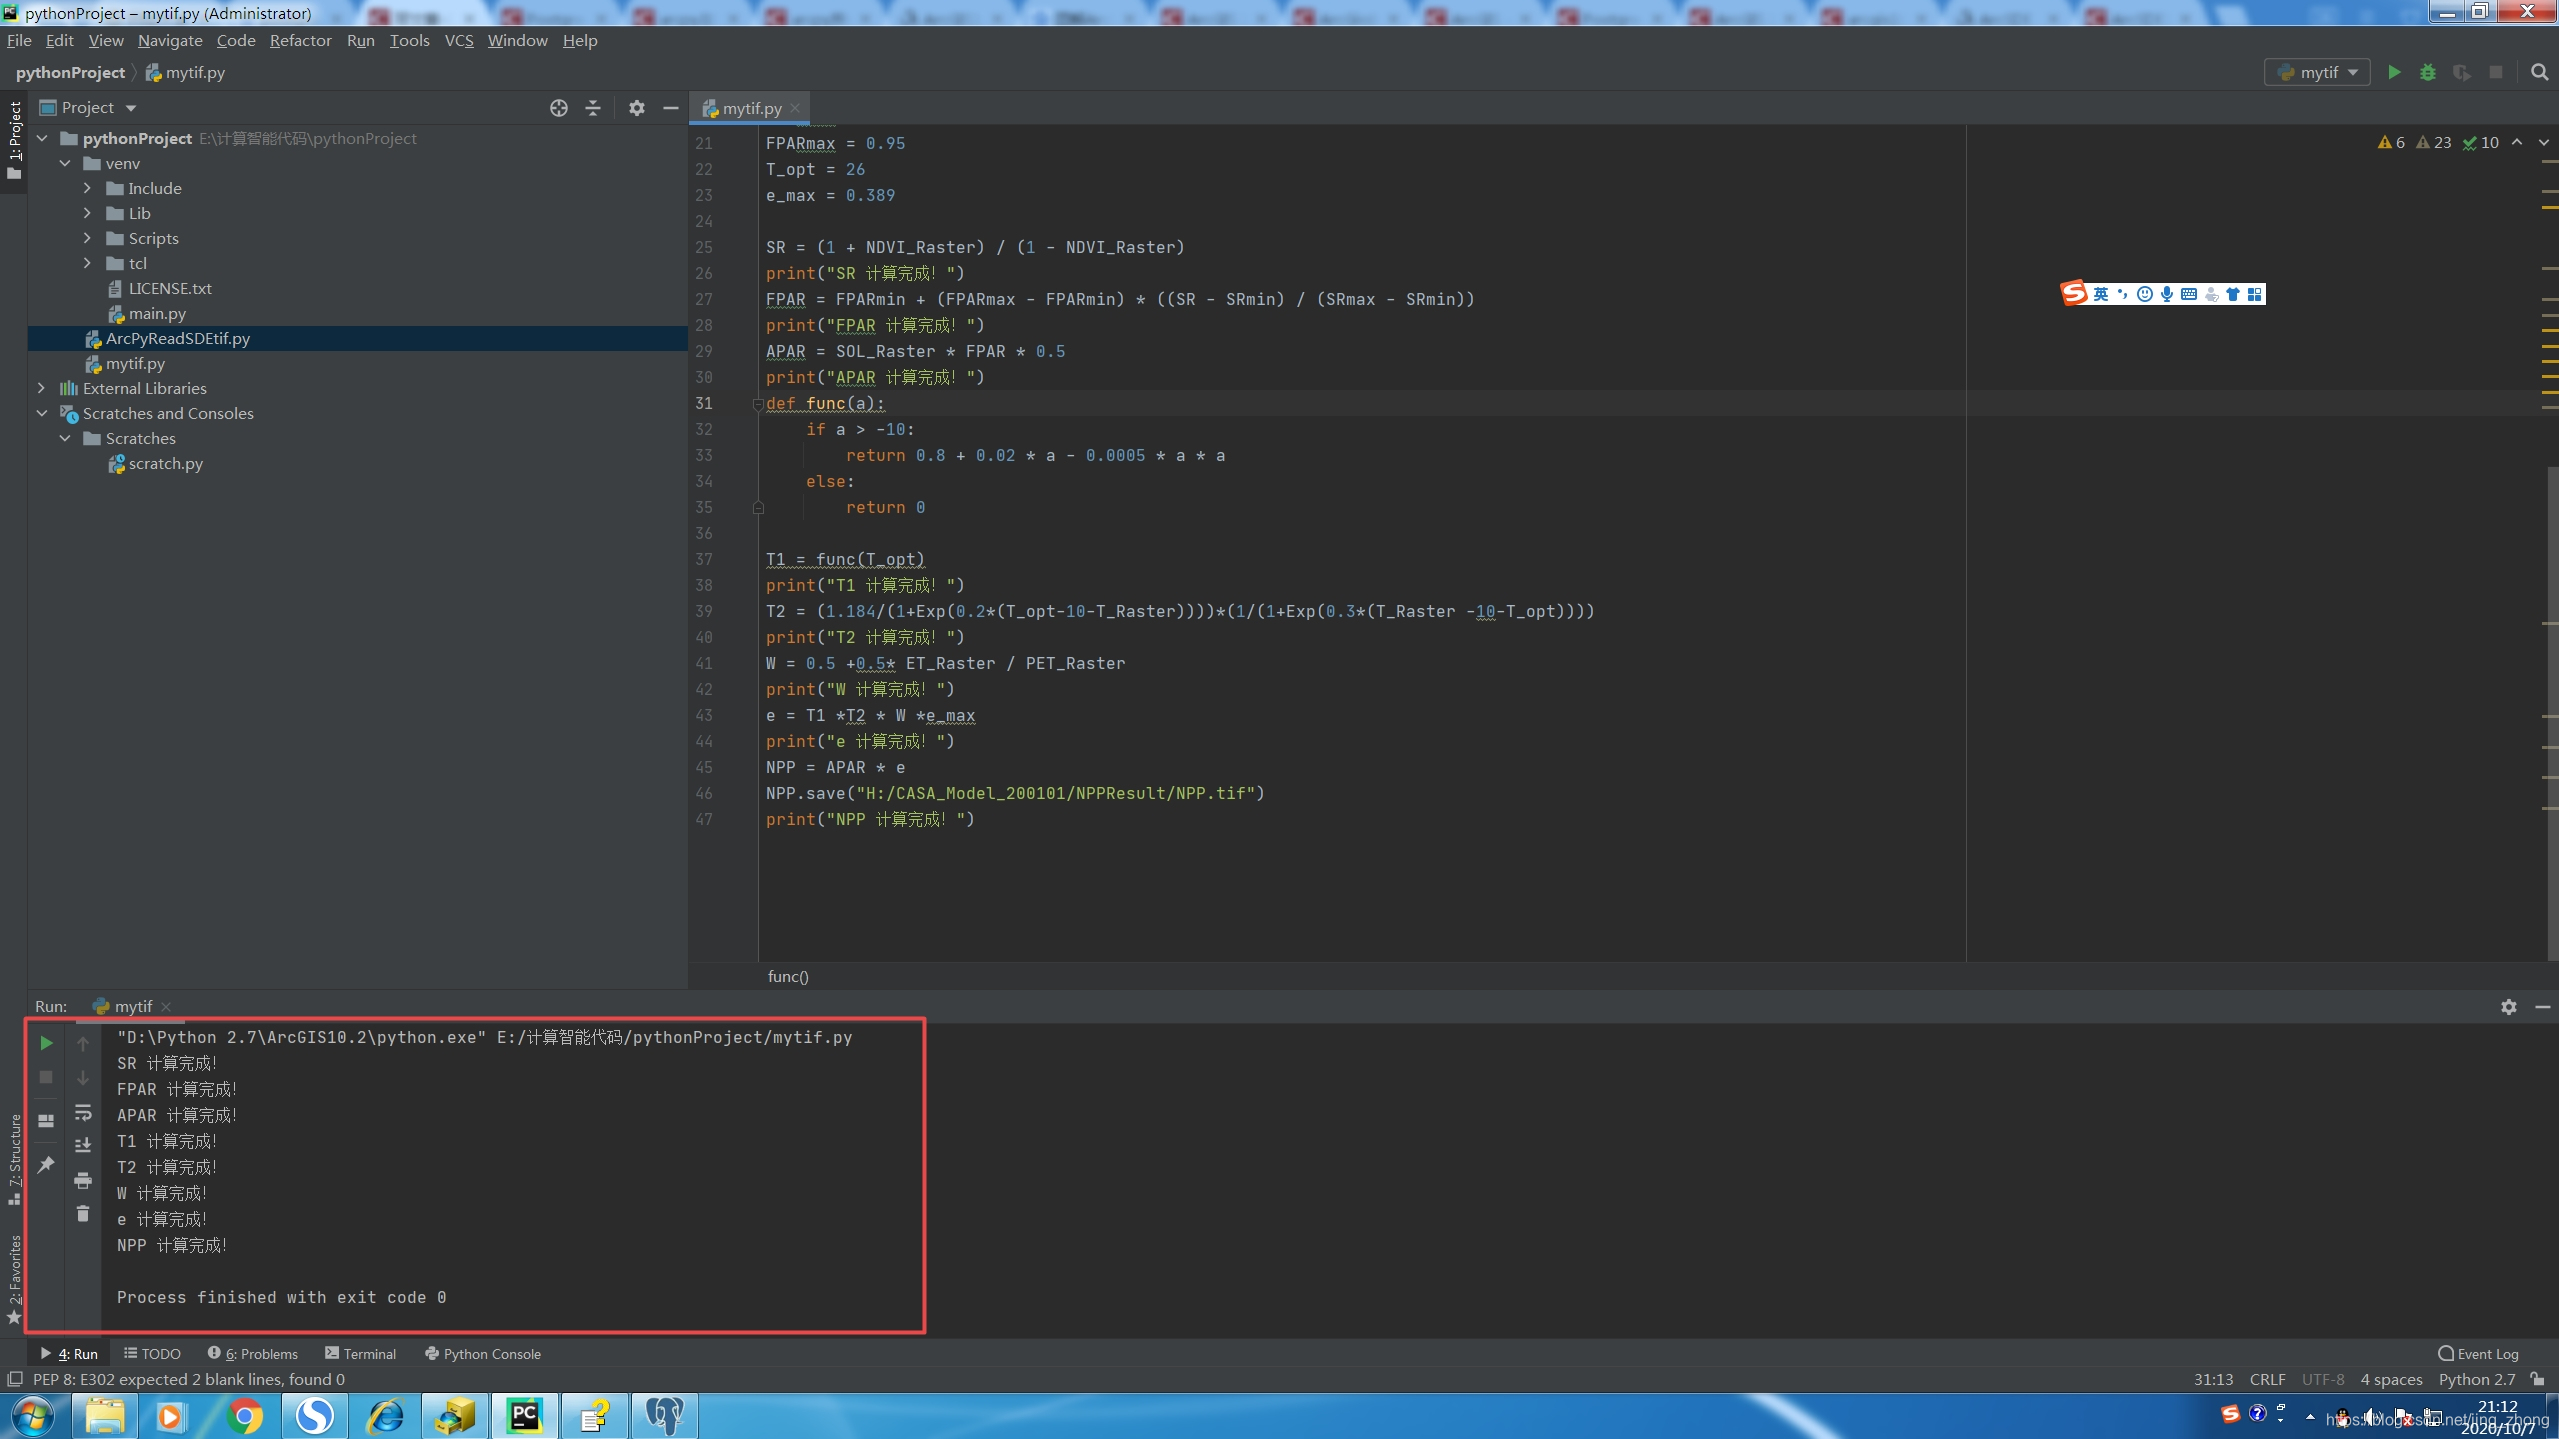
final processing result is saved to the file directory.
