Install and deploy postgresql database to build timescaledb database (time series library)
timescaledb build
Article Directory
- Install and deploy postgresql database to build timescaledb database (time series library)
-
- Build a pg database
-
- 1. Install yum source (used when the server can access the Internet)
- 2. Install the client
- 3. Install the server
- 4. Initialize the database
- 5. Modify the service startup script
- 6. Modify the database configuration
- 7. Open firewall ports
- 8. Start the database service
- 9. Modify the database postgres user password
- Second install the plug-in
- Three changed postgres to timescaledb timing library
Build a pg database
1. Install yum source (used when the server can access the Internet)
yum install -y https://download.postgresql.org/pub/repos/yum/reporpms/EL-7-x86_64/pgdg-redhat-repo-latest.noarch.rpm
2. Install the client
yum install postgresql11 –y
3. Install the server
yum install postgresql11-server -y
4. Initialize the database
After installing with yum, a passwordless postgres user will be created in the system. Switch to this user on the main node server, and then create a data directory, which will store all configuration files, database files, and log files.
root # mkdir -p /u01/apps/pgsql/data
root # chown -R postgres:postgres /u01/apps/pgsql/
The installation directory of PostgreSQL is stored in /usr/pgsql-11 by default. Use the following command to initialize the database directory:
execute with postgres user: record
I put
/usr/pgsql-11/bin/initdb -D 【数据目录全路径】
5. Modify the service startup script
Use the root user to modify the /usr/lib/systemd/system/postgresql-11.service file and modify the PGDATA in it to the new data directory
vim /usr/lib/systemd/system/postgresql-11.service

6. Modify the database configuration
Use the postgres user to enter the self-created data directory and modify the postgresql.conf file:
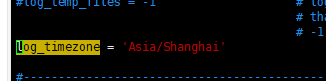
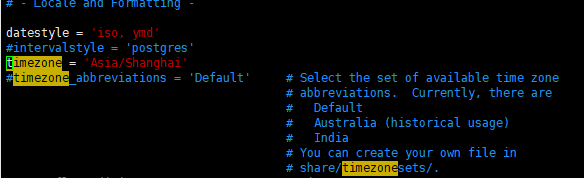
you must modify listen_addresses, port, max_connections, log_timezone, timezone, and datestyle .

Modify the pg_hda.conf file under the data directory, and add the address that is allowed to connect to the database:

7. Open firewall ports
firewall-cmd --add-port=5432/tcp --permanent
firewall-cmd --reload
8. Start the database service
Start the service: systemctl start postgresql-11
Stop the service: systemctl stop postgresql-11
Restart the service: systemctl restart postgresql-11
9. Modify the database postgres user password
Modify the password of the database postgres user, use the system postgres user to enter psql, and execute the following command:
[root]# su - postgres
上一次登录:二 12月 29 13:35:56 CST 2020pts/0 上
-bash-4.2$ psql
psql (11.5)
输入 "help" 来获取帮助信息.
 postgres=# ALTER USER postgres ENCRYPTED PASSWORD '【密码】';
Second install the plug-in
Install the required plugins
- Install PostGIS and pgAgent
yum install postgis25_11 -y
yum install pgagent_11 -y
- Switch to the postgres user, run psql to enter the postgresql client, and run the following command in the postgres database:
Create extension pgagent;
- Run the following command in the postgresql client to create the database cs2:
Create database cs2;
- Create a database extension in the cs2 database
Create extension postgis;
Create extension "uuid-ossp";
Create extension "postgres_fdw"
- Use the root user to start the pgagent service:
systemctl start pgagent_11
systemctl enable pgagent_11
Three changed postgres to timescaledb timing library
1 Install timescaledb-postgresql-11
sudo yum install -y timescaledb-postgresql-11
2 Edit the configuration file
vi /u01/data/pgdata/postgresql.conf
Modify the content
shared_preload_libraries = 'timescaledb'
Create a directory
mkdir /etc/postgresql/11/main/ # (no directories are created level by level)
Copy files to the directory /etc/postgresql/11/main/
cp /u01/data/pgdata/postgresql.conf /etc/postgresql/11/main/
3 Configure the database (configure as needed)
sudo timescaledb-tune --pg-config=/usr/pgsql-11/bin/pg_config
Note: If the default values are used
sudo timescaledb-tune --pg-config=/usr/pgsql-11/bin/pg_config --quiet --yes
4 Create EXTENSION:
Switch user:
su – postgres
-bash-4.2$ psql
postgres=# CREATE DATABASE 数据库名;
postgres=# \c 数据库名
hrmwv2=# CREATE SCHEMA 模式名;
hrmwv2=# set search_path to 模式名;   #(这一步一定要执行,指定函数在那个模式下)
hrmwv2=# CREATE EXTENSION timescaledb;
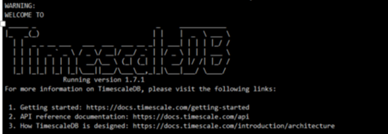
The installation is successful when the following effects occur
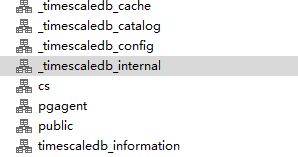
5. View the database
He will appear a lot of patterns appear, the general installation is successful