KVM virtualization deployment Centos
Virtualization technology
- Through the virtualization technology award, a computer is virtualized into multiple logical computers, and multiple logical computers are running on one computer at the same time. Each logical computer can run a different operating system, and application programs can run in independent spaces. Do not affect each other, thereby improving the efficiency of the computer
Features:
1. Simulate multiple operating systems (centos, win10) in the operating system (win10) and simulate multiple operating systems (centos, w10, suse). At the same time, each operating system can run different services to achieve a host to build a cluster (From the whole)
2. Realize the functions of physical hardware through software/applications
(Software resources are not as high as hardware resources (stable and efficient))
Virtualization technology development
- Prototype
In 1961, the IBM 7O9 machine implemented a time-sharing system, which disguised the CPU occupancy as multiple extremely short time slices (1/100sec). Each time slice performed different tasks. By polling these time slices, one CPU disguised as multiple CPu
In 1972, IBM officially named the time-sharing system of the system370 machine as a virtual machine.
In 1990, the system390 machine introduced by IBM supports logical partitioning (a CPU is divided into multiple copies, independent of each other, that is, logical division)
Xen came out in 2003 as an external hypervisor program (virtual machine management program) that can control the host and allocate resources to multiple clients.
KVM: came out in 2007 and is now built into the kernel kernel.
Xen supports virtualization technologies: Full virtualization, para-virtualization
KVM: Supported virtualization technology: full virtualization
Virtualization type
1. Full virtualization: All physical hardware resources are abstracted through software, and finally called
**Method used: Use hypervisor (VMM) software, the principle is to establish an abstraction layer between the underlying hardware and the server, and The core-based virtual machine is an open source product hypervisor (VMM) for Linux systems that can capture CPU instructions and act as an intermediary for instructions to access hardware controllers and peripherals.
2. Paravirtualization: need to modify the operating system
3. Pass-through: use physical hardware resources directly (need support, not perfect yet)
- Features: Advantages
①Centralized management (remote management, maintenance)
②Improve hardware utilization (low utilization of physical resources-such as peak, virtualization solves "idle" capacity)
③Dynamic adjustment of machine/resource configuration (virtualization changes the application and Separation of service hardware and increased flexibility)
④High reliability (additional functions and solutions can be deployed, which can improve application environments such as transparent load balancing, migration, and recovery replication)'
- Disadvantage
①High early-stage cost (initial hardware support)
②Reduce hardware utilization ((specific scenarios-such as extremely resource-intensive applications may not be suitable for virtualization)
③Greater error impact (local physical machine down opportunities cause virtual machines to be Unavailable, and all files in the virtual machine may be damaged)
④The implementation configuration is complicated and the management is complicated (management personnel operation and maintenance, troubleshooting difficulties)
⑤ Certain restrictions (virtualization technology involves various restrictions, must be compatible with the support/compatible virtualization
( Combined use of servers, applications and suppliers) ⑥Security (the security risks of virtualization technology itself)
- Before virtualization
①Each host has an operating system
②Software and hardware are closely integrated
③Running multiple applications on the same host usually leads to conflicts
④The system resource utilization is low (for example: 5%)
⑤The hardware cost is high and not flexible enough
- After virtualization
①Break the interdependence between operating system and hardware ②Manage the operating
system and application programs as a single individual through the technology of encapsulating the virtual machine
③Strong security and fault isolation
④The virtual machine is independent of the hardware, they can be in any hardware Run on
- Compared:
Operating system (before virtualization): In the
LAMP architecture (implemented by a host)
LINUX + Apache + MySQL + PHP,
where Apache and MySQL resources are shared.
If the architecture requires high security isolation between services, the Apache page The directory of the MySQL database and the MySQL database must not be able to meet each other. If the Apache vulnerability is exposed, the attacker can access the MySQL data directory by the Apache process to obtain the data in MySQL. This is a serious security risk and wants to solve this. Potential dangers can be achieved through kernel-level isolation (using virtualization technology)
- Combination of software and hardware
Because the hardware and the operating system is not compatible or does not support, leading to some software and hardware features are not available (and most difficult problem) normal
use of virtualization, between software and hardware will drive to isolate (deployment) through a virtualization layer,
as long as The virtualization layer can identify software/hardware applications, and can combine software and hardware
. Running multiple applications on the same host usually causes conflicts.
Apache and Nginx have the same positioning (port 80) and
can only be separated by reverse proxy. At the same time, if you use this method on the same machine, if important data files in Apache and Nginx are leaked out at the same time... and virtualization can isolate services
Introduction to KVM:
- KVM - Kernel-based virtual machine
KVM is an open source Linux native full virtualization solution based on virtualized extended X86 hardware (requires CPU to support Intel-VT-x or AMD-V) KVM is embedded in the kernel module to simulate the processor and memory to support virtual machine operation
The virtual machine is implemented as a regular Linux process and is scheduled by a standard Linux scheduler;
each virtual CPU of the virtual machine is implemented as a regular Linux process. This allows KMV to use the existing functions of the Linux kernel,
but KVM itself does not perform any simulation. The client space program (virtual machine) is required to set the address space of a client virtual server through the /dev/kym (this virtual device needs to be turned on hardware-assisted virtualization) interface, and it is performed by Qemu simulated I/O (ioctl) Resource scheduling and maintenance management
Libvirt: KVM management tool, in addition to managing VMMs such as KVM, it can also manage Xen, VirtualBox, and even the underlying OpenStack Libvirt contains 3 components: the background daemon program libvirtd, API library, and command line tool virsh
- KVM architecture and principle
1. Guest mode (guestOS): The OS in the VM is the mode in which the GuestOs
guest runs in the operating system. The guest is divided into a kernel mode and a user mode. The functions are as follows: 2. User mode:
provides users with virtual machine management users Space tools and perform I/O on behalf of users, Qemu works in this mode (the main function of Qemu) 3. The linux kernel mode
simulates CPU and memory, realizes client mode switching, and handles the launch of client mode, and KVM runs in this mode under
kvm project
[root@glt7 ~]# cd /etc/yum.repos.d/
[root@glt7 yum.repos.d]# mkdir bak
[root@glt7 yum.repos.d]# mv * bak
mv: 无法将目录"bak" 移动至自身的子目录"bak/bak" 下
[root@glt7 yum.repos.d]# ll
总用量 0
drwxr-xr-x. 3 root root 38 1月  12 08:45 bak
[root@glt7 yum.repos.d]# vim abc.repo
[abc]
name=test
baseurl=file:///mnt
enabled=1
gpgcheck=0
~
~
[root@glt7 yum.repos.d]# yum clean all
[root@glt7 yum.repos.d]# mount /dev/sr0 /mnt
[root@glt7 yum.repos.d]# yum makecache
- Turn off firewall
[root@glt7 yum.repos.d]# systemctl stop firewalld
[root@glt7 yum.repos.d]# setenforce 0
[root@glt7 yum.repos.d]# systemctl disable firewalld
[root@glt7 yum.repos.d]# vim /etc/selinux/config

          SELINUX=disabled
[root@glt7 yum.repos.d]# init 6
Install yum package
# yum groupinstall -y "GNOME Desktop"  '//安装 GNOME 桌面环境  如果装了图形界面不需要装了'
# yum -y install qemu-kvm  '//安装KVM 模块'
# yum -y install qemu-kvm-tools    '// KVM 调试工具,可不安装'
# yum -y install virt-install      '//构建虚拟机的命令行工具'
# yum -y install qemu-img     '//qemu 组件,创建磁盘、 启动虚拟机等'
# yum -y install bridge-utils   '//网络支持工具'
# yum -y install libvirt   '//虚拟机管理工具'
#yum -y install virt-manager   '//图形界面管理虚拟机'
# reboot	'//重启'
[root@glt7 ~]# ln -sf /lib/systemd/system/graphical.target /etc/systemd/system/default.target#将 系 统 的 默 认 运 行 target 更 改 为graphical.targe。 重启后系统将进入图形化界面。
[root@glt7 ~]# lsmod | grep kvm  '//查看KVM模块是否安装'
kvm_intel             170086  0
kvm                   566340  1 kvm_intel
irqbypass              13503  1 kvm
[root@glt7 ~]# cat /proc/cpuinfo | grep vmx # 查看CPU是否支持虚拟化 将会出现包含一串字母 带其中有红色的vmx
[root@glt7 ~]# systemctl start libvirtd #开启libvirtd服务
[root@glt7 ~]# systemctl enable libvirtd #开机启动libvirtd服务
Modify network card
[root@glt7 ~]# vim /etc/sysconfig/network-scripts/ifcfg-ens33
TYPE=Ethernet
PROXY_METHOD=none
BROWSER_ONLY=no
BOOTPROTO=none
#IPADDR=20.0.0.16
#NETMASK=255.255.255.0
#GATEWAY=20.0.0.2
#DNS=20.0.0.2
DEFROUTE=yes
IPV4_FAILURE_FATAL=no
IPV6INIT=yes
IPV6_AUTOCONF=yes
IPV6_DEFROUTE=yes
IPV6_FAILURE_FATAL=no
IPV6_ADDR_GEN_MODE=stable-privacy
NAME=ens33
UUID=ee1c9b8b-e532-43a6-afb5-fee05d5dea35
DEVICE=ens33
ONBOOT=yes
BRIDGE=br0 '//注释掉原本的IP地址,添加此处'
新建桥接网卡
[root@glt7 ~]# vim /etc/sysconfig/network-scripts/ifcfg-br0
TYPE=Bridge
OTPROTO=static
DEFROUTE=yes
PEERDNS=yes
PEERROUTES=yes
IPV4_FAILURE_FATAL=no
IPV6INIT=yes
IPV6_AUTOCONF=yes
IPV6_DEFROUTE=yes
IPV6_PEERDNS=yes
IPV6_PEERROUTES=yes
IPV6_FAILURE_FATAL=no
IPV6_ADDR_GEN_MODE=stable-privacy
NAME=br0
DEVICE=br0
ONBOOT=yes
IPADDR=20.0.0.16
NETMASK=255.255.255.0
GATEWAY=20.0.0.2
[root@glt7 ~]# systemctl restart network
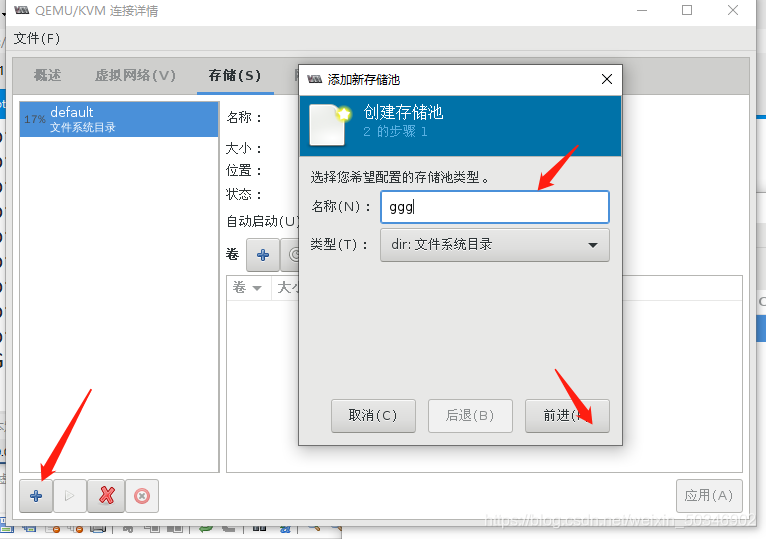
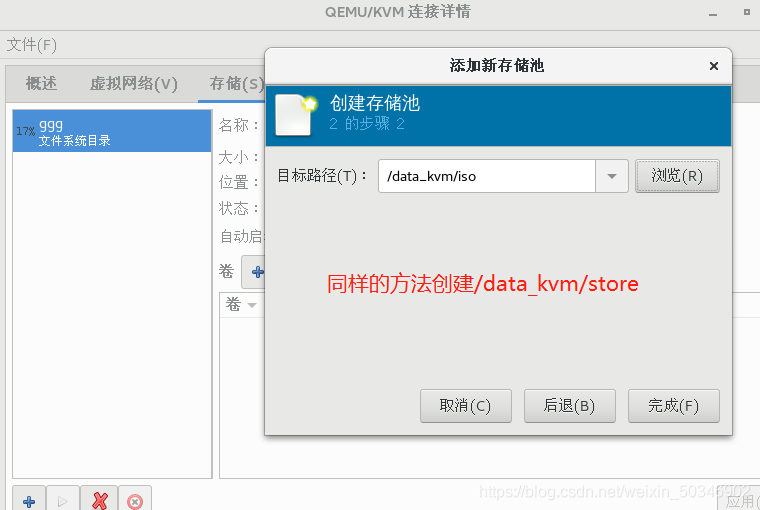
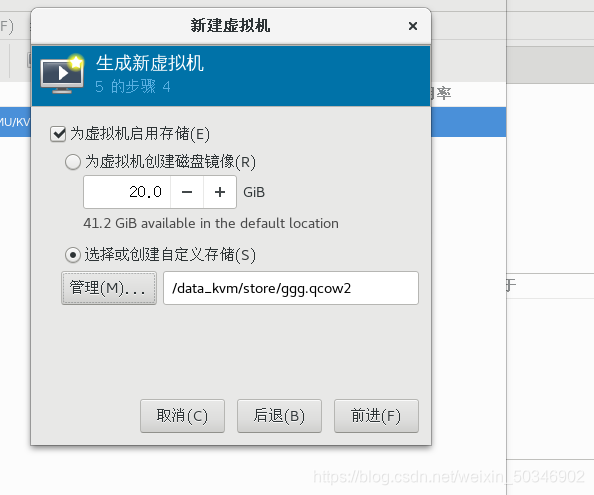
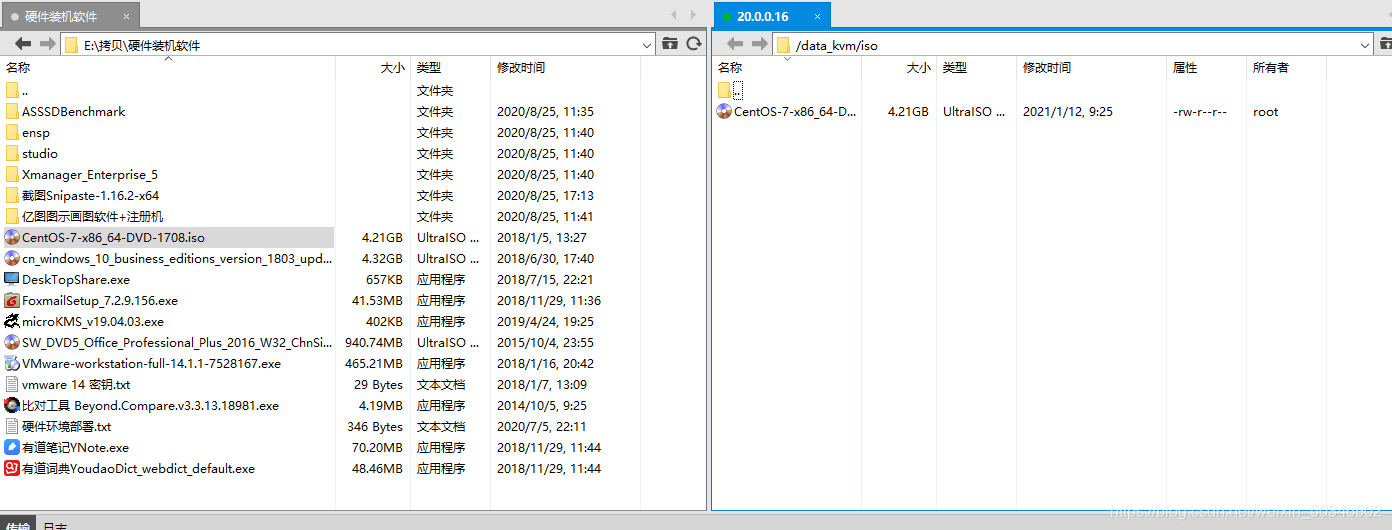
[root@glt7 ~]# mkdir -p /data_kvm/iso
[root@glt7 ~]# mkdir -p /data_kvm/stor
[root@glt7 ~]# cd /data_kvm/iso/
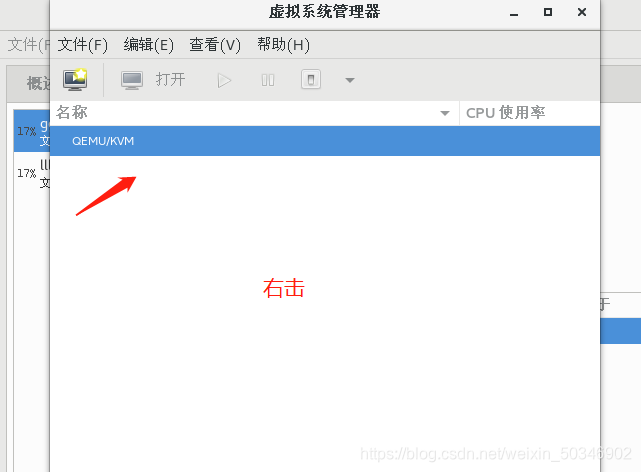
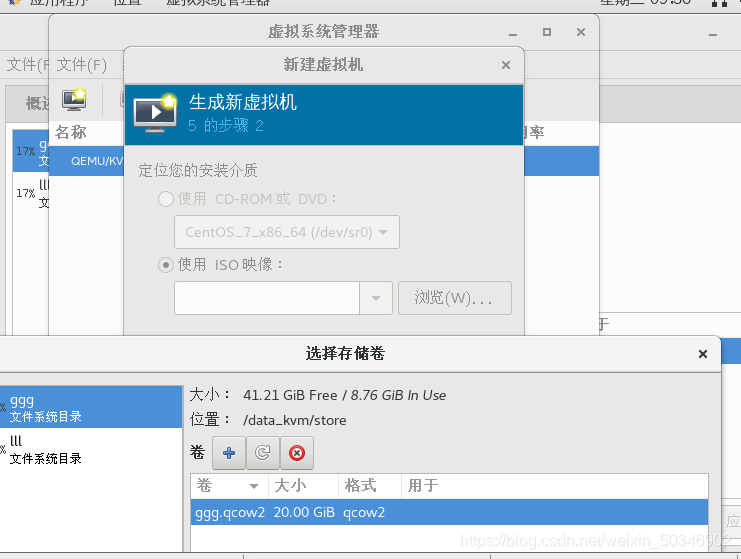
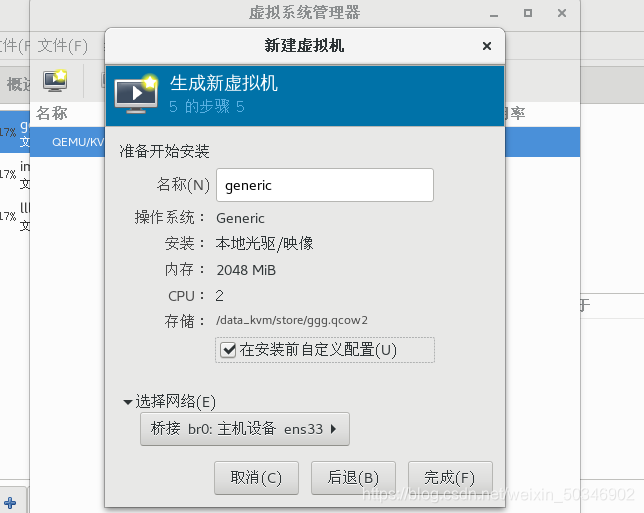
[root@glt7 iso]# virt-manager