Artist introduction:
Pom comes from Thailand and dreams of becoming a 3D artist. He has experience in drawing cartoons, and making characters he likes is a way of expressing his art.
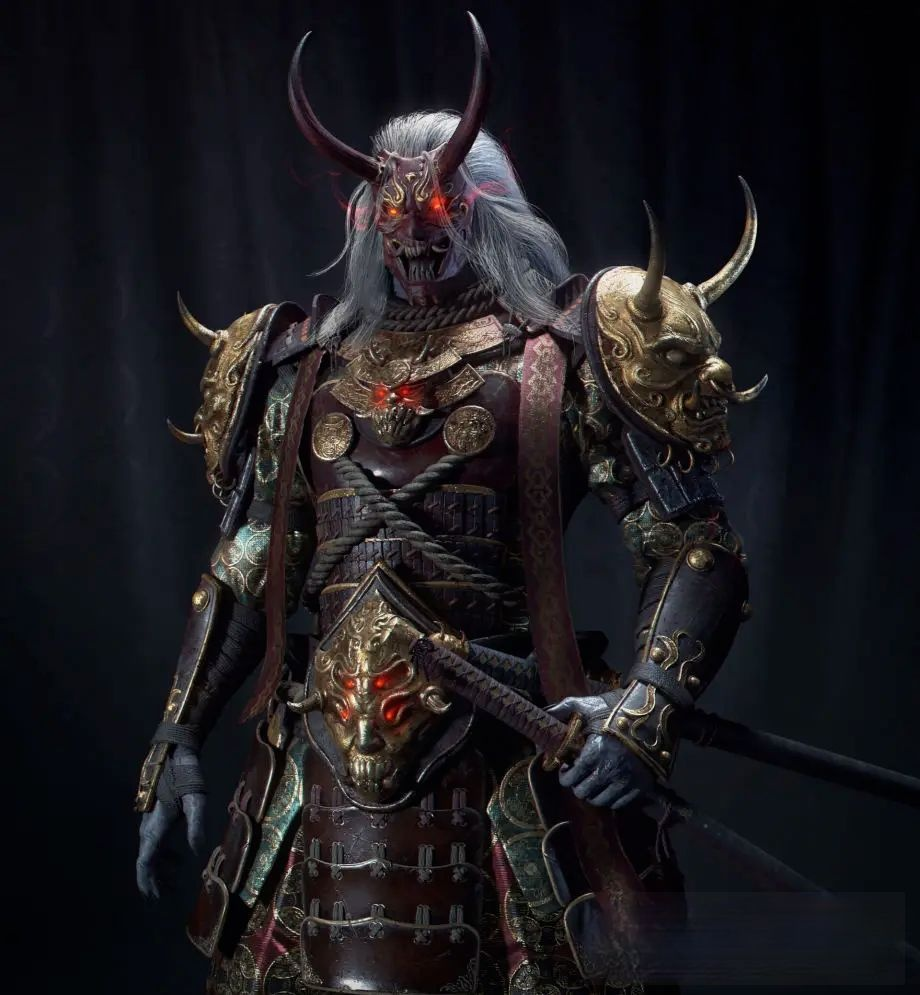
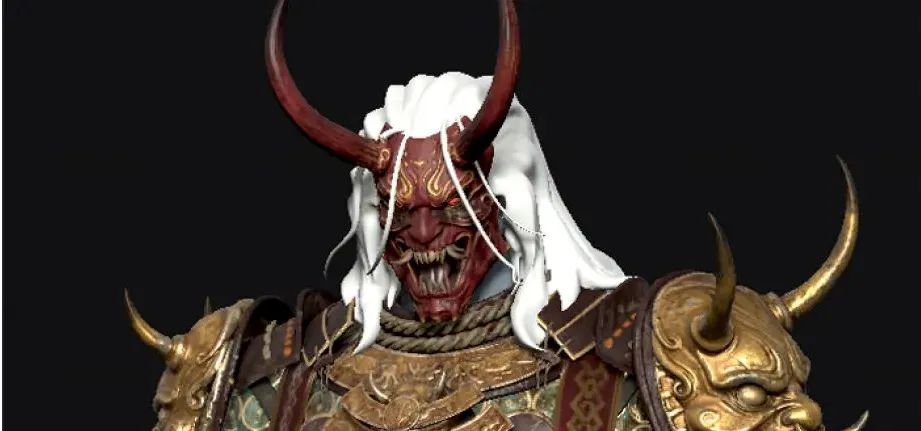
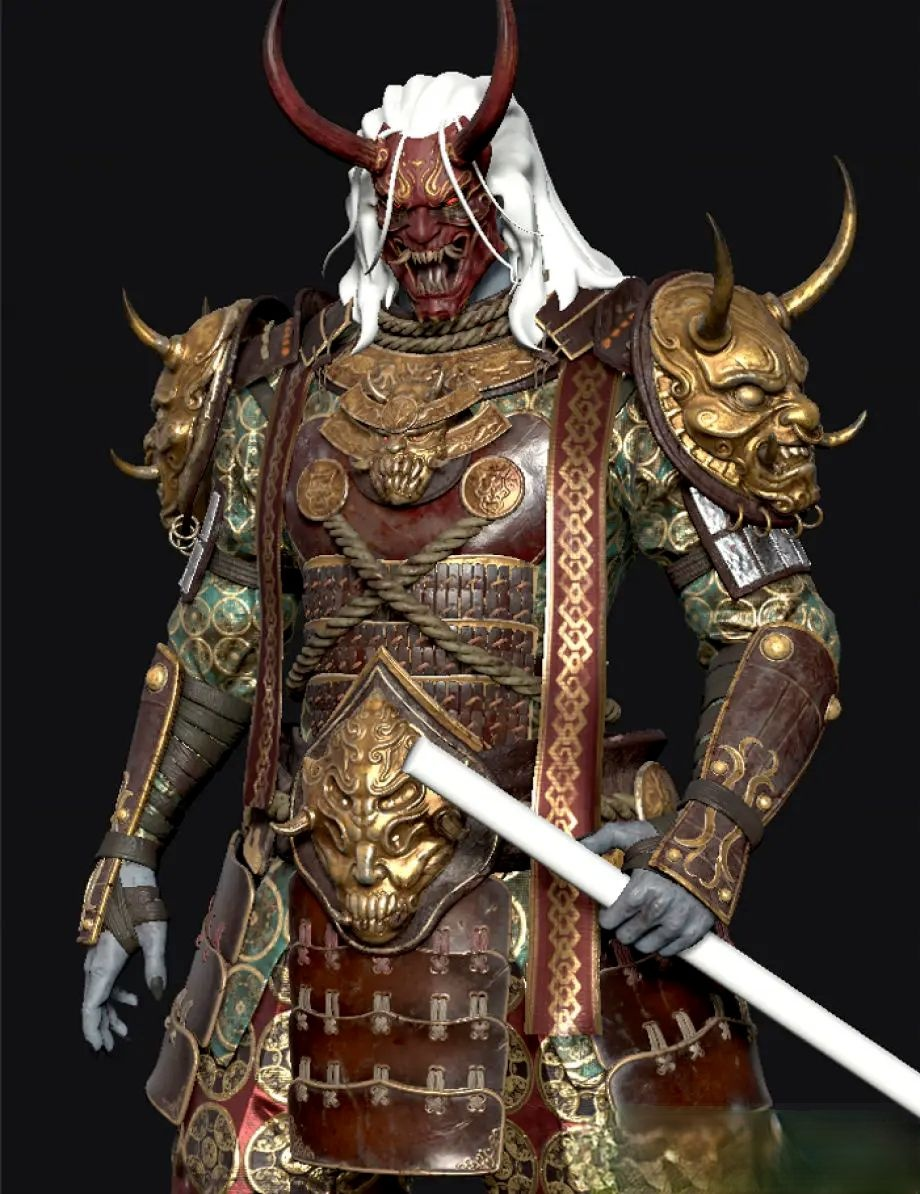
In this production, he shared some details of his production of the Japanese-style ghost character. The prototype of the character is based on the killer in "Dead by Daylight": Oni Samurai.
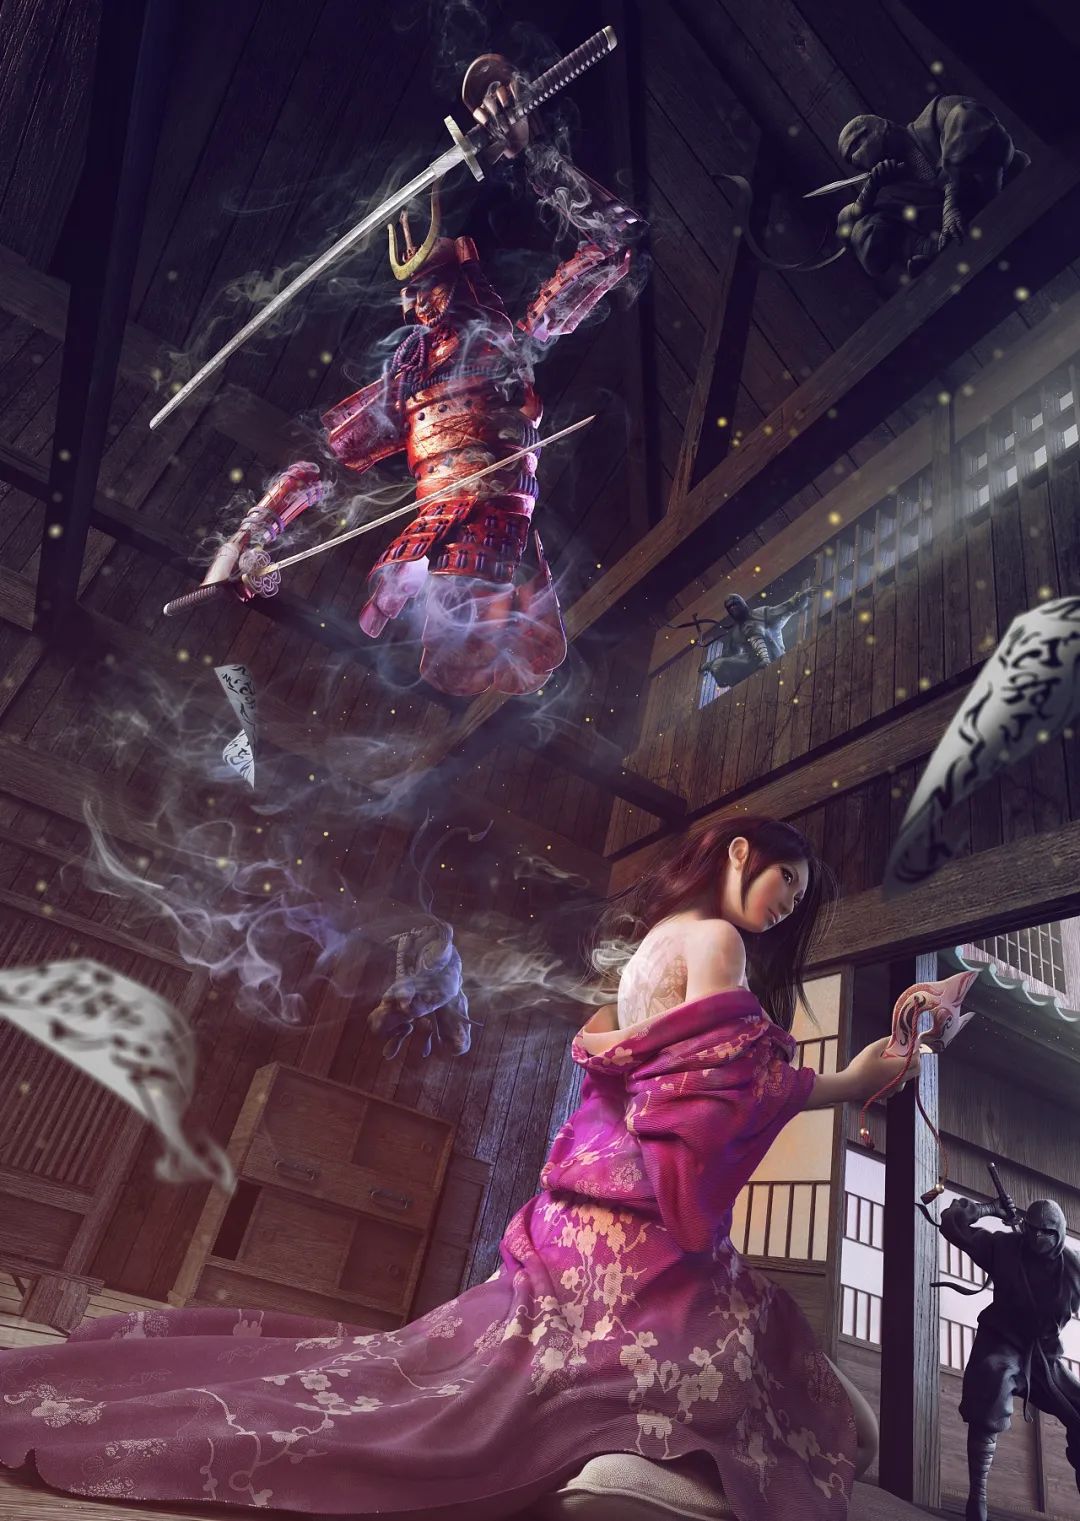

Pom is very interested in Japanese art and culture. He has previously created a Japanese ghost based on "Dead by Daylight" (The Spirit).
Another work by Pom: The Spirit (The Spirit)
Pom consulted the game concept design drawing of "Dead by Daylight" and real reference materials (how the armor should be combined) as a reference.
Carving and modeling
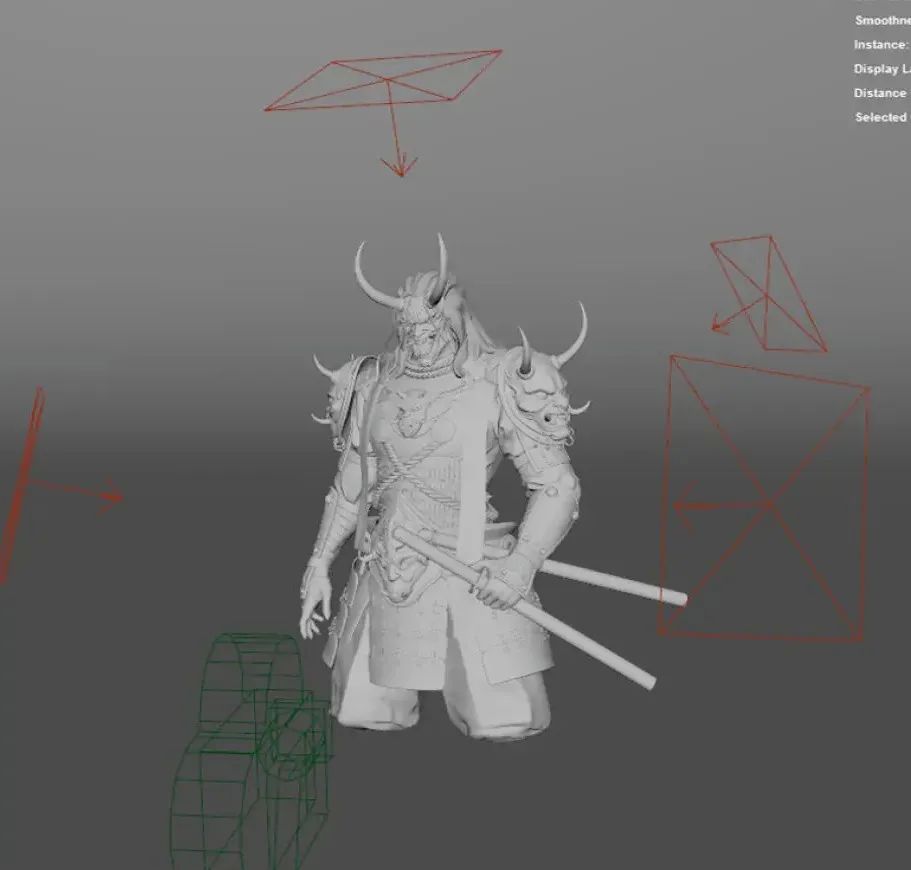
The character sculpting uses a male model to make the base, and most of the armor parts are extracted from the base mesh, and then use Dynamesh to sculpt until the shape is satisfied. After the model is completed, use ZRemesher to clean the topology. If you want to learn next-generation game modeling, you need free software tools and information packages, you can add q group 630838699 [ Poke me to enter the learning community immediately]
Pom mainly uses Clay build up, Dam standard and Move brushes in production
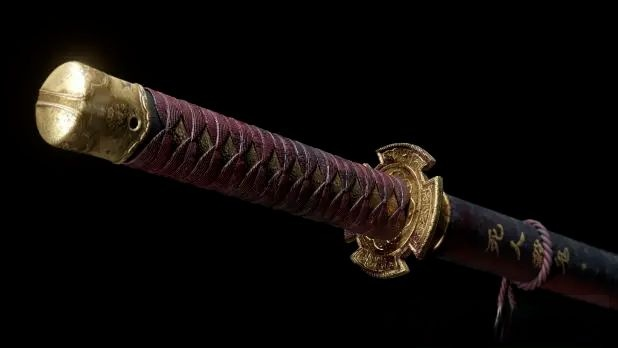
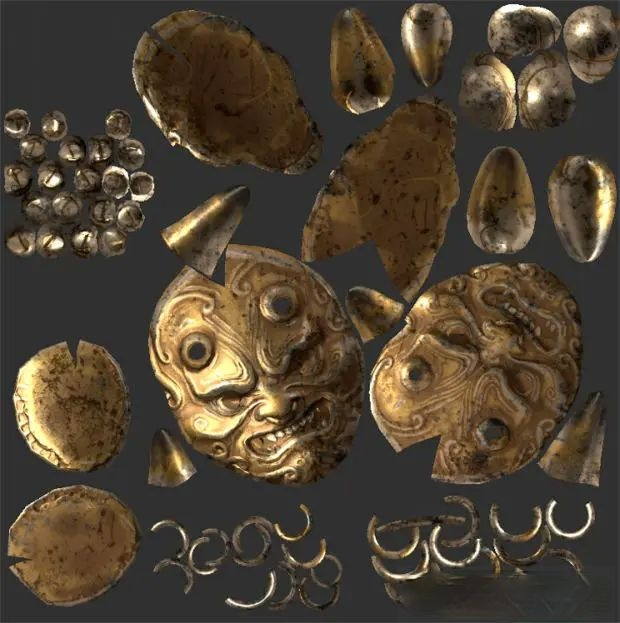
These three brushes, but in this project, Badking's customized twisted rope brush is also used to make the ghost samurai armor and the huge thick rope wrapped around the neck ▼
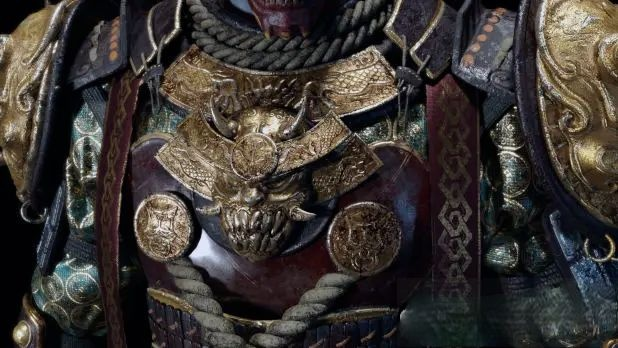
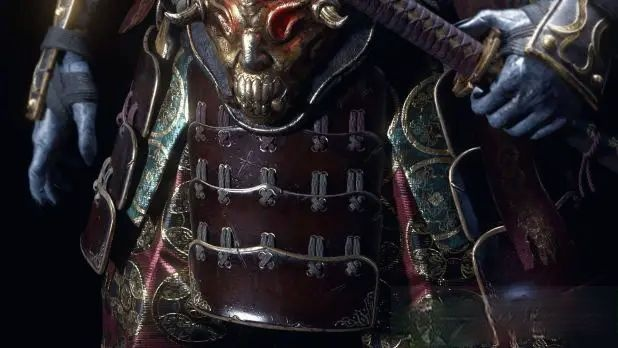
The engraving of the breastplate and sword uses a mask brush▼
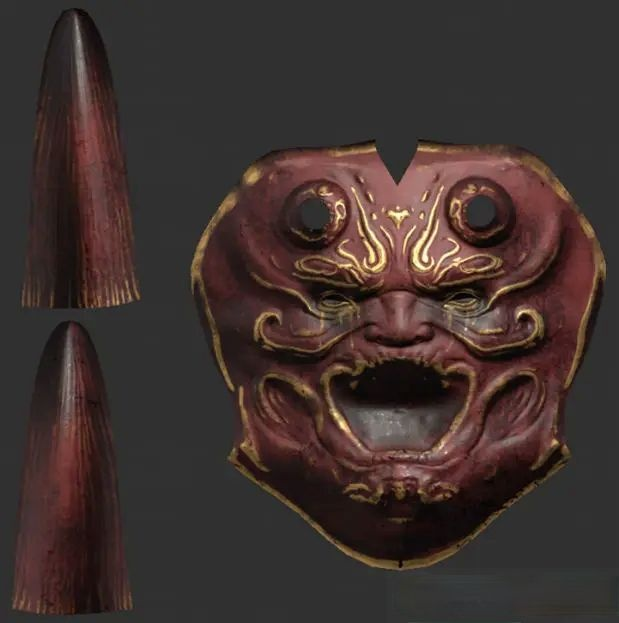
The shoulder is an extracted mesh with four cylinders added to sculpt fangs and corners▼
The hair is made using Maya's XGen. The general process is to first make a mesh similar to the scalp, then place the guide lines in the direction of hair growth, and then add modifiers.
UV
This project is only for display, so don't worry too much about bone binding and animation. The UV uses the UV Unwrap tool of ZBrush, and then manually split the UV in Maya (some main parts: the golden part on the mask or armor, in order to achieve the best effect, they are all manually placed in Maya put).
And those smaller parts, such as the rope connecting armor or leather, use Unwrap UV in ZBrush to save time with painting. If you find a problem, you can fix it in Maya at any time.
Texture
In this project, most of the textures are made using fill layers, generators, black and white masks, hand-painted, etc.
For example, the red filling layer is a combination of dust and dirt texture. And also used a seamless wooden normal map created in Photoshop, and then added some subtle wooden details. The golden part of the armor uses another filling layer mask, which has a different metal and roughness setting. The golden area is painted with white as a mask layer.
To save time, P created a smart material for making gold and used it on the golden parts of the model.

The patterns on clothes and pants are troublesome. You can only draw the patterns in black and white in Photoshop, and then use the patterns on the mask of the golden smart material to create the pattern shape. Then a three-plane projection was used on the filling layer to make the pattern repeat around the grid. The armor pieces hanging on the shoulders are also made in this way.

The light uses Redshift's standard three-point lighting setting, and in order to separate the character from the black background, the edge lights are adjusted to be brighter.
The advantage of Redshift is that some post-processing will be performed when rendering the image. In order to make the effect better, LUT and Bloom effects are added. Then put the 3 rendering channels output by Redshift: Beauty, AO and Alpha into the post-adjustment.