content
The node server login interface uses real SMS to verify login
1. Node server building + database connection
The operation here is more concise and easy to understand, you can refer to: Node server quick setup
2. Use of SMS API
For the SMS api, here is Alibaba Cloud's SMS service as an example (as long as it is a platform with SMS service, it can be used)
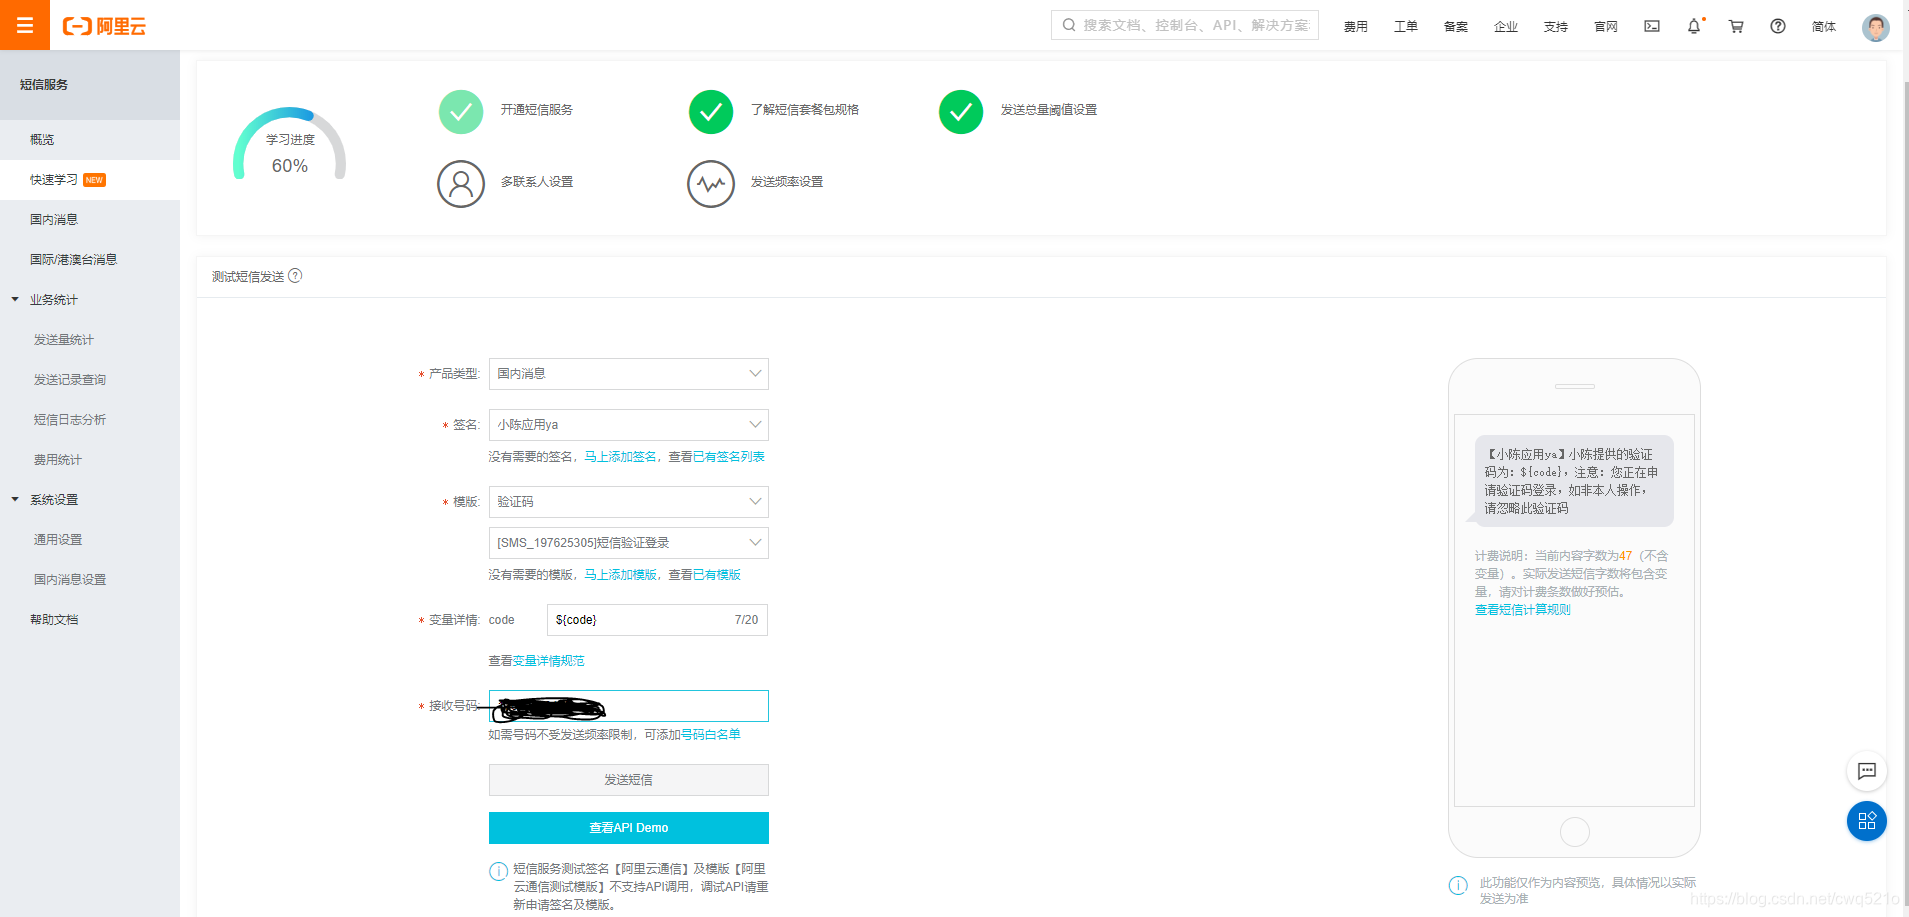
2.1 Log in to the platform for parameter configuration
1. Enter the SMS console and configure the format of the SMS to be sent. If there is no signature, you need to apply for a signature and operate
2. Click View API Demo to enter the api generated by the configuration; select Node.js at this time
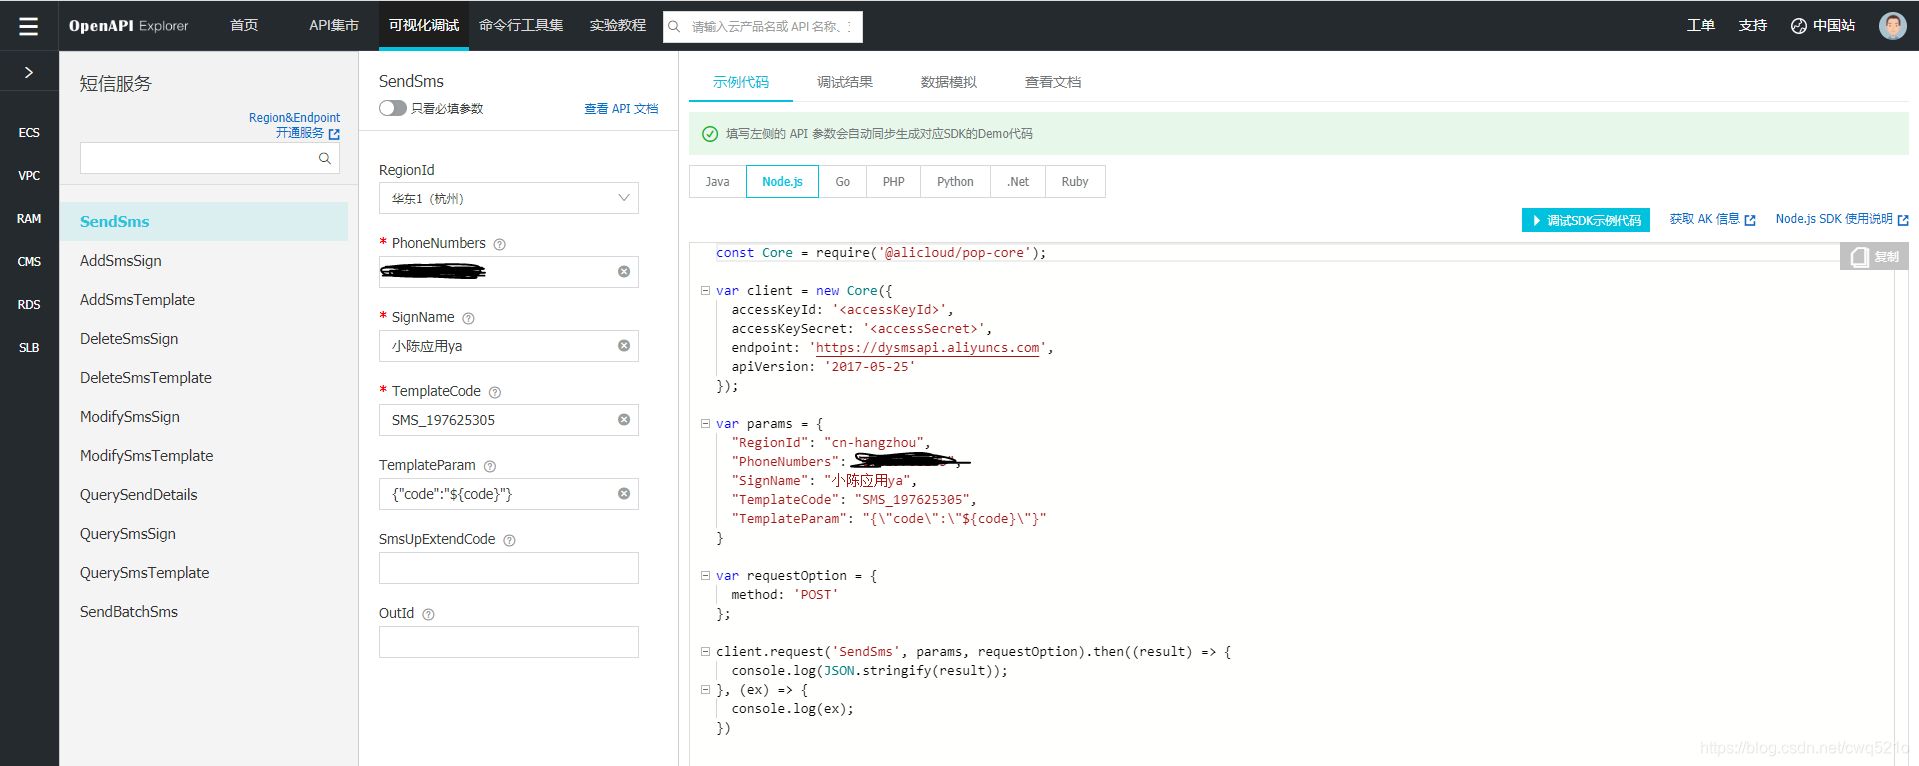
2.2 Use in the project according to the generated api
Detailed code comments
const Core = require('@alicloud/pop-core'); //cwen 调用阿里短信模块(需先安装)
//cwen 对阿里短信服务API进行配置
let client = new Core({


  accessKeyId: '<accessKeyId>', // 需要先申请(步骤在下文)
  accessKeySecret: '<accessSecret>', // 需要先申请(步骤在下文)
  endpoint: 'https://dysmsapi.aliyuncs.com', //无需更改
  apiVersion: '2017-05-25' //无需更改
});
//cwen 请求方式
let requestOption = {


    method: 'POST'
};

//# 生成随机四位数,模拟验证码
function rander(max, min) {


    return Math.floor(Math.random() * (max - min)) + min
}
//# 存储手机号+验证码(方便验证)
var loginInfo = [];
//# 验证手机号是否已经发送个验证码
let validate = (phone) => {


    return loginInfo.some(item => item.phone === phone)
}
//# 验证验证码是否一致
let validateCode = (phone, code) => {


    return loginInfo.some(item => (item.phone === phone && item.code == code))
}

//cwen 用阿里云api发送短信验证(验证码登录)
let sendLoginCroeCode = async(req, res) => {


    let {

     phone } = req.body;
    let randCode = rander(1000, 9999);
    var params = {


            "RegionId": "cn-hangzhou",
            "PhoneNumbers": phone, // 客户端手机号
            "SignName": "小陈应用ya", //签名
            "TemplateCode": "SMS_197625305", //模板,用于发送文字信息
            "TemplateParam": JSON.stringify({

     'code': randCode }) //指定要发送的验证码(此处以rander 函数为例)
        }
          //# 发送验证码之前判断手机号是否注册过
    if (await isRegister(phone)) {

      // 此处为数据库操作(可忽略)
        client.request('SendSms', params, requestOption).then((result) => {


            if (result.Code == 'OK') {


                res.send({


                    status: 200,
                    msg: '发送成功'
                });
                loginInfo.push({


                    phone: phone,
                    code: randCode
                });
                console.log(randCode)
            } else {


                res.send({


                    status: 400,
                    msg: '发送失败'
                })
            }
        })
    } else {


        res.send({


            status: 400,
            msg: '该手机号未注册'
        })
    }
}

//# 验证码登录接口
let phoneCodeLogin = async(req, res) => {


    let {

     phone, code } = req.body;
    if (validate(phone)) {

     //判断手机号是否发送过验证码
        if (validateCode(phone, code)) {

     // 判断验证码与手机号是否匹配
            let user = await isFirstLogin(phone); // 此处为数据库操作,获取用户信息(可忽略)
            res.send({


                status: 200,
                msg: '登录成功',
                data: user[0]
            })
            loginInfo = []; // 登录成功,立马清空数组,以免无法再次发送验证码
        } else {


            res.send({


                status: 400,
                msg: '验证码错误'
            })
        }
    } else {


        res.send({


            status: 400,
            msg: '未获取验证码'
        })
    }
}

// 注意:最后记得把接口暴露出去
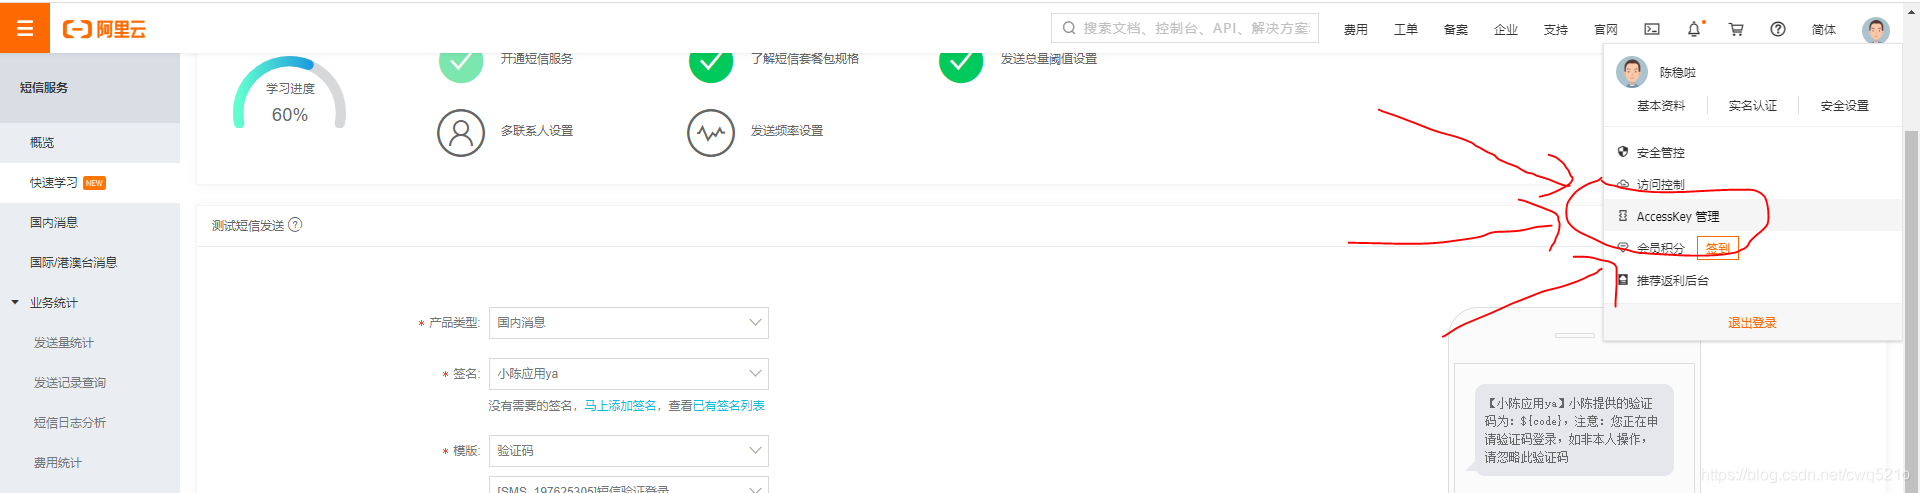
Note : You accessKeyId、accessKeySecretneed to apply before using
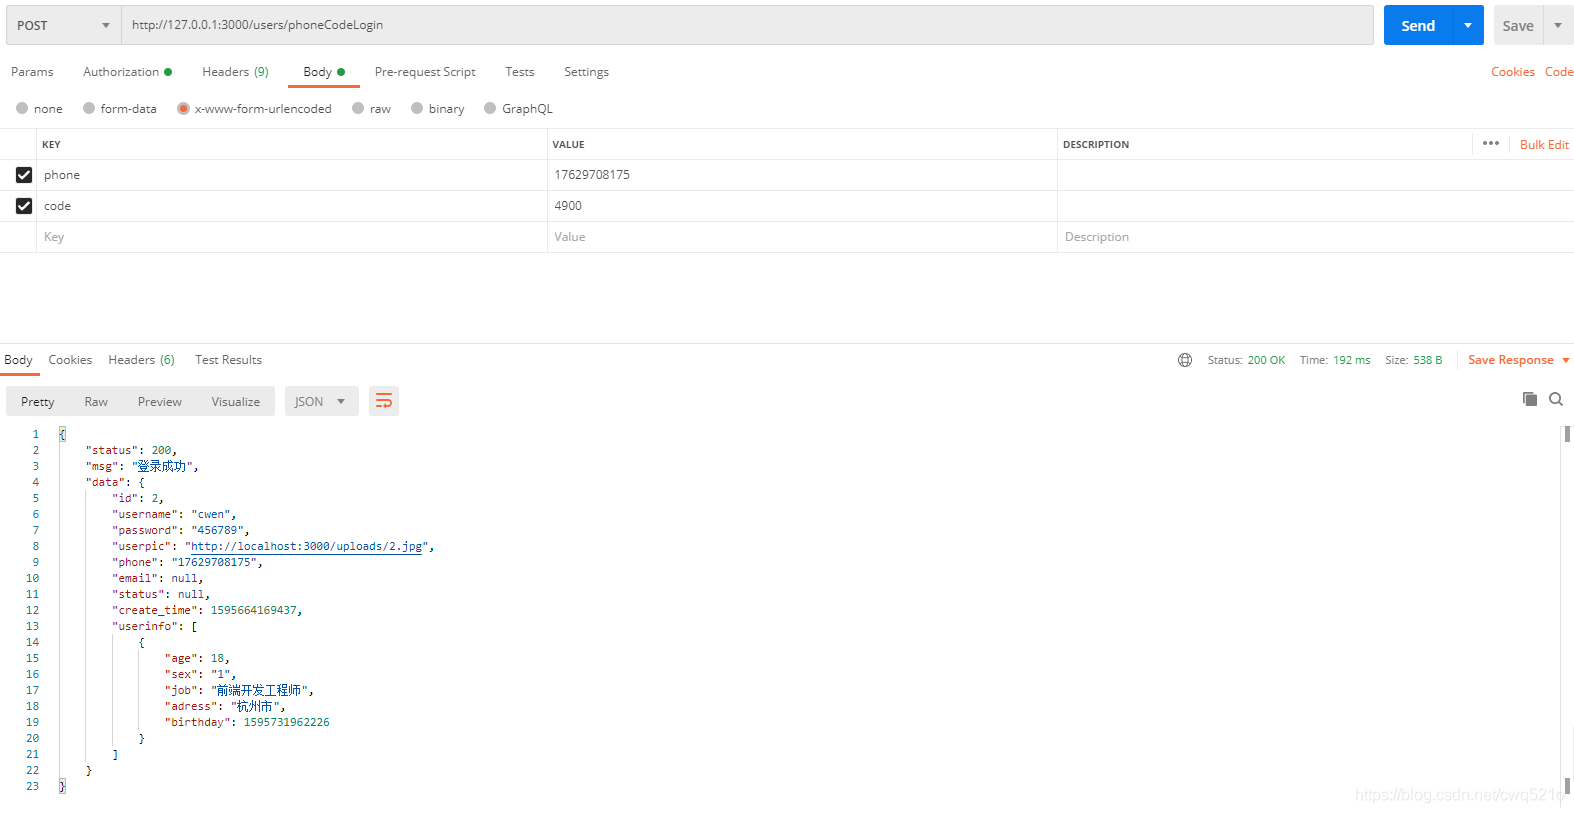
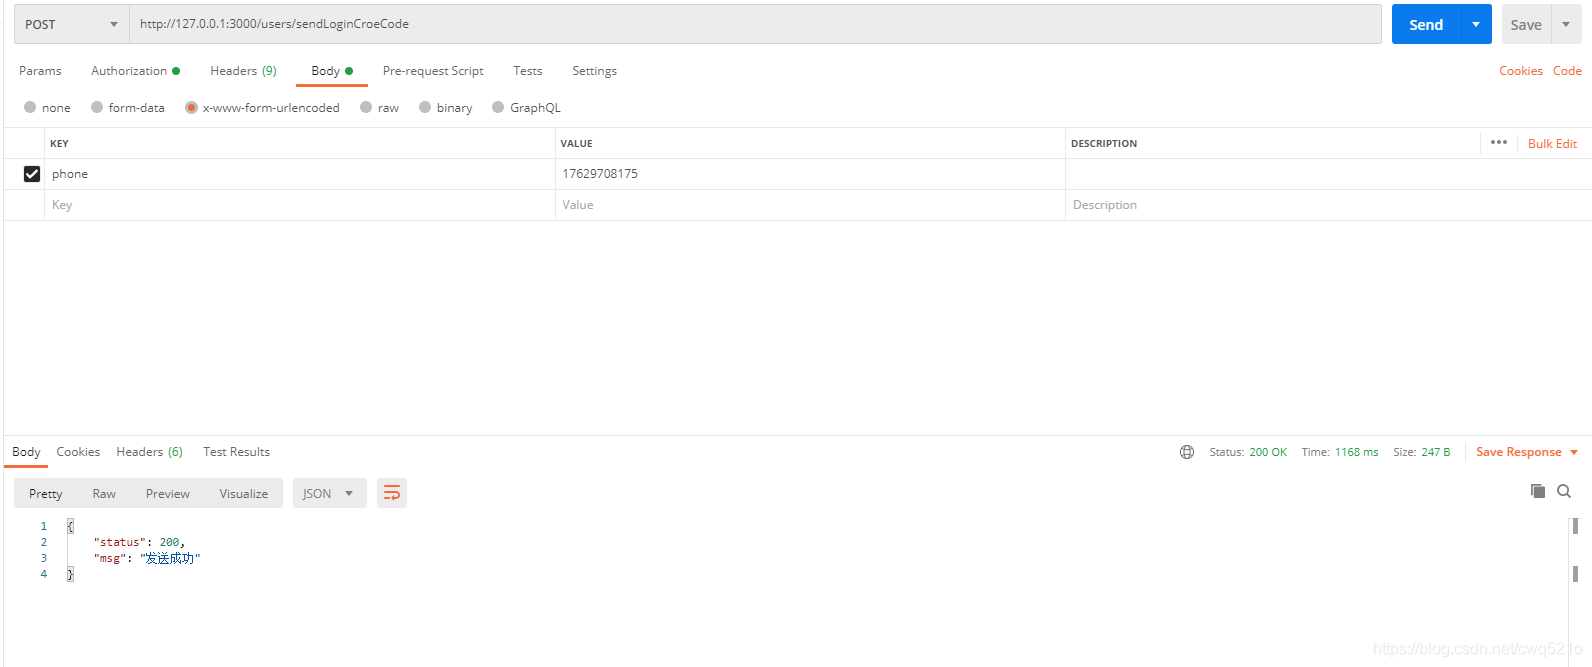
3. Login using interface
Take the Postman interface debugging tool as an example, the mobile phone number is the mobile phone number registered in the database
- Request to send verification code
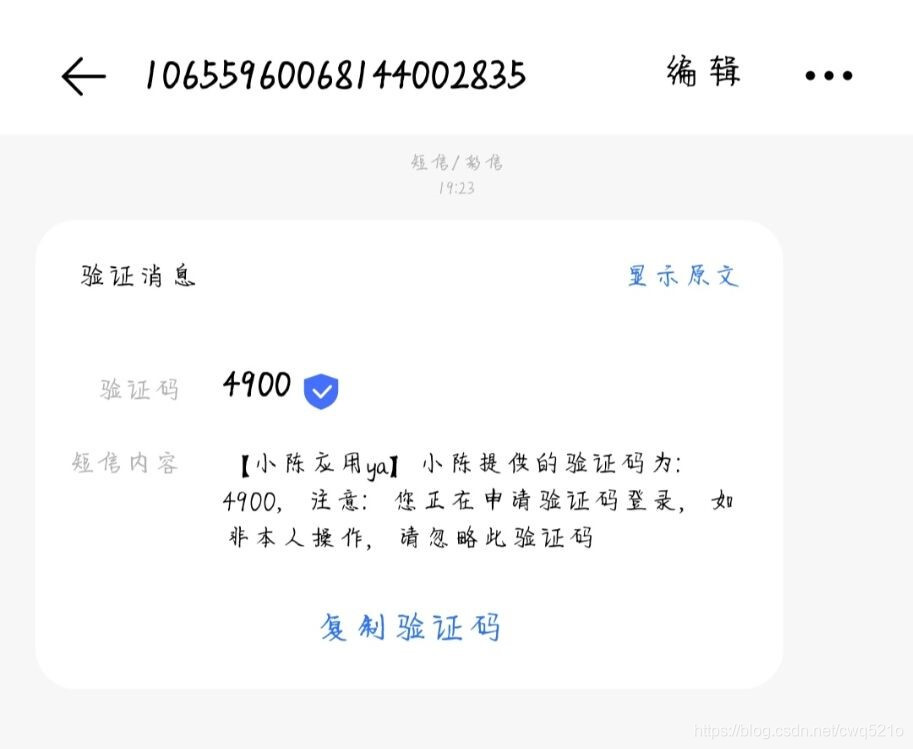
- Mobile phone received verification code
- Verification code login