1. 主机规划
| 服务器名称 | 操作系统版本 | 内网IP | 外网IP(模拟) | Hostname | 部署模块 |
|---|---|---|---|---|---|
| salt100 | CentOS7.5 | 172.16.1.100 | 10.0.0.100 | salt100 | salt-master、salt-minion |
| salt01 | CentOS7.5 | 172.16.1.11 | 10.0.0.11 | salt01 | salt-master、salt-minion |
| salt02 | CentOS7.5 | 172.16.1.12 | 10.0.0.12 | salt02 | salt-minion |
| salt03 | CentOS7.5 | 172.16.1.13 | 10.0.0.13 | salt03 | salt-minion |
实现2个master,当这两个master运行时都可以向minion发送命令。
salt 版本
[root@salt100 ~]# salt --version
salt 2018.3.3 (Oxygen)
[root@salt100 ~]# salt-minion --version
salt-minion 2018.3.3 (Oxygen)
salt 多master文档
https://docs.saltstack.com/en/latest/topics/tutorials/multimaster.html
2. 多master架构
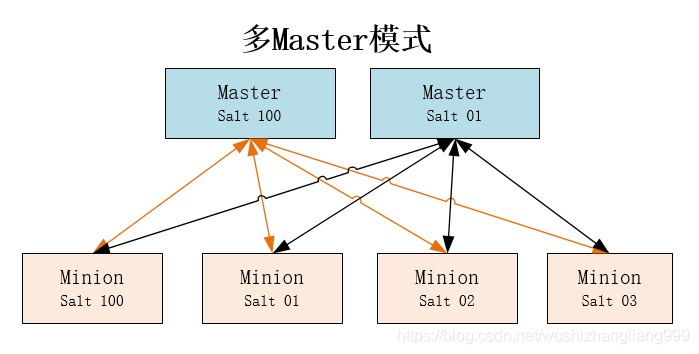
说明:
根据规划在salt01创建冗余的master。
3. 多master实现步骤
3.1. 创建冗余的master
yum install -y salt-master
3.2. 拷贝主master的key和配置到冗余的master
# 拷贝的秘钥
/etc/salt/pki/master/master.pem
/etc/salt/pki/master/master.pub
# 拷贝主master的配置
/etc/salt/master
# 拷贝主master的目录
/srv
3.3. 启动冗余master
systemctl enable salt-master.service  # 开机自启动
systemctl start salt-master.service   # 启动salt-master
3.4. 配置minion去连接冗余master并重启minion
每台minion机器都操作
[root@salt02 ~]# vim /etc/salt/minion
…………
# Set the location of the salt master server. If the master server cannot be
# resolved, then the minion will fail to start.
#master: salt
# 修改后的配置如下
master:
  - salt100
  - salt01
…………
[root@salt02 ~]# systemctl restart salt-minion.service
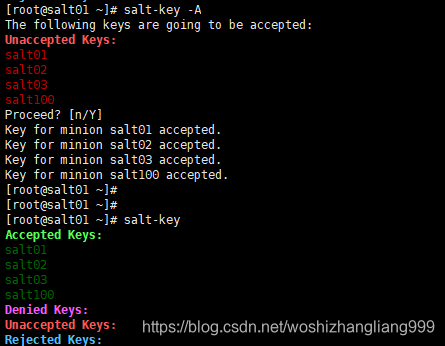
3.5. 在冗余master接受minion的key
[root@salt01 ~]# salt-key
Accepted Keys:
Denied Keys:
Unaccepted Keys:
salt01
salt02
salt03
salt100
Rejected Keys:
[root@salt01 ~]# salt-key -A
The following keys are going to be accepted:
Unaccepted Keys:
salt01
salt02
salt03
salt100
Proceed? [n/Y] Y
Key for minion salt01 accepted.
Key for minion salt02 accepted.
Key for minion salt03 accepted.
Key for minion salt100 accepted.
4. 多master操作示例
salt '*' pillar.items
salt '*' pillar.item level1:level2:my_user:0
salt '*' grains.item roles