文章目录
目录
从现在开始进入springboot项目入门,先来张本文的概要脑图:

一、环境搭建2种方式
这里说的是Pom引入springboot的包的方式:
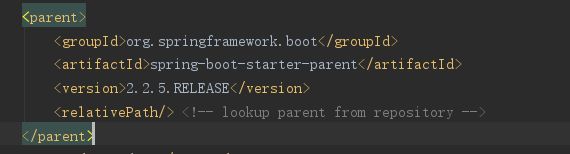
①继承父组件
<project xmlns="http://maven.apache.org/POM/4.0.0" xmlns:xsi="http://www.w3.org/2001/XMLSchema-instance"
         xsi:schemaLocation="http://maven.apache.org/POM/4.0.0 https://maven.apache.org/xsd/maven-4.0.0.xsd">
    <modelVersion>4.0.0</modelVersion>
    <parent>
        <groupId>org.springframework.boot</groupId>
        <artifactId>spring-boot-starter-parent</artifactId>
        <version>2.2.5.RELEASE</version>
        <relativePath/> <!-- lookup parent from repository -->
    </parent>
    <groupId>com.demo</groupId>
    <artifactId>springboot2-demo</artifactId>
    <version>0.0.1-SNAPSHOT</version>
    <name>springboot2-demo</name>
    <description>Demo project for Spring Boot</description>

    <properties>
        <java.version>1.8</java.version>
    </properties>


    <dependencies>
        <dependency>
            <groupId>org.springframework.boot</groupId>
            <artifactId>spring-boot-starter</artifactId>
        </dependency>

        <dependency>
            <groupId>org.springframework.boot</groupId>
            <artifactId>spring-boot-starter-test</artifactId>
            <scope>test</scope>
            <exclusions>
                <exclusion>
                    <groupId>org.junit.vintage</groupId>
                    <artifactId>junit-vintage-engine</artifactId>
                </exclusion>
            </exclusions>
        </dependency>
    </dependencies>

    <build>
        <plugins>
            <plugin>
                <groupId>org.springframework.boot</groupId>
                <artifactId>spring-boot-maven-plugin</artifactId>
            </plugin>
        </plugins>
    </build>

</project>
关键是这里:
②第2种引入方式:
不继承spring-boot-starter-parent。
我们从maven中央仓库找到这个包:

修改下:
这样引入:
 <dependency>
   <groupId>org.springframework.boot</groupId>
    <artifactId>spring-boot-dependencies</artifactId>
    <version>2.2.5.RELEASE</version>
    <scope>import</scope>
    <type>pom</type>
</dependency>
全部的pom如下:
<?xml version="1.0" encoding="UTF-8"?>
<project xmlns="http://maven.apache.org/POM/4.0.0" xmlns:xsi="http://www.w3.org/2001/XMLSchema-instance"
         xsi:schemaLocation="http://maven.apache.org/POM/4.0.0 https://maven.apache.org/xsd/maven-4.0.0.xsd">
    <modelVersion>4.0.0</modelVersion>

    <groupId>com.demo</groupId>
    <artifactId>springboot2-demo</artifactId>
    <version>0.0.1-SNAPSHOT</version>
    <name>springboot2-demo</name>
    <description>Demo project for Spring Boot</description>

    <properties>
        <java.version>1.8</java.version>
    </properties>
        <dependencyManagement>
            <dependencies>
                <dependency>
                    <groupId>org.springframework.boot</groupId>
                    <artifactId>spring-boot-dependencies</artifactId>
                    <version>2.2.5.RELEASE</version>
                    <scope>import</scope>
                    <type>pom</type>
                </dependency>
            </dependencies>
        </dependencyManagement>

    <dependencies>
        <dependency>
            <groupId>org.springframework.boot</groupId>
            <artifactId>spring-boot-starter</artifactId>
        </dependency>

        <dependency>
            <groupId>org.springframework.boot</groupId>
            <artifactId>spring-boot-starter-test</artifactId>
            <scope>test</scope>
            <exclusions>
                <exclusion>
                    <groupId>org.junit.vintage</groupId>
                    <artifactId>junit-vintage-engine</artifactId>
                </exclusion>
            </exclusions>
        </dependency>
    </dependencies>

    <build>
        <plugins>
            <plugin>
                <groupId>org.springframework.boot</groupId>
                <artifactId>spring-boot-maven-plugin</artifactId>
            </plugin>
        </plugins>
    </build>

</project>
上面的2种方式都可以。
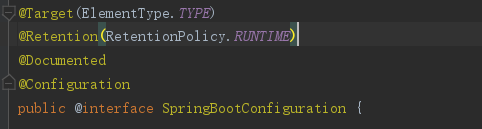
二.@SpringBootApplication注解分析
我们看下启动类上有个注解@SpringBootApplication注解
,这个注解,满足我们的所有想象,帮我们做了都很多的工作。
来段代码:
@SpringBootConfiguration
public class Springboot2DemoApplication {

    @Bean
    public Runnable createRunnable(){
        return () -> {
            System.out.println("spirng boot is started");
        };
    }

    public static void main(String[] args) {
        ConfigurableApplicationContext context = SpringApplication.run(Springboot2DemoApplication.class, args);
        context.getBean(Runnable.class).run();
        System.out.println(context.getBean(User.class));
    }

}
点击注解看到,它是个组合注解:

- @ComponentScan 可以扫描当前包下的组件。
- @SpringBootConfiguration把入口类配置成一个Configuration配置类。它包含了
@Configuration注解。
- @EnableAutoConfiguration自动配置,功能强大,以后说。
案例1:入口替换为@ComponentScan
定义一个bean
@Component
public class User {
}
修改入口注解:
@ComponentScan
public class App2 {
    @Bean
    public Runnable createRunnable(){
        return () -> {
            System.out.println("spirng boot is started");
        };
    }

    public static void main(String[] args) {
        ConfigurableApplicationContext context = SpringApplication.run(App2.class, args);
        context.getBean(Runnable.class).run();
        System.out.println(context.getBean(User.class));
        System.out.println(context.getBean(List.class));
    }

}
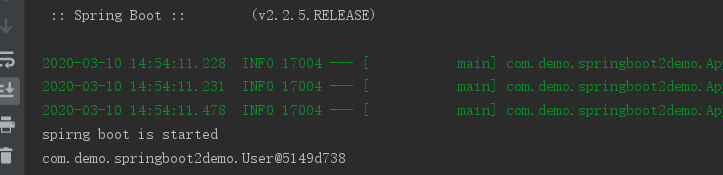
运行结果:

完美。
说明什么?
说明@ComponentScan扫描到了User对象,容器拿到这个bean。
但是这个入口类为啥能拿到Runnable这个类?我们明明去掉了SpringBootConfiguration,不能把这个类当成配置类了啊。
解答:
我们看下入口的run的方法:


答案在这里。
这里会把入口类这个resouce类默认配置到容器中,所以可以当做配置类来使用。
案例2:@SpringBootConfiguration替换@Configuration
演示@SpringBootConfiguration是否有配置功能:
@SpringBootConfiguration
public class MyConfig {

    @Bean
    public List createList(){
        return new ArrayList();
    }
}
测试:
@ComponentScan
public class Springboot2DemoApplication {

    @Bean
    public Runnable createRunnable(){
        return () -> {
            System.out.println("spirng boot is started");
        };
    }

    public static void main(String[] args) {
        ConfigurableApplicationContext context = SpringApplication.run(Springboot2DemoApplication.class, args);
        context.getBean(Runnable.class).run();
        System.out.println(context.getBean(List.class));
    }

}

可以看出已经注入进来了。
三、两种启动方式
①默认的静态方法运行

官方默认是这种方式,使用SpringApplication调用run方法,运行整个springboot项目。现在换一种方式启动:
②new SpringApplication()方式启动
@ComponentScan
public class App {
@Bean
    public Runnable createRunnable(){
        return () -> {
            System.out.println("spirng boot is started");
        };
    }
    public static void main(String[] args) {
        SpringApplication app = new SpringApplication(App.class);
//        Set<String> sets = new HashSet<>();
//        sets.add(App.class.getName());
//        app.setSources(sets);
        ConfigurableApplicationContext context = app.run(args);
        context.getBean(Runnable.class).run();
        System.out.println(context.getBean(User.class));
    }
}
看下效果:

也可以这样写:
@ComponentScan
public class App {
   @Bean
    public Runnable createRunnable(){
        return () -> {
            System.out.println("spirng boot is started");
        };
    }
    public static void main(String[] args) {
        SpringApplication app = new SpringApplication();
        Set<String> sets = new HashSet<>();
        sets.add(App.class.getName());
        app.setSources(sets);
        ConfigurableApplicationContext context = app.run(args);
        context.getBean(Runnable.class).run();
        System.out.println(context.getBean(User.class));
    }
}
结果完美:
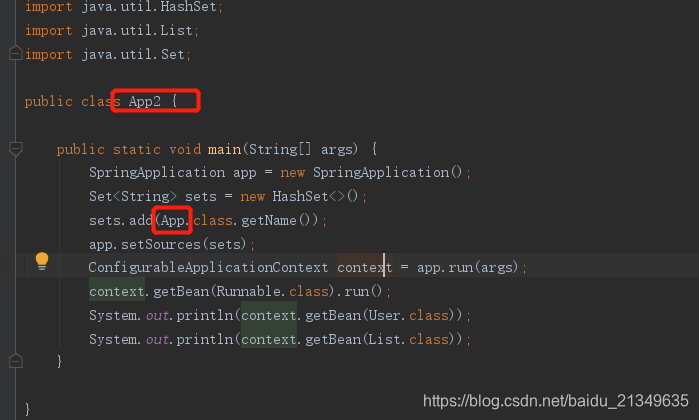
同时,还可以调用其他的入口:
比如从新写个类,没有@ComponentScan,当前类也没有注入bean
public class App2 {

    public static void main(String[] args) {
        SpringApplication app = new SpringApplication();
        Set<String> sets = new HashSet<>();
        sets.add(App.class.getName());
        app.setSources(sets);
        ConfigurableApplicationContext context = app.run(args);
        context.getBean(Runnable.class).run();
        System.out.println(context.getBean(User.class));
        System.out.println(context.getBean(List.class));
    }

}
可以看到这里调用的是其他的入口类
显示结果也ok:

个人微信公号:
搜索: 怒放de每一天
不定时推送相关文章,期待和大家一起成长!!

完
