目录
1 Hystrix解决的问题
1.1 请求熔断
我们知道微服务架构的服务提供者会有很多,每次请求都会根据负载均衡算法把请求分发给各个服务提供。假设所有的服务提供者都会请求同一个数据库,如果一个服务提供者有问题,长时间没有相应,后续还有有很多请求进来,随着请求的增多,种种原因请求数据库的链接一直没有释放,一直在增加,就会把数据库的链接资源耗尽,把所有的服务都拖死,造成雪崩的情况。为了防止这个问题hystrix提供了请求熔断的能力。
1.2 服务降级
Fallback相当于是降级操作. 对于查询操作, 我们可以实现一个fallback方法, 当请求后端服务出现异常的时候, 可以使用fallback方法返回的值. fallback方法的返回值一般是设置的默认值或者来自缓存.告知后面的请求服务不可用了,不要再来了。
1.3 请求缓存
一个请求过来请求我=1的数据,后面的请求也过来请求同样的数据,这时不会继续走原来的那条请求链路了,而是把第一次请求缓存过了,把第一次的请求结果返回给后面的请求。
1.4 请求合并
我依赖于某一个服务,我要调用N次,比如说查数据库的时候,我发了N条请求发了N条SQL然后拿到一堆结果,这时候我们可以把多个请求合并成一个请求,发送一个查询多条数据的SQL的请求,这样我们只需查询一次数据库,提升了效率。
1.5 依赖隔离
在Hystrix中, 主要通过线程池来实现资源隔离. 通常在使用的时候我们会根据调用的远程服务划分出多个线程池.比如说,一个服务调用两外两个服务,你如果调用两个服务都用一个线程池,那么如果一个服务卡在哪里,资源没被释放,后面的请求又来了,导致后面的请求都卡在哪里等待,导致你依赖的A服务把你卡在哪里,耗尽了资源,也导致了你另外一个B服务也不可用了。这时如果依赖隔离,某一个服务调用A B两个服务,如果这时我有100个线程可用,我给A服务分配50个,给B服务分配50个,这样就算A服务挂了,我的B服务依然可以用。
2 hystrix实战示例
2.1 实例创建与演示
创建项目springcloud-hystrix-demo。
引入hystrix相关的依赖:
        <dependency>
            <groupId>org.springframework.cloud</groupId>
            <artifactId>spring-cloud-starter-hystrix</artifactId>
            <version>1.4.0.RELEASE</version>
        </dependency>
        <dependency>
            <groupId>org.springframework.cloud</groupId>
            <artifactId>spring-cloud-starter-hystrix-dashboard</artifactId>
            <version>1.4.0.RELEASE</version>
        </dependency>
创建application.yml配置文件:
server:
  port: 9001
spring:
  application:
    name: Ribbon-Consumer

eureka:
  #客户端
  client:
    #注册中心地址
    service-url:
      defaultZone: http://localhost:7001/eureka/,http://localhost:7002/eureka/
创建启动类HystrixApplication.java,加入@EnableCircuitBreaker表示允许断路器。
@SpringBootApplication
@EnableDiscoveryClient
@EnableCircuitBreaker//允许断路器
public class HystrixApplication {

    public static void main(String[] args) {
        SpringApplication.run(HystrixApplication.class, args);
    }

    @Bean
    public IRule ribbonRule(){
        return new RandomRule();
    }

    @Bean
    @LoadBalanced
    public RestTemplate restTemplate(){
        return new RestTemplate();
    }

}
为了代码更清晰,创建service
@Service
public class HelloService {

    @Autowired
    private RestTemplate restTemplate;

    //当服务出现问题时候会执行fallbackMetho属性的名为helloFallBack的方法
    @HystrixCommand(fallbackMethod = "helloFallBack")
    public String helloService() throws ExecutionException, InterruptedException {
        return restTemplate.getForEntity("http://HELLO-SERVICE/helloprovider", String.class).getBody();
    }

    public String helloFallBack(){
        return "error";
    }

}
创建controller
@RestController
public class ConsumerController {

    @Autowired
    private HelloService helloService;

    @RequestMapping("/consumer")
    public String helloConsumer() throws ExecutionException, InterruptedException {
        return helloService.helloService();
    }

}
启动注册中心项目springcloud-eureka1、springcloud-eureka2,启动服务提供者springcloud-provider1、springcloud-provider2,启动消费者springcloud-hystrix。登录注册中心:http://localhost:7001 得到如下所示服务列表:

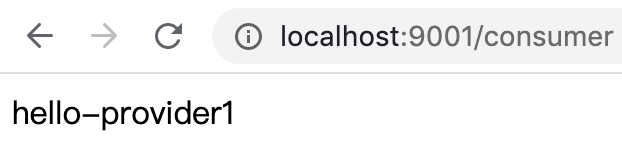
浏览器访问 http://localhost:9001/consumer 多次刷新会得到hello-provider1和hello-provider2两个结果,如下图所示

停掉服务springcloud-provider2,再访问 http://localhost:9001/consumer 多次刷新会得到hello-provider1和error两个结果,如下图所示:

由于hello--provider2被我们停止了,导致服务不可访问了,返回原先在代码中定义的服务降级后的结果error回来,当后面还有请求再也不会轮询到hello-provider2了,网页上永远出现hello-provider1。
到这里简单演示了用Hystrix的注解@HystrixCommand(fallbackMethod = "helloFallBack"),来实现熔断和服务降级。
2.2 自定义熔断降级
上面使用了注解的方式实现了熔断和服务降级,使用起来简单,但是不够灵活。Hystrix给提供了HystrixCommand类,继承之后可以自己手动更灵活的去实现熔断和服务降级。下面我们一起来演示如何使用:
创建项目springcloud-hystrix1,引用依赖和springcloud-hystrix完全一样。
创建配置文件application.yml
server:
  port: 9002
spring:
  application:
    name: Ribbon-Consumer

eureka:
  #客户端
  client:
    #注册中心地址
    service-url:
      defaultZone: http://localhost:7001/eureka/,http://localhost:7002/eureka/
创建启动类HystrixApplication1.java
@SpringBootApplication
@EnableDiscoveryClient
@EnableCircuitBreaker//允许断路器
public class HystrixApplication1 {

    public static void main(String[] args) {
        SpringApplication.run(HystrixApplication1.class, args);
    }

    @Bean
    public IRule ribbonRule(){
        return new RandomRule();
    }

    @Bean
    @LoadBalanced
    public RestTemplate restTemplate(){
        return new RestTemplate();
    }

}
创建继承HystrixCommand的类HelloServiceCommand.java
public class HelloServiceCommand extends HystrixCommand<String> {

    private RestTemplate restTemplate;

    protected HelloServiceCommand(String commandGroupKey,RestTemplate restTemplate) {
        super(HystrixCommandGroupKey.Factory.asKey(commandGroupKey));
        this.restTemplate = restTemplate;
    }

    @Override
    protected String run() throws Exception {
        System.out.println(Thread.currentThread().getName());
        return restTemplate.getForEntity("http://HELLO-SERVICE/helloprovider",String.class).getBody();
    }

    @Override
    protected String getFallback() {
        return "error";
    }
}
创建controller层代码
@RestController
public class ConsumerController {

    @Autowired
    private RestTemplate restTemplate;

    @RequestMapping("/consumer")
    public String helloConsumer() throws ExecutionException, InterruptedException {

        HelloServiceCommand command = new HelloServiceCommand("helloprovider",restTemplate);
        String result = command.execute();
        return result;
    }
}
浏览器中输入 http://localhost:9002/consumer 得到的效果和2.1节的效果完全一样。停掉springcloud-provider2服务,也会返回error,之后一直返回hello-provider1。演示效果和2.1节完全一样。
2.3 非阻塞式IO实现
restTemplate.getForEntity("http://HELLO-SERVICE/helloprovider", String.class).getBody();是阻塞式的,如果后面还有处理逻辑就需要等待。如果需要请求多个服务就需要排队来执行,比如要请求两个服务,一个耗时2秒,一个耗时3秒,那么完成本次操作就需要5秒。如何提升性能,更快的拿到结果,这就引入了非阻塞IO,即可以实现两个服务同时请求,这样耗时最长的就是总耗时时间。
hystrix为我们提供了两个实现非阻塞式IO的方式:Future将来式和Callable回调式。
Future将来式:用Future将来式去请求一个网络IO之类的任务,会以多线程的形式去实现,主线程不必卡死在哪里等待,等什么时候需要结果就通过Future的get()方法去取,不用阻塞。
Callable回调式:预定义一个回调任务,Callable发出去的请求,主线程继续往下执行,等请求返回结果执行完了,会自动调用哪个回调任务。
新建项目springcloud-future来演示Future的注解实现方式,复制项目springcloud-hystrix的依赖,java类,配置文件到新创建的项目。application.yml配置文件修改端口,如下所示:
server:
  port: 9003
spring:
  application:
    name: Ribbon-Consumer

eureka:
  #客户端
  client:
    #注册中心地址
    service-url:
      defaultZone: http://localhost:7001/eureka/,http://localhost:7002/eureka/
HelloService类修改如下所示:
@Service
public class HelloService {

    @Autowired
    private RestTemplate restTemplate;

    @HystrixCommand(fallbackMethod = "helloFallBack")
    public String helloService() throws ExecutionException, InterruptedException {

        Future<String> future = new AsyncResult<String>() {
            @Override
            public String invoke() {
                return restTemplate.getForEntity("http://HELLO-SERVICE/helloprovider",String.class).getBody();
            }
        };
        return future.get();
    }

    public String helloFallBack(){
        return "error";
    }

}
新建项目springcloud-future1来演示继承HystrixCommand类的实现方式,复制项目springcloud-hystrix1的引用依赖、java类、配置文件到新创建的项目。修改配置文件端口号,如下所示:
server:
  port: 9004
spring:
  application:
    name: Ribbon-Consumer

eureka:
  #客户端
  client:
    #注册中心地址
    service-url:
      defaultZone: http://localhost:7001/eureka/,http://localhost:7002/eureka/
修改ConsumerController类,如下所示:
@RestController
public class ConsumerController {

    @Autowired
    private RestTemplate restTemplate;

    @RequestMapping("/consumer")
    public String helloConsumer() throws ExecutionException, InterruptedException {
        HelloServiceCommand command = new HelloServiceCommand("helloprovider",restTemplate);
        Future<String> queue = command.queue();
        return queue.get();
    }
}
两个项目的演示效果是一样的。
3 总结
本文介绍了hystrix提供的熔断和服务降级的使用方法,降级也可以实现多级的降级,但是实际应用中很少使用,感兴趣的小伙伴可以自己尝试一下,本文的源码下载地址:https://github.com/xiaoyususu/springcloud-hystrix-demo.git
