被称作Bean的对象是构成应用程序的基础,是由Spring的IOC容器进行管理的,而对于一个Bean通常包含一下属性:
| 属性 | 描述 |
|---|---|
| class | 完全限定名,这个属性是强制性的,并且指定用来创建 bean 的 bean 类。 |
| name | 这个属性指定唯一的 bean 标识符。在基于 XML 的配置元数据中,你可以使用 ID 和/或 name 属性来指定 bean 标识符。 |
| scope | 这个属性指定由特定的 bean 定义创建的对象的作用域,它将会在 bean 作用域的章节中进行讨论。 |
| constructor-arg | 它是用来注入依赖关系的,并会在接下来的章节中进行讨论。 |
| properties | 它是用来注入依赖关系的,并会在接下来的章节中进行讨论。 |
| autowiring mode | 它是用来注入依赖关系的,并会在接下来的章节中进行讨论。 |
| lazy-initialization mode | 延迟初始化的 bean 告诉 IoC 容器在它第一次被请求时,而不是在启动时去创建一个 bean 实例。 |
| initialization 方法 | 在 bean 的所有必需的属性被容器设置之后,调用回调方法。它将会在 bean 的生命周期章节中进行讨论。 |
| destruction 方法 | 当包含该 bean 的容器被销毁时,使用回调方法。它将会在 bean 的生命周期章节中进行讨论。 |
Bean的标识符可以不用显示的配置,Spring会默认的根据Bean对象的名称按照标准的驼峰命名法来设置Bean的标识符,如accountService、userDao等;但是,在(不寻常的)特殊情况下,如果有多个字符,并且第一个和第二个字符都是大写的,则保留原来的大小写。
Bean的作用域
当在 Spring 中定义一个 bean 时,你必须声明该 bean 的作用域的选项。例如,为了强制 Spring 在每次需要时都产生一个新的 bean 实例,你应该声明 bean 的作用域的属性为 prototype。同理,如果你想让 Spring 在每次需要时都返回同一个bean实例,你应该声明 bean 的作用域的属性为 singleton。
Spring 框架支持以下五个作用域,分别为singleton、prototype、request、session和global session,5种作用域说明如下所示,注意,如果你使用 web-aware ApplicationContext 时,其中三个是可用的。
| 作用域 | 描述 |
|---|---|
| singleton | 在spring IoC容器仅存在一个Bean实例,Bean以单例方式存在,默认值 |
| prototype | 每次从容器中调用Bean时,都返回一个新的实例,即每次调用getBean()时,相当于执行newXxxBean() |
| request | 每次HTTP请求都会创建一个新的Bean,该作用域仅适用于WebApplicationContext环境 |
| session | 同一个HTTP Session共享一个Bean,不同Session使用不同的Bean,仅适用于WebApplicationContext环境 |
| global-session | 一般用于Portlet应用环境,该运用域仅适用于WebApplicationContext环境 |
下面,将讨论前两个作用域的使用。为了方便测试,我们需要重新创建一个POJO(LifeScope.java)和测试方法,代码如下:
/**
 * @author johnson liu
 * @description Bean的生命周期测试POJO类
 */
public class LifeScope {
    private String name;

    public void getName(int num) {
        System.out.println("Your name :"+name+">>>"+num);
    }
    public void setName(String name) {
        this.name = name;
    }
}
定义接口LifeService.java和其实现类LifeServiceImpl.java:
package scope;

import quickstart.LifeScope;

public interface LifeService {
    /**
     *
     * @param lifeScope 作用域测试
     */
    void setLife(LifeScope lifeScope);

    LifeScope getLife();
}
package scope;

import quickstart.LifeScope;
/**
 * @author johnson liu
 * @description Bean生命周期测试
 */
public class LifeServiceImpl implements LifeService {

    private LifeScope lifeScope;
    /**
     * @param lifeScope 作用域测试
     */
    public void setLife(LifeScope lifeScope) {
        this.lifeScope=lifeScope;
    }
    public LifeScope getLife(){
        return this.lifeScope;
    }
}
为了测试Spring容器实例化的Bean是单例还是多例,还需要创建一个简单的多线程类来测试(通过多线程,我们可以获取实现类的多个实例,输出该实例,如果实例对象的引用地址一样,则是单例,否则,属于多例;其次,为了方便区别这两种模式用法上的不同,在线程的内部创建了私有变量num,以此来区分是哪个线程进行了输出):
package scope;

import org.springframework.context.ApplicationContext;
import quickstart.LifeScope;

import java.util.Random;
/**
 * @author johnson liu
 * @description
 */
public class LifeThread extends Thread {
    private ApplicationContext context;
    private LifeScope lifeScope;
    private Integer num;
    public LifeThread(){
    }
    public LifeThread(int num,ApplicationContext context,LifeScope lifeScope){
        this.context=context;
        this.lifeScope=lifeScope;
        this.num=num;
    }
    @Override
    public void run() {
        long time=(long)(Math.random()*1000+1);
        try {
            LifeServiceImpl lifeService=((LifeServiceImpl)context.getBean("lifeService"));
            System.out.println(lifeService);
            lifeService.setLife(lifeScope);
            Thread.sleep(time);
            LifeScope returnLifeScope= lifeService.getLife();
            returnLifeScope.getName(num);
        }catch (Exception e){

        }
    }
}
配置Beans.xml,让LifeServiceImpl被Spring容器所管理:
<?xml version="1.0" encoding="UTF-8"?>
<beans xmlns="http://www.springframework.org/schema/beans"
       xmlns:xsi="http://www.w3.org/2001/XMLSchema-instance"
       xsi:schemaLocation="http://www.springframework.org/schema/beans http://www.springframework.org/schema/beans/spring-beans.xsd">
    <bean id="helloWorld" class="quickstart.HelloWorld">
        <!--<constructor-arg name="message" value="使用xml进行构造函数注入"></constructor-arg>-->
        <property name="message" value="hello world"></property>
    </bean>

    <!--<bean id="lifeService" class="scope.LifeServiceImpl" scope="prototype"></bean>-->
    <bean id="lifeService" class="scope.LifeServiceImpl" scope="singleton"></bean>

</beans>
编写测试代码:
package quickstart;

import org.springframework.context.ApplicationContext;
import org.springframework.context.annotation.AnnotationConfigApplicationContext;
import org.springframework.context.support.ClassPathXmlApplicationContext;
import org.springframework.context.support.FileSystemXmlApplicationContext;
import scope.LifeServiceImpl;
import scope.LifeThread;

public class MainTest {

    public static void main(String[] args){
        /**
         * ApplicationContext 是一个接口,负责读取Spring的配置文件,管理对象的加载、生成;维护Bean对象与Bean对象之间的依赖关系,负责Bean的生命周期等。
         * ClassPathXmlApplicationContext、FileSystemXmlApplicationContext、AnnotationConfigApplicationContext等是ApplicationContext接口的实现类
         * ClassPathXmlApplicationContext用于从classpath路径下读取Spring的配置文件
         * FileSystemXmlApplicationContext用于从文件系统中加载应用上下文
         * AnnotationConfigApplicationContext用于从Java类中加载应用上下文
         */
        ApplicationContext context=new ClassPathXmlApplicationContext("Beans.xml");//从类路径中加载应用上下文
//        ApplicationContext context=new FileSystemXmlApplicationContext("D:\\IdeaProjects\\java\\spring\\core\\src\\main\\resources\\Beans.xml");//从文件系统中加载应用上下文
        //ApplicationContext context=new AnnotationConfigApplicationContext("quickstart");//从Java类中加载应用上下文
        /*HelloWorld helloWorld=(HelloWorld)context.getBean("helloWorld");
        helloWorld.getMessage();*/

        LifeServiceImpl lifeService=(LifeServiceImpl)context.getBean("lifeService");
        LifeScope lifeScope1=new LifeScope();
        lifeScope1.setName("Scope测试1");

        LifeScope lifeScope2=new LifeScope();
        lifeScope2.setName("Scope测试2");

        LifeScope lifeScope3=new LifeScope();
        lifeScope3.setName("Scope测试3");

        LifeScope lifeScope4=new LifeScope();
        lifeScope4.setName("Scope测试4");

        LifeScope lifeScope5=new LifeScope();
        lifeScope5.setName("Scope测试5");

        LifeScope lifeScope6=new LifeScope();
        lifeScope6.setName("Scope测试6");

        new LifeThread(1,context,lifeScope1).start();
        new LifeThread(2,context,lifeScope2).start();
        new LifeThread(3,context,lifeScope3).start();
        new LifeThread(4,context,lifeScope4).start();
        new LifeThread(5,context,lifeScope5).start();
        new LifeThread(6,context,lifeScope6).start();
    }
}
此时,我们使用的是singleton作用域,其测试结果如下:
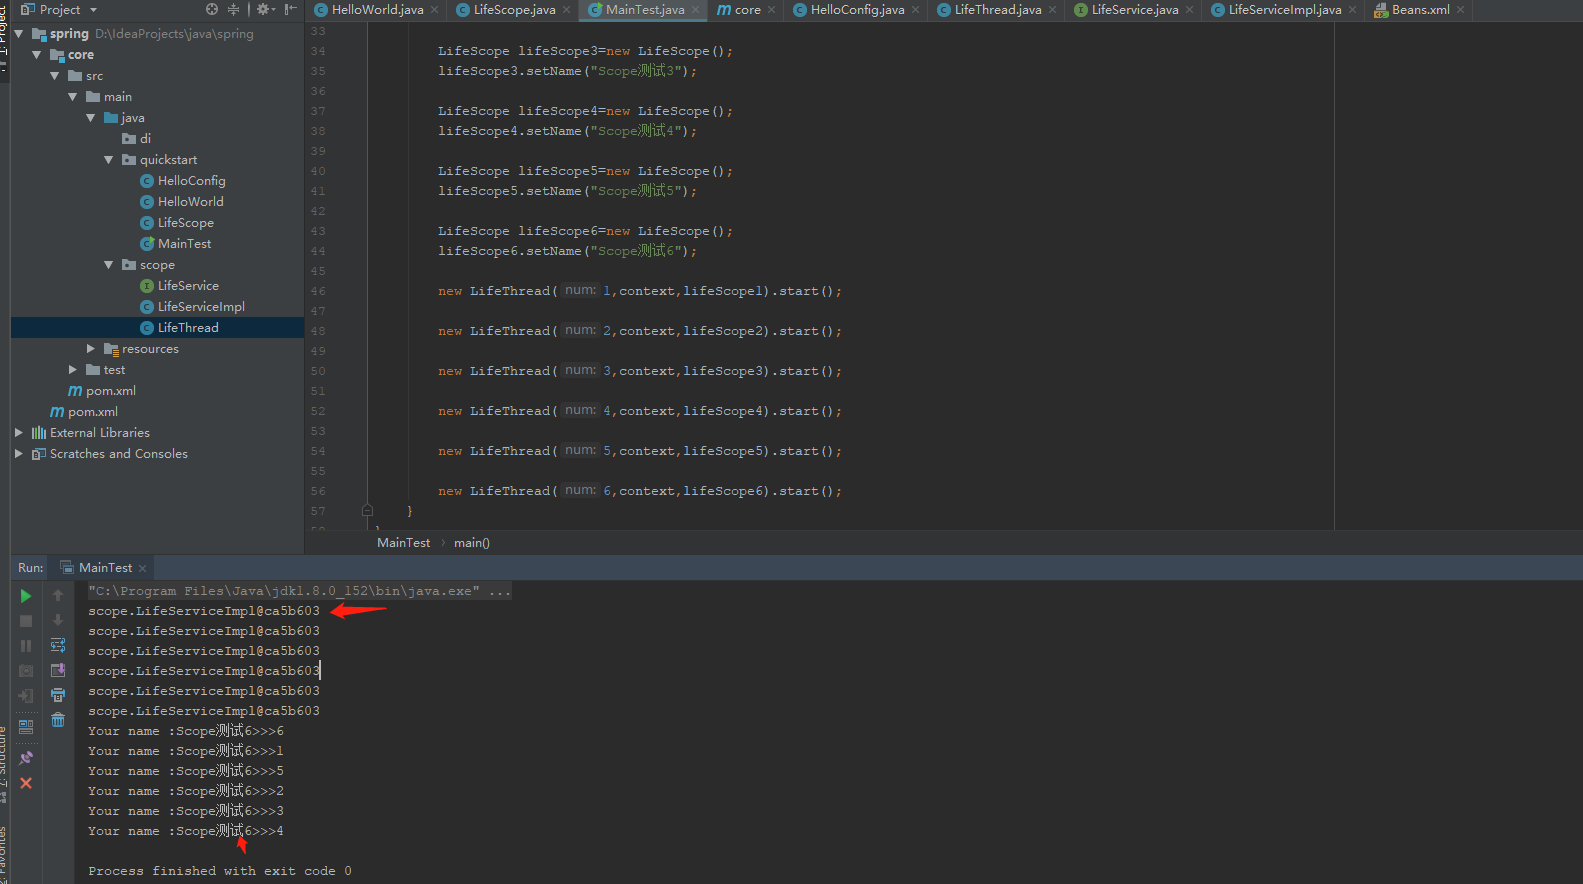
从测试结果中可以发现,我们获取的Bean实例对象是同一个对象,但是在通过bean实例对象的私有属性赋值后输出,其得到的值并不是当前线程设置的值。下面我们再来看将bean的作用域修改为scope="prototype"后的结果:
<bean id="lifeService" class="scope.LifeServiceImpl" scope="prototype"></bean>//将以上beans.xml中的这段代码行取消注释
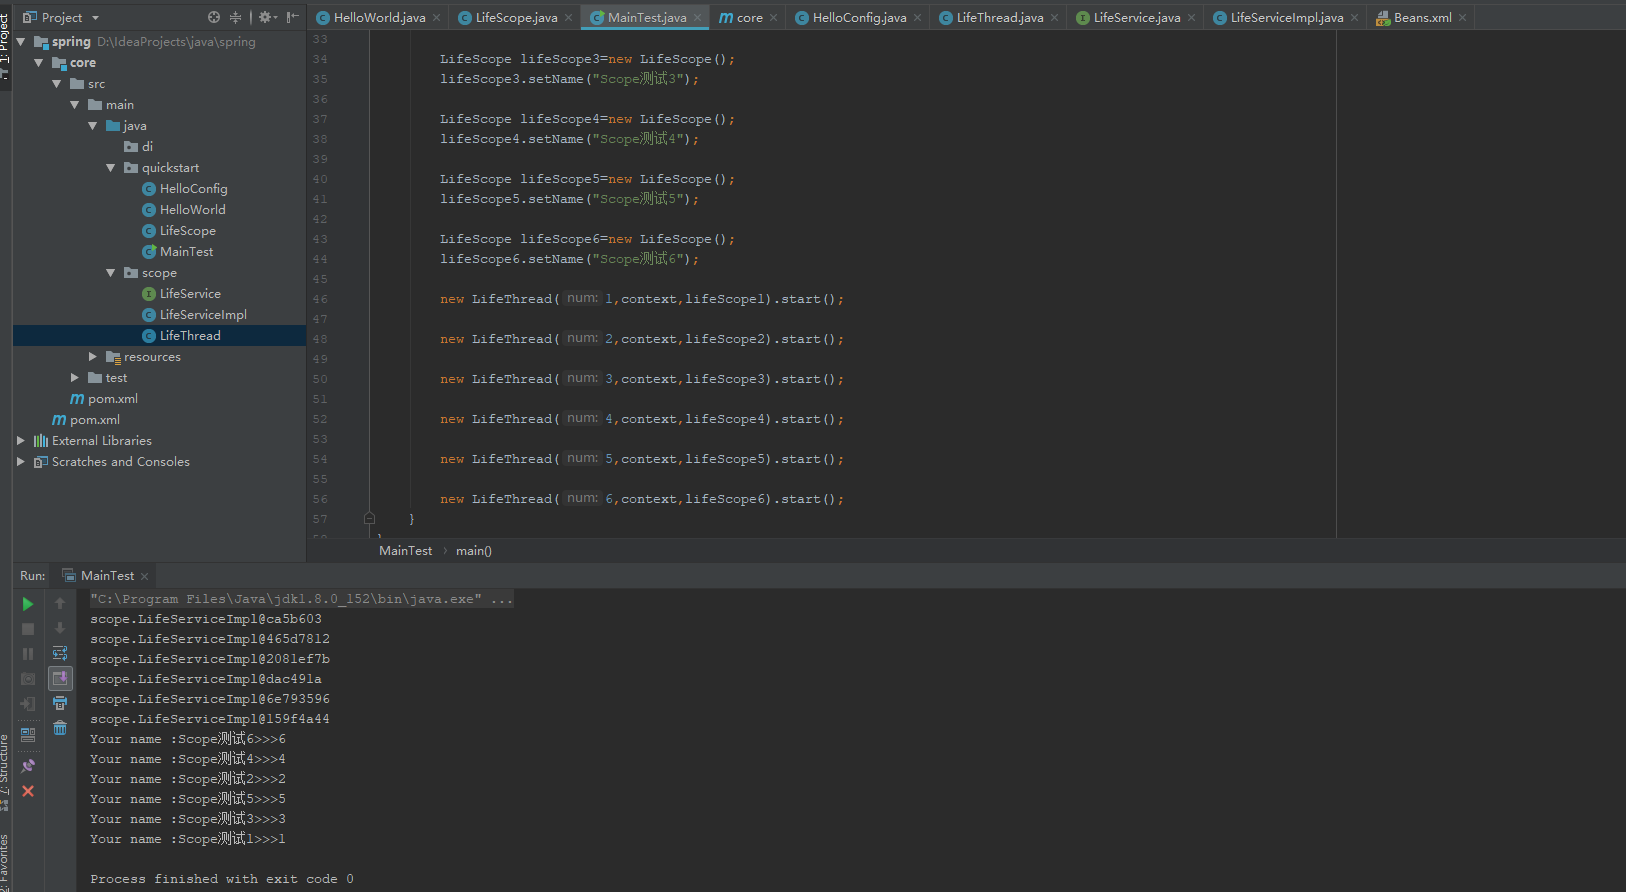
  从以上测试结果我们发现在多线程下,多例模式是线程安全的。通常这类Bean中含有全局的私有属性的Bean,我们称之为有状态Bean,反之为无状态的Bean。
  因此,对于有状态的这类bean,在定义时,我们一定要将其作用域声明为prototype模式。