相信经过上篇博文的学习,聪明的你已经学会了如何在Centos7 上通过yum 方式安装Nginx ,但是有时候有些场景或者特俗情况下,我们往往需要通过编译源码方式安装,以便于更灵活地定制我们的Nginx.
这节课我们将一起学习如何在centos7 上使用编译源码的方式安装Nginx.
在开始之前,我们先来看看源码编译安装的优缺点,这样以便于我们更好地理解什么时候用哪种安装方式比较好。
要知道,源码编译安装并不是件容易的事情,所以这种方式有一些缺点,如下所示:
- 所用的时间。
- 单独安装软件的所有依赖项。
- 完整掌握软件编译。
但是在以下情况下重新编译是有用的:(优点)
- 编译你的有用模块而不是全部。
- 使用最新版本而不是旧版本。
- 可以使用您自己的对您的项目有用的配置。
- 创建一个新的Centos机器:
本博文教程在Centos7 上演示,所以没有Linux 环境的可以参考鄙人的另外一篇博文 VMWare Workstation虚拟机 安装Centos7 图文指南
1. 安装前我们最好使用yum更新下
yum -y update
2. 我们还是最好退一个层级目录
因为当我们打开终端,默认是这样的,

所以我们最好退一个目录,否则可能运行命令会失败
cd ..
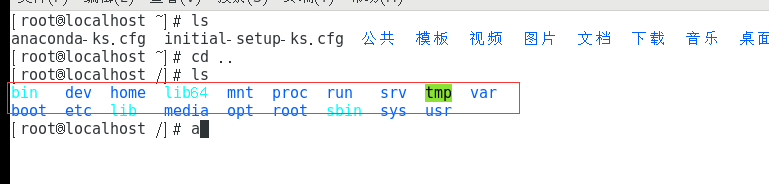
Tips: cd 和.. 之间要有空格哦
2. 安装Nginx 编译所需所有依赖项
yum -y install gcc gcc-c++ make zlib-devel pcre-devel openssl-devel
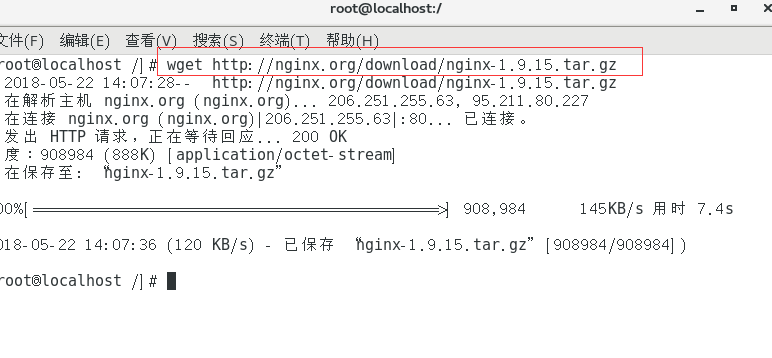
3. 编译我们需要下载源代码。
有两个地方都可以进行下载
下载一: http://nginx.org/download/
centos7 下载命令
wget http://nginx.org/download/nginx-1.9.15.tar.gz
下载成功后如图所示:
下载二: https://github.com/nginx/nginx
git clone [email protected]:nginx/nginx.git
4. 下载完毕后我们需要解压他们
tar -xzf nginx-1.9.15.tar.gz
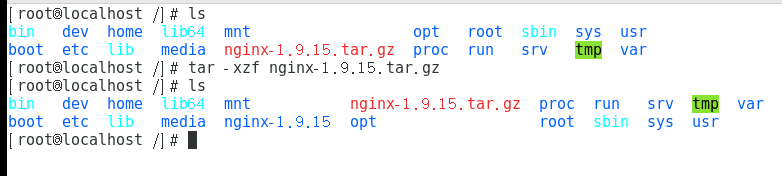
5. 进入nginx-1.9.15.tar.gz 文件夹
cd nginx-1.9.15
6.选择安装的模块
nginx是非常大的软件,它内部有很多模块。 在这里你必须选择哪个模块对你的网站有用。 您可以查看下面的列表。 您也可以按照以下命令通过自己的系统进行检查:
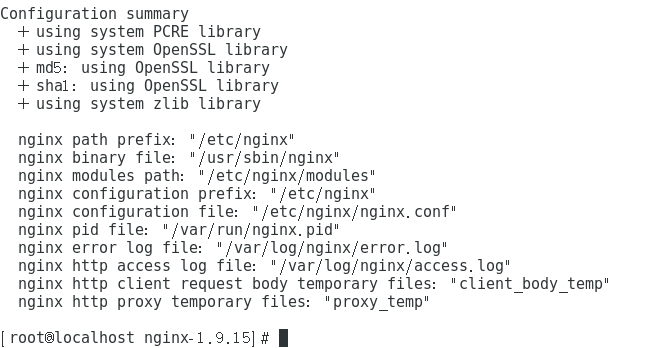
./configure \
--user=nginx \
--group=nginx \
--prefix=/etc/nginx \
--sbin-path=/usr/sbin/nginx \
--conf-path=/etc/nginx/nginx.conf \
--pid-path=/var/run/nginx.pid \
--lock-path=/var/run/nginx.lock \
--error-log-path=/var/log/nginx/error.log \
--http-log-path=/var/log/nginx/access.log \
--with-http_gzip_static_module \
--with-http_stub_status_module \
--with-http_ssl_module \
--with-pcre \
--with-file-aio \
--with-http_realip_module \
--without-http_scgi_module \
--without-http_uwsgi_module \
--without-http_fastcgi_module
执行完上面的指令后会看到这样的回显
7.执行编译指令,输入以下命令
make
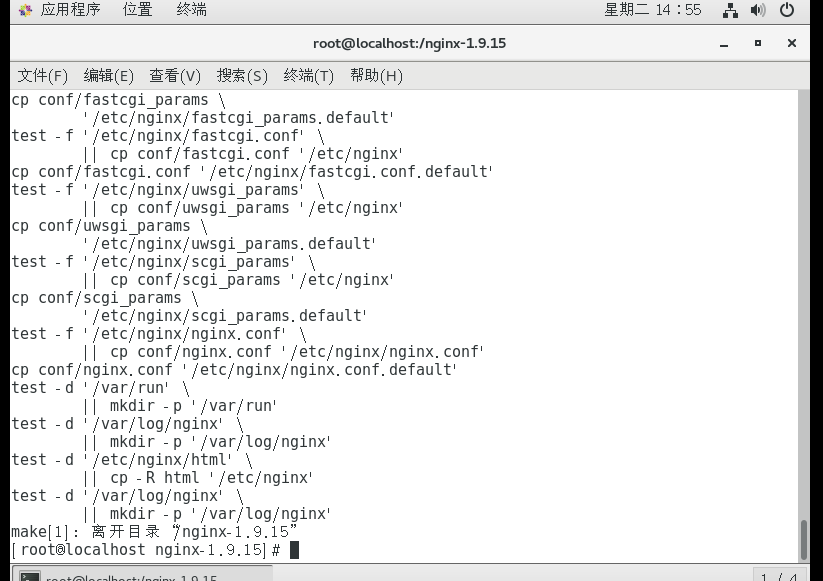
8.执行成功后再输入安装指令
make install
编译安装成功后会有如下回显
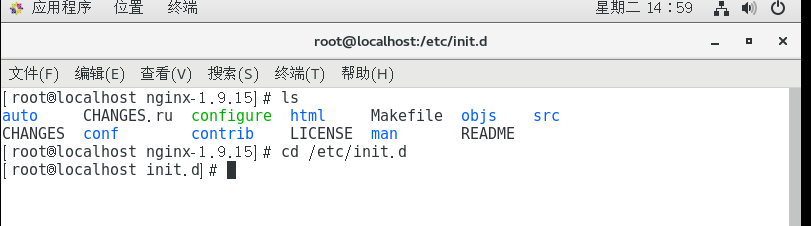
9. 我们需要在init.d文件夹中创建nginx启动文件。 这样每次服务器重新启动init进程都会自动启动我们的Web服务器
cd /etc/init.d
成功进入后会有这样的回显
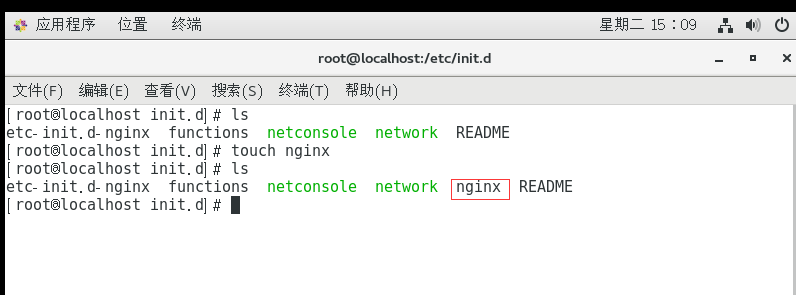
8. 创建nginx 配置文件
touch nginx
执行前后如图所示:
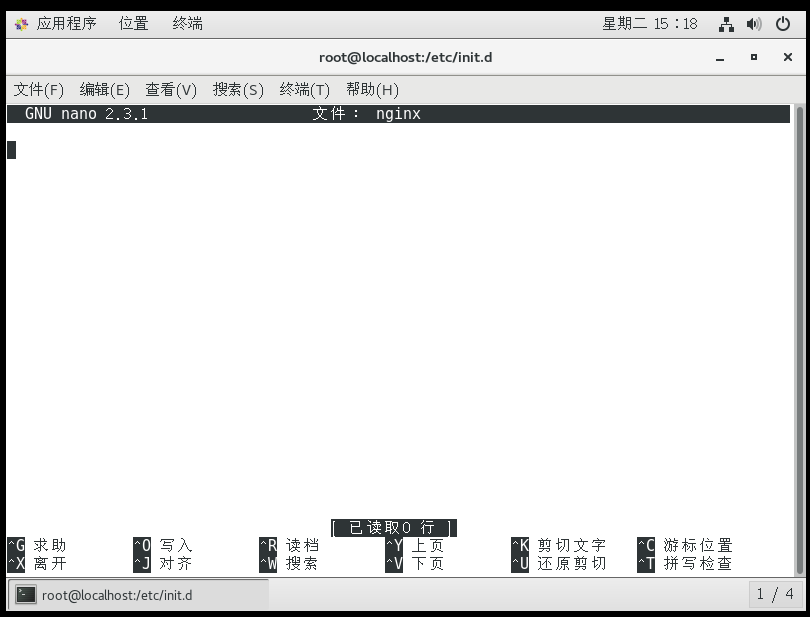
10. 编辑这个文件
nano nginx
打开成功的话可以看到这样
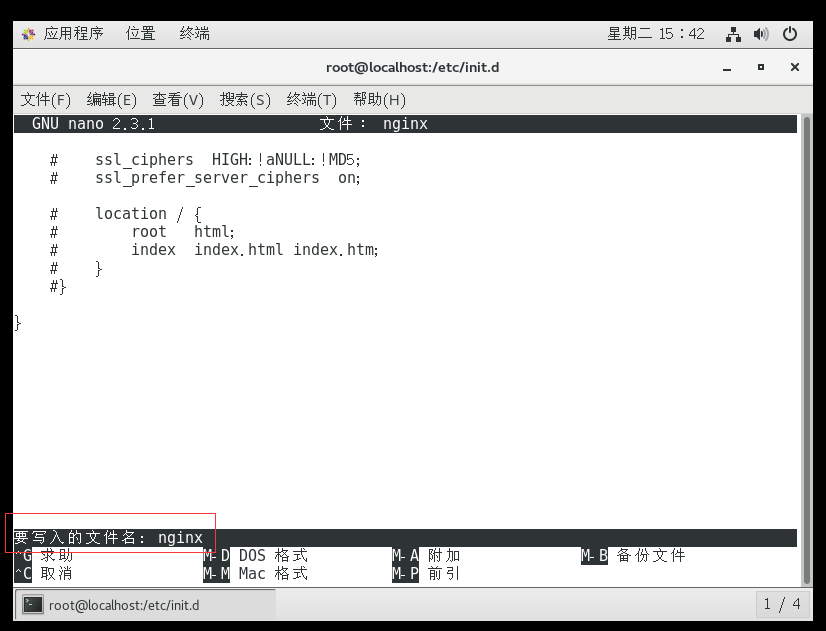
11. 复制以下内容到这个编辑器中
编辑文件内容如下:


#!/bin/sh
#
# nginx - this script starts and stops the nginx daemin
#
# chkconfig:   - 85 15
# description:  Nginx is an HTTP(S) server, HTTP(S) reverse \
#               proxy and IMAP/POP3 proxy server
# processname: nginx
# config:      /etc/nginx/nginx.conf
# pidfile:     /var/run/nginx.pid
# user:        nginx

# Source function library.
. /etc/rc.d/init.d/functions

# Source networking configuration.
. /etc/sysconfig/network

# Check that networking is up.
[ "$NETWORKING" = "no" ] && exit 0

nginx="/usr/sbin/nginx"
prog=$(basename $nginx)

NGINX_CONF_FILE="/etc/nginx/nginx.conf"

lockfile=/var/run/nginx.lock

start() {
    [ -x $nginx ] || exit 5
    [ -f $NGINX_CONF_FILE ] || exit 6
    echo -n $"Starting $prog: "
    daemon $nginx -c $NGINX_CONF_FILE
    retval=$?
    echo
    [ $retval -eq 0 ] && touch $lockfile
    return $retval
}

stop() {
    echo -n $"Stopping $prog: "
    killproc $prog -QUIT
    retval=$?
    echo
    [ $retval -eq 0 ] && rm -f $lockfile
    return $retval
}

restart() {
    configtest || return $?
    stop
    start
}

reload() {
    configtest || return $?
    echo -n $"Reloading $prog: "
    killproc $nginx -HUP
    RETVAL=$?
    echo
}

force_reload() {
    restart
}

configtest() {
  $nginx -t -c $NGINX_CONF_FILE
}

rh_status() {
    status $prog
}

rh_status_q() {
    rh_status >/dev/null 2>&1
}

case "$1" in
    start)
        rh_status_q && exit 0
        $1
        ;;
    stop)
        rh_status_q || exit 0
        $1
        ;;
    restart|configtest)
        $1
        ;;
    reload)
        rh_status_q || exit 7
        $1
        ;;
    force-reload)
        force_reload
        ;;
    status)
        rh_status
        ;;
    condrestart|try-restart)
        rh_status_q || exit 0
            ;;
    *)
        echo $"Usage: $0 {start|stop|status|restart|condrestart|try-restart|reload|force-reload|configtest}"
        exit 2
esac
12. Ctrl +O 快捷键保存,看到下面提示,按下回车键
13. 然后再按下 Ctrl + X 离开

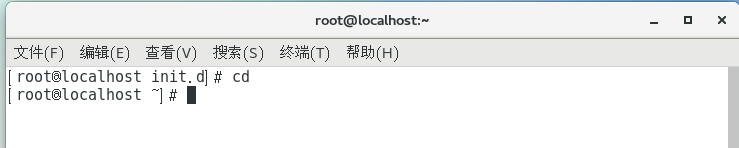
14. 会到上层目录
cd
执行前后效果如图所示
15. 创建一个用户
useradd -r nginx
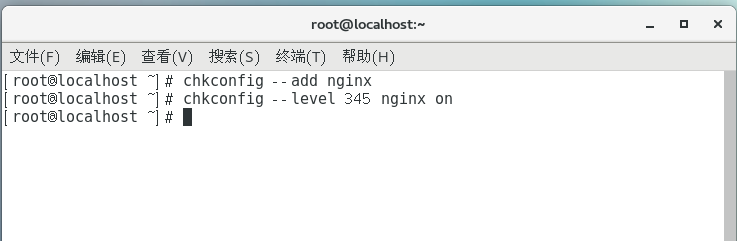
16. 校验配置文件依次输入下列命令
chkconfig --add nginx
chkconfig --level 345 nginx on
执行成功后如图所示:
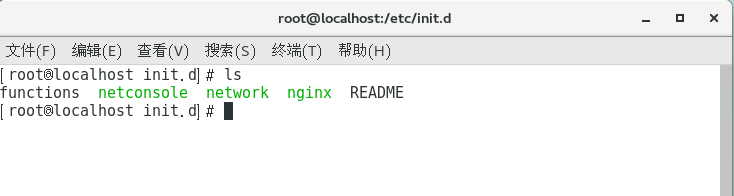
17. 进入init.d 文件夹
cd /etc/init.d/
当前文件所在目录
18. 给这个文件添加执行权限
chmod +x nginx
执行成功后看到这样的回显

19.退出当前目录
cd ..
20. 打开Nginx 配置文件
nano /etc/nginx/nginx.conf
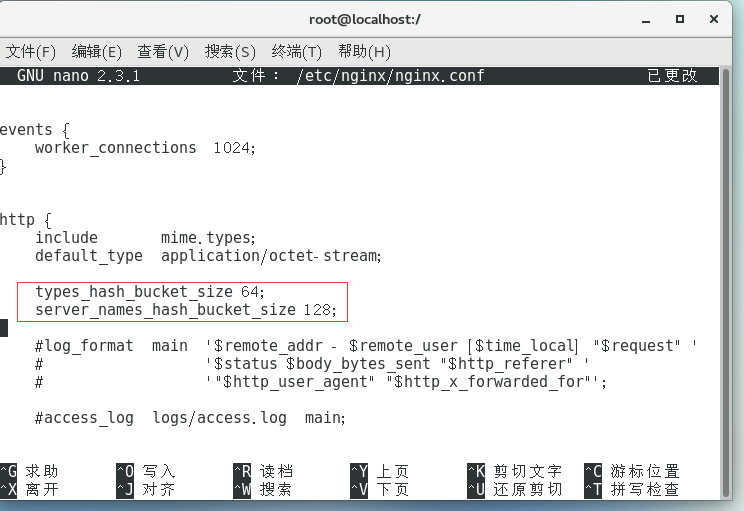
21. 在配置文件中default_type 下面添加这两行内容
types_hash_bucket_size 64;
server_names_hash_bucket_size 128;
效果如图所示:
Ctrl +O 写入,然后键盘快捷键Ctrl+X 退出编辑器
有时候由于Linux 服务器上防火墙会端口拦截,所以我们需要在防火墙中开放80 端口,方便我们待会在物理机上查看
firewall-cmd --permanent --add-port=80/tcp --zone=public
执行成功看到回显

重新加载防火墙配置
firewall-cmd --reload
防火墙配置重新加载成功回看到这个

22. 启动nginx服务
service nginx start
23. 查看当前IP地址输入命令:
ifconfig
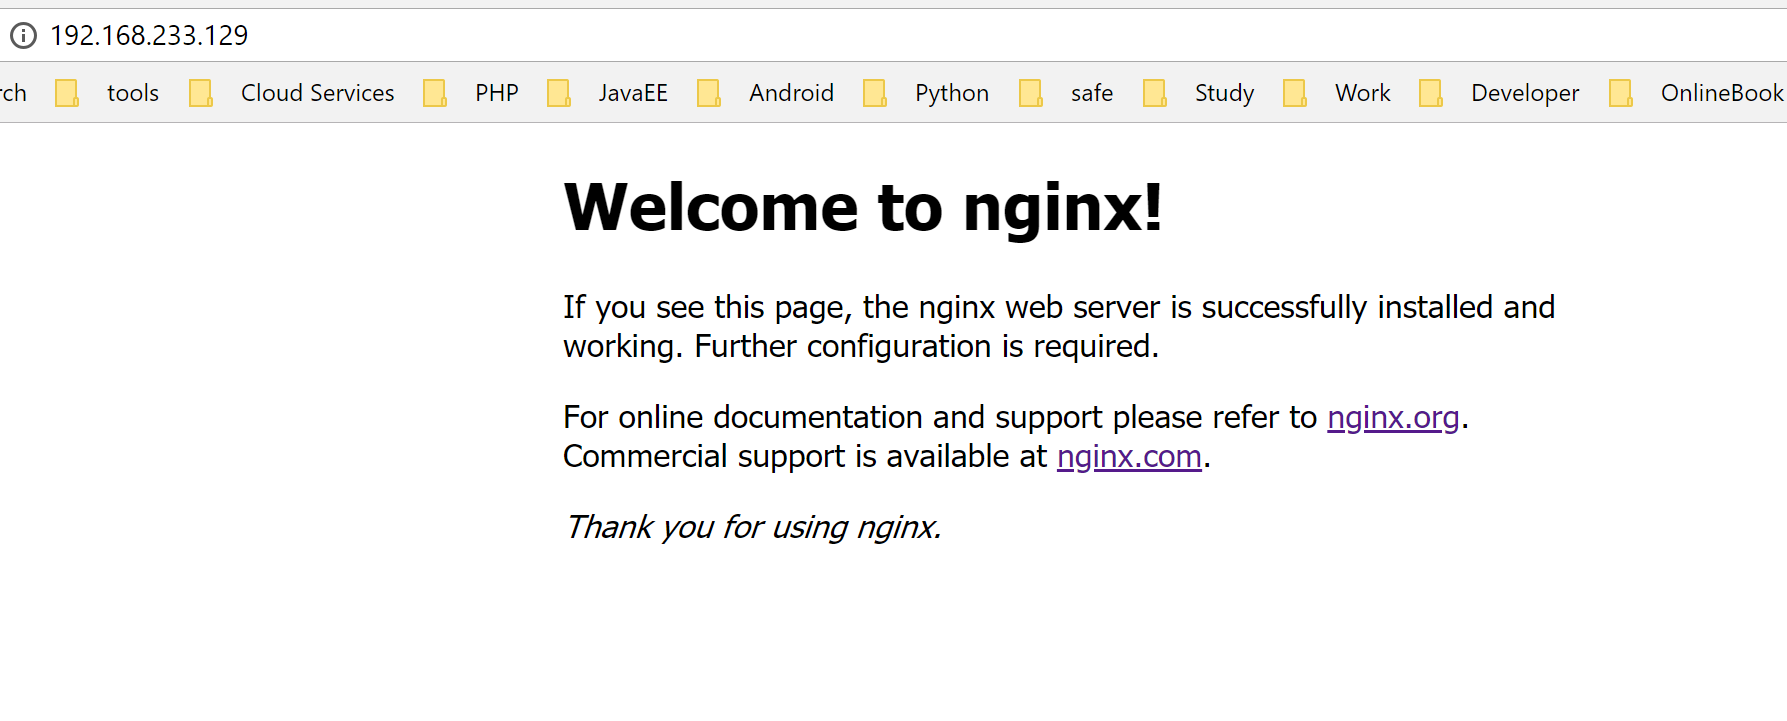
执行成功后可以看到我们的Linux 操作系统IP地址是 192.168.233.129

然后在我们的windows 主机Chrome 浏览器上输入IP地址:
http://192.168.233.129
可以看到结果
停止Nginx服务
systemctl stop nginx

(本篇完~)
参考资料: YouTube视频资料 文档资料