1、建立datasources.xml,创建jndi
<jee:jndi-lookup id="datasource" jndi-name="jndiname" resouce-ref="true"/>
2、创建jetty-env.xml文件
<?xml version="1.0" encoding="utf-8"?>
<!DOCTYPE Configure PUBLIC "-//Mort Bay Consulting//DTD Configure//EN" "http://www.eclipse.org/jetty/configure.dtd">
<Configure class="org.eclipse.jetty.webapp.WebAppContext">
 <New id="datasource" class="org.eclipse.jetty.plus.jndi.Resource">
  <Arg>jdbcname</Arg>
  <Arg>
   <New class="org.apache.commons.dbcp.BasicDataSource">
    <Set name="driverClassName">oracle.jdbc.driver.OracleDriver</Set>
    <Set name="url">jdbc:oracle:thin:@ip:port:servername</Set>
    <Set name="username">username</Set>
    <Set name="password">password</Set>
   </New>
  </Arg>
 </New>
</Configure>
3、配置启动项,
Run Configurations---Jetty WebApp---New
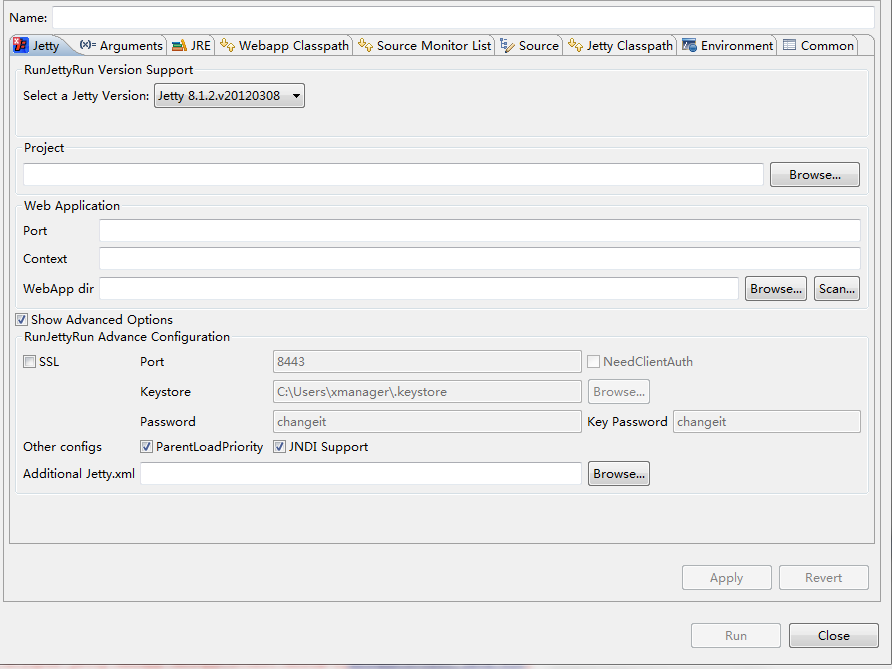
填入内容,注意一定要把JNDI Support勾选上,否则则会报错:javax.naming.NameNotFoundException; remaining name 'jndiname'
再一点就是注意select a Jetty Version ,如果不成功,试试选择高版本的jetty