1.引入如下依赖
        <dependency>
            <groupId>org.springframework.cloud</groupId>
            <artifactId>spring-cloud-starter-netflix-eureka-client</artifactId>
        </dependency>
        <dependency>
            <groupId>org.springframework.cloud</groupId>
            <artifactId>spring-cloud-starter-netflix-zuul</artifactId>
        </dependency>

        <dependency>
            <groupId>org.springframework.boot</groupId>
            <artifactId>spring-boot-starter-test</artifactId>
            <scope>test</scope>
        </dependency>
2.启动类添加如下注解 @EnableZuulProxy
@SpringBootApplication
@EnableZuulProxy
public class ApiZuulApplication {
    public static void main(String[] args) {
        SpringApplication.run(ApiZuulApplication.class, args);
    }}
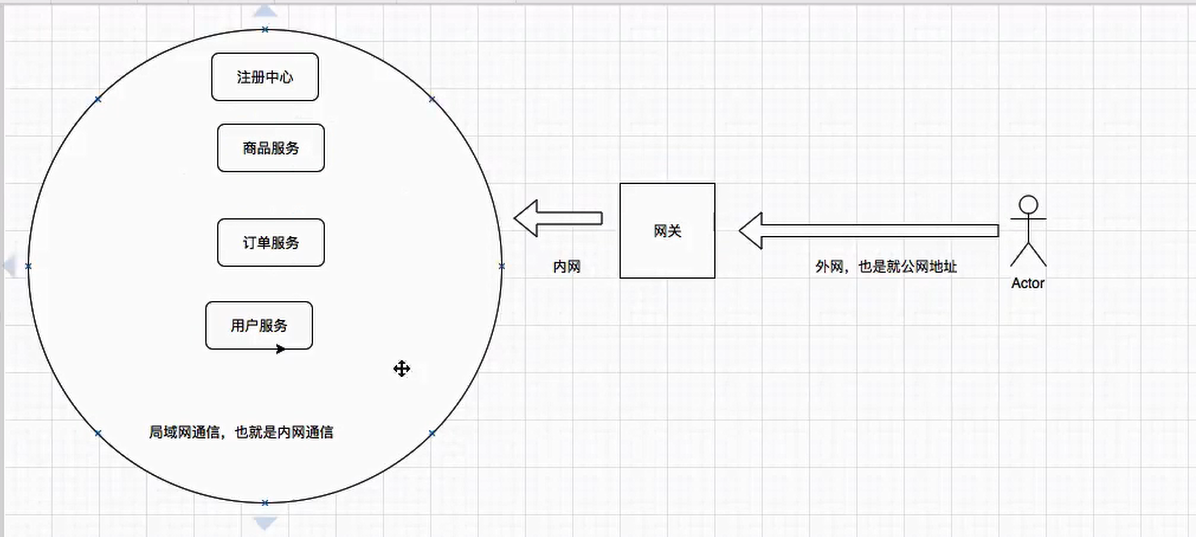
原先访问商品服务如下:

通过网关访问:将访问地址改为网关地址,并添加商品服务的服务名称如下:

即完成统一完成由网关进行发送
同时可以在启动类中添加自定义路由映射
#/order-service/api/v1/order/save?user_id=2&product_id=1
#自定义路由映射
zuul:
  routes:
    order-service: /apizuul/order/**
    product-service: /apizuul/product/**
  #统一入口为上面的配置,其他入口忽略
  ignored-patterns: /*-service/**
  #处理http请求头为空的问题
  sensitive-headers:
这样就可以做到不向用户暴露真实的请求路径