1.无设备打包(电脑没有连接手机设备或模拟器)
Android如果没有在项目build.gradle配置打包密钥这些的时候,打包方式为
Build里的Generate Signed Apk然后配置密码直接打包就可以了
如果在项目build.gradle配置了打包密钥这些,例子如下
signingConfigs {
    debug {
        storeFile file(DEBUGKEY)
    }
    release {
        storeFile rootProject.file("${SIGNFILE}")
        storePassword KEY_STORE_PASSWORD
        keyAlias KEY_ALIAS
        keyPassword KEY_ALIAS_PASSWORD
    }
}

buildTypes {
    debug{
        buildConfigField 'boolean','logEnable',"true"
    }
    release {
        minifyEnabled false
        zipAlignEnabled false
        proguardFiles getDefaultProguardFile('proguard-android.txt'), 'proguard-rules.txt'
        signingConfig signingConfigs.release
    }
}
其中数值在gradle.properties里配置,当然路径和密码这些就是自己建密钥的时候设置的了
#Debug\u7B7E\u540D
DEBUGKEY = C://keystores/debug.keystore

#\u7B7E\u540D\u914D\u7F6E
SIGNFILE = keystore/Key_Android
KEY_STORE_PASSWORD = ALeeTest
KEY_ALIAS = ALeeTest
KEY_ALIAS_PASSWORD = ALeeTest
现在可以直接使用Android Studio右侧的gradle打包了,一般测试人员打正式包都是这种方式打包,打出来的正式包别忘了用三方软件(如360加固)加固,功能位置截图
一般双击assembleRelease就是打正式包了,具体位置为项目名->app->Tasks->build->assembleRelease
如上面截图的MatrixLearning->MatrixLearning(root)->Tasks->build->assembleRelease
2.有设备打包(电脑连接上手机设备或模拟器)
有设备打包使用的是直接点击执行打包按钮,打出来的包会直接安装到设备上
下面主要讲一下打包的launcher mode配置,配置在

下拉后选择Edit Configurations

常用到的是Launch Options
一般Launch为Default Activity
这时要在AndroidManifest里给你想要软件默认打开的activity添加intent-filter
<intent-filter>
    <action android:name="android.intent.action.MAIN" />

    <category android:name="android.intent.category.LAUNCHER" />
</intent-filter>
当Launch选择Nothing时,

AndroidManifest添不添加Intent-filter都没关系,包打出来安装后在桌面是看不到软件图标的,只能在系统已安装应用的列表里找到,这时候这个软件无法单独打开,只能通过第三方软件去吊起其中的类来打开
当Launch选择Specified Activity时

我们需要在下面的

activity里加上要打开的类,这种方式有图标,但是打开软件必定是首先打开这个activity,activity右面的三个小点···我们点开可以根据activity名搜索或直接在项目路径里找,十分方便

注意,这种方式选择的activity,必须要在AndroidManifest里面声明<intent-filter>,一般声明成下面这样即可
<intent-filter>
    <action android:name="android.intent.action.MAIN"/>
    <category android:name="android.intent.category.DEFAULT"/>
</intent-filter>
最后Lanunch选择URL时

要打开的activity需要在AndroidManifest配置如下intent-filter
<intent-filter>
    <!--其中xl为scheme协议,其他port,host,path可根据自己喜欢配置-->
    <data android:scheme="xl" android:host="test" android:port="8888" android:path="/testPath"/>

    <!--下面这三个一定要配上,不然会报错-->
    <category android:name="android.intent.category.DEFAULT"/>
    <action android:name="android.intent.action.VIEW"/>
    <category android:name="android.intent.category.BROWSABLE"/>
</intent-filter>
然后在launcher options里根据配置填写url即可,根据上面配置填写的url为
执行打包的按钮位置为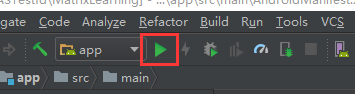
你会发现这种方式打出来的包是debug包,如果你要打release包,可以在Android Studio的左侧工具栏选择Build Variants
然后点击一下debug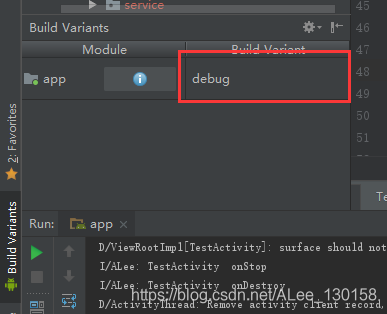
此时就可以选择为release啦,选择后重新点击一下执行按钮,再打出来的包就是release包了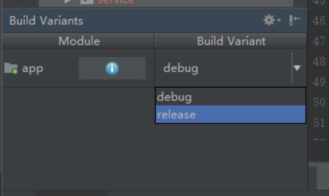
无论是有设备打包,还是无设备打包,打出来的包都会在项目里有备份,备份的路径看截图(release包出现unsigned是因为没有在build.gradle里配置签名设置)
这次的小记到这里暂时结束了。
