1.更改主机名
***(“三台虚拟机内操作”)
我们为了能够更加方便来识别主机,我们使用主机名而不是使用IP地址,以免多处配置带来更多的麻烦。把三台虚拟机服务器中的主机名(hostname)分别更改为master、node1、node2。
[root@localhost ~]# cd /etc/                       //进入配置目录
[root@localhost ~]# hostnamectl set-hostname  master
[root@localhost ~]#bash
hostname配置文件中更改为master,其他hd-node1和hd-node2用同样的方式更改并保存。
更改主机名:
#hostnamectl set-hostname   主机名
#bash
成功后可见主机名已经被修改:
[root@master ~]#
其他两台同样可见
2.网卡配置
***(“三台虚拟机内操作”)
查看自己网卡名称
[root@master ~]# ip addr
 这是两张网卡名记住开头后可用TAB键补全

//修改配置文件
[root@master ~]# vi /etc/sysconfig/network-scripts/ifcfg-eno16777736
修改:
BOOTPROTO=static ONBOOT=yes 新增 IPADDR=192.168.100.10
修改后如图:

更改之后使用:wq命令保存,同样的方式更改另一张网卡
[root@master ~]# vi /etc/sysconfig/network-scripts/ifcfg-eno33554984
这是要修改的部分,不要纠结于他的引号,跟着原始配置文件走( ̄ c ̄)y▂ξ。。。
BOOTPROTO="static"
ONBOOT="yes"
IPADDR="192.168.200.10"
PREFIX="24"
GATEWAY="192.168.200.2"
同样修改后如图:
 更改之后使用:wq命令保存
退出配置网卡文件后重启网卡
[root@master ~]# systemctl restart network
无任何返回结果则配置成功
接着同样的方式配置其他两张网卡,下面我把node1和node2的配置文件截图贴上来,标个号不要看混了,j就ip那和子网掩码那有点不一样,可以跟着改。
A.node1第一张网卡:
[root@node1 ~]# vi /etc/sysconfig/network-scripts/ifcfg-eno16777736

B.node1第二张网卡:
[root@node1 ~]# vi /etc/sysconfig/network-scripts/ifcfg-eno33554960

C.node2第一张网卡:
[root@node2 ~]# vi /etc/sysconfig/network-scripts/ifcfg-eno16777736

D.node2第二张网卡:
[root@node2 ~]# vi /etc/sysconfig/network-scripts/ifcfg--eno33554984

node1和node2节点都配置完后都重启网卡
[root@master ~]# systemctl restart network
无任何返回结果则配置成功
3.配置hosts
***(“三台虚拟机内操作”)
配置hosts主要是为了让机器能够互相识别主机名。
注:hosts文件是域名解析文件,在hosts文件内配置了 IP地址和主机名的对应关系,配置之后,通过主机名,电脑就可以定位到相应的IP地址 。
[root@master ~]# vi /etc/hosts
在hosts配置文件内容输入如下内容:
192.168.100.10 master
192.168.100.11 node1
192.168.100.12 node2
这样:
 master节点配置完成后在node1和node2节点进行同样操作,不要觉得麻烦哈慢慢来<(_ _)>
4.配置SSH免密
***(“三台虚拟机内操作”)
首先确保SSH已经安装,查看SSH软件是否安装。
[root@master ~]# ssh
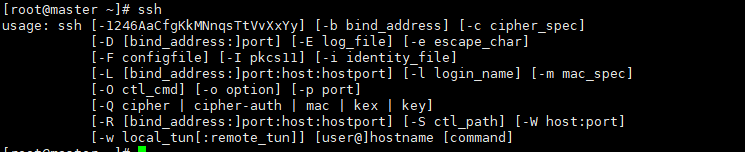 返回结果如上图说明已经安装SSH,如未安装参考下列教程
linux下安装SSH服务及使用详解
制作RSA密钥,命令如下:
[root@master ~]ssh-keygen
连续按三个回车
Generating public/private rsa key pair.
Enter file in which to save the key (/root/.ssh/id_rsa): 回车
Enter passphrase (empty for no passphrase): 回车
Enter same passphrase again: 回车
Your identification has been saved in .es
Your public key has been saved in .pub.
The key fingerprint is:
38:fa:33:d4:9f:39:99:1e:7d:3d:30:71:83:6c:e9:98 root@node3
The key's randomart image is:
+--[ RSA 2048]----+
|                 |
|            . o  |
|             * o |
|       .    = o .|
|      o.S  E +   |
|     ....  .  o. |
|    ..   ..=. ...|
|     .o   B. .  .|
|      .o ...     |
+-----------------+

接下来node1和node2节点同样操作
把产生的公钥文件放置到authorized_keys文件中,进入/etc目录:
[root@master etc ]# cat ~/.ssh/id_rsa.pub >> ~/.ssh/authorized_keys
[root@master etc ]# chmod 0600 ~/.ssh/authorized_keys
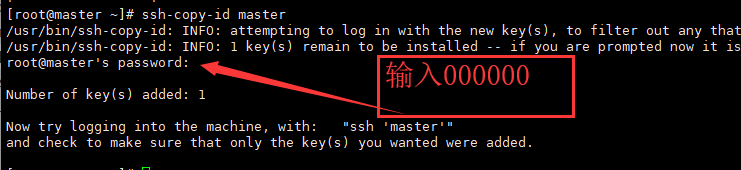
[root@master ~]ssh-copy-id master
把产生的公钥文件放置到authorized_keys文件中,命令如下:
[root@master etc ]# cat ~/.ssh/id_rsa.pub >> ~/.ssh/authorized_keys
[root@master etc ]# chmod 0600 ~/.ssh/authorized_keys
在其他机器上(node1和node2)使用ssh-copy-id -i master命令将本地公钥发送给master主机的authorized_keys文件内。
在node1主机上,传输公钥到master主机
[root@node1 ~]# ssh-copy-id -i master
/usr/bin/ssh-copy-id: INFO: attempting to log in with the new key(s), to filter out any that are already installed
/usr/bin/ssh-copy-id: INFO: 1 key(s) remain to be installed -- if you are prompted now it is to install the new keys

Number of key(s) added: 1

Now try logging into the machine, with:   "ssh 'master'"
and check to make sure that only the key(s) you wanted were added.
在node2主机上,传输公钥到master主机
[root@node2 ~]# ssh-copy-id -i master
/usr/bin/ssh-copy-id: INFO: attempting to log in with the new key(s), to filter out any that are already installed
/usr/bin/ssh-copy-id: INFO: 1 key(s) remain to be installed -- if you are prompted now it is to install the new keys

Number of key(s) added: 1

Now try logging into the machine, with:   "ssh 'master'"
and check to make sure that only the key(s) you wanted were added.
同样的方式在master节点上执行如下命令:
[root@master ~]# ssh-copy-id -i node1
[root@master ~]# ssh-copy-id -i node2

在 master主机上授权authonrized文件
[root@master .ssh]# chmod 0600 authorized_keys
将授权文件发送到其他主机
[root@master .ssh]# scp authorized_keys node1:/root/.ssh/
[root@master .ssh]# scp authorized_keys node2:/root/.ssh/
ssh 登录远程主机查看是否成功
[root@master ~]# ssh node1

[root@node1 ~]# ssh node2

[root@node2 ~]# ssh master

5.关闭防火墙
***(“三台虚拟机内操作”)
如未关闭防火墙在最后访问网站的时候可能会无法访问
root@master ~]# systemctl disable firewalld.service
无任何返回结果操作成功
对node1和node2同样操作
下一篇:
