POM
<?xml version="1.0" encoding="UTF-8"?>
<project xmlns="http://maven.apache.org/POM/4.0.0" xmlns:xsi="http://www.w3.org/2001/XMLSchema-instance"
         xsi:schemaLocation="http://maven.apache.org/POM/4.0.0 http://maven.apache.org/xsd/maven-4.0.0.xsd">
    <modelVersion>4.0.0</modelVersion>

    <parent>
        <groupId>com.funtl</groupId>
        <artifactId>spring-security-oauth2</artifactId>
        <version>1.0.0-SNAPSHOT</version>
    </parent>

    <artifactId>spring-security-oauth2-server</artifactId>
    <url>http://www.funtl.com</url>

    <licenses>
        <license>
            <name>Apache 2.0</name>
            <url>https://www.apache.org/licenses/LICENSE-2.0.txt</url>
        </license>
    </licenses>

    <developers>
        <developer>
            <id>liwemin</id>
            <name>Lusifer Lee</name>
            <email>[email protected]</email>
        </developer>
    </developers>

    <dependencies>
        <!-- Spring Boot -->
        <dependency>
            <groupId>org.springframework.boot</groupId>
            <artifactId>spring-boot-starter-web</artifactId>
        </dependency>
        <dependency>
            <groupId>org.springframework.boot</groupId>
            <artifactId>spring-boot-starter-test</artifactId>
        </dependency>

        <!-- Spring Security -->
        <dependency>
            <groupId>org.springframework.cloud</groupId>
            <artifactId>spring-cloud-starter-oauth2</artifactId>
        </dependency>
    </dependencies>

    <build>
        <plugins>
            <plugin>
                <groupId>org.springframework.boot</groupId>
                <artifactId>spring-boot-maven-plugin</artifactId>
                <configuration>
                    <mainClass>com.funtl.oauth2.OAuth2ServerApplication</mainClass>
                </configuration>
            </plugin>
        </plugins>
    </build>

</project>
Application
package com.funtl.oauth2;

import org.springframework.boot.SpringApplication;
import org.springframework.boot.autoconfigure.SpringBootApplication;

/**
 * 认证服务器,用于获取 Token
 * <p>
 * Description:
 * </p>
 *
 * @author Lusifer
 * @version v1.0.0
 * @date 2019-04-01 16:06:45
 * @see com.funtl.oauth2
 */
@SpringBootApplication
public class OAuth2ServerApplication {

    public static void main(String[] args) {
        SpringApplication.run(OAuth2ServerApplication.class, args);
    }

}
基于内存存储令牌
概述
本章节基于 内存存储令牌 的模式用于演示最基本的操作,帮助大家快速理解 oAuth2 认证服务器中 “认证”、“授权”、"访问令牌” 的基本概念
操作流程

配置认证服务器
配置客户端信息:ClientDetailsServiceConfigurer
inMemory:内存配置
withClient:客户端标识
secret:客户端安全码
authorizedGrantTypes:客户端授权类型
scopes:客户端授权范围
redirectUris:注册回调地址
配置 Web 安全
通过 GET 请求访问认证服务器获取授权码
端点:/oauth/authorize
通过 POST 请求利用授权码访问认证服务器获取令牌
端点:/oauth/token
附:默认的端点 URL
/oauth/authorize:授权端点
/oauth/token:令牌端点
/oauth/confirm_access:用户确认授权提交端点
/oauth/error:授权服务错误信息端点
/oauth/check_token:用于资源服务访问的令牌解析端点
/oauth/token_key:提供公有密匙的端点,如果你使用 JWT 令牌的话
配置认证服务器
创建一个类继承 AuthorizationServerConfigurerAdapter 并添加相关注解:
@Configuration
@EnableAuthorizationServer
package com.funtl.oauth2.server.config;

import org.springframework.context.annotation.Configuration;
import org.springframework.security.oauth2.config.annotation.configurers.ClientDetailsServiceConfigurer;
import org.springframework.security.oauth2.config.annotation.web.configuration.AuthorizationServerConfigurerAdapter;
import org.springframework.security.oauth2.config.annotation.web.configuration.EnableAuthorizationServer;

@Configuration
@EnableAuthorizationServer
public class AuthorizationServerConfiguration extends AuthorizationServerConfigurerAdapter {
    @Override
    public void configure(ClientDetailsServiceConfigurer clients) throws Exception {
        // 配置客户端
        clients
                // 使用内存设置
                .inMemory()
                // client_id
                .withClient("client")
                // client_secret
                .secret("secret")
                // 授权类型
                .authorizedGrantTypes("authorization_code")
                // 授权范围
                .scopes("app")
                // 注册回调地址
                .redirectUris("http://www.funtl.com");
    }
}
服务器安全配置
创建一个类继承 WebSecurityConfigurerAdapter 并添加相关注解:
@Configuration
@EnableWebSecurity
@EnableGlobalMethodSecurity(prePostEnabled = true, securedEnabled = true, jsr250Enabled = true):全局方法拦截
package com.funtl.oauth2.server.config;

import org.springframework.context.annotation.Configuration;
import org.springframework.security.config.annotation.method.configuration.EnableGlobalMethodSecurity;
import org.springframework.security.config.annotation.web.configuration.EnableWebSecurity;
import org.springframework.security.config.annotation.web.configuration.WebSecurityConfigurerAdapter;

@Configuration
@EnableWebSecurity
@EnableGlobalMethodSecurity(prePostEnabled = true, securedEnabled = true, jsr250Enabled = true)
public class WebSecurityConfiguration extends WebSecurityConfigurerAdapter {

}
application.yml
spring:
  application:
    name: oauth2-server
  security:
    user:
      # 账号
      name: root
      # 密码
      password: 123456

server:
  port: 8080
访问获取授权码
打开浏览器,输入地址:
http://localhost:8080/oauth/authorize?client_id=client&response_type=code
第一次访问会跳转到登录页面

验证成功后会询问用户是否授权客户端

选择授权后会跳转到我的博客,浏览器地址上还会包含一个授权码(code=1JuO6V),浏览器地址栏会显示如下地址:
http://www.funtl.com/?code=1JuO6V
有了这个授权码就可以获取访问令牌了
通过授权码向服务器申请令牌
通过 CURL 或是 Postman 请求
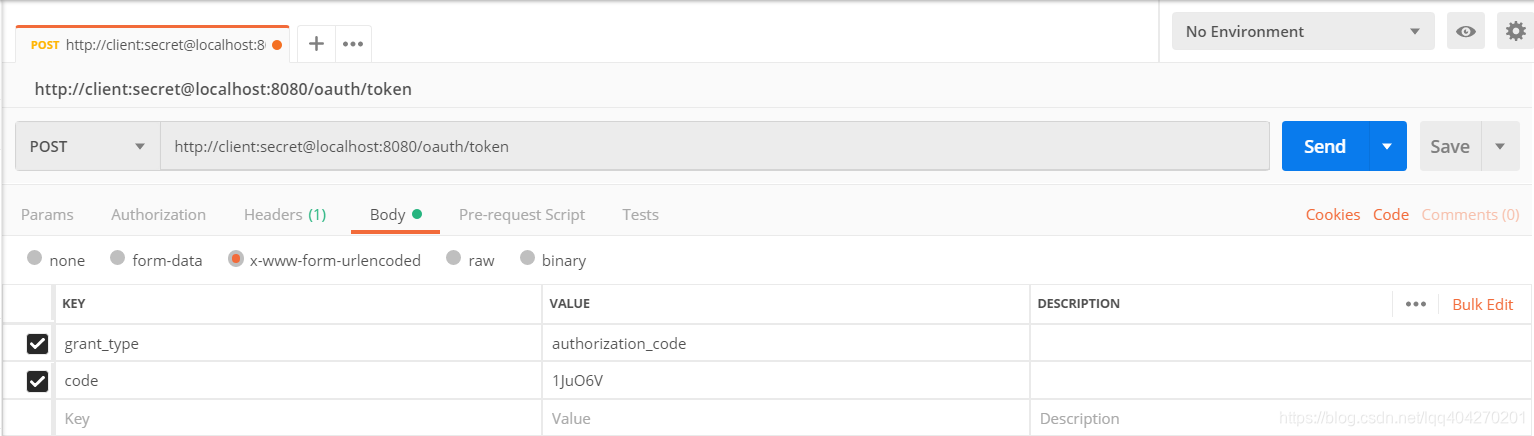
注意:此时无法请求到令牌,访问服务器会报错 There is no PasswordEncoder mapped for the id “null”,是因为加密方式
基于 JDBC 存储令牌
概述
本章节 基于 JDBC 存储令牌 的模式用于演示最基本的操作,帮助大家快速理解 oAuth2 认证服务器中 “认证”、“授权”、"访问令牌” 的基本概念
操作流程

初始化 oAuth2 相关表
在数据库中配置客户端
配置认证服务器
配置数据源:DataSource
配置令牌存储方式:TokenStore -> JdbcTokenStore
配置客户端读取方式:ClientDetailsService -> JdbcClientDetailsService
配置服务端点信息:AuthorizationServerEndpointsConfigurer
tokenStore:设置令牌存储方式
配置客户端信息:ClientDetailsServiceConfigurer
withClientDetails:设置客户端配置读取方式
配置 Web 安全
配置密码加密方式:BCryptPasswordEncoder
配置认证信息:AuthenticationManagerBuilder
通过 GET 请求访问认证服务器获取授权码
端点:/oauth/authorize
通过 POST 请求利用授权码访问认证服务器获取令牌
端点:/oauth/token
附:默认的端点 URL
/oauth/authorize:授权端点
/oauth/token:令牌端点
/oauth/confirm_access:用户确认授权提交端点
/oauth/error:授权服务错误信息端点
/oauth/check_token:用于资源服务访问的令牌解析端点
/oauth/token_key:提供公有密匙的端点,如果你使用 JWT 令牌的话
初始化 oAuth2 相关表
使用官方提供的建表脚本初始化 oAuth2 相关表,地址如下:
https://github.com/spring-projects/spring-security-oauth/blob/master/spring-security-oauth2/src/test/resources/schema.sql
由于我们使用的是 MySQL 数据库,默认建表语句中主键为 VARCHAR(256),这超过了最大的主键长度,请手动修改为 128,并用 BLOB 替换语句中的 LONGVARBINARY 类型,修改后的建表脚本如下:
CREATE TABLE `clientdetails` (
  `appId` varchar(128) NOT NULL,
  `resourceIds` varchar(256) DEFAULT NULL,
  `appSecret` varchar(256) DEFAULT NULL,
  `scope` varchar(256) DEFAULT NULL,
  `grantTypes` varchar(256) DEFAULT NULL,
  `redirectUrl` varchar(256) DEFAULT NULL,
  `authorities` varchar(256) DEFAULT NULL,
  `access_token_validity` int(11) DEFAULT NULL,
  `refresh_token_validity` int(11) DEFAULT NULL,
  `additionalInformation` varchar(4096) DEFAULT NULL,
  `autoApproveScopes` varchar(256) DEFAULT NULL,
  PRIMARY KEY (`appId`)
) ENGINE=InnoDB DEFAULT CHARSET=utf8;

CREATE TABLE `oauth_access_token` (
  `token_id` varchar(256) DEFAULT NULL,
  `token` blob,
  `authentication_id` varchar(128) NOT NULL,
  `user_name` varchar(256) DEFAULT NULL,
  `client_id` varchar(256) DEFAULT NULL,
  `authentication` blob,
  `refresh_token` varchar(256) DEFAULT NULL,
  PRIMARY KEY (`authentication_id`)
) ENGINE=InnoDB DEFAULT CHARSET=utf8;

CREATE TABLE `oauth_approvals` (
  `userId` varchar(256) DEFAULT NULL,
  `clientId` varchar(256) DEFAULT NULL,
  `scope` varchar(256) DEFAULT NULL,
  `status` varchar(10) DEFAULT NULL,
  `expiresAt` timestamp NULL DEFAULT NULL,
  `lastModifiedAt` timestamp NULL DEFAULT NULL
) ENGINE=InnoDB DEFAULT CHARSET=utf8;

CREATE TABLE `oauth_client_details` (
  `client_id` varchar(128) NOT NULL,
  `resource_ids` varchar(256) DEFAULT NULL,
  `client_secret` varchar(256) DEFAULT NULL,
  `scope` varchar(256) DEFAULT NULL,
  `authorized_grant_types` varchar(256) DEFAULT NULL,
  `web_server_redirect_uri` varchar(256) DEFAULT NULL,
  `authorities` varchar(256) DEFAULT NULL,
  `access_token_validity` int(11) DEFAULT NULL,
  `refresh_token_validity` int(11) DEFAULT NULL,
  `additional_information` varchar(4096) DEFAULT NULL,
  `autoapprove` varchar(256) DEFAULT NULL,
  PRIMARY KEY (`client_id`)
) ENGINE=InnoDB DEFAULT CHARSET=utf8;

CREATE TABLE `oauth_client_token` (
  `token_id` varchar(256) DEFAULT NULL,
  `token` blob,
  `authentication_id` varchar(128) NOT NULL,
  `user_name` varchar(256) DEFAULT NULL,
  `client_id` varchar(256) DEFAULT NULL,
  PRIMARY KEY (`authentication_id`)
) ENGINE=InnoDB DEFAULT CHARSET=utf8;

CREATE TABLE `oauth_code` (
  `code` varchar(256) DEFAULT NULL,
  `authentication` blob
) ENGINE=InnoDB DEFAULT CHARSET=utf8;

CREATE TABLE `oauth_refresh_token` (
  `token_id` varchar(256) DEFAULT NULL,
  `token` blob,
  `authentication` blob
) ENGINE=InnoDB DEFAULT CHARSET=utf8;
在数据库中配置客户端
在表 oauth_client_details 中增加一条客户端配置记录,需要设置的字段如下:
client_id:客户端标识
client_secret:客户端安全码,此处不能是明文,需要加密
scope:客户端授权范围
authorized_grant_types:客户端授权类型
web_server_redirect_uri:服务器回调地址
使用 BCryptPasswordEncoder 为客户端安全码加密,代码如下:
System.out.println(new BCryptPasswordEncoder().encode("secret"));
POM
由于使用了 JDBC 存储,我们需要增加相关依赖,数据库连接池部分弃用 Druid 改为 HikariCP (号称全球最快连接池)
<dependency>
    <groupId>com.zaxxer</groupId>
    <artifactId>HikariCP</artifactId>
    <version>${hikaricp.version}</version>
</dependency>
<dependency>
    <groupId>org.springframework.boot</groupId>
    <artifactId>spring-boot-starter-jdbc</artifactId>
    <exclusions>
        <!-- 排除 tomcat-jdbc 以使用 HikariCP -->
        <exclusion>
            <groupId>org.apache.tomcat</groupId>
            <artifactId>tomcat-jdbc</artifactId>
        </exclusion>
    </exclusions>
</dependency>
<dependency>
    <groupId>mysql</groupId>
    <artifactId>mysql-connector-java</artifactId>
    <version>${mysql.version}</version>
</dependency>
配置认证服务器
创建一个类继承 AuthorizationServerConfigurerAdapter 并添加相关注解:
@Configuration
@EnableAuthorizationServer
package com.funtl.oauth2.server.config;

import org.springframework.boot.context.properties.ConfigurationProperties;
import org.springframework.boot.jdbc.DataSourceBuilder;
import org.springframework.context.annotation.Bean;
import org.springframework.context.annotation.Configuration;
import org.springframework.context.annotation.Primary;
import org.springframework.security.oauth2.config.annotation.configurers.ClientDetailsServiceConfigurer;
import org.springframework.security.oauth2.config.annotation.web.configuration.AuthorizationServerConfigurerAdapter;
import org.springframework.security.oauth2.config.annotation.web.configuration.EnableAuthorizationServer;
import org.springframework.security.oauth2.config.annotation.web.configurers.AuthorizationServerEndpointsConfigurer;
import org.springframework.security.oauth2.provider.ClientDetailsService;
import org.springframework.security.oauth2.provider.client.JdbcClientDetailsService;
import org.springframework.security.oauth2.provider.token.TokenStore;
import org.springframework.security.oauth2.provider.token.store.JdbcTokenStore;

import javax.sql.DataSource;

@Configuration
@EnableAuthorizationServer
public class AuthorizationServerConfiguration extends AuthorizationServerConfigurerAdapter {

    @Bean
    @Primary
    @ConfigurationProperties(prefix = "spring.datasource")
    public DataSource dataSource() {
        // 配置数据源(注意,我使用的是 HikariCP 连接池),以上注解是指定数据源,否则会有冲突
        return DataSourceBuilder.create().build();
    }

    @Bean
    public TokenStore tokenStore() {
        // 基于 JDBC 实现,令牌保存到数据
        return new JdbcTokenStore(dataSource());
    }

    @Bean
    public ClientDetailsService jdbcClientDetails() {
        // 基于 JDBC 实现,需要事先在数据库配置客户端信息
        return new JdbcClientDetailsService(dataSource());
    }

    @Override
    public void configure(AuthorizationServerEndpointsConfigurer endpoints) throws Exception {
        // 设置令牌
        endpoints.tokenStore(tokenStore());
    }

    @Override
    public void configure(ClientDetailsServiceConfigurer clients) throws Exception {
        // 读取客户端配置
        clients.withClientDetails(jdbcClientDetails());
    }
}
服务器安全配置
创建一个类继承 WebSecurityConfigurerAdapter 并添加相关注解:
@Configuration
@EnableWebSecurity
@EnableGlobalMethodSecurity(prePostEnabled = true, securedEnabled = true, jsr250Enabled = true):全局方法拦截
package com.funtl.oauth2.server.config;

import org.springframework.context.annotation.Bean;
import org.springframework.context.annotation.Configuration;
import org.springframework.security.config.annotation.authentication.builders.AuthenticationManagerBuilder;
import org.springframework.security.config.annotation.method.configuration.EnableGlobalMethodSecurity;
import org.springframework.security.config.annotation.web.configuration.EnableWebSecurity;
import org.springframework.security.config.annotation.web.configuration.WebSecurityConfigurerAdapter;
import org.springframework.security.crypto.bcrypt.BCryptPasswordEncoder;

@Configuration
@EnableWebSecurity
@EnableGlobalMethodSecurity(prePostEnabled = true, securedEnabled = true, jsr250Enabled = true)
public class WebSecurityConfiguration extends WebSecurityConfigurerAdapter {

    @Bean
    public BCryptPasswordEncoder passwordEncoder() {
        // 设置默认的加密方式
        return new BCryptPasswordEncoder();
    }

    @Override
    protected void configure(AuthenticationManagerBuilder auth) throws Exception {

        auth.inMemoryAuthentication()
                // 在内存中创建用户并为密码加密
                .withUser("user").password(passwordEncoder().encode("123456")).roles("USER")
                .and()
                .withUser("admin").password(passwordEncoder().encode("123456")).roles("ADMIN");

    }
}
application.yml
spring:
  application:
    name: oauth2-server
  datasource:
    type: com.zaxxer.hikari.HikariDataSource
    driver-class-name: com.mysql.cj.jdbc.Driver
    jdbc-url: jdbc:mysql://192.168.141.128:3307/oauth2?useUnicode=true&characterEncoding=utf-8&useSSL=false
    username: root
    password: 123456
    hikari:
      minimum-idle: 5
      idle-timeout: 600000
      maximum-pool-size: 10
      auto-commit: true
      pool-name: MyHikariCP
      max-lifetime: 1800000
      connection-timeout: 30000
      connection-test-query: SELECT 1

server:
  port: 8080
访问获取授权码
打开浏览器,输入地址:
http://localhost:8080/oauth/authorize?client_id=client&response_type=code
第一次访问会跳转到登录页面

验证成功后会询问用户是否授权客户端

选择授权后会跳转到我的博客,浏览器地址上还会包含一个授权码(code=1JuO6V),浏览器地址栏会显示如下地址:
http://www.funtl.com/?code=1JuO6V
有了这个授权码就可以获取访问令牌了
通过授权码向服务器申请令牌
通过 CURL 或是 Postman 请求
curl -X POST -H "Content-Type: application/x-www-form-urlencoded" -d 'grant_type=authorization_code&code=1JuO6V' "http://client:secret@localhost:8080/oauth/token"

得到响应结果如下:
{
    "access_token": "016d8d4a-dd6e-4493-b590-5f072923c413",
    "token_type": "bearer",
    "expires_in": 43199,
    "scope": "app"
}
操作成功后数据库 oauth_access_token 表中会增加一笔记录,效果图如下:

RBAC 基于角色的权限控制
概述
RBAC(Role-Based Access Control,基于角色的访问控制),就是用户通过角色与权限进行关联。简单地说,一个用户拥有若干角色,每一个角色拥有若干权限。这样,就构造成“用户-角色-权限”的授权模型。在这种模型中,用户与角色之间,角色与权限之间,一般是多对多的关系。(如下图)

目的
在我们的 oAuth2 系统中,我们需要对系统的所有资源进行权限控制,系统中的资源包括:
静态资源(对象资源):功能操作、数据列
动态资源(数据资源):数据
系统的目的就是对应用系统的所有对象资源和数据资源进行权限控制,比如:功能菜单、界面按钮、数据显示的列、各种行级数据进行权限的操控
对象关系
权限
系统的所有权限信息。权限具有上下级关系,是一个树状的结构。如:
系统管理
用户管理
查看用户
新增用户
修改用户
删除用户
用户
系统的具体操作者,可以归属于一个或多个角色,它与角色的关系是多对多的关系
角色
为了对许多拥有相似权限的用户进行分类管理,定义了角色的概念,例如系统管理员、管理员、用户、访客等角色。角色具有上下级关系,可以形成树状视图,父级角色的权限是自身及它的所有子角色的权限的综合。父级角色的用户、父级角色的组同理可推。
关系图

模块图

表结构
CREATE TABLE `tb_permission` (
  `id` bigint(20) NOT NULL AUTO_INCREMENT,
  `parent_id` bigint(20) DEFAULT NULL COMMENT '父权限',
  `name` varchar(64) NOT NULL COMMENT '权限名称',
  `enname` varchar(64) NOT NULL COMMENT '权限英文名称',
  `url` varchar(255) NOT NULL COMMENT '授权路径',
  `description` varchar(200) DEFAULT NULL COMMENT '备注',
  `created` datetime NOT NULL,
  `updated` datetime NOT NULL,
  PRIMARY KEY (`id`)
) ENGINE=InnoDB AUTO_INCREMENT=37 DEFAULT CHARSET=utf8 COMMENT='权限表';

CREATE TABLE `tb_role` (
  `id` bigint(20) NOT NULL AUTO_INCREMENT,
  `parent_id` bigint(20) DEFAULT NULL COMMENT '父角色',
  `name` varchar(64) NOT NULL COMMENT '角色名称',
  `enname` varchar(64) NOT NULL COMMENT '角色英文名称',
  `description` varchar(200) DEFAULT NULL COMMENT '备注',
  `created` datetime NOT NULL,
  `updated` datetime NOT NULL,
  PRIMARY KEY (`id`)
) ENGINE=InnoDB AUTO_INCREMENT=37 DEFAULT CHARSET=utf8 COMMENT='角色表';

CREATE TABLE `tb_role_permission` (
  `id` bigint(20) NOT NULL AUTO_INCREMENT,
  `role_id` bigint(20) NOT NULL COMMENT '角色 ID',
  `permission_id` bigint(20) NOT NULL COMMENT '权限 ID',
  PRIMARY KEY (`id`)
) ENGINE=InnoDB AUTO_INCREMENT=37 DEFAULT CHARSET=utf8 COMMENT='角色权限表';

CREATE TABLE `tb_user` (
  `id` bigint(20) NOT NULL AUTO_INCREMENT,
  `username` varchar(50) NOT NULL COMMENT '用户名',
  `password` varchar(64) NOT NULL COMMENT '密码,加密存储',
  `phone` varchar(20) DEFAULT NULL COMMENT '注册手机号',
  `email` varchar(50) DEFAULT NULL COMMENT '注册邮箱',
  `created` datetime NOT NULL,
  `updated` datetime NOT NULL,
  PRIMARY KEY (`id`),
  UNIQUE KEY `username` (`username`) USING BTREE,
  UNIQUE KEY `phone` (`phone`) USING BTREE,
  UNIQUE KEY `email` (`email`) USING BTREE
) ENGINE=InnoDB AUTO_INCREMENT=37 DEFAULT CHARSET=utf8 COMMENT='用户表';

CREATE TABLE `tb_user_role` (
  `id` bigint(20) NOT NULL AUTO_INCREMENT,
  `user_id` bigint(20) NOT NULL COMMENT '用户 ID',
  `role_id` bigint(20) NOT NULL COMMENT '角色 ID',
  PRIMARY KEY (`id`)
) ENGINE=InnoDB AUTO_INCREMENT=37 DEFAULT CHARSET=utf8 COMMENT='用户角色表';
基于 RBAC 的自定义认证
概述
在实际开发中,我们的用户信息都是存在数据库里的,本章节基于 RBAC 模型 将用户的认证信息与数据库对接,实现真正的用户认证与授权
操作流程
继续 基于 JDBC 存储令牌 章节的代码开发
初始化 RBAC 相关表
在数据库中配置“用户”、“角色”、“权限”相关信息
数据库操作使用 tk.mybatis 框架,故需要增加相关依赖
配置 Web 安全
配置使用自定义认证与授权
通过 GET 请求访问认证服务器获取授权码
端点:/oauth/authorize
通过 POST 请求利用授权码访问认证服务器获取令牌
端点:/oauth/token
附:默认的端点 URL
/oauth/authorize:授权端点
/oauth/token:令牌端点
/oauth/confirm_access:用户确认授权提交端点
/oauth/error:授权服务错误信息端点
/oauth/check_token:用于资源服务访问的令牌解析端点
/oauth/token_key:提供公有密匙的端点,如果你使用 JWT 令牌的话
初始化 RBAC 相关表
CREATE TABLE `tb_permission` (
  `id` bigint(20) NOT NULL AUTO_INCREMENT,
  `parent_id` bigint(20) DEFAULT NULL COMMENT '父权限',
  `name` varchar(64) NOT NULL COMMENT '权限名称',
  `enname` varchar(64) NOT NULL COMMENT '权限英文名称',
  `url` varchar(255) NOT NULL COMMENT '授权路径',
  `description` varchar(200) DEFAULT NULL COMMENT '备注',
  `created` datetime NOT NULL,
  `updated` datetime NOT NULL,
  PRIMARY KEY (`id`)
) ENGINE=InnoDB AUTO_INCREMENT=44 DEFAULT CHARSET=utf8 COMMENT='权限表';
insert  into `tb_permission`(`id`,`parent_id`,`name`,`enname`,`url`,`description`,`created`,`updated`) values
(37,0,'系统管理','System','/',NULL,'2019-04-04 23:22:54','2019-04-04 23:22:56'),
(38,37,'用户管理','SystemUser','/users/',NULL,'2019-04-04 23:25:31','2019-04-04 23:25:33'),
(39,38,'查看用户','SystemUserView','',NULL,'2019-04-04 15:30:30','2019-04-04 15:30:43'),
(40,38,'新增用户','SystemUserInsert','',NULL,'2019-04-04 15:30:31','2019-04-04 15:30:44'),
(41,38,'编辑用户','SystemUserUpdate','',NULL,'2019-04-04 15:30:32','2019-04-04 15:30:45'),
(42,38,'删除用户','SystemUserDelete','',NULL,'2019-04-04 15:30:48','2019-04-04 15:30:45');

CREATE TABLE `tb_role` (
  `id` bigint(20) NOT NULL AUTO_INCREMENT,
  `parent_id` bigint(20) DEFAULT NULL COMMENT '父角色',
  `name` varchar(64) NOT NULL COMMENT '角色名称',
  `enname` varchar(64) NOT NULL COMMENT '角色英文名称',
  `description` varchar(200) DEFAULT NULL COMMENT '备注',
  `created` datetime NOT NULL,
  `updated` datetime NOT NULL,
  PRIMARY KEY (`id`)
) ENGINE=InnoDB AUTO_INCREMENT=38 DEFAULT CHARSET=utf8 COMMENT='角色表';
insert  into `tb_role`(`id`,`parent_id`,`name`,`enname`,`description`,`created`,`updated`) values
(37,0,'超级管理员','admin',NULL,'2019-04-04 23:22:03','2019-04-04 23:22:05');

CREATE TABLE `tb_role_permission` (
  `id` bigint(20) NOT NULL AUTO_INCREMENT,
  `role_id` bigint(20) NOT NULL COMMENT '角色 ID',
  `permission_id` bigint(20) NOT NULL COMMENT '权限 ID',
  PRIMARY KEY (`id`)
) ENGINE=InnoDB AUTO_INCREMENT=43 DEFAULT CHARSET=utf8 COMMENT='角色权限表';
insert  into `tb_role_permission`(`id`,`role_id`,`permission_id`) values
(37,37,37),
(38,37,38),
(39,37,39),
(40,37,40),
(41,37,41),
(42,37,42);

CREATE TABLE `tb_user` (
  `id` bigint(20) NOT NULL AUTO_INCREMENT,
  `username` varchar(50) NOT NULL COMMENT '用户名',
  `password` varchar(64) NOT NULL COMMENT '密码,加密存储',
  `phone` varchar(20) DEFAULT NULL COMMENT '注册手机号',
  `email` varchar(50) DEFAULT NULL COMMENT '注册邮箱',
  `created` datetime NOT NULL,
  `updated` datetime NOT NULL,
  PRIMARY KEY (`id`),
  UNIQUE KEY `username` (`username`) USING BTREE,
  UNIQUE KEY `phone` (`phone`) USING BTREE,
  UNIQUE KEY `email` (`email`) USING BTREE
) ENGINE=InnoDB AUTO_INCREMENT=38 DEFAULT CHARSET=utf8 COMMENT='用户表';
insert  into `tb_user`(`id`,`username`,`password`,`phone`,`email`,`created`,`updated`) values
(37,'admin','$2a$10$9ZhDOBp.sRKat4l14ygu/.LscxrMUcDAfeVOEPiYwbcRkoB09gCmi','15888888888','[email protected]','2019-04-04 23:21:27','2019-04-04 23:21:29');

CREATE TABLE `tb_user_role` (
  `id` bigint(20) NOT NULL AUTO_INCREMENT,
  `user_id` bigint(20) NOT NULL COMMENT '用户 ID',
  `role_id` bigint(20) NOT NULL COMMENT '角色 ID',
  PRIMARY KEY (`id`)
) ENGINE=InnoDB AUTO_INCREMENT=38 DEFAULT CHARSET=utf8 COMMENT='用户角色表';
insert  into `tb_user_role`(`id`,`user_id`,`role_id`) values
(37,37,37);
由于使用了 BCryptPasswordEncoder 的加密方式,故用户密码需要加密,代码如下:
System.out.println(new BCryptPasswordEncoder().encode("123456"));
POM
数据库操作采用 tk.mybatis 框架,需增加相关依赖
<dependency>
    <groupId>tk.mybatis</groupId>
    <artifactId>mapper-spring-boot-starter</artifactId>
</dependency>
获取用户信息
目的是为了实现自定义认证授权时可以通过数据库查询用户信息,Spring Security oAuth2 要求使用 username 的方式查询,提供相关用户信息后,认证工作由框架自行完成
package com.funtl.oauth2.server.service.impl;

import com.funtl.oauth2.server.domain.TbUser;
import com.funtl.oauth2.server.mapper.TbUserMapper;
import com.funtl.oauth2.server.service.TbUserService;
import org.springframework.stereotype.Service;
import tk.mybatis.mapper.entity.Example;

import javax.annotation.Resource;

@Service
public class TbUserServiceImpl implements TbUserService {

    @Resource
    private TbUserMapper tbUserMapper;

    @Override
    public TbUser getByUsername(String username) {
        Example example = new Example(TbUser.class);
        example.createCriteria().andEqualTo("username", username);
        return tbUserMapper.selectOneByExample(example);
    }
}
获取用户权限信息
认证成功后需要给用户授权,具体的权限已经存储在数据库里了,SQL 语句如下:
SELECT
  p.*
FROM
  tb_user AS u
  LEFT JOIN tb_user_role AS ur
    ON u.id = ur.user_id
  LEFT JOIN tb_role AS r
    ON r.id = ur.role_id
  LEFT JOIN tb_role_permission AS rp
    ON r.id = rp.role_id
  LEFT JOIN tb_permission AS p
    ON p.id = rp.permission_id
WHERE u.id = <yourUserId>
自定义认证授权实现类
创建一个类,实现 UserDetailsService 接口,代码如下:
package com.funtl.oauth2.server.config.service;

import com.funtl.oauth2.server.domain.TbPermission;
import com.funtl.oauth2.server.domain.TbUser;
import com.funtl.oauth2.server.service.TbPermissionService;
import com.funtl.oauth2.server.service.TbUserService;
import org.assertj.core.util.Lists;
import org.springframework.beans.factory.annotation.Autowired;
import org.springframework.security.core.GrantedAuthority;
import org.springframework.security.core.authority.SimpleGrantedAuthority;
import org.springframework.security.core.userdetails.User;
import org.springframework.security.core.userdetails.UserDetails;
import org.springframework.security.core.userdetails.UserDetailsService;
import org.springframework.security.core.userdetails.UsernameNotFoundException;
import org.springframework.stereotype.Service;

import java.util.List;

/**
 * 自定义用户认证与授权
 * <p>
 * Description:
 * </p>
 *
 * @author Lusifer
 * @version v1.0.0
 * @date 2019-04-04 23:57:04
 * @see com.funtl.oauth2.server.config
 */
@Service
public class UserDetailsServiceImpl implements UserDetailsService {

    @Autowired
    private TbUserService tbUserService;

    @Autowired
    private TbPermissionService tbPermissionService;

    @Override
    public UserDetails loadUserByUsername(String username) throws UsernameNotFoundException {
        // 查询用户信息
        TbUser tbUser = tbUserService.getByUsername(username);
        List<GrantedAuthority> grantedAuthorities = Lists.newArrayList();
        if (tbUser != null) {
            // 获取用户授权
            List<TbPermission> tbPermissions = tbPermissionService.selectByUserId(tbUser.getId());

            // 声明用户授权
            tbPermissions.forEach(tbPermission -> {
                if (tbPermission != null && tbPermission.getEnname() != null) {
                    GrantedAuthority grantedAuthority = new SimpleGrantedAuthority(tbPermission.getEnname());
                    grantedAuthorities.add(grantedAuthority);
                }
            });
        }

        // 由框架完成认证工作
        return new User(tbUser.getUsername(), tbUser.getPassword(), grantedAuthorities);
    }
}
服务器安全配置
创建一个类继承 WebSecurityConfigurerAdapter 并添加相关注解:
@Configuration
@EnableWebSecurity
@EnableGlobalMethodSecurity(prePostEnabled = true, securedEnabled = true, jsr250Enabled = true):全局方法拦截
package com.funtl.oauth2.server.config;

import com.funtl.oauth2.server.config.service.UserDetailsServiceImpl;
import org.springframework.context.annotation.Bean;
import org.springframework.context.annotation.Configuration;
import org.springframework.security.config.annotation.authentication.builders.AuthenticationManagerBuilder;
import org.springframework.security.config.annotation.method.configuration.EnableGlobalMethodSecurity;
import org.springframework.security.config.annotation.web.configuration.EnableWebSecurity;
import org.springframework.security.config.annotation.web.configuration.WebSecurityConfigurerAdapter;
import org.springframework.security.core.userdetails.UserDetailsService;
import org.springframework.security.crypto.bcrypt.BCryptPasswordEncoder;

@Configuration
@EnableWebSecurity
@EnableGlobalMethodSecurity(prePostEnabled = true, securedEnabled = true, jsr250Enabled = true)
public class WebSecurityConfiguration extends WebSecurityConfigurerAdapter {

    @Bean
    public BCryptPasswordEncoder passwordEncoder() {
        // 设置默认的加密方式
        return new BCryptPasswordEncoder();
    }

    @Bean
    @Override
    public UserDetailsService userDetailsService() {
        return new UserDetailsServiceImpl();
    }

    @Override
    protected void configure(AuthenticationManagerBuilder auth) throws Exception {
        // 使用自定义认证与授权
        auth.userDetailsService(userDetailsService());
    }
}
Application
增加了 Mapper 的包扫描配置
package com.funtl.oauth2;

import org.springframework.boot.SpringApplication;
import org.springframework.boot.autoconfigure.SpringBootApplication;
import tk.mybatis.spring.annotation.MapperScan;

/**
 * 认证服务器,用于获取 Token
 * <p>
 * Description:
 * </p>
 *
 * @author Lusifer
 * @version v1.0.0
 * @date 2019-04-01 16:06:45
 * @see com.funtl.oauth2
 */
@SpringBootApplication
@MapperScan(basePackages = "com.funtl.oauth2.server.mapper")
public class OAuth2ServerApplication {

    public static void main(String[] args) {
        SpringApplication.run(OAuth2ServerApplication.class, args);
    }

}
application.yml
spring:
  application:
    name: oauth2-server
  datasource:
    type: com.zaxxer.hikari.HikariDataSource
    driver-class-name: com.mysql.cj.jdbc.Driver
    jdbc-url: jdbc:mysql://192.168.141.128:3307/oauth2?useUnicode=true&characterEncoding=utf-8&useSSL=false
    username: root
    password: 123456
    hikari:
      minimum-idle: 5
      idle-timeout: 600000
      maximum-pool-size: 10
      auto-commit: true
      pool-name: MyHikariCP
      max-lifetime: 1800000
      connection-timeout: 30000
      connection-test-query: SELECT 1

server:
  port: 8080

mybatis:
  type-aliases-package: com.funtl.oauth2.server.domain
  mapper-locations: classpath:mapper/*.xml
访问获取授权码
打开浏览器,输入地址:
http://localhost:8080/oauth/authorize?client_id=client&response_type=code
第一次访问会跳转到登录页面

验证成功后会询问用户是否授权客户端

选择授权后会跳转到我的博客,浏览器地址上还会包含一个授权码(code=1JuO6V),浏览器地址栏会显示如下地址:
http://www.funtl.com/?code=1JuO6V
有了这个授权码就可以获取访问令牌了
通过授权码向服务器申请令牌
通过 CURL 或是 Postman 请求
curl -X POST -H "Content-Type: application/x-www-form-urlencoded" -d 'grant_type=authorization_code&code=1JuO6V' "http://client:secret@localhost:8080/oauth/token"

得到响应结果如下:
{
    "access_token": "016d8d4a-dd6e-4493-b590-5f072923c413",
    "token_type": "bearer",
    "expires_in": 43199,
    "scope": "app"
}
操作成功后数据库 oauth_access_token 表中会增加一笔记录,效果图如下:

