一、网页压缩
在实际的应用中,我们为了使nginx上的资源尽可能的少占用,而大量的高清的图片与含有信息量大的网页会占用我们非常多的资源。这不利于nginx的性能优化,为了解决这个问题,我们可以做 Gzip压缩。
Nginx性能优化功能: Gzip压缩(大幅度提高页面加载速度) ,开启Gzip压缩功能, 可以使网站的css、js 、xml、html 文件在传输时进行压缩,提高访问速度,进而优化Nginx性能。经过Gzip压缩后页面大小可以变为原来的30%甚至更小,这样,用户浏览页面的时候速度会快得多。Gzip的压缩页面需要浏览器和服务器双方都支持,实际上就是服务器端压缩,传到浏览器后浏览器解压并解析。浏览器那里不需要我们担心,因为目前的巨大多数浏览器 都支持解析Gzip过的页面。
1、修改配置文件/usr/local/nginx/conf/nginx.conf
 33     gzip  on;
 	# 开启gzip压缩功能
 34     gzip_min_length 1;
 	# 设置允许压缩的页面最小字节数;
 35     gzip_comp_level 2;
 	# 设置压缩比率,最小为1,处理速度快,传输速度慢;9为最大压缩比,处理速度慢,传输速度快; 这里表示压缩级别,可以是0到9中的任一个,级别越高,压缩就越小,节省了带宽资源,但同时也消耗CPU资源,所以一般折中为6
 36     gzip_types  text/plain application/x-javascript  test/css  application/xml  vascript applic        ation/x-httpd/php  image/gif   image/png;
 	#制定压缩的类型,线上配置时尽可能配置多的压缩类型
- 1
- 2
- 3
- 4
- 5
- 6
- 7
- 8
 2、编辑nginx的默认发布文件
/usr/local/nginx/html/index.html
[root@server2 html]# ls
50x.html  index.html
[root@server2 html]# pwd
/usr/local/nginx/html
[root@server2 html]# cp /etc/passwd .
[root@server2 html]# ls
50x.html  index.html  passwd
[root@server2 html]# du -sh passwd
4.0K	passwd
[root@server2 html]# vim passwd
[root@server2 html]# du -sh passwd
44K	passwd
[root@server2 html]# mv passwd index.html
mv: overwrite ‘index.html’? y
[root@server2 html]# du -sh index.html
44K	index.html
- 1
- 2
- 3
- 4
- 5
- 6
- 7
- 8
- 9
- 10
- 11
- 12
- 13
- 14
- 15
- 16
- 17
3、然后在网页查看大小(按下F12,之后选择Network->Size,便可以查看到其文件大小)
4、重启服务nginx -s reload,清除缓存,再次查看
二、图片压缩
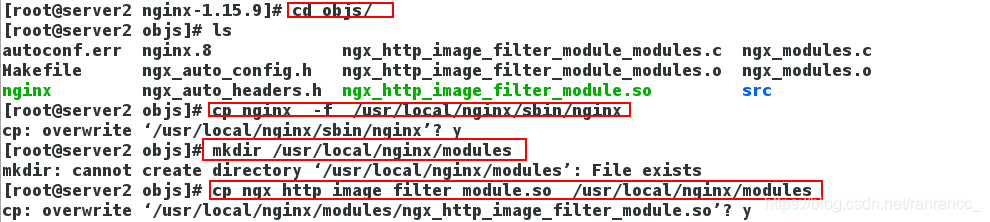
1、停止服务,重新编译。添加新的模块
[root@server2 nginx-1.15.9]# make clean
[root@server2 nginx-1.15.9]# ./configure \
> --prefix=/usr/local/nginx  \
> --pid-path=/var/run/nginx/nginx.pid \
> --lock-path=/var/lock/nginx.lock \
> --error-log-path=/var/log/nginx/error.log \
> --http-log-path=/var/log/nginx/access.log \
> --with-http_realip_module  --with-http_image_filter_module=dynamic
[root@server2 nginx-1.15.9]# make
[root@server2 nginx-1.15.9]# cd objs/
[root@server2 objs]# ls
autoconf.err  nginx.8             ngx_http_image_filter_module_modules.c  ngx_modules.c
Makefile      ngx_auto_config.h   ngx_http_image_filter_module_modules.o  ngx_modules.o
nginx         ngx_auto_headers.h  ngx_http_image_filter_module.so         src
[root@server2 objs]# cp nginx  -f  /usr/local/nginx/sbin/nginx
	#将新的二进制文件替换成之前的二进制文件
cp: overwrite ‘/usr/local/nginx/sbin/nginx’? y
[root@server2 objs]# mkdir /usr/local/nginx/modules
	#创建新的目录,并将图像模块放在目录下
[root@server2 objs]# cp ngx_http_image_filter_module.so  /usr/local/nginx/modules
- 1
- 2
- 3
- 4
- 5
- 6
- 7
- 8
- 9
- 10
- 11
- 12
- 13
- 14
- 15
- 16
- 17
- 18
- 19
- 20
- 21
2、编辑nginx配置文件/usr/local/nginx/conf/nginx.conf,重新加载。
 1 load_module  modules/ngx_http_image_filter_module.so;
 47         location /search/ {
 48                 image_filter  resize 50  100;
 49                 }
- 1
- 2
- 3
- 4
- 5

3、测试
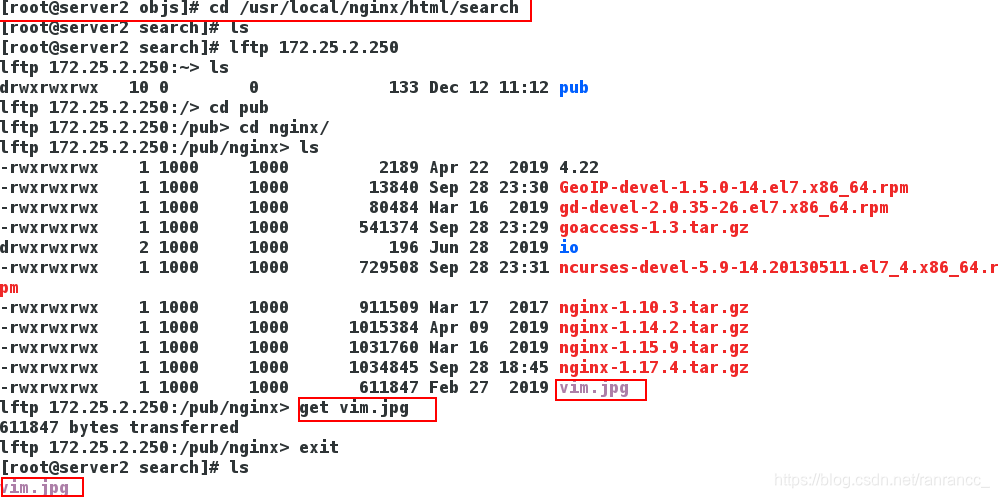
在上面的共享图片中我们可以得知,在浏览器中查询时必须得输入完整的路径,其中包括图片的名称,可是这样显然是不合理的,我们认为将图片都放置一个目录下,通过查看目录选择图片才是一种不错的方式
