< dependency> < ! -- jdbc-- >
< groupId> . springframework. boot< / groupId>
< artifactId> - boot- starter- jdbc< / artifactId>
< / dependency>
< ! -- mybatis-- >
< dependency> < groupId> . mybatis. spring. boot< / groupId>
< artifactId> - spring- boot- starter< / artifactId>
< version> 2.1 .1 < / version>
< / dependency>
< ! -- mysql-- >
< dependency> < groupId> < / groupId>
< artifactId> - connector- java< / artifactId>
< version> 8.0 .11 < / version>
< / dependency>
spring:
datasource:
username: root
password: admin
url: jdbc: mysql: / / localhost: 3306 / abc? serverTimezone= UTC& useUnicode= true & characterEncoding= utf8& useSSL= false
driver- class - name: com. mysql. cj. jdbc. Driver
mybatis:
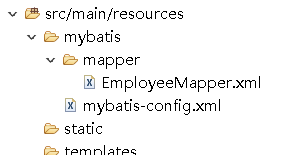
config- location: classpath: mybatis/ mybatis- config. xml
mapper- locations: classpath: mybatis/ mapperpackage com. example. mapper;
import org. apache. ibatis. annotations. Delete;
import org. apache. ibatis. annotations. Insert;
import org. apache. ibatis. annotations. Options;
import org. apache. ibatis. annotations. Select;
import org. apache. ibatis. annotations. Update;
import com. example. bean. Department;
public interface DepartmentMapper {
@Select ( "select * from department where id=#{id}" )
public Department get ( Integer id) ;
@Delete ( "delete from department where id=#{id}" )
public Integer delete ( Integer id) ;
@Options ( useGeneratedKeys = true , keyProperty = "id" )
@Insert ( "insert into department(departmentName) values(#{departmentName})" )
public Integer insert ( Department department) ;
@Update ( "update department set departmentName=#{departmentName} where id=#{id}" )
public Integer update ( Department department) ;
}
package com. example;
import org. mybatis. spring. annotation. MapperScan;
import org. springframework. boot. SpringApplication;
import org. springframework. boot. autoconfigure. SpringBootApplication;
@MapperScan ( value= "com.example.mapper" )
@SpringBootApplication
public class MybatisApplication {
public static void main ( String[ ] args) {
SpringApplication. run ( MybatisApplication. class , args) ;
}
}
@Autowired
DepartmentMapper mapper;
@ResponseBody
@GetMapping ( "/get/{id}" )
public Department BB ( @PathVariable ( "id" ) int id) {
return mapper. get ( id) ;
}
package com. example. mapper;
import com. example. bean. Employee;
public interface EmployeeMapper {
public Employee get ( int id) ;
public int add ( Employee employee) ;
}
mybatis-config.xml < ? xml version= "1.0" encoding= "UTF-8" ? >
< ! DOCTYPE configuration
PUBLIC "-//mybatis.org//DTD Config 3.0//EN"
"http://mybatis.org/dtd/mybatis-3-config.dtd" >
< configuration> < environments default = "development" >
< environment id= "development" >
< transactionManager type= "JDBC" / >
< dataSource type= "POOLED" >
< property name= "driver" value= "${driver}" / >
< property name= "url" value= "${url}" / >
< property name= "username" value= "${username}" / >
< property name= "password" value= "${password}" / >
< / dataSource>
< / environment>
< / environments>
< mappers> < mapper resource= "org/mybatis/example/BlogMapper.xml" / >
< / mappers>
< / configuration>
< ? xml version= "1.0" encoding= "UTF-8" ? >
< ! DOCTYPE configuration
PUBLIC "-//mybatis.org//DTD Config 3.0//EN"
"http://mybatis.org/dtd/mybatis-3-config.dtd" >
< configuration> < / configuration>
EmployeeMapper.xml < ? xml version= "1.0" encoding= "UTF-8" ? >
< ! DOCTYPE mapper
PUBLIC "-//mybatis.org//DTD Mapper 3.0//EN"
"http://mybatis.org/dtd/mybatis-3-mapper.dtd" >
< mapper namespace= "com.example.mapper.EmployeeMapper" >
< select id= "get" resultType= "com.example.bean.Employee" >
select * from employee where id = #{ id}
< / select>
< insert id= "add" >
insert into employee ( lastName, email, gender, d_id) values ( #{ lastName} , #{ email} , ) #{ gender} , #{ d_id} )
< / insert>
< / mapper>
@Autowired
EmployeeMapper employeeMapper;
@ResponseBody
@GetMapping ( "/emp/{id}" )
public Employee getEmp ( @PathVariable ( "id" ) int id) {
return employeeMapper. get ( id) ;
}
当然注解和配置文件两种方式可以一起使用