SpringBoot常用配置管理方式
之前Consul扮演的是服务发现组件的角色,本章Consul扮演的是配置服务器的角色
Spring Boot配置管理与优先级
参考Spring说明文档中的 24. Externalized Configuration 一节
- 设置server.port=${SERVER_PORT}
java -jar ms-user-0.0.1-SNAPSHOT.jar --server.port=8888
SERVER_PORT=8888 java -jar ms-user-0.0.1-SNAPSHOT.jar
-
对于linux系统等 也可以配置到 /etc/profile 或 .bash_profile中
-
另外可以通过http://localhost:8081/actuator/env查看当前环境变量(应用级变量 环境级变量)
-
读取外部配置文件
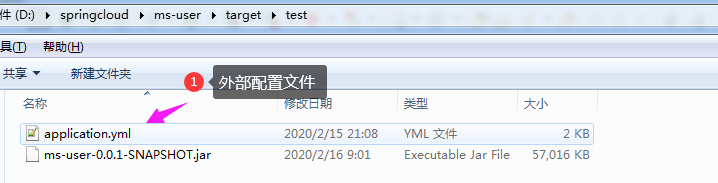
并修改配置文件的端口为8888
java -jar ms-user-0.0.1-SNAPSHOT.jar
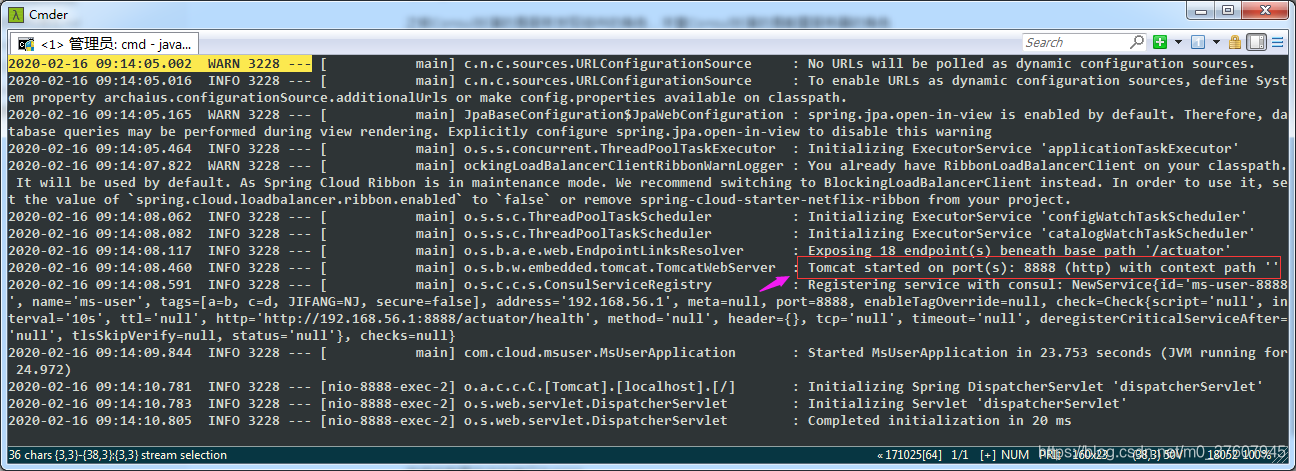
可以看到启动的端口为8888 说明外部配置文件的优先级大于内部配置文件的优先级
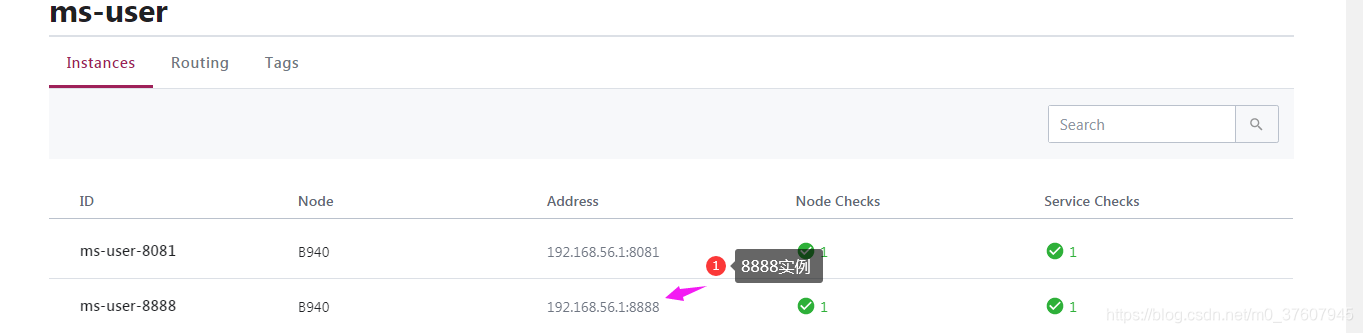
查看consul http://localhost:8500/ui/dc1/services/ms-user 注册的服务
http://localhost:8081/actuator/configprops 查看所有的配置属性
Profile
通过在配置文件中加入 — 将配置文件分割成多段
# 通用配置
---
# profile=x的专用配置
---
# profile=y的专用配置
server:
  port: 8081
spring:
  datasource:
    url: jdbc:mysql://127.0.0.1:3306/ms_user?serverTimezone=UTC
    hikari:
      username: root
      password: root
      driver-class-name: com.mysql.cj.jdbc.Driver
  jpa:
    hibernate:
      ddl-auto: none  # 让hibernate不去操作表结构
  application:
    # 指定注册到Consul上的服务名称 分割符必须使用中划线 而不能使用下划线
    # 如果你的服务发现组件使用的是consul,如果使用了_,那么会强制转换为-
    # 如果服务发现组件不是consul,那么会造成微服务之间无法正常通信
    # ribbon[默认把ms-user作为虚拟主机名 而主机名不包含下划线]
    name: ms-user
  cloud:
    consul:
      host: localhost
      port: 8500
      discovery:
        health-check-path: /actuator/health
        prefer-ip-address: true
        # 设置Spring Cloud的元数据
        tags: a=b,c=d,JIFANG=NJ
management:
  endpoints:
    web:
      exposure:
        include: '*'
  endpoint:
    health:
      show-details: always
# 通用环境 不需要打印sql
---
# profile=dev的专用配置
spring:
  profiles: dev
  jpa:
    # 打印执行的sql
    show-sql: true
---
# profile=prod的专用配置
spring:
  profiles: prod
  jpa:
    # 不需要打印执行的sql
    show-sql: false

启动dev版本
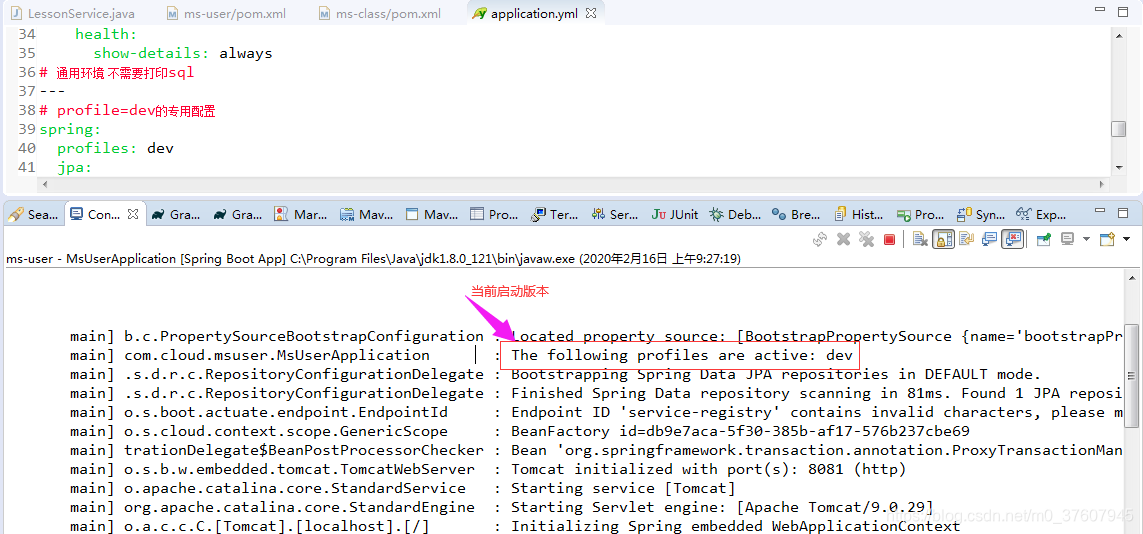
如果不配置的话则默认版本为通用配置
当然也可以通过配置来修改,通过如下方式设置默认的激活版本为dev
spring.profiles.active=dev
将yaml文件转为properties文件:
https://toyaml.com/index.html
将application.yaml改为-application.yaml
同时创建application.properties、application-dev.properties、application-prod.properties文件:

# application.properties
server.port=8081
spring.datasource.url=jdbc:mysql://127.0.0.1:3306/ms_user?serverTimezone=UTC
spring.datasource.hikari.username=root
spring.datasource.hikari.password=root
spring.datasource.hikari.driver-class-name=com.mysql.cj.jdbc.Driver
spring.jpa.hibernate.ddl-auto=none
spring.application.name=ms-user
spring.cloud.consul.host=localhost
spring.cloud.consul.port=8500
spring.cloud.consul.discovery.health-check-path=/actuator/health
spring.cloud.consul.discovery.prefer-ip-address=true
spring.cloud.consul.discovery.tags=a=b,c=d,JIFANG=NJ
spring.profiles.active=dev
management.endpoints.web.exposure.include=*
management.endpoint.health.show-details=always
# application-dev.properties 当前profile=dev
spring.jpa.show-sql=true
# application-prod.properties 当前profile=prod
spring.jpa.show-sql=false
使用Consul配置管理
- 配置共享与重用
多个微服务公用一个配置文件
- 配置动态刷新
…
因此需要一个配置服务器
在用户微服务中加入如下控制层代码:
package com.cloud.msuser.controller;

import org.springframework.beans.factory.annotation.Value;
import org.springframework.web.bind.annotation.GetMapping;
import org.springframework.web.bind.annotation.RestController;

@RestController
public class TestController {

	@Value("${first.config:default}")
	private String condig;

	@GetMapping("/test-config")
	public String testConfig() {
		return this.condig;
	}
}
在配置文件中增加如下配置:
first:
  config: cloud
访问http://localhost:8081/test-config

要想使用consul进行管理需要怎么办呢?
首先删除上面的配置
增加依赖配置
		<dependency>
			<groupId>org.springframework.cloud</groupId>
			<artifactId>spring-cloud-starter-consul-config</artifactId>
		</dependency>
创建一个新的配置文件bootstrap.yml文件
将与consul相关的配置从application.yml中移到bootstrap,yml文件中
# bootstrap,yml
spring:
  application:
    name: ms-user
  cloud:
    consul:
      host: localhost
      port: 8500
      config:
        format: yaml
在consul控制台设置key/value


此时系统报错:

修改配置
不能使用tab键 使用两个空格键 即可

在控制台日志中有一段如下
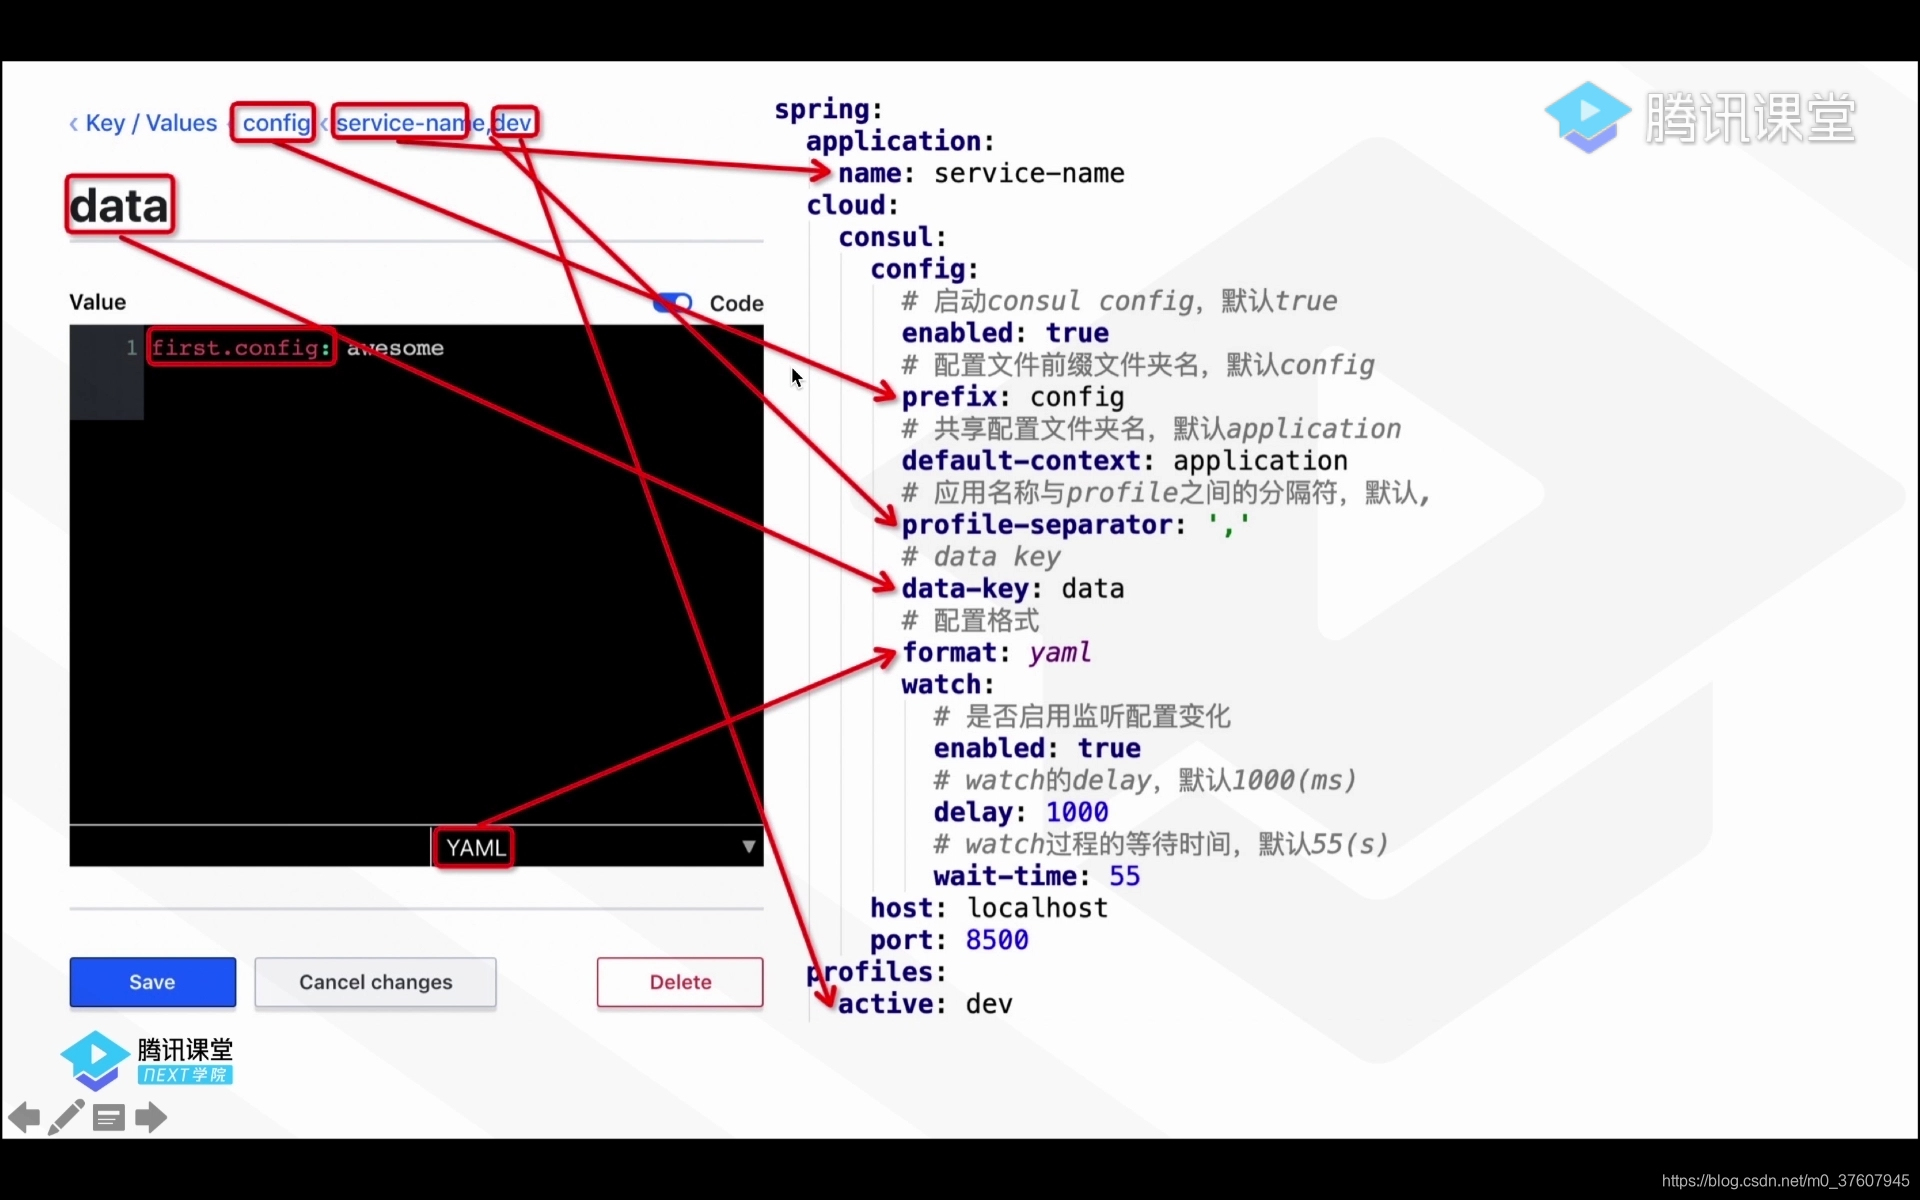
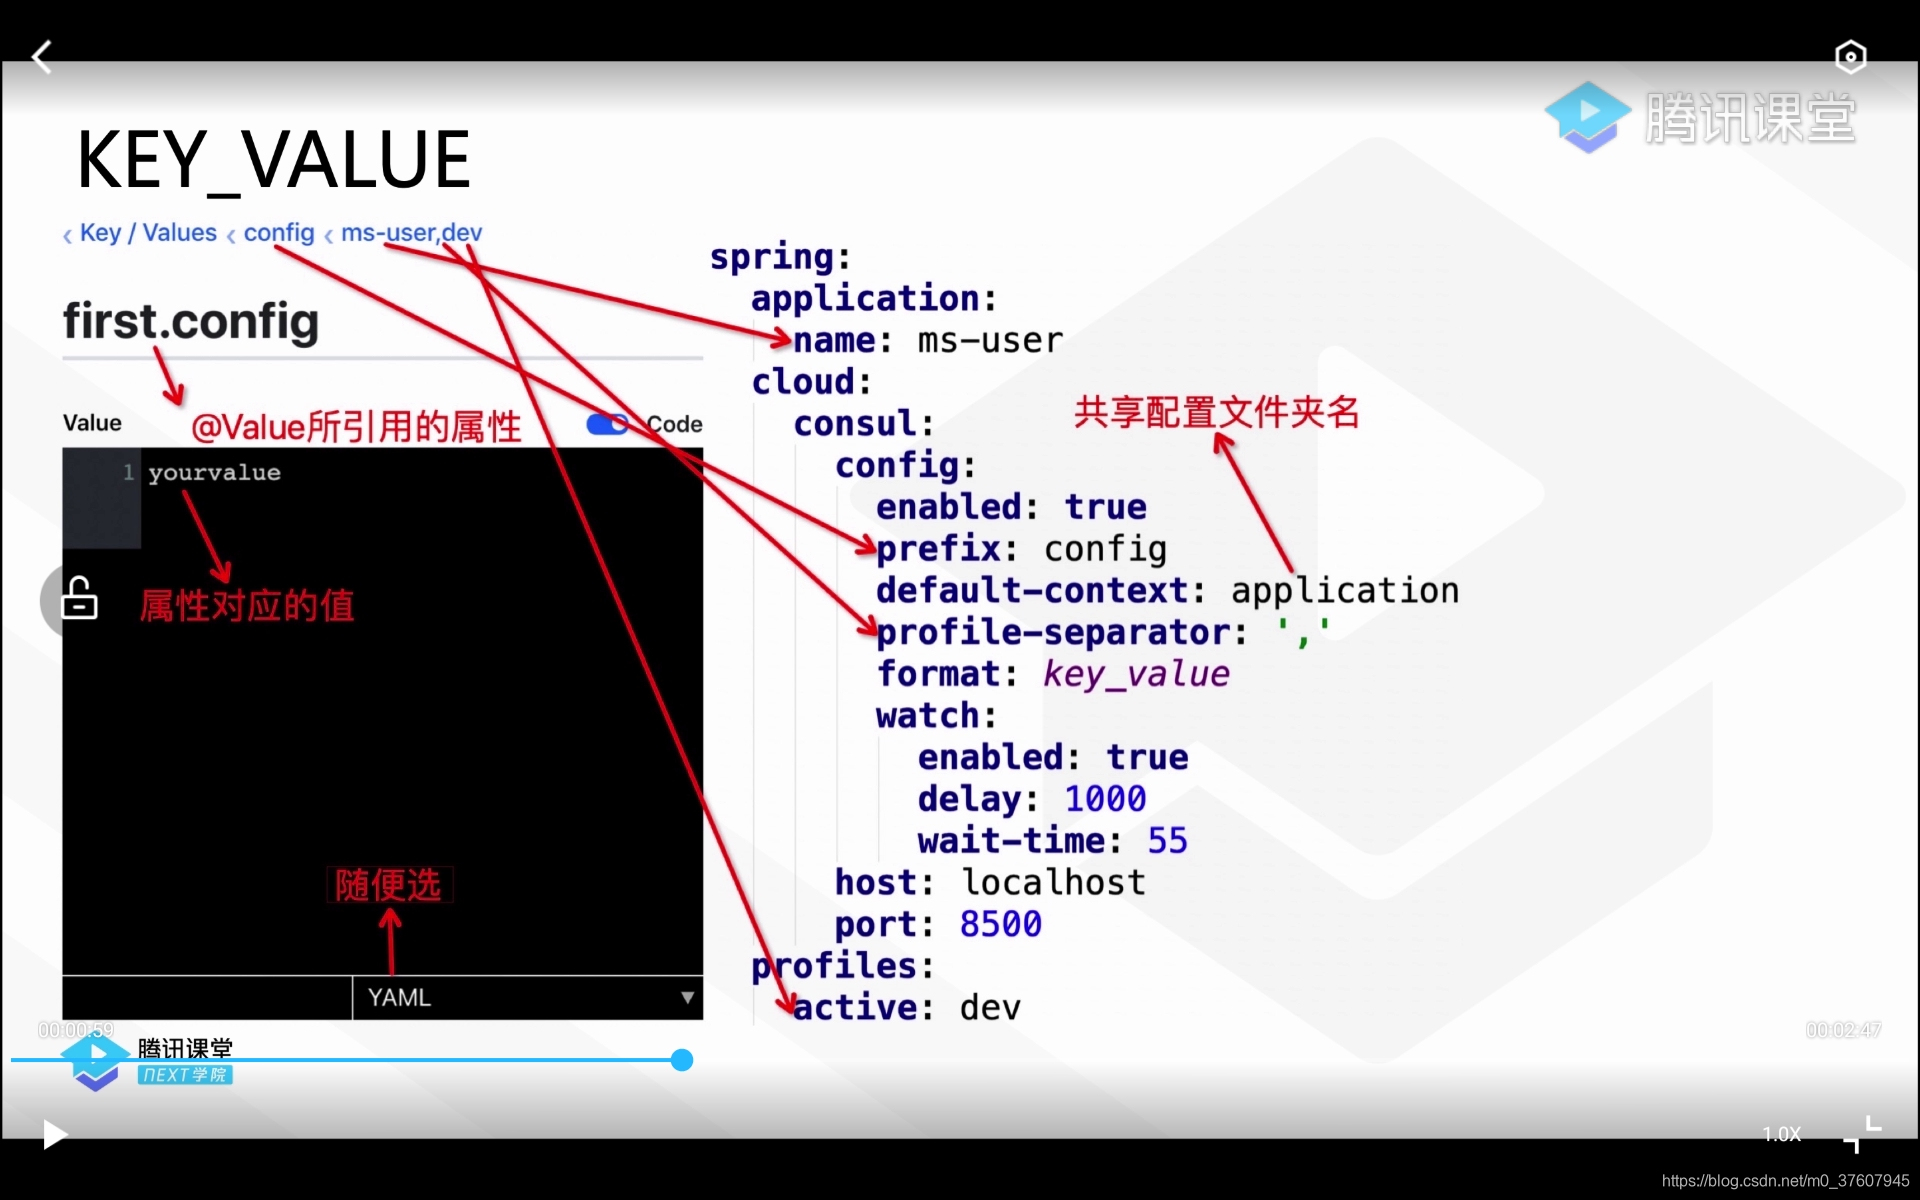
2020-02-16 11:00:38.423 INFO 7052 --- [ main] b.c.PropertySourceBootstrapConfiguration : Located property source: [BootstrapPropertySource {name='bootstrapProperties-config/ms-user,dev/'}, BootstrapPropertySource {name='bootstrapProperties-config/ms-user/'}, BootstrapPropertySource {name='bootstrapProperties-config/application,dev/'}, BootstrapPropertySource {name='bootstrapProperties-config/application/'}]
这些配置优先级依次降低
如果不设置版本为dev,则设置key/value时 key为 config/ms-user/data
引导上下文(Bootstrap Context)
是Application Context的父上下文,Spring Cloud引入
Spring Cloud用来连接配置服务器 获取远程配置
bootstrap.xml是引导上下文的配置文件,所以配置服务器的地址需要写在引导上下文中。只要和配置服务器相关的配置都需要写在bootstrap.xml文件当中
配置属性动态刷新
如果在consul控制台修改了属性,而不希望重新启动项目就可以读取,只需要在读取配置的类上面添加注解@RefreshScope就可以了
import org.springframework.cloud.context.config.annotation.RefreshScope;
单consul的配置更新是有延迟的,如果希望强制刷新(不喜欢时延)
通过 curl -X POST http://localhost:8081/actuator/refresh 即可
也可以修改配置consul时延 但对性能有一定影响 因为不建议生产环境修改这些值
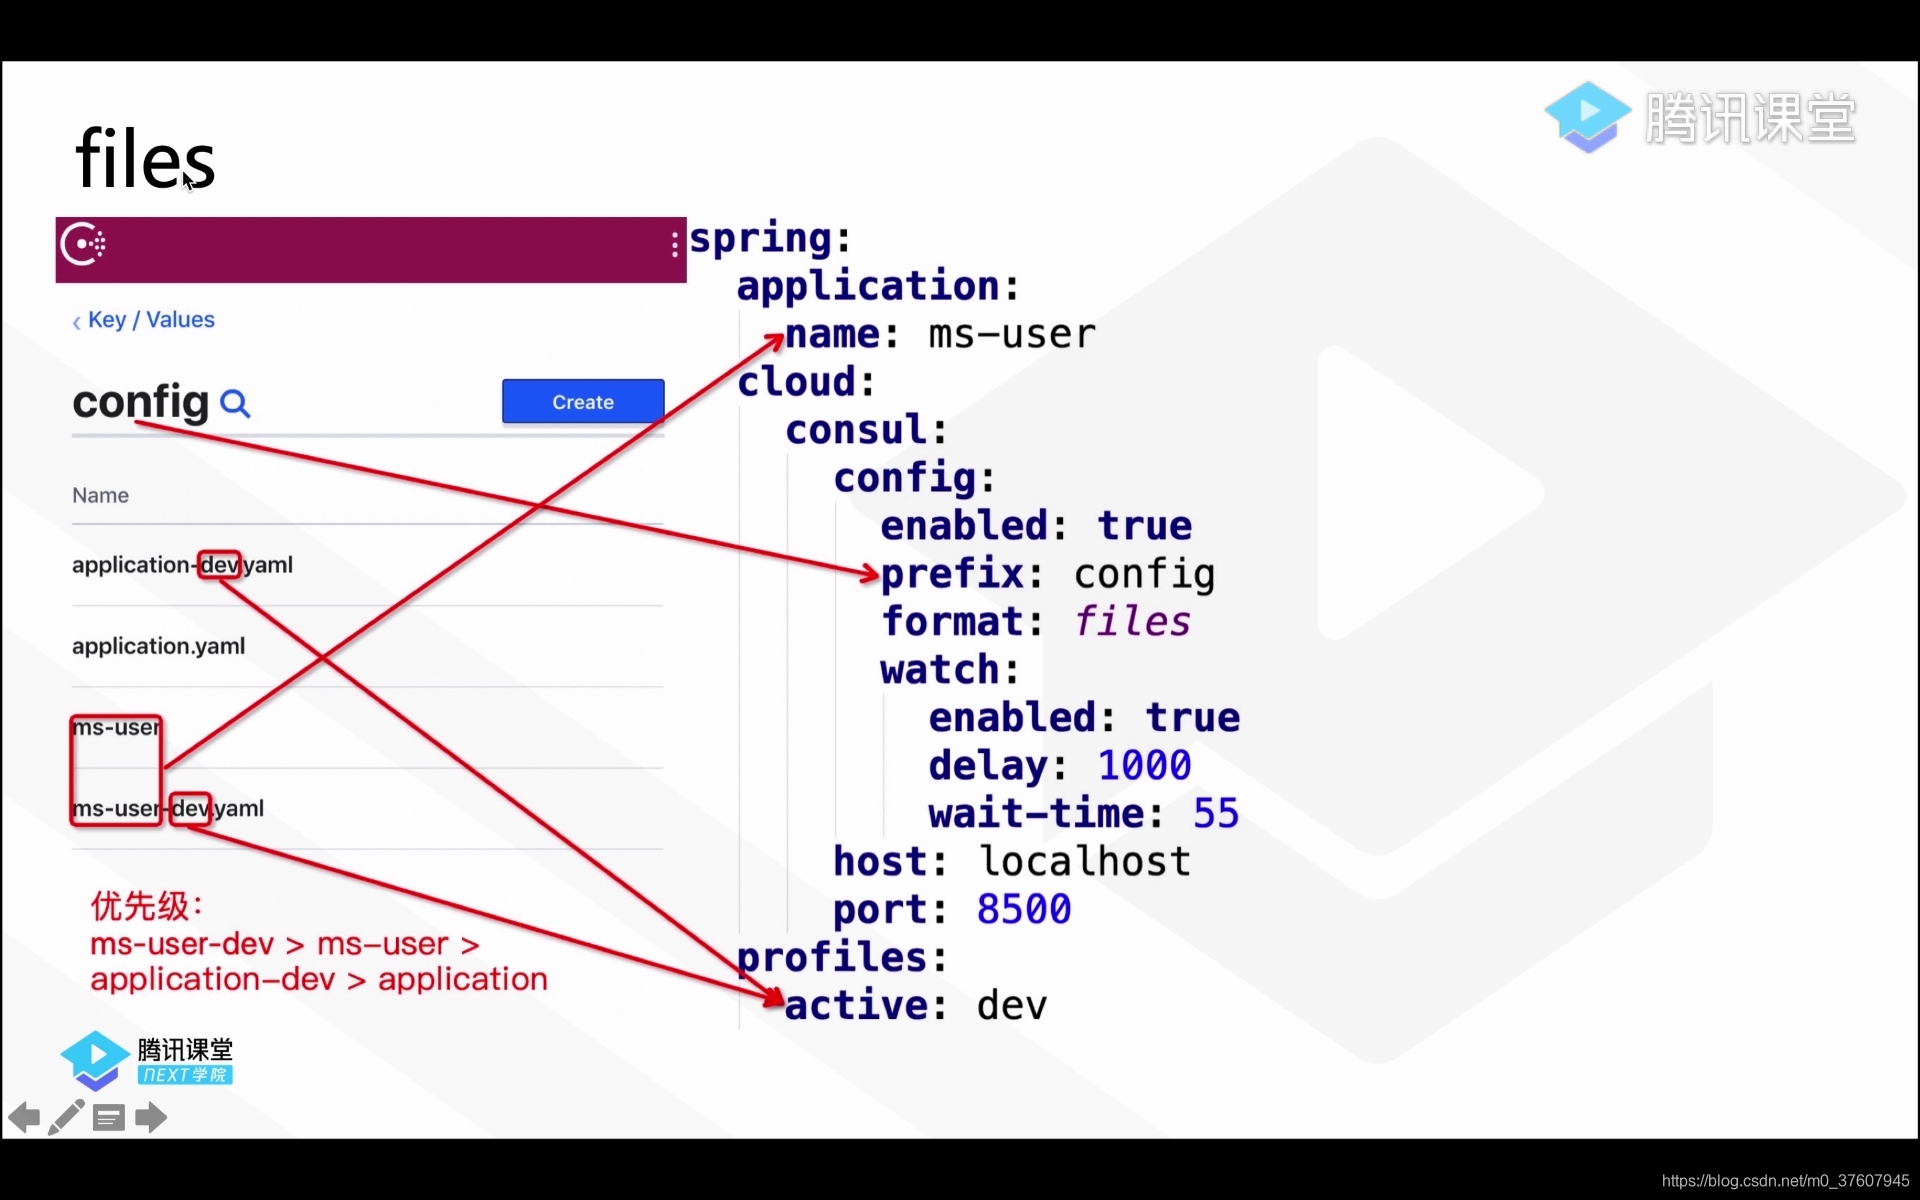
Spring Cloud Consul支持的配置格式
-
yaml
-
Properties
-
KEY_VALUE
-
files
使用git-2-consul实现配置
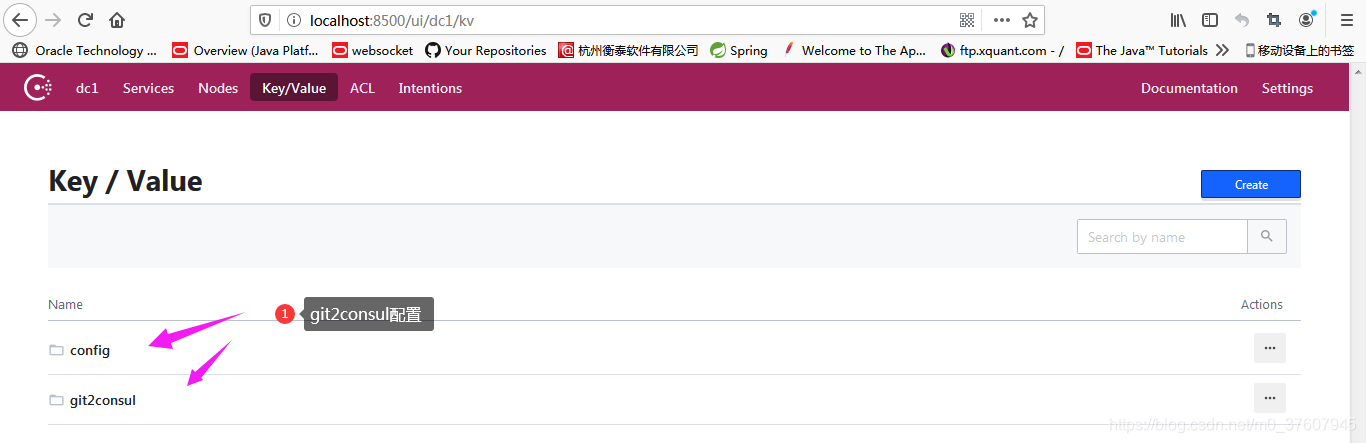
git2Consul(基于Node.js编写)可用来将Git仓库中的数据,同步到Consul
配置回滚(GIT)
配置回溯(GIT)
配置持久化,重启consul不会导致配置信息丢失
注:当且仅当spring.cloud.consul.config.format=files时,才可以用git2consul管理配置,其他格式无法使用
下载Node.js
https://nodejs.org/en/download/ 下载最新版本的Node.js
https://nodejs.org/en/download/releases/ 下载指定版本的Node.js
安装Node.js
点击安装文件next->next即可完成安装
安装git2consul
指定如下命令即可安装git2consul
npm install -g git2consul
如果网络不好,安装速度过慢,可使用如下命令:
npm install -g git2consul --registry=https://registry.npm.taobao.org
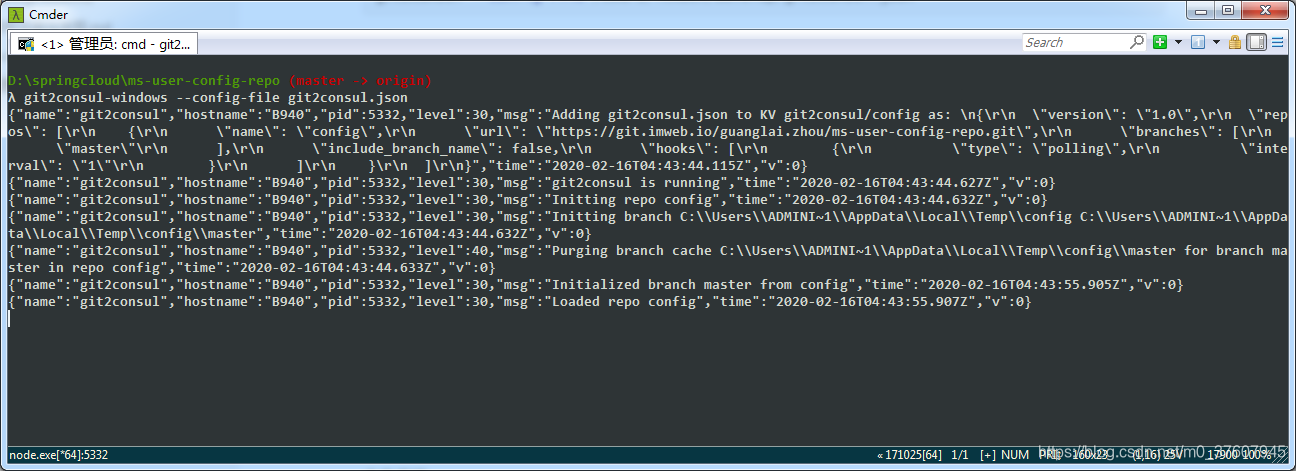
注意:对于Windows操作系统,需执行:
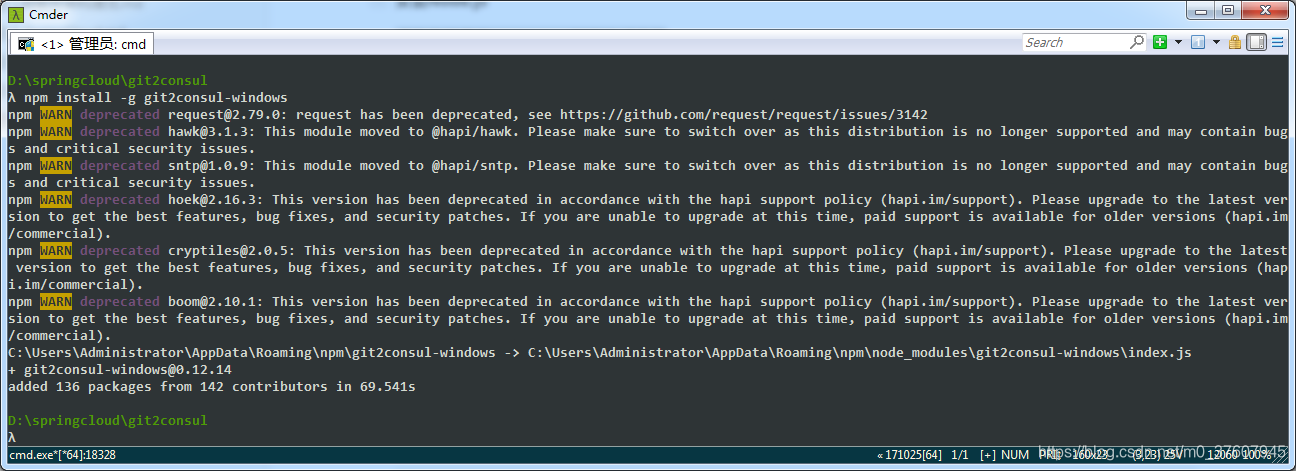
npm install -g git2consul-windows
创建gitLab项目
https://git.imweb.io/projects
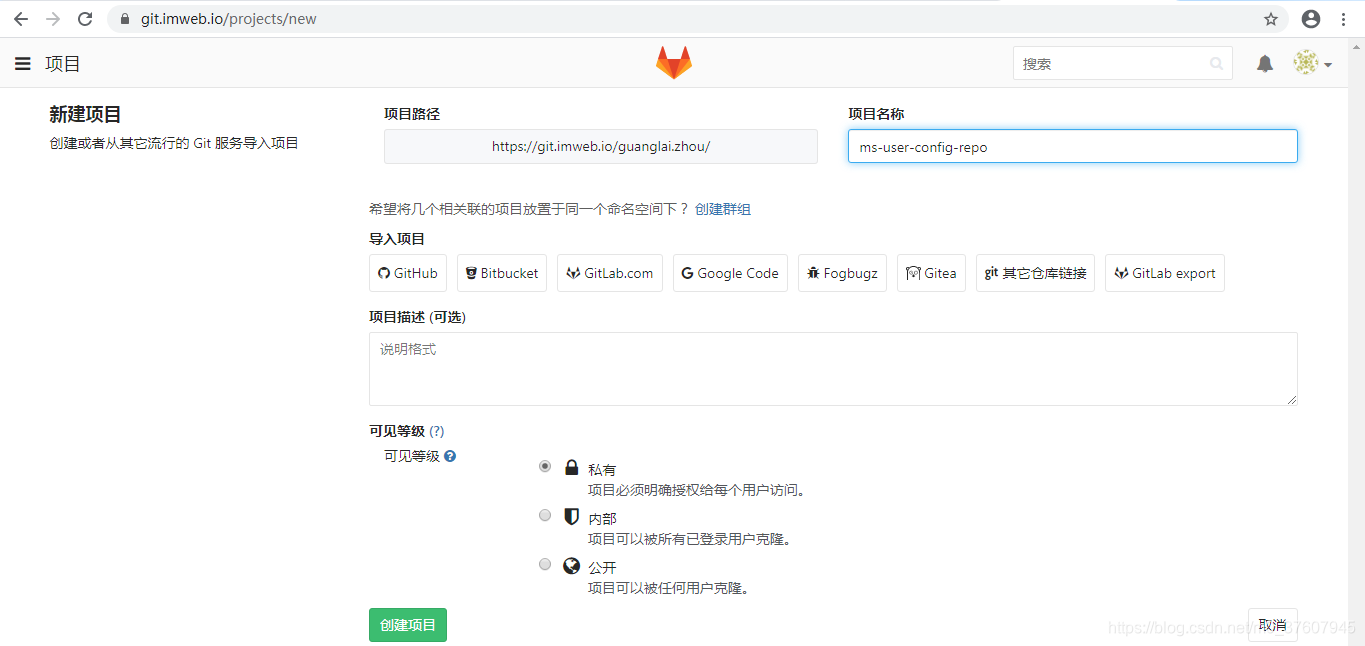
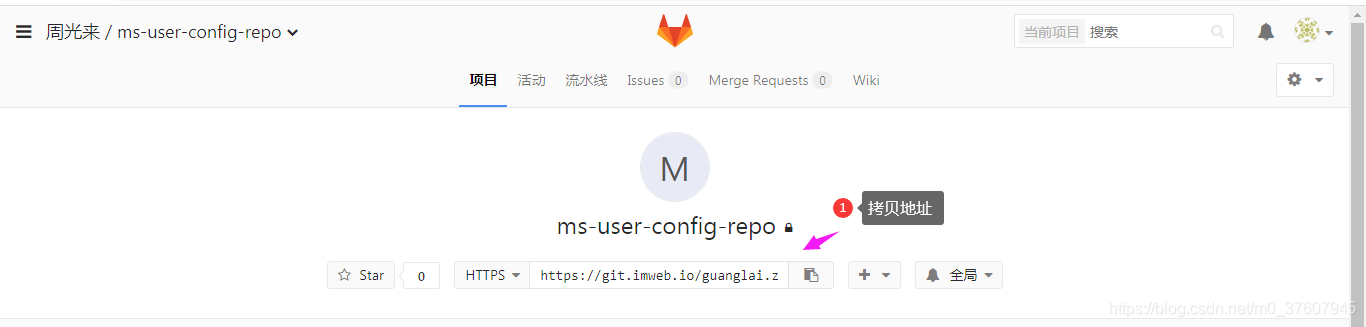
https://git.imweb.io/guanglai.zhou/ms-user-config-repo.git
参照下面的git命令:
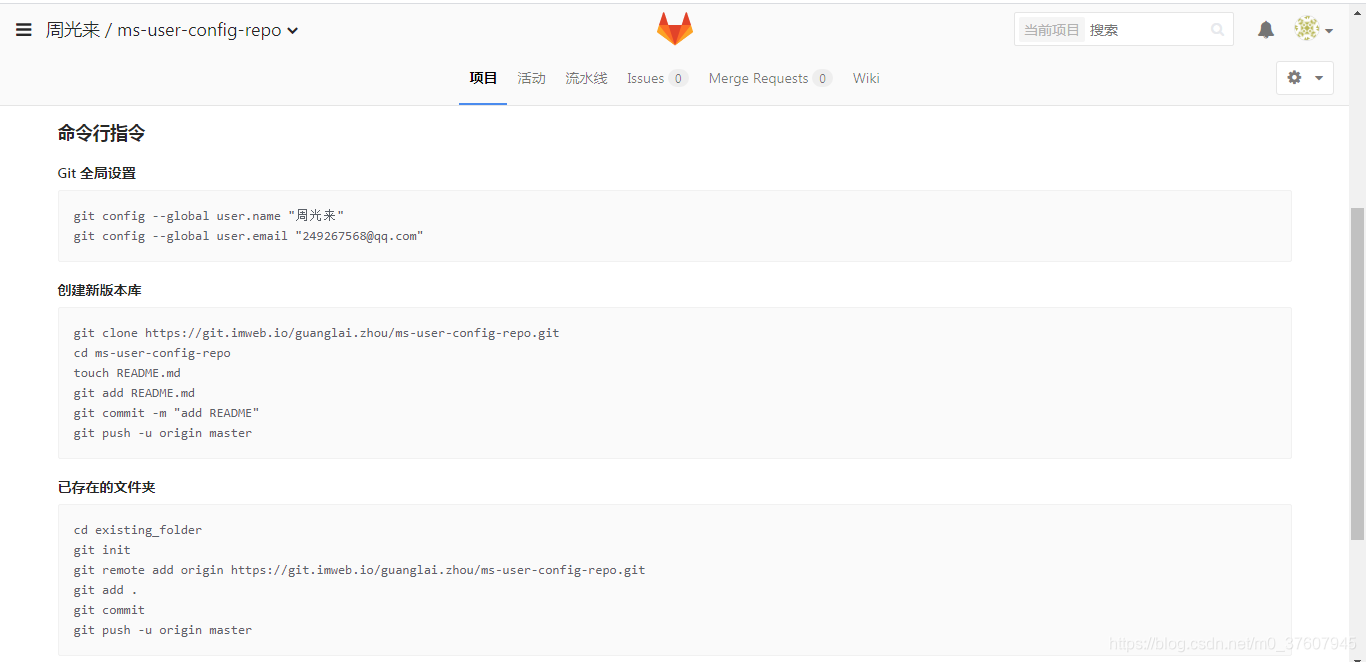
git config --system --unset credential.helper
git config --global credential.helper store
B940+Administrator@B940 MINGW64 /d/springcloud
$ git clone https://git.imweb.io/guanglai.zhou/ms-user-config-repo.git
Cloning into 'ms-user-config-repo'...
Username for 'https://git.imweb.io': guanglai.zhou
warning: You appear to have cloned an empty repository.
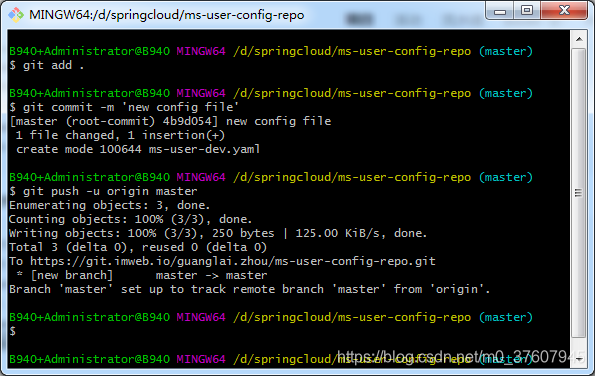
进入到ms-user-config-repo目录下:
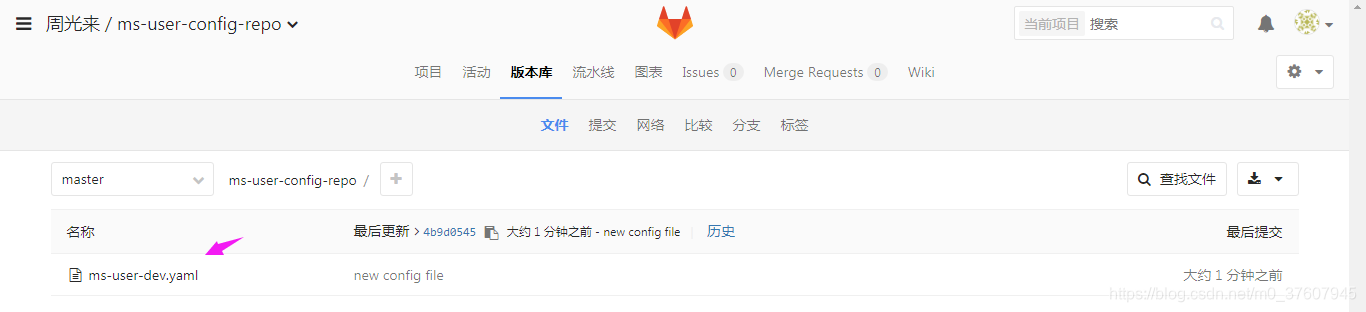
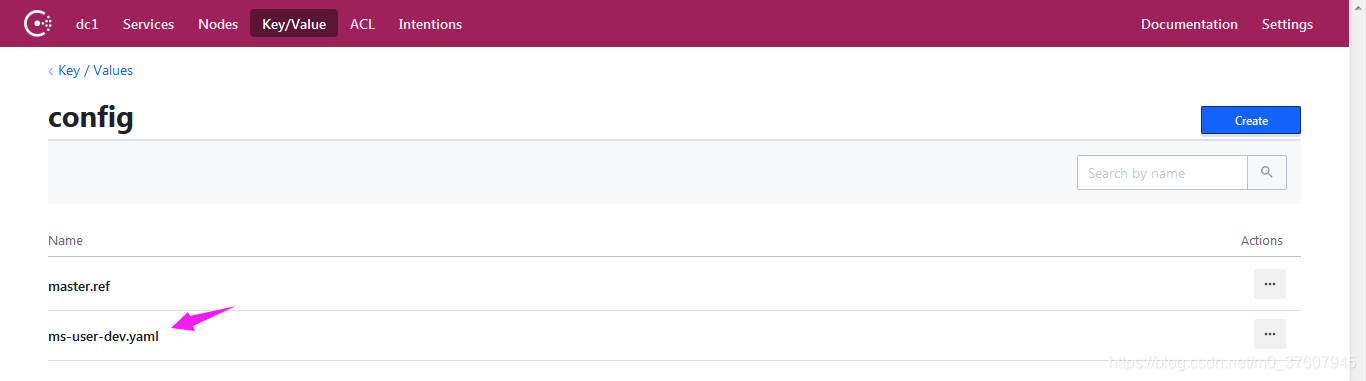
创建文件ms-user-dev.yaml文件
first.config: cloud-8
提交文件到git中

配置git2consul
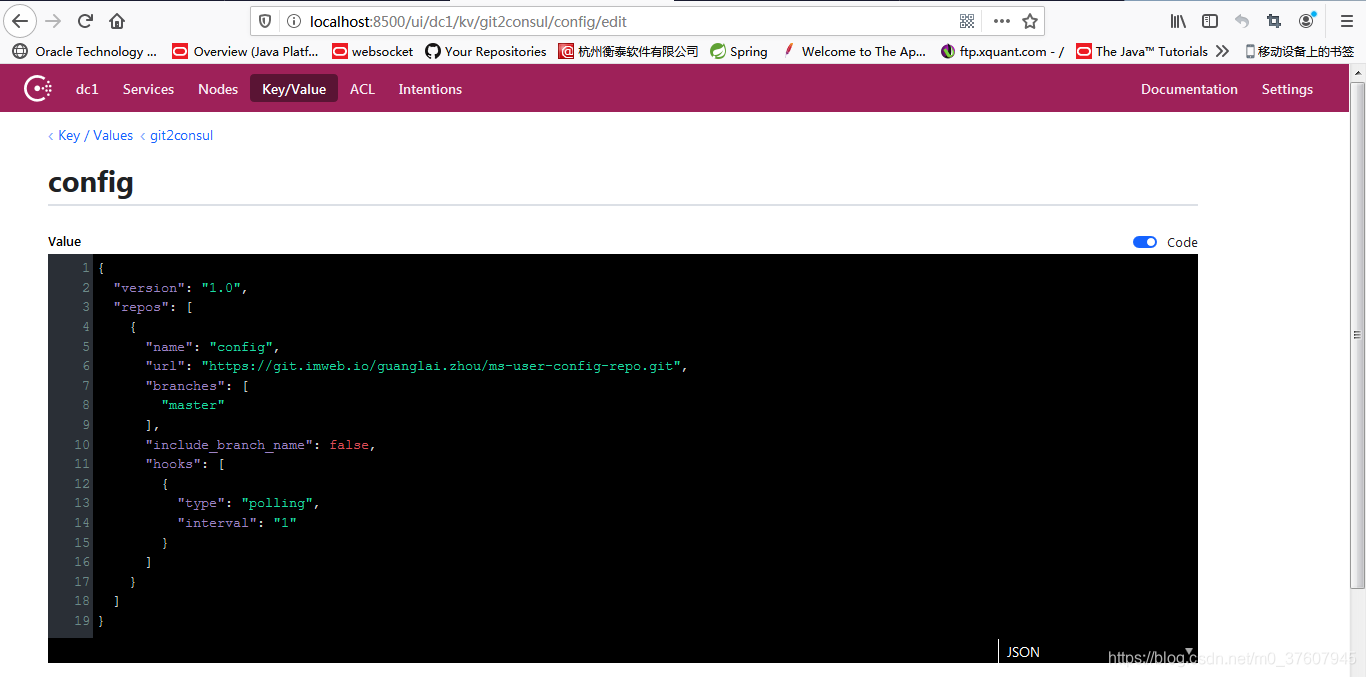
准备配置文件,名为 git2consul.json 内容如下:
{
  // 配置版本
  "version": "1.0",
  "repos": [
    {
      // 名称,指的是在consul里面的目录名称
      "name": "config",
      // 要同步的Git仓库
      "url": "你的git仓库",
      "branches": [
        // 要同步的分支
        "master"
      ],
      // 是否要把分支名称作为Consul的key前缀
      "include_branch_name": false,
      "hooks": [
        {
          // 拉取模式
          "type": "polling",
          // 同步的间隔(分钟)
          "interval": "1"
        }
      ]
    }
  ]
}
{
  "version": "1.0",
  "repos": [
    {
      "name": "config",
      "url": "https://git.imweb.io/guanglai.zhou/ms-user-config-repo.git",
      "branches": [
        "master"
      ],
      "include_branch_name": false,
      "hooks": [
        {
          "type": "polling",
          "interval": "1"
        }
      ]
    }
  ]
}
其他选项详见:https://github.com/breser/git2consul
启动git2consul
执行如下命令,即可启动git2consul
git2consul --config-file /Users/itmuch/develop/git2consul.json
注意:对于Windows操作系统,需执行:
git2consul-windows --config-file C:/xxxx/xxx/git2consul.json
备注:首先要删除consul中的key/value配置、修改bootstap.xml文件
spring.cloud.consul.config.format=files
spring:
  application:
    name: ms-user
  cloud:
    consul:
      host: localhost
      port: 8500
      config:
        format: files
  profiles:
    active: dev
启动用户微服务
访问网址:http://localhost:8081/test-config
配置优先级总结
- Spring Boot配置优先级
- Spring Cloud配置优先级
{application}-{profile}.yml – 指定应用在指定环境的配置
{application}.yml – 指定应用在所有环境下的配置
application-{profile}.yml – 所有应用在指定环境下的配置
application.yml – 所有应用在所有环境下的配置
配置优先级依次递减
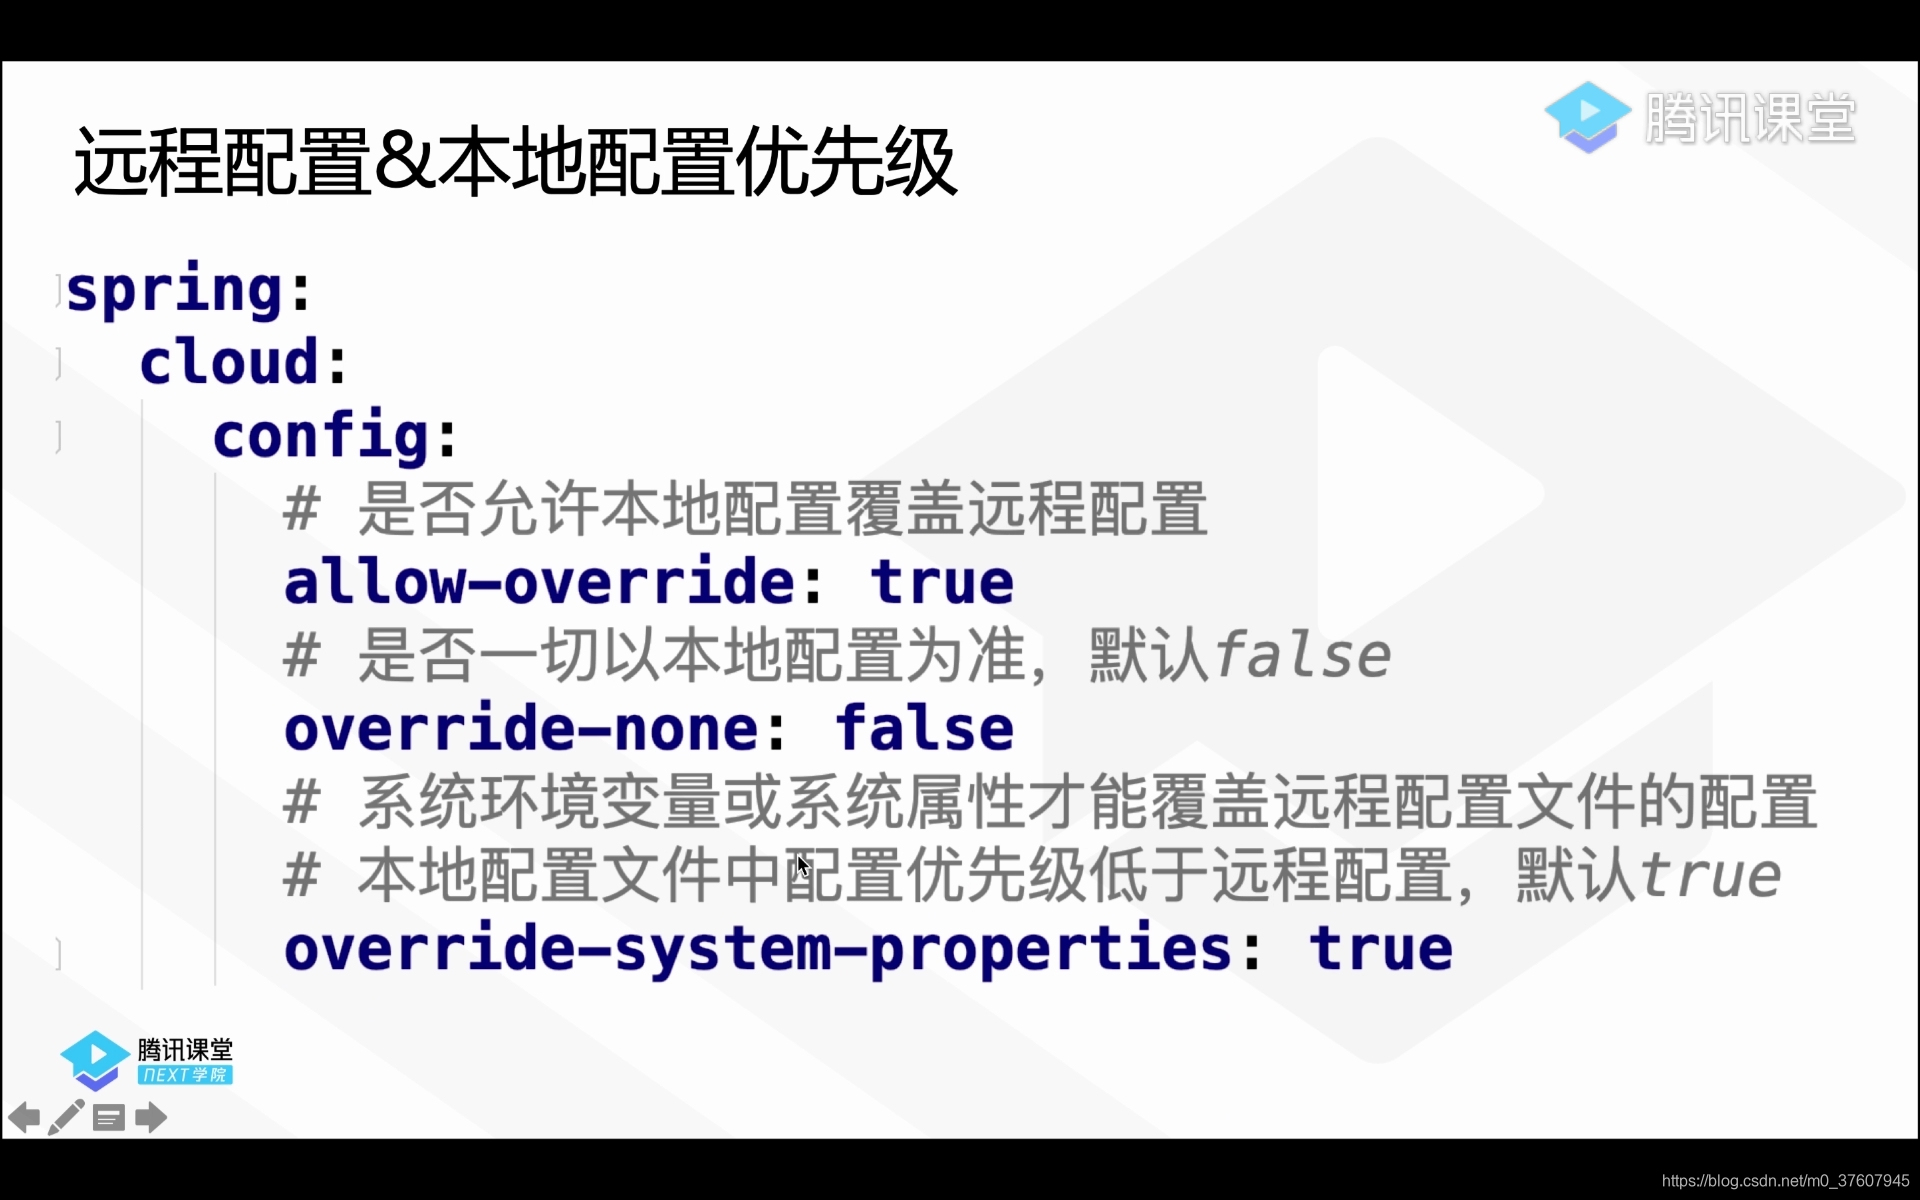
- 远程配置与本地配置优先级
可以通过配置修改 但是这些配置必须存在于远程才起效
配置管理最佳实践总结
- 能放本地 不放远程 对开发人员最好 方便管理 方便维护 开发工具友好提示 不要滥用配置服务器
- 尽量规避优先级
- 指定配置规范 比如写好注释
- 利用/actuator/configprops、/actuator/env、启动日志快速排错
本章总结
- profile
- 用Consul管理配置
- 引导上下文
- Spring Cloud Consul支持的配置格式
- Consul高可用
- 配置管理最佳实践
