JAVA
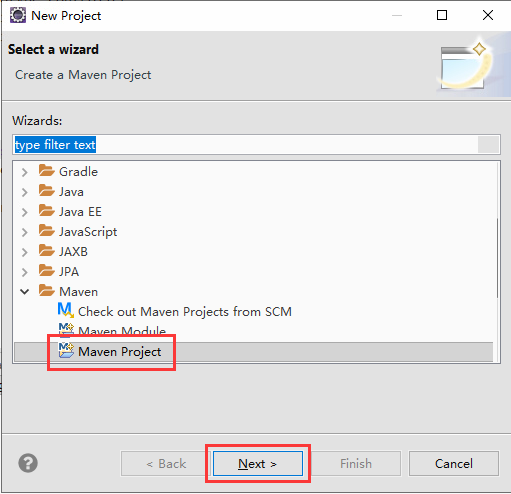
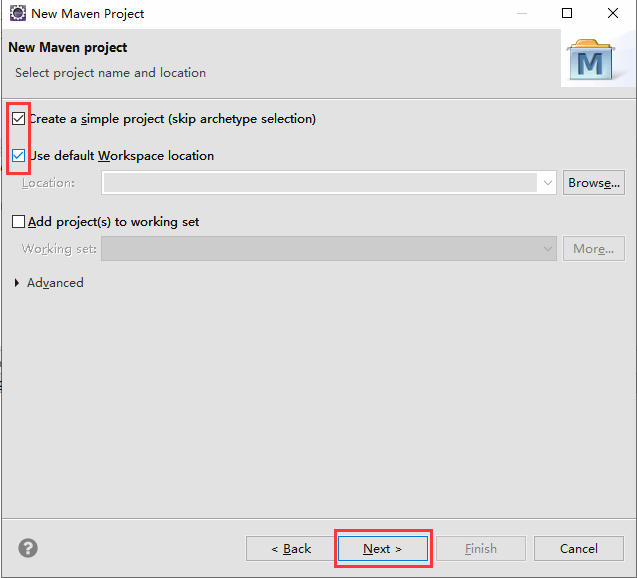
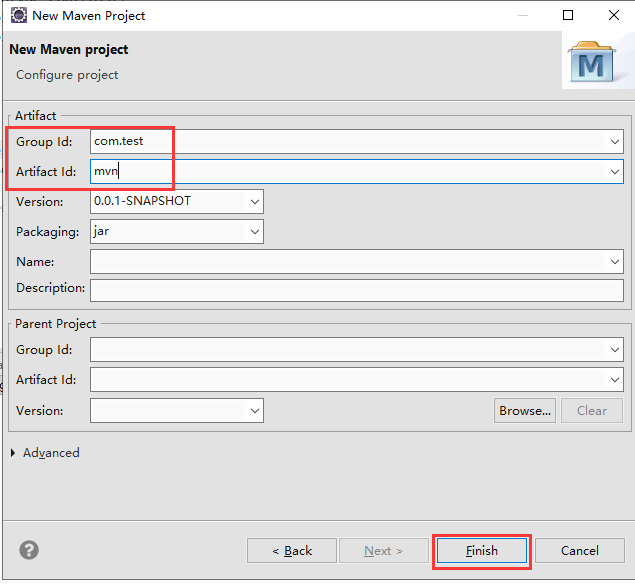
Eclipse→File→New→Project..
WEB
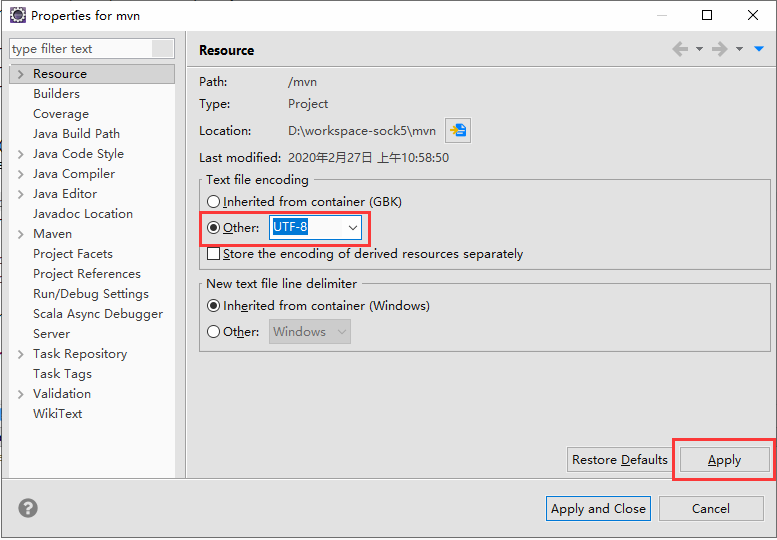
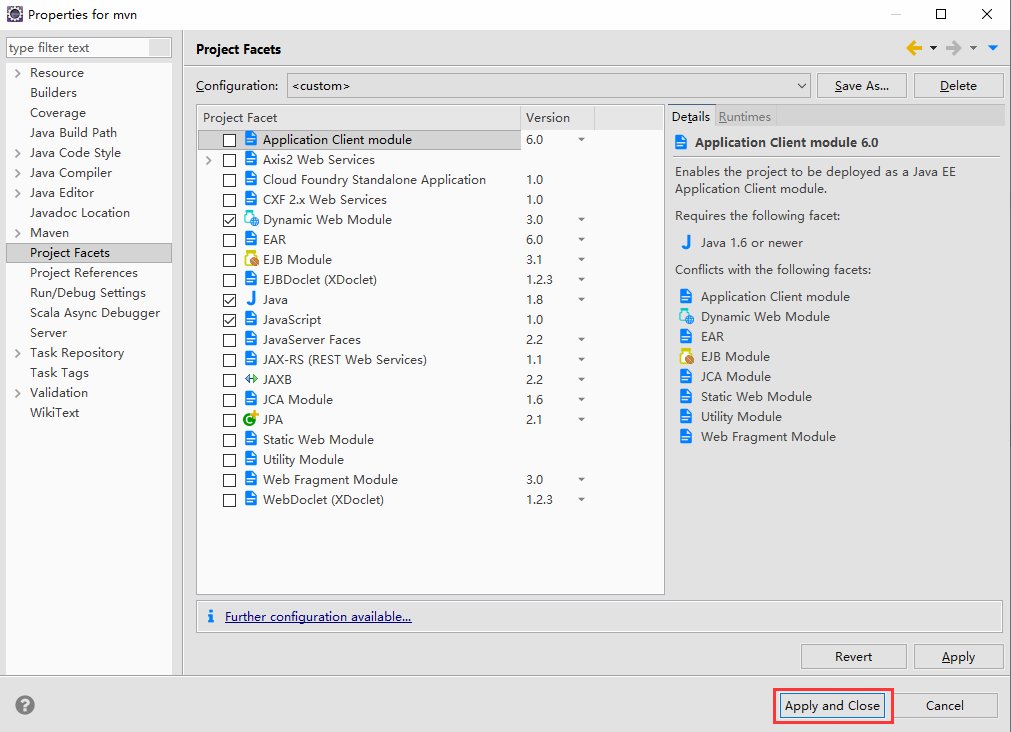
右键mvn项目→Properties

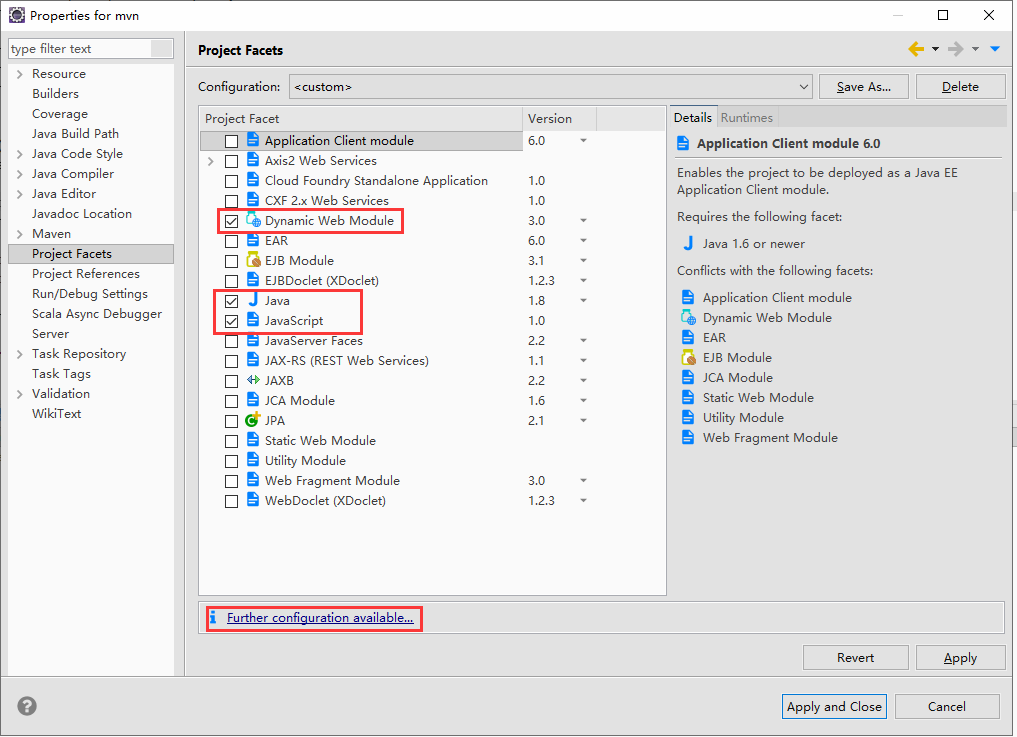
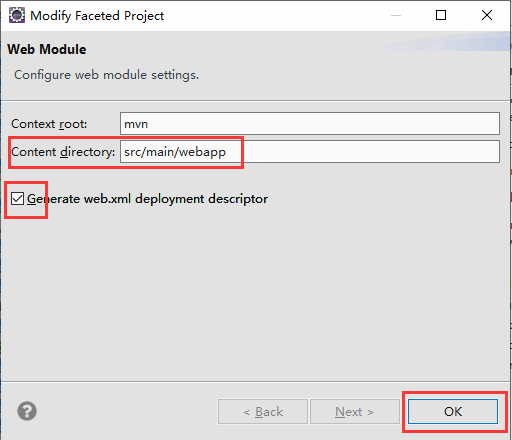
src/main/webapp
pom.xml
<project xmlns="http://maven.apache.org/POM/4.0.0" xmlns:xsi="http://www.w3.org/2001/XMLSchema-instance" xsi:schemaLocation="http://maven.apache.org/POM/4.0.0 http://maven.apache.org/xsd/maven-4.0.0.xsd">
  <modelVersion>4.0.0</modelVersion>
  <groupId>com.test</groupId>
  <artifactId>mvn</artifactId>
  <version>0.0.1-SNAPSHOT</version>
  <dependencies>
    <dependency>
      <groupId>javax.servlet</groupId>
      <artifactId>javax.servlet-api</artifactId>
      <version>4.0.1</version>
      <scope>provided</scope>
    </dependency>
    <dependency>
      <groupId>org.springframework</groupId>
      <artifactId>spring-webmvc</artifactId>
      <version>4.3.25.RELEASE</version>
    </dependency>
    <dependency>
      <groupId>org.aspectj</groupId>
      <artifactId>aspectjweaver</artifactId>
      <version>1.7.4</version>
    </dependency>
  </dependencies>
</project>
web.xml
<?xml version="1.0" encoding="UTF-8"?>
<web-app id="WebApp_ID" version="3.0"
    xmlns="http://java.sun.com/xml/ns/javaee" xmlns:xsi="http://www.w3.org/2001/XMLSchema-instance"
    xsi:schemaLocation="http://java.sun.com/xml/ns/javaee http://java.sun.com/xml/ns/javaee/web-app_3_0.xsd">

  <context-param>
    <param-name>contextConfigLocation</param-name>
    <param-value>classpath:applicationContext.xml</param-value>
  </context-param>

  <listener>
    <listener-class>
      org.springframework.web.context.ContextLoaderListener
    </listener-class>
  </listener>

  <filter>
      <filter-name>httpPutFormContentFilter</filter-name>
      <filter-class>org.springframework.web.filter.HttpPutFormContentFilter</filter-class>
  </filter>

  <filter>
      <filter-name>characterEncoding</filter-name>
      <filter-class>org.springframework.web.filter.CharacterEncodingFilter</filter-class>
      <init-param>
          <param-name>encoding</param-name>
          <param-value>UTF-8</param-value>
      </init-param>
  </filter>

  <filter-mapping>
      <filter-name>httpPutFormContentFilter</filter-name>
      <url-pattern>/*</url-pattern>
  </filter-mapping>

  <filter-mapping>
      <filter-name>characterEncoding</filter-name>
      <url-pattern>/*</url-pattern>
  </filter-mapping>

  <servlet>
      <servlet-name>SpringMVC</servlet-name>
      <servlet-class>org.springframework.web.servlet.DispatcherServlet</servlet-class>
      <init-param>
          <param-name>contextConfigLocation</param-name>
          <param-value>classpath:springmvc-servlet.xml</param-value>
      </init-param>
      <load-on-startup>1</load-on-startup>
  </servlet>

  <servlet-mapping>
      <servlet-name>SpringMVC</servlet-name>
      <url-pattern>/</url-pattern>
  </servlet-mapping>

  <session-config>
    <session-timeout>10</session-timeout>
  </session-config>

<!--   <welcome-file-list>
    <welcome-file>index.html</welcome-file>
  </welcome-file-list> -->

</web-app>
applicationContext.xml
<beans xmlns="http://www.springframework.org/schema/beans"
    xmlns:xsi="http://www.w3.org/2001/XMLSchema-instance" xmlns:aop="http://www.springframework.org/schema/aop"
    xmlns:context="http://www.springframework.org/schema/context" xmlns:tx="http://www.springframework.org/schema/tx"
    xsi:schemaLocation="http://www.springframework.org/schema/beans
                           http://www.springframework.org/schema/beans/spring-beans-4.0.xsd
                           http://www.springframework.org/schema/tx
                           http://www.springframework.org/schema/tx/spring-tx-4.0.xsd
                           http://www.springframework.org/schema/aop
                           http://www.springframework.org/schema/aop/spring-aop-4.0.xsd
                           http://www.springframework.org/schema/context
                           http://www.springframework.org/schema/context/spring-context-4.0.xsd">

    <!-- 扫描指定目录下的注解,将@Service,@Repository,@Controller,@Component等这些注解的类注册为bean
        如果配置了<context:component-scan>那么<context:annotation-config/>标签就可以不用在xml中再配置了,前者包含后者
        注:在注解后加上例如@Component(value=”abc”)时,注册的这个类的bean的id就是adc -->
    <context:component-scan base-package="com.test" />

    <!--
    <bean id="iservice" class="com.project.OTHER.db.Access" factory-method="getService"></bean>
     -->

</beans>
springmvc-servlet.xml
<?xml version="1.0" encoding="UTF-8"?>
<beans xmlns="http://www.springframework.org/schema/beans"
    xmlns:xsi="http://www.w3.org/2001/XMLSchema-instance"
    xmlns:mvc="http://www.springframework.org/schema/mvc"
    xmlns:context="http://www.springframework.org/schema/context"
    xmlns:aop="http://www.springframework.org/schema/aop"
    xmlns:tx="http://www.springframework.org/schema/tx"
    xsi:schemaLocation="http://www.springframework.org/schema/beans
                        http://www.springframework.org/schema/beans/spring-beans-4.0.xsd
                        http://www.springframework.org/schema/mvc
                        http://www.springframework.org/schema/mvc/spring-mvc-4.0.xsd
                        http://www.springframework.org/schema/context
                        http://www.springframework.org/schema/context/spring-context-4.0.xsd
                        http://www.springframework.org/schema/aop
                        http://www.springframework.org/schema/aop/spring-aop-4.0.xsd
                        http://www.springframework.org/schema/tx
                        http://www.springframework.org/schema/tx/spring-tx-4.0.xsd">

    <!-- 自动注册RequestMappingHandlerMapping与RequestMappingHandlerAdapter两个Bean,这是Spring MVC为@Controller分发请求所必需的 -->
    <mvc:annotation-driven/>
    <!-- 配置了  context:component-scan就不用配置这个了
    <context:annotation-config/> -->
    <!-- 使用默认的Servlet来响应静态文件  -->
    <mvc:default-servlet-handler/>
    <!-- 设置使用注解的类所在的jar包 -->
    <context:component-scan base-package="com.test.controller" />
    <!-- 启动对@AspectJ注解的支持 log begin-->
    <!-- proxy-target-class等于true是强制使用cglib代理,proxy-target-class默认是false,如果你的类实现了接口 就走JDK代理,如果没有,走cglib代理  -->
    <!-- 注:对于单例模式建议使用cglib代理,虽然JDK动态代理比cglib代理速度快,但性能不如cglib -->
    <!--如果不写proxy-target-class="true"这句话也没问题-->
    <aop:aspectj-autoproxy proxy-target-class="true"/>
    <!--切面-->
    <!--添加页面视图解析器-->
<!--     <bean class="org.springframework.web.servlet.view.InternalResourceViewResolver">
        <property name="prefix" value="/html/"/>
        <property name="suffix" value=".html"/>
        <property name="contentType" value="text/html;charset=UTF-8"/>
    </bean> -->
</beans>
TestController.java
package com.test.controller;

import javax.servlet.http.HttpServletRequest;
import javax.servlet.http.HttpServletResponse;

import org.springframework.stereotype.Controller;
import org.springframework.web.bind.annotation.RequestMapping;
import org.springframework.web.bind.annotation.RequestMethod;

@Controller
@RequestMapping(value = "/test")
public class TestController {

//    @Resource
//    private IService iservice;

    @RequestMapping(value = "/test", method = RequestMethod.GET)
    public String logingui(HttpServletRequest request, HttpServletResponse response) {
        try {
            response.setCharacterEncoding("UTF-8");
            response.getWriter().print("success");
        } catch (Exception e) {
            e.printStackTrace();
        }
        return null;
    }

}
