spring cloud有些框架不再维护了(如eureka不再免费开源等原因,当然不影中国人响使用),走了和dobbo当年的老路,但是由于阿里巴巴加入的spring cloud开发中,那么为其微服务的发展注入了新鲜的活力,那么先上个手感受一下再说呗
GitHub地址: https://github.com/zhang-xiaoxiang/nacos-spring-boot-example
百度云盘
链接:https://pan.baidu.com/s/14j_w0SQ0o8H9QBDiRhQCuA 提取码:c35q
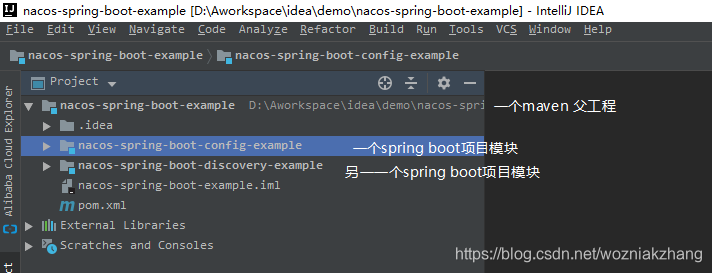
大致结构如下
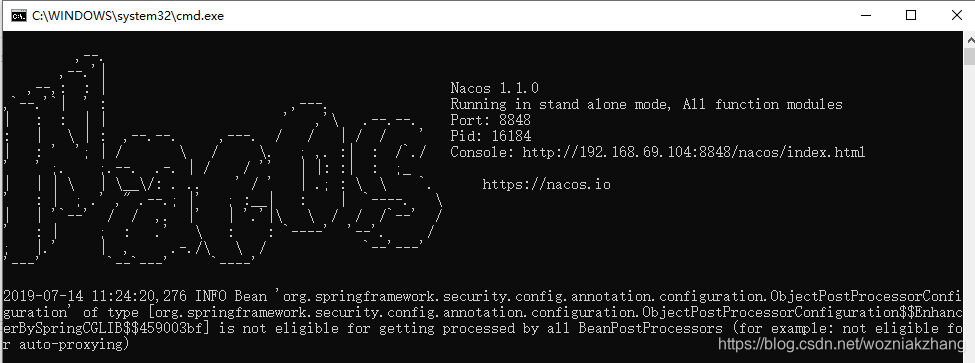
准备工作,如果是使用Windows那么下载window版本的zip包,和zookeeper类似,需要开启即可 (我使用的zip下载,当然你也可以直接使用git工具或者idea下载,都行),如果是下载zip包那么解压,到bin里面去双击执行 startup 即可
https://github.com/alibaba/nacos

1: 创建好一个maven项目后,在maven项目基础上创建一个配置的spring boot的模块,pom依赖下
    <properties>
        <java.version>1.8</java.version>
        <!--注意:版本 0.2.x.RELEASE 对应的是 Spring Boot 2.x 版本,版本 0.1.x.RELEASE 对应的是 Spring Boot 1.x 版本。-->
        <nacos-config-spring-boot.version>0.2.1</nacos-config-spring-boot.version>
    </properties>

    <dependencies>
        <dependency>
            <groupId>org.springframework.boot</groupId>
            <artifactId>spring-boot-starter</artifactId>
        </dependency>
        <dependency>
            <groupId>org.springframework.boot</groupId>
            <artifactId>spring-boot-starter-web</artifactId>
        </dependency>

        <dependency>
            <groupId>org.springframework.boot</groupId>
            <artifactId>spring-boot-starter-test</artifactId>
            <scope>test</scope>
        </dependency>
        <dependency>
            <groupId>org.springframework.boot</groupId>
            <artifactId>spring-boot-starter-actuator</artifactId>
        </dependency>

        <dependency>
            <groupId>com.alibaba.boot</groupId>
            <artifactId>nacos-config-spring-boot-starter</artifactId>
            <version>${nacos-config-spring-boot.version}</version>
        </dependency>

        <dependency>
            <groupId>com.alibaba.boot</groupId>
            <artifactId>nacos-config-spring-boot-actuator</artifactId>
            <version>${nacos-config-spring-boot.version}</version>
        </dependency>


    </dependencies>
2:在 application.properties 中配置 Nacos server 的地址(注意这里配置8080端口也行,因为默认是它,可以不用显示写出来)
nacos.config.server-addr=127.0.0.1:88483:使用 @NacosPropertySource 加载 dataId 为 example 的配置源,并开启自动更新:
@SpringBootApplication
@NacosPropertySource(dataId = "example", autoRefreshed = true)
public class NacosConfigApplication {

    public static void main(String[] args) {
        SpringApplication.run(NacosConfigApplication.class, args);
    }
}
4:通过 Nacos 的 @NacosValue 注解设置属性值。
@Controller
@RequestMapping("config")
public class ConfigController {

    @NacosValue(value = "${useLocalCache:false}", autoRefreshed = true)
    private boolean useLocalCache;

    @RequestMapping(value = "/get", method = GET)
    @ResponseBody
    public boolean get() {
        return useLocalCache;
    }
}
5:启动 NacosConfigApplication,调用 curl http://localhost:8080/config/get,返回内容是 false
说明: curl http://localhost:8080/config/get 表示使用命令行模拟浏览器访问接口,可以在Linux平台或者Windows平台,
如果Windows平台CMD命令提示没有命令,百度安装一下CURL的软件(建议配置环境变量方便操作)
6:通过调用 Nacos Open API 向 Nacos server 发布配置:dataId 为example,内容为useLocalCache=true
curl -X POST "http://127.0.0.1:8848/nacos/v1/cs/configs?dataId=example&group=DEFAULT_GROUP&content=useLocalCache=true"7:再次访问(控制台命令或者浏览器直接访问都行) http://localhost:8080/config/get,此时返回内容为true,说明程序中的useLocalCache值已经被动态更新了。
到这里相当于服务配置OK了,下面叙述如何启动服务发现
1:同样创建一个spring boot模块作为服务启动发现的服务.pom依赖主要如下
<properties>
        <java.version>1.8</java.version>
        <nacos-discovery-spring-boot.version>0.2.1</nacos-discovery-spring-boot.version>

    </properties>

    <dependencies>
        <dependency>
            <groupId>org.springframework.boot</groupId>
            <artifactId>spring-boot-starter-web</artifactId>
        </dependency>

        <dependency>
            <groupId>org.springframework.boot</groupId>
            <artifactId>spring-boot-starter-test</artifactId>
            <scope>test</scope>
        </dependency>
        <dependency>
            <groupId>com.alibaba.boot</groupId>
            <artifactId>nacos-discovery-spring-boot-starter</artifactId>
            <version>${nacos-discovery-spring-boot.version}</version>
        </dependency>
    </dependencies>
2:在 application.properties 中配置 Nacos server 的地址:
#配置端口号
server.port=8081
#在 application.properties 中配置 Nacos server 的地址:
nacos.discovery.server-addr=127.0.0.1:8848
3:使用 @NacosInjected 注入 Nacos 的 NamingService 实例
@Controller
@RequestMapping("discovery")
public class DiscoveryController {

    @NacosInjected
    private NamingService namingService;

    @RequestMapping(value = "/get", method = GET)
    @ResponseBody
    public List<Instance> get(@RequestParam String serviceName) throws NacosException {
        return namingService.getAllInstances(serviceName);
    }
}

@SpringBootApplication
public class NacosDiscoveryApplication {

    public static void main(String[] args) {
        SpringApplication.run(NacosDiscoveryApplication.class, args);
    }
}
4:启动 NacosDiscoveryApplication,调用 curl http://localhost:8081/discovery/get?serviceName=example,此时返回为空 JSON 数组[]。--注意端口号8081哟,不要搞错
5:通过调用 Nacos Open API 向 Nacos server 注册一个名称为 example 服务(注意如果Windows报错就把双引号变成单引号,官方的是给的单引号的例子,我试了不行,就使用双引号,可能是Linux用单引号,没有测试Linux的)
curl -X PUT "http://127.0.0.1:8848/nacos/v1/ns/instance?serviceName=example&ip=127.0.0.1&port=8080" 6:再次访问 curl http://localhost:8081/discovery/get?serviceName=example,此时返回内容为
[{
	"instanceId": "127.0.0.1#8080#DEFAULT#DEFAULT_GROUP@@example",
	"ip": "127.0.0.1",
	"port": 8080,
	"weight": 1.0,
	"healthy": true,
	"cluster": {
		"serviceName": null,
		"name": "",
		"healthChecker": {
			"type": "TCP"
		},
		"defaultPort": 80,
		"defaultCheckPort": 80,
		"useIPPort4Check": true,
		"metadata": {}
	},
	"service": null,
	"metadata": {}
}]
如有什么疑问,也可以参考官网或者直接去GitHub下载,这里只是简单入门,官方文档如下
