前面介绍的CAS的使用方式是CAS的原生的方式,可以看到,操作相当繁琐。使用SpringSecurity集成之后,web.xml中的一些监听器的配置就都可以转移到spring的配置文件中了。
1. 搭建SpringSecurity项目
1.1 引入依赖
<project xmlns="http://maven.apache.org/POM/4.0.0" xmlns:xsi="http://www.w3.org/2001/XMLSchema-instance" xsi:schemaLocation="http://maven.apache.org/POM/4.0.0 http://maven.apache.org/xsd/maven-4.0.0.xsd">
  <modelVersion>4.0.0</modelVersion>
  <groupId>com.bjc.cas</groupId>
  <artifactId>cas2Springsecurity</artifactId>
  <version>0.0.1-SNAPSHOT</version>
  <packaging>war</packaging>

  <properties>
		<spring.version>4.2.4.RELEASE</spring.version>
	</properties>

	<dependencies>

		<dependency>
			<groupId>org.springframework</groupId>
			<artifactId>spring-core</artifactId>
			<version>${spring.version}</version>
		</dependency>
		<dependency>
			<groupId>org.springframework</groupId>
			<artifactId>spring-web</artifactId>
			<version>${spring.version}</version>
		</dependency>

		<dependency>
			<groupId>org.springframework</groupId>
			<artifactId>spring-webmvc</artifactId>
			<version>${spring.version}</version>
		</dependency>

		<dependency>
			<groupId>org.springframework</groupId>
			<artifactId>spring-context-support</artifactId>
			<version>${spring.version}</version>
		</dependency>

		<dependency>
			<groupId>org.springframework</groupId>
			<artifactId>spring-test</artifactId>
			<version>${spring.version}</version>
		</dependency>

		<dependency>
			<groupId>org.springframework</groupId>
			<artifactId>spring-jdbc</artifactId>
			<version>${spring.version}</version>
		</dependency>

		<dependency>
			<groupId>org.springframework.security</groupId>
			<artifactId>spring-security-web</artifactId>
			<version>4.1.0.RELEASE</version>
		</dependency>

		<dependency>
			<groupId>org.springframework.security</groupId>
			<artifactId>spring-security-config</artifactId>
			<version>4.1.0.RELEASE</version>
		</dependency>

		<dependency>
			<groupId>javax.servlet</groupId>
			<artifactId>servlet-api</artifactId>
			<version>2.5</version>
			<scope>provided</scope>
		</dependency>


	</dependencies>
	<build>
	  <plugins>
	      <!-- java编译插件 -->
		  <plugin>
				<groupId>org.apache.maven.plugins</groupId>
				<artifactId>maven-compiler-plugin</artifactId>
				<version>3.2</version>
				<configuration>
					<source>1.7</source>
					<target>1.7</target>
					<encoding>UTF-8</encoding>
				</configuration>
		  </plugin>
	      <plugin>
				<groupId>org.apache.tomcat.maven</groupId>
				<artifactId>tomcat7-maven-plugin</artifactId>
				<configuration>
					<!-- 指定端口 -->
					<port>9003</port>
					<!-- 请求路径 -->
					<path>/</path>
				</configuration>
	  	  </plugin>
	   </plugins>
    </build>

</project>
1.2 配置web.xml
<?xml version="1.0" encoding="UTF-8"?>
<web-app xmlns:xsi="http://www.w3.org/2001/XMLSchema-instance" xmlns="http://java.sun.com/xml/ns/javaee" xsi:schemaLocation="http://java.sun.com/xml/ns/javaee http://java.sun.com/xml/ns/javaee/web-app_2_5.xsd" version="2.5">
  	<context-param>
		<param-name>contextConfigLocation</param-name>
		<param-value>classpath:spring-security.xml</param-value>
	 </context-param>
	 <listener>
		<listener-class>
			org.springframework.web.context.ContextLoaderListener
		</listener-class>
	 </listener>

	 <filter>
		<filter-name>springSecurityFilterChain</filter-name>
		<filter-class>org.springframework.web.filter.DelegatingFilterProxy</filter-class>
	 </filter>
	 <filter-mapping>
		<filter-name>springSecurityFilterChain</filter-name>
		<url-pattern>/*</url-pattern>
	 </filter-mapping>
</web-app>
1.3 spring的配置
<?xml version="1.0" encoding="UTF-8"?>
<beans:beans xmlns="http://www.springframework.org/schema/security"
xmlns:beans="http://www.springframework.org/schema/beans" xmlns:xsi="http://www.w3.org/2001/XMLSchema-instance"
xsi:schemaLocation="http://www.springframework.org/schema/beans http://www.springframework.org/schema/beans/spring-beans.xsd
http://www.springframework.org/schema/security http://www.springframework.org/schema/security/spring-security.xsd">
<!-- 页面拦截规则 -->
<http pattern="/login.html" security="none"></http>
<http pattern="/error.html" security="none"></http>
<!-- 页面拦截 -->
<http use-expressions="false" >
<!-- 如果启用表达式,那么access的属性值就要写层SPEL表达式了 hasRole('ROLE_USER') -->
<intercept-url pattern="/**" access="ROLE_USER" />
<form-login default-target-url="/index.html" login-page="/login.html" authentication-failure-url="/error.html"/>
<csrf disabled="true"/>
</http>
<!-- 认证管理器 -->
<authentication-manager>
<authentication-provider>
<user-service>
<user name="admin" password="123456" authorities="ROLE_USER"/>
</user-service>
</authentication-provider>
</authentication-manager>
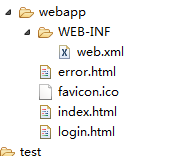
</beans:beans>1.4 相关页面准备
2. SpringSecurity与CAS集成
2.1 引入依赖
springSecurity与CAS的整合包,CAS的原生包
<!-- 引入cas依赖 -->
<dependency>
	   <groupId>org.springframework.security</groupId>
	   <artifactId>spring-security-cas</artifactId>
	   <version>4.1.0.RELEASE</version>
</dependency>
<dependency>
	<groupId>org.jasig.cas.client</groupId>
	<artifactId>cas-client-core</artifactId>
	<version>3.3.3</version>
	<exclusions>
	    <exclusion>
		<groupId>org.slf4j</groupId>
		<artifactId>log4j-over-slf4j</artifactId>
	    </exclusion>
	</exclusions>
</dependency>
2.2 修改SpringSecurity的xml配置
<?xml version="1.0" encoding="UTF-8"?>
<beans:beans xmlns="http://www.springframework.org/schema/security"
	xmlns:beans="http://www.springframework.org/schema/beans" xmlns:xsi="http://www.w3.org/2001/XMLSchema-instance"
	xsi:schemaLocation="http://www.springframework.org/schema/beans http://www.springframework.org/schema/beans/spring-beans.xsd
						http://www.springframework.org/schema/security http://www.springframework.org/schema/security/spring-security.xsd">

	<!--   entry-point-ref  入口点引用 -->
	<!--
		entry-point-ref:登录点引用。因为我们要集成CAS,那么登录就不会在本地项目中了,所以这时候我们本地的login.html就不需要了
						 ,而是使用的CAS配置的登录页面casProcessingFilterEntryPoint就是下面的CAS入口点配置的id值
	-->
	<http use-expressions="false" entry-point-ref="casProcessingFilterEntryPoint">
        <intercept-url pattern="/**" access="ROLE_USER"/>
        <csrf disabled="true"/>
        <!--
			SpringSecurity过滤器配置,在SpringSecurity中,可以在配置文件中配置过滤器,这样在web.xml中就不需要配置过滤器了
			在springsecurity中内置了很多过滤器,每一个过滤器都有一个别名
			custom-filter为过滤器标签,
			position 表示将过滤器放在指定的位置上,
			before表示放在指定位置之前  ,
			after表示放在指定的位置之后
		-->
		<!-- 表示在当前http拦截当中,配置一个过滤器,这个过滤器在CAS_FILTER上出现 -->
        <custom-filter ref="casAuthenticationFilter"  position="CAS_FILTER" />
		<!-- 请求单点登出过滤器,在过滤器LOGOUT_FILTER的前面执行  该过滤器是CAS原生包提供的 -->
        <custom-filter ref="requestSingleLogoutFilter" before="LOGOUT_FILTER"/>
		<!-- 请求单点登出过滤器,在过滤器CAS_FILTER的位置处执行  该过滤器是SpringSecurity提供的 -->
        <custom-filter ref="singleLogoutFilter" before="CAS_FILTER"/>
    </http>

  	<!-- CAS入口点 开始 -->
    <beans:bean id="casProcessingFilterEntryPoint" class="org.springframework.security.cas.web.CasAuthenticationEntryPoint">
        <!-- 单点登录服务器登录URL -->
        <beans:property name="loginUrl" value="http://localhost:9100/cas/login"/>
        <beans:property name="serviceProperties" ref="serviceProperties"/>
    </beans:bean>
    <beans:bean id="serviceProperties" class="org.springframework.security.cas.ServiceProperties">
        <!--service 配置自身工程的根地址+/login/cas   -->
        <beans:property name="service" value="http://localhost:9003/login/cas"/>
    </beans:bean>
    <!-- CAS入口点 结束 -->


    <!-- 认证过滤器 开始 -->
    <beans:bean id="casAuthenticationFilter" class="org.springframework.security.cas.web.CasAuthenticationFilter">
        <beans:property name="authenticationManager" ref="authenticationManager"/>
    </beans:bean>
		<!-- 认证管理器 -->
	<authentication-manager alias="authenticationManager">
		<authentication-provider  ref="casAuthenticationProvider">
		</authentication-provider>
	</authentication-manager>
		<!-- 认证提供者 -->
	<beans:bean id="casAuthenticationProvider"     class="org.springframework.security.cas.authentication.CasAuthenticationProvider">
        <beans:property name="authenticationUserDetailsService">
            <beans:bean class="org.springframework.security.core.userdetails.UserDetailsByNameServiceWrapper">
                <beans:constructor-arg ref="userDetailsService" />
            </beans:bean>
        </beans:property>
        <beans:property name="serviceProperties" ref="serviceProperties"/>
        <!-- ticketValidator 为票据验证器 -->
        <beans:property name="ticketValidator">
            <beans:bean class="org.jasig.cas.client.validation.Cas20ServiceTicketValidator">
                <beans:constructor-arg index="0" value="http://localhost:9100/cas"/>
            </beans:bean>
        </beans:property>
        <beans:property name="key" value="an_id_for_this_auth_provider_only"/>
    </beans:bean>
   		 <!-- 认证类 -->
	<beans:bean id="userDetailsService" class="cn.bjc.demo.UserDetailServiceImpl"/>

	<!-- 认证过滤器 结束 -->


	<!-- 单点登出  开始  -->
	<!-- 对服务端进行单点登出 -->
    <beans:bean id="singleLogoutFilter" class="org.jasig.cas.client.session.SingleSignOutFilter"/>
	<!-- 主要是用来配置下面的地址信息的
		经过此配置,当用户在地址栏输入本地工程/logout/cas即,在地址栏输入/logout/cas就相当于输入了http://localhost:9100/cas/logout?service=http://www.baidu.com
	-->
    <beans:bean id="requestSingleLogoutFilter" class="org.springframework.security.web.authentication.logout.LogoutFilter">
        <beans:constructor-arg value="http://localhost:9100/cas/logout?service=http://www.baidu.com"/>
        <beans:constructor-arg>
            <beans:bean class="org.springframework.security.web.authentication.logout.SecurityContextLogoutHandler"/>
        </beans:constructor-arg>
        <beans:property name="filterProcessesUrl" value="/logout/cas"/>
    </beans:bean>
    <!-- 单点登出  结束 -->

</beans:beans>
2.3 SpringSecurity认证类
之前的springsecurity的认证类需要去数据库查询用户信息,现在跟cas整合之后,就不需要了,是因为在CAS中已经配置了数据源的。现在这个认证类的作用也发生了变化,不在起到认证的作用了,而是根据传递过来的用户名来返回角色列表
创建认证类,实现UserDetailsService接口
package com.bjc.demo;

import java.util.ArrayList;
import java.util.List;

import org.springframework.security.core.GrantedAuthority;
import org.springframework.security.core.authority.SimpleGrantedAuthority;
import org.springframework.security.core.userdetails.User;
import org.springframework.security.core.userdetails.UserDetails;
import org.springframework.security.core.userdetails.UserDetailsService;
import org.springframework.security.core.userdetails.UsernameNotFoundException;

/**
 * 认证类
 * @author Administrator
 *
 */
public class UserDetailServiceImpl implements UserDetailsService{


	/*
	 * username  是用户登录的时候输入的用户名
	 * 返回null   就登录失败
	 */
	@Override
	public UserDetails loadUserByUsername(String username) throws UsernameNotFoundException {

		// 获取角色组
		List<GrantedAuthority> authorities = new ArrayList<>();
		// 注意:这里的角色名称要和配置文件中<intercept-url pattern="/**" access="ROLE_USER"/>的角色名称一样
		GrantedAuthority e = new SimpleGrantedAuthority("ROLE_USER");
		authorities.add(e );

		/*
		 * 注意:这里的第二个参数是密码,可以给空,因为这个类已经不做认证了,所以可以随便写什么,关键的是第三个参数,所有的角色列表
		 * */
		return new User(username, "", authorities);
	}

}
注意:
1. 因为该认证类不需要做认证了,所以基本上不涉及到一些逻辑的操作。返回对象User的三个参数,第一个是用户名,第二个是密码,第三个是角色列表,其中,密码可以给空,也可以给其他的任何字符串,关键是第三个参数的角色列表,必须和配置文件中的角色名称一致。
2. 认证类的名称必须与配置文件中的认证类的配置一致
<!-- 认证类 -->
<beans:bean id="userDetailsService" class="com.bjc.demo.UserDetailServiceImpl"/>
3. 获取登录名
在security中可以通过SecurityContextHolder来获取用户名,既然security和cas整合了,所以security必定也将获取用户的方法封装到了SecurityContextHolder中了,也就是可以按照security的方式来进行获取用户;
同时,因为与cas整合,而在cas中是可以通过request对象来获取登录的用户名的,所以还可以使用cas的方式获取
3.1 在web.xml中配置SpringMVC
<servlet>
  	<servlet-name>springmvc</servlet-name>
  	<servlet-class>org.springframework.web.servlet.DispatcherServlet</servlet-class>
  	<!-- 指定加载的配置文件 ,通过参数contextConfigLocation加载-->
  	<init-param>
  		<param-name>contextConfigLocation</param-name>
  		<param-value>classpath:springmvc.xml</param-value>
  	</init-param>
  </servlet>

  <servlet-mapping>
  	<servlet-name>springmvc</servlet-name>
  	<url-pattern>*.do</url-pattern>
  </servlet-mapping>
3.2 SpringMVC配置文件
<?xml version="1.0" encoding="UTF-8"?>
<beans xmlns="http://www.springframework.org/schema/beans"
	xmlns:xsi="http://www.w3.org/2001/XMLSchema-instance" xmlns:p="http://www.springframework.org/schema/p"
	xmlns:context="http://www.springframework.org/schema/context"
	xmlns:dubbo="http://code.alibabatech.com/schema/dubbo" xmlns:mvc="http://www.springframework.org/schema/mvc"
	xsi:schemaLocation="http://www.springframework.org/schema/beans http://www.springframework.org/schema/beans/spring-beans.xsd
        http://www.springframework.org/schema/mvc http://www.springframework.org/schema/mvc/spring-mvc.xsd
        http://code.alibabatech.com/schema/dubbo http://code.alibabatech.com/schema/dubbo/dubbo.xsd
        http://www.springframework.org/schema/context http://www.springframework.org/schema/context/spring-context.xsd">
    <context:property-placeholder location="classpath:config/application.properties" />


	<context:component-scan base-package="com.bjc.demo" />
	<mvc:annotation-driven />

</beans>
3.3 controller
package com.bjc.demo;

import javax.servlet.http.HttpServletRequest;

import org.springframework.security.core.context.SecurityContextHolder;
import org.springframework.web.bind.annotation.RequestMapping;
import org.springframework.web.bind.annotation.RestController;

@RestController
public class UserController {

	@RequestMapping("/getname")
	public void getName(HttpServletRequest request){
		String username = request.getRemoteUser();
		System.out.println("当前登录用户是(cas):" + username);

		// 使用security的方式
		String name = SecurityContextHolder.getContext().getAuthentication().getName();
		System.out.println("当前登录用户是(security):" + username);
	}
}
测试结果:

4. 退出登录
1)在页面上添加退出连接
<a href="logout/cas">退出</a>2)修改SpringSecurity的配置文件,设置logout访问页面
<beans:constructor-arg value="http://localhost:9100/cas/logout?service=http://localhost:9003/logout.html"/> 
我们试着在页面上尝试退出,发现,退出之后,直接跳转到login.html了,这是因为SpringSecurity拦截了logout.html页面,所以我们需要给该页面放行
3)放行退出页面
在SpringSecurity配置文件中添加放行的配置
<http pattern="/logout.html" security="none"></http>