Thymeleaf与JSP比较
与JSP相比,Thymeleaf模板是原生的,不依赖标签库,可以在接收原始的HTML的地方进行编辑和渲染。不与servlet规范耦合。JSP在内嵌的servlet容器上运行有一些问题(内嵌Tomcat,Jetty不支持jar形式运行JSP,Undertow不支持JSP),也就是说,springboot项目如果想使用JSP的话,必须放弃其内嵌的Tomcat。Spring Boot 提供大量的模板引擎(FreeMarker,Groovy,Thymeleaf,Velocity和Mustache),Spring Boot推荐使用Thymeleaf,Thymeleaf提供完美的Spring MVC支持。
非Spring Boot项目使用Thymeleaf环境
需要配置三哥启用Thymeleaf与Spring集成的Bean
- ThymeleafViewResolver: 将逻辑视图名称解析为Thymeleaf模板视图
- SpringTemplateEngine: 处理模板并渲染结果
- TemplateResolver:加载Thymeleaf模板
使用java配置:
    @Bean
    public ViewResolver viewResolver(SpringTemplateEngine templateEngine){
        ThymeleafViewResolver viewResolver = new ThymeleafViewResolver();
        viewResolver.setTemplateEngine(templateEngine);
        return viewResolver;
    }

    @Bean
    public TemplateEngine templateEngine(TemplateResolver templateResolver){
        SpringTemplateEngine templateEngine = new SpringTemplateEngine();
        templateEngine.setTemplateResolver(templateResolver);
        return templateEngine;
    }

    @Bean
    public TemplateResolver templateResolver(){
        TemplateResolver templateResolver = new ServletContextTemplateResolver();
        templateResolver.setPrefix("/WEB-INF/templates/");
        templateResolver.setSuffix(".html");
        templateResolver.setTemplateMode("HTML5");
        return templateResolver;
    }
使用xml配置:
<?xml version="1.0" encoding="UTF-8"?>
<beans xmlns="http://www.springframework.org/schema/beans"
       xmlns:xsi="http://www.w3.org/2001/XMLSchema-instance" xmlns:p="http://www.springframework.org/schema/p"
       xsi:schemaLocation="http://www.springframework.org/schema/beans http://www.springframework.org/schema/beans/spring-beans.xsd">


    <bean id="viewResolver"
          class="org.thymeleaf.spring4.view.ThymeleafViewResolver"
          p:templateEngine-ref="templateEngine"/>

    <bean id="templateEngine"
          class="org.thymeleaf.spring4.SpringTemplateEngine"
          p:templateResolver-ref="templateResolver"/>


    <bean id="templateResolver"
          class="org.thymeleaf.templateresolver.ServletContextTemplateResolver"
          p:prefix="/WEB-INF/templates/"
          p:suffix=".html"
          p:templateMode="HTML5"/>
</beans>
Spring Boot使用Thymeleaf
- 新建Spring Boot项目
- 在创建时添加thymeleaf依赖,或者是创建完毕在pom.xml文件中添加thymeleaf依赖
pom.xml
<dependency>
    <groupId>org.springframework.boot</groupId>
    <artifactId>spring-boot-starter-thymeleaf</artifactId>
</dependency>
在application。properties中配置
//关闭缓存
spring.thymeleaf.cache=false
Thymeleaf的简单使用
新建html页面
传统项目放在配置的位置
springboot项目一般放在static/templates下
首先添加thymeleaf的命名空间
xmlns:th="http://www.thymeleaf.org"<!DOCTYPE html>
<html lang="en" xmlns:th="http://www.thymeleaf.org">
<head>
<meta charset="UTF-8"/>
<title>index</title>
</head>
<body>
</body>
</html>测试
在static里面创建css/style.css,用来测试读取静态资源
.title{
    color: red;
    font-size: larger;
}
创建javaBean
public class Student {

    private String name;

    private Double score;

    public Student(String name, Double score) {
        this.name = name;
        this.score = score;
    }

    public String getName() {
        return name;
    }

    public void setName(String name) {
        this.name = name;
    }

    public Double getScore() {
        return score;
    }

    public void setScore(Double score) {
        this.score = score;
    }
}
准备测试数据
@Controller
@SpringBootApplication
public class ThymeleafdemoApplication {

    @RequestMapping("/")
    public String index(Model model){

        Student stu = new Student("stu_1", 34.5d);

        List<Student> studentList1 = new ArrayList<>();
        Student s1 = new Student("list-1", 23.5d);
        Student s2 = new Student("list-2", 22.5d);
        Student s3 = new Student("list-3", 21.5d);
        studentList1.add(s1);
        studentList1.add(s2);
        studentList1.add(s3);

        //空的list
        List<Student> studentList2 = new ArrayList<>();

        model.addAttribute("stu", stu);
        model.addAttribute("studentList1", studentList1);
        model.addAttribute("studentList2", studentList2);


        return "index";
    }


    public static void main(String[] args) {
        SpringApplication.run(ThymeleafdemoApplication.class, args);
    }

}
在templates下创建index.html
<!DOCTYPE html>
<html lang="en" xmlns:th="http://www.thymeleaf.org">
<head>
<meta charset="UTF-8"/>
<title>index</title>
<!--添加css-->
<link rel="stylesheet" type="text/css" th:href="@{css/style.css}"/>
</head>
<body>
<!--测试css资源引用 red:成功找到css资源-->
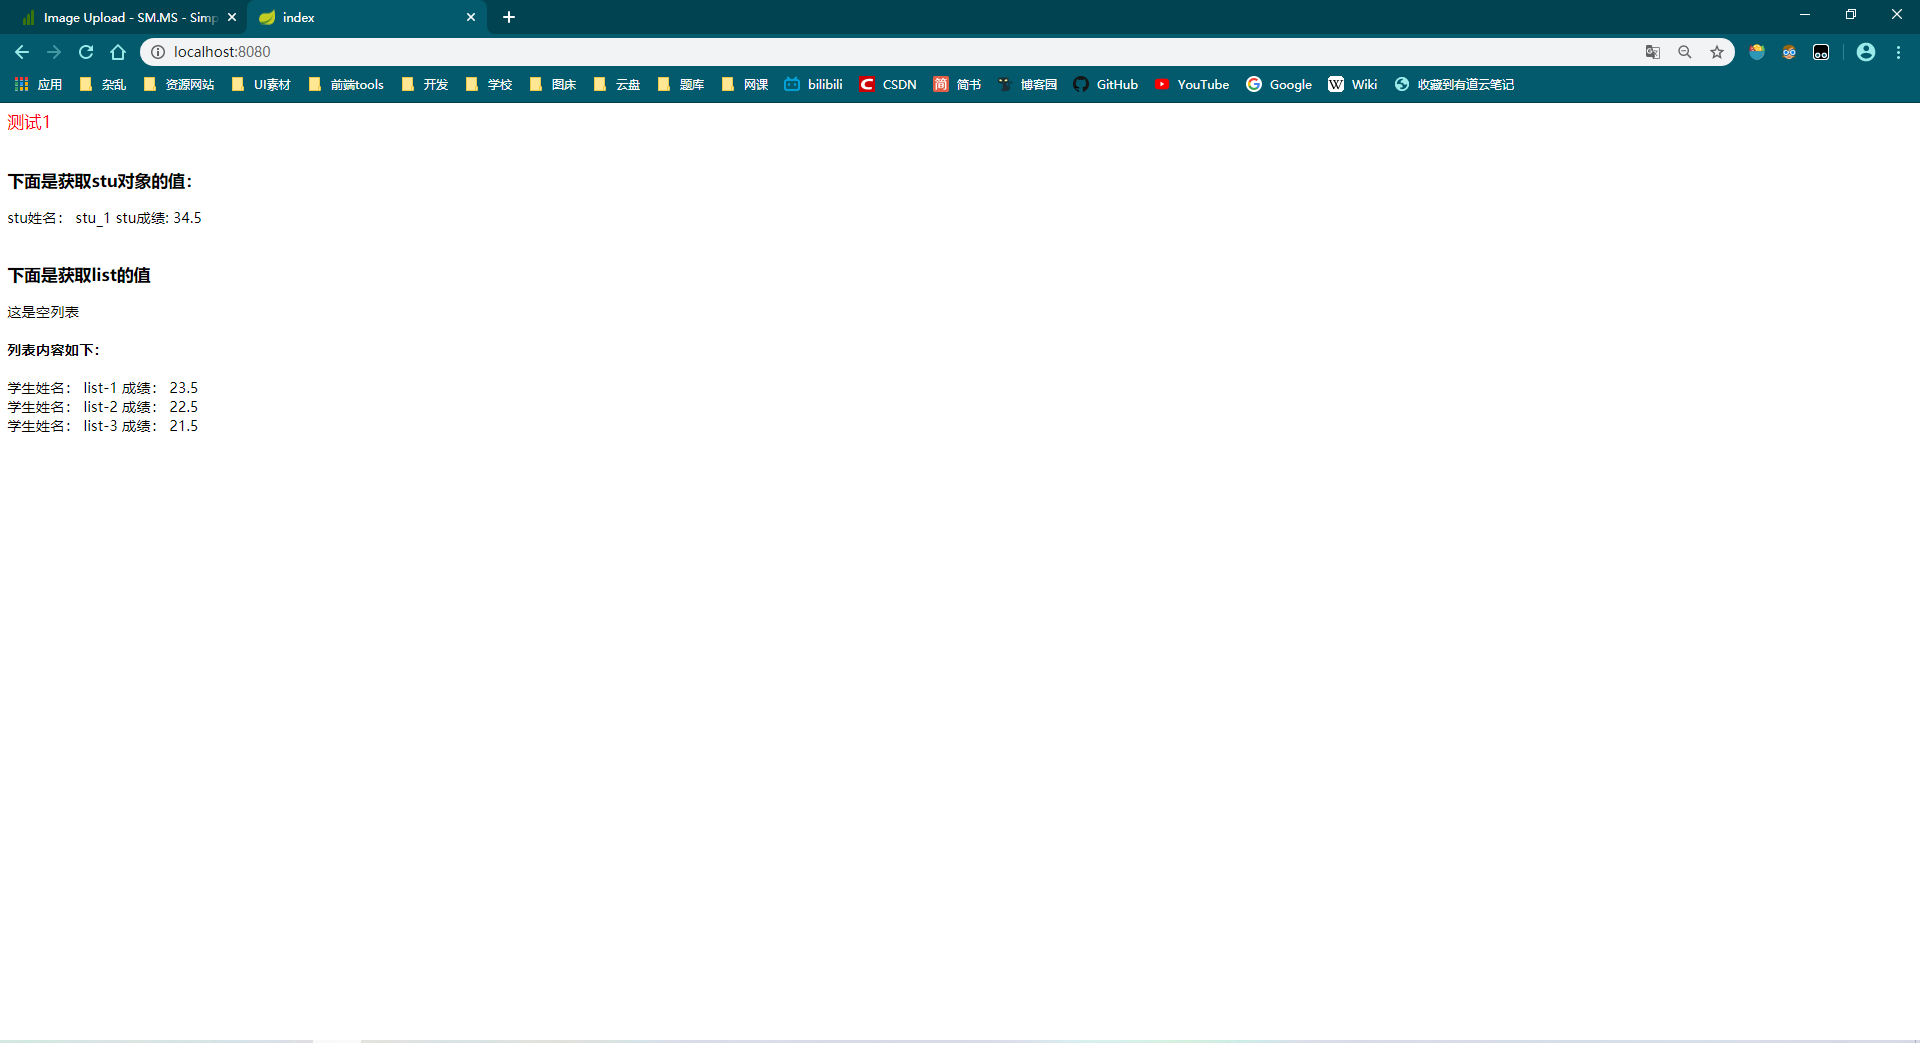
<div class="title">测试1</div>
<br/>
<h3>下面是获取stu对象的值:</h3>
<div>
stu姓名:
<span th:text="${stu.name}">获取不到</span>
stu成绩:
<span th:text="${stu.score}">获取不到</span>
</div>
<br/>
<div>
<h3>下面是获取list的值</h3>
<div th:if="${ #lists.isEmpty(studentList2)}">
这是空列表
</div>
<div th:if="${ not #lists.isEmpty(studentList1)}">
<h4>列表内容如下:</h4>
<div th:each="stu:${studentList1}">
学生姓名:
<span th:text="${stu.name}">没有数据</span>
成绩:
<span th:text="${stu.score}">没有数据</span>
</div>
</div>
</div>
</body>
</html>测试结果:
thymeleaf模板编写时需要严格的按照html规范!!!内容参考《Spring实战》、《Java EE开发颠覆者 Spring Boot实战》